This site is supported by our readers. We may earn a commission, at no cost to you, if you purchase through links.

That weak, sputtering water pressure problem isn’t a water pressure problem—it’s crusty mineral deposits choking your shower head’s nozzles. Hard water carries dissolved calcium and magnesium that crystallize when heated, forming a stubborn white layer that gradually blocks water flow and ruins your morning routine.
The good news: you don’t need specialty cleaners or plumber-level skills to fix it. A simple vinegar soak, the right scrubbing technique, and about twenty minutes of your time will restore full flow and pressure, transforming your shower from disappointing drizzle back to the strong, even spray you’re paying for.
Table Of Contents
- Key Takeaways
- Why Mineral Buildup Forms on Shower Heads
- Essential Supplies for Cleaning Shower Heads
- Preparing Your Shower Head for Cleaning
- Basic Cleaning: Vinegar Bag Method
- Deep Cleaning: Removing and Soaking Shower Head
- Scrubbing Away Stubborn Mineral Deposits
- Rinsing and Reassembling The Shower Head
- Preventing Future Mineral Buildup
- Top 5 Products for Removing Mineral Buildup
- Shower Head Maintenance and Cleaning Schedule
- Frequently Asked Questions (FAQs)
- What dissolves calcium buildup on shower heads?
- How to remove stubborn limescale from shower head?
- How to decalcify a shower head without removing it?
- Can vinegar damage chrome or nickel finishes?
- What causes colored stains on shower heads?
- Do filtered shower heads still get buildup?
- How to clean rainfall or multi-function heads?
- Are electronic or LED shower heads cleanable?
- Conclusion
Key Takeaways
- Weak water pressure in your shower is usually caused by calcium and magnesium deposits from hard water that crystallize when heated, blocking nozzles and restricting flow—not an actual pressure problem in your plumbing.
- You can restore full spray pressure in about 20 minutes using distilled white vinegar (5% acidity) in a plastic bag secured around the shower head, letting it soak for 15-60 minutes depending on buildup severity, then scrubbing with a soft brush.
- Preventative maintenance every 4-8 weeks for hard water (or 2-4 months for moderately hard water) using quick vinegar soaks and wiping the shower head dry after each use will stop mineral deposits before they choke your water flow.
- Installing a water softener addresses the root cause by removing calcium and magnesium before they reach your fixtures, cutting your cleaning frequency in half and protecting your entire plumbing system from scale buildup.
Why Mineral Buildup Forms on Shower Heads
If you’ve noticed your shower head sputtering or spraying unevenly, you’re dealing with mineral buildup—and it’s more common than you might think.
Fortunately, you can restore your shower pressure naturally using simple household items like vinegar instead of expensive cleaners.
This crusty layer forms naturally over time, especially in homes with hard water, and it directly affects your water pressure and overall shower experience. Understanding why this happens, how it impacts your daily routine, and what warning signs to watch for will help you tackle the problem before it gets worse.
Hard Water and Mineral Deposits
Hard water carries dissolved calcium and magnesium from underground limestone and chalk formations. When that water heats up in your shower, these minerals crystallize and bond to the shower head, forming scale buildup that requires descaling.
Water softening systems intercept minerals before they reach fixtures, offering effective scale prevention and corrosion control. Here’s what mineral deposits mean for your home:
- White, chalky calcium carbonate coats nozzles and screens
- Brownish magnesium compounds create stubborn, dull stains
- Higher temperatures accelerate mineral analysis and crystallization rates
- Deposit removal becomes harder the longer buildup sits untreated
For more details on the science behind water hardness and minerals, check out this resource.
Impact on Water Pressure and Flow
Mineral deposits shrink nozzle openings and constrict pipe diameter, which chokes your shower’s water flow. Even when pressure in your lines holds steady at 60 psi, scale buildup adds friction loss that drops the actual gallons per minute reaching you.
| Buildup Effect | What Happens |
|---|---|
| Clean nozzles | Full flow, strong spray pattern |
| Light scale | Reduced flow, uneven coverage |
| Heavy deposits | Weak trickle, clogged jets |
| Complete blockage | No water from affected nozzles |
That’s why your shower feels weak despite normal pressure regulation elsewhere.
In some cases, the problem can be linked to broader water pressure problems in plumbing.
Signs Your Shower Head Needs Cleaning
You’ll know it’s time to clean when you see white deposits clumping around spray holes, notice uneven water coverage with some jets dry while others sputter, or feel a weaker flow even though your home’s water pressure hasn’t changed.
In hard water areas, these signs usually appear every one to two months and signal mineral buildup that restricts normal flow.
Essential Supplies for Cleaning Shower Heads

You don’t need fancy chemicals or expensive products to tackle mineral buildup on your shower head. Most of what you need is probably sitting in your kitchen or bathroom right now, and the rest you can pick up for a few bucks at any grocery store.
Here’s what you’ll want to gather before you start cleaning.
Distilled White Vinegar
You’ll want to grab distilled white vinegar with 5 percent acidity, the same stuff you’d use for pickling. This clear solution dissolves mineral deposits like nothing else, thanks to its acidic properties that break down limescale fast.
It’s a natural disinfectant that’s safe for your shower head and won’t damage chrome or metal finishes when you’re cleaning.
Baking Soda
Baking soda acts as your gentle abrasive partner in this cleaning duo. This fine white powder, sodium bicarbonate with a pH around 9, works alongside vinegar to create fizzing action that loosens stubborn mineral deposits without scratching your shower head’s finish.
You’ll use it to form a mild alkaline solution that dissolves organic grime and enhances the mineral removal power of your vinegar soak.
Ziploc Bags and Rubber Bands
A gallon-sized Ziploc bag becomes your hands-free soaking chamber, allowing you to submerge the shower head in cleaning solution without detaching anything. The double zipper seal locks in the vinegar mixture, preventing leaks during the multi-hour soak. You’ll secure the bag around the shower arm using rubber bands or zip ties, creating a makeshift clamp that keeps everything in place while the solution dissolves those stubborn mineral deposits.
Bag Sealing Tips and Storage Solutions for Showerhead Maintenance:
- Choose gallon freezer bags for durability and resistance to vinegar during extended soaking periods
- Wrap two or three rubber bands around the bag’s neck to create secure tension against the shower arm threads
- Fill the bag while it’s positioned below the shower head to prevent spills and guarantee complete submersion
- The clear polyethylene material lets you monitor soaking progress without breaking the seal
- After cleaning, wash and reuse the Ziploc bag for future maintenance sessions to save money
Soft Brushes and Microfiber Cloths
You’ll need two key tools to tackle mineral buildup without scratching your shower head.
A soft-bristled nylon brush reaches tight nozzle crevices and stays gentle on chrome finishes, while a microfiber cloth holds seven times its weight in water and traps particles effectively.
These brush materials paired with your cleaning solution deliver thorough showerhead cleaning without the damage that rougher tools cause.
Preparing Your Shower Head for Cleaning

Before you start cleaning, you’ll want to take a good look at your shower head to see what you’re dealing with. A quick inspection helps you decide whether you can clean it in place or if you need to remove it completely.
Taking a few minutes to prep the area now saves you from dealing with scratches, leaks, or damaged fixtures later.
Inspecting for Visible Buildup
Before you grab any cleaning supplies, take a close look at the shower head to spot mineral buildup. Check the spray nozzles and mesh screens for dull white or tan deposits that cling to outlets, especially on the underside where water flows.
If visible buildup covers more than a quarter of the nozzle area or you notice crusty patches, it’s time for thorough cleaning.
Determining if Removal is Necessary
Sometimes you can clean a shower head without taking it off, but other times removal is the only way to tackle stubborn mineral deposits.
Here’s when removal is necessary:
- Water pressure drops by half despite cleaning the outside, signaling internal blockage.
- Thick crust on threads prevents bag attachment or proper seal.
- Filter screens need cleaning, which requires direct access inside.
- Spray pattern stays irregular after a vinegar soak, meaning deep scale removal is essential.
Protecting Surrounding Fixtures
Before you start scrubbing, take a minute to protect nearby fixtures from drips and cleaning solution splashes. Lay a microfiber cloth or towel over faucet controls, tub spouts, and exposed pipes to prevent corrosion from vinegar exposure.
| Protection Step | Why It Matters |
|---|---|
| Cover nearby chrome fixtures | Prevents acid damage from vinegar |
| Seal wall penetrations with waterproof caulk | Stops moisture intrusion |
| Place towels on valve knobs | Guards against chemical exposure |
| Check existing sealant condition | Identifies weak spots needing repair |
| Keep cleaning area contained | Reduces accidental fixture contact |
This simple damage mitigation step saves you from refinishing corroded surfaces later.
Basic Cleaning: Vinegar Bag Method
The vinegar bag method is your go-to solution when you don’t want to remove the shower head from its threaded arm.
This technique works well for regular maintenance and light to moderate mineral buildup, using supplies you probably already have in your kitchen. Here’s how to mix, attach, and soak your way to a cleaner shower head.
Mixing Vinegar and Baking Soda Solution

The right vinegar ratio makes all the difference for scale removal. Pour one cup of distilled white vinegar into a bowl, then add two tablespoons of baking soda slowly—you’ll see the acid base reaction create a fizzing action that helps loosen mineral buildup.
This cleaning solution combines baking soda benefits with vinegar’s dissolving power for effective shower head maintenance:
- Mix ingredients in an open container to release carbon dioxide safely
- Wait until most fizzing subsides before proceeding, usually 30 seconds
- Use the solution immediately for best cleaning solution safety and effectiveness
Filling and Attaching The Bag

Once your vinegar and baking soda mixture settles, pour it carefully into a gallon-sized Ziploc bag—this guarantees the seal quality holds during soaking. Position the bag so the shower head sits fully submerged, then secure it around the fixture with two rubber bands wrapped snugly around the bag neck and threaded arm. Proper bag orientation prevents leaks and keeps the solution in contact with mineral deposits.
| Step | What to Do |
|---|---|
| Fill bag | Pour vinegar solution to halfway point |
| Position opening | Slide bag upward over shower head face |
| Check submersion | Make certain all nozzles sit below liquid line |
| Wrap first band | Secure rubber band around bag and pipe |
| Add second band | Place higher for extra stability during soak |
Soaking Duration and Tips

With the bag secured, let the shower head soak for 15 to 30 minutes if you’re dealing with light mineral deposits—warm water around 110 degrees Fahrenheit speeds up the vinegar’s work on that crusty buildup.
Here’s what affects your soak time optimization:
- Extend to 60 minutes for moderate scale, checking nozzles halfway through
- Never exceed 90 minutes to protect gaskets and prevent mineral redeposition
- Use 5% vinegar concentration (standard white vinegar) for safe, effective mineral removal
- In hard water areas, repeat soaking frequency every 2 to 4 weeks for best flow
Deep Cleaning: Removing and Soaking Shower Head

Sometimes the bag method won’t cut it, especially when mineral deposits have hardened around the nozzles and internal parts.
When that happens, you’ll need to remove the shower head entirely and give it a proper soak in a cleaning solution. Here’s how to safely detach your shower head, clean the hidden components, and get everything working like new again.
Detaching The Shower Head Safely
Before you tackle any plumbing maintenance, turn off the water supply to prevent sudden sprays. Grasp the shower head firmly at the connection point and twist counterclockwise. If it won’t budge by hand, wrap a cloth around the fitting and apply gentle, steady pressure with pliers.
After removal, inspect the threads for corrosion and clean them with a dry brush for better reinstallation.
Submerging in Vinegar or Safe Cleaner
Once you’ve detached the shower head, drop it into a container large enough to fully cover the nozzles and interior passages. Use distilled white vinegar at a 1:1 ratio with water for tough mineral deposits, or dilute to 1:2 for sensitive finishes.
Here’s your game plan:
- Soak for 4 to 12 hours depending on buildup severity
- Check material compatibility before using commercial descalers
- Rinse thoroughly with clean water after soaking
Cleaning Filter Screens and Threads
After your shower head has soaked, pay close attention to the filter screen and threads—they’re where mineral deposits love to hide.
Remove the screen if possible, then rinse it under running water and gently scrub with a soft brush or baking soda paste to dissolve stubborn scale. Clean the threaded connection with a toothbrush, removing all encrustation to prevent corrosion and restore proper water flow.
Scrubbing Away Stubborn Mineral Deposits

After soaking, you’ll still find some stubborn deposits clinging to the nozzles and surface, especially in areas where mineral buildup has hardened over time.
A little elbow grease with the right tools will break through these remaining spots without damaging your shower head’s finish. Here’s how to scrub away what the vinegar couldn’t dissolve on its own.
Using a Toothbrush or Soft Brush
Once you’ve soaked the shower head, grab a soft-bristled toothbrush to work on those stubborn mineral deposits. You’ll want gentle scrubbing action here—soft bristles won’t scratch chrome or plastic finishes while still dislodging buildup.
Dip your toothbrush in leftover baking soda for extra grit, then work it across the faceplate in small circles, paying attention to any visible scale or crusty spots.
Targeting Clogged Nozzles
Once you’ve loosened the surface crud, turn your attention to the individual nozzle holes—that’s where limescale removal really counts for flow restoration.
Use a toothpick or straightened paperclip to gently pierce each clogged opening, working mineral deposits free without forcing anything. You’ll feel slight resistance before the debris clears, restoring the original spray pattern.
This targeted nozzle cleaning step makes the real difference in shower head repair and long-term clog prevention.
Wiping and Polishing With a Microfiber Cloth
After all that scrubbing work, grab a clean microfiber cloth—those ultrafine fibers lift away leftover mineral deposits and soap residue without scratching chrome or plastic finishes.
Dampen the cloth slightly for stubborn spots, then buff dry in straight passes across each surface. Proper cloth selection and polishing techniques restore the original shine while your baking soda and vinegar cleaning solutions keep working between deep cleans.
Rinsing and Reassembling The Shower Head

After all that soaking and scrubbing, you’re almost done—but skipping a proper rinse can leave debris in the nozzles and cause problems down the line.
Getting the shower head back in place correctly matters just as much as the cleaning itself, since a loose connection can mean leaks and wasted effort. Here’s how to finish the job right and get back to enjoying strong water pressure.
Flushing With Water to Clear Debris
After you’ve finished scrubbing, turn the water on full blast and let it run for at least two to three minutes—this high water pressure creates the flow velocity needed for effective debris removal and pipe cleaning.
Here’s what happens during this critical flush duration:
- Mineral deposits and loosened scale wash away from interior surfaces
- Water flow clears residual vinegar and baking soda from nozzles
- Debris removal confirms proper shower maintenance success
- Clear water signals complete showerhead cleaning
- Consistent spray pattern verifies unobstructed jets
Reinstalling and Sealing
Now that water’s running clean, thread sealant or plumber’s tape becomes your insurance against leaks—wrap it clockwise on the male threads before you hand-tighten the shower head back on.
Here’s your tightening sequence for leak prevention:
| Step | Action | Why It Matters |
|---|---|---|
| 1 | Hand-tighten first | Prevents cross-threading damage |
| 2 | Snug with cloth-wrapped wrench | Protects finish, reaches torque settings |
| 3 | Run water 30 seconds | Tests seal area cleaning effectiveness |
| 4 | Check for drips | Confirms proper bathroom cleaning results |
| 5 | Retighten if needed | Ensures showerhead plumbing maintenance |
Small adjustments beat over-tightening every time.
Preventing Future Mineral Buildup

Now that you’ve cleaned your shower head, you don’t want to repeat this process every few weeks. The good news is that a few simple habits can keep mineral buildup at bay and extend the time between deep cleans.
Here are three practical strategies to protect your shower head and maintain strong water flow.
Regular Vinegar Soaks
The secret to stress-free shower head maintenance is to schedule a vinegar soak every four to six weeks if you’ve got hard water, or stretch it to two months for softer conditions. This simple habit keeps mineral deposits from ever getting stubborn.
- Fill a clear plastic bag with equal parts distilled white vinegar and warm water
- Secure the bag around your showerhead using a sturdy rubber band
- Let it soak for 30 minutes to 2 hours, depending on buildup severity
- Never exceed 4 hours to protect seals and chrome finishes
- Flush thoroughly afterward to clear loosened mineral debris
Wiping After Each Use
Beyond scheduled soaks, grab a microfiber cloth after every shower and give your shower head a quick wipe. This gentle wiping removes soap scum and water spots before they harden into stubborn deposits, turning routine cleaning into a five-second habit.
It’s basic bathroom maintenance that protects chrome finishes and keeps nozzles clear between deep treatments, so you’re always working with a clean surface.
Considering a Water Softener
If your home has hard water with heavy mineral content, wiping and soaking will feel like a losing battle. Installing a water softener addresses the root problem by using an ion exchange process to remove calcium and magnesium before they reach your fixtures, cutting your shower head maintenance in half and protecting every faucet, appliance, and pipe in your home.
Hard water demands constant cleaning—install a water softener to stop mineral buildup at its source and protect your entire plumbing system
Here’s what a water softener delivers:
- Reduced cleaning frequency – Soft water prevents mineral deposits from forming, so you’ll spend less time scrubbing fixtures and more time enjoying consistent water pressure throughout your plumbing system.
- Lower long-term costs – Though water softener costs and softener maintenance require upfront investment, you’ll save on cleaning products, extend appliance lifespan, and reduce repair calls caused by hard water effects.
- Better water quality – Regeneration cycles keep resin beads fresh, ensuring your hard water solutions consistently deliver spot-free dishes, softer laundry, and a cleaner shower experience without the constant buildup.
Top 5 Products for Removing Mineral Buildup
You don’t need fancy commercial cleaners to tackle mineral buildup, but a few reliable products can make the job easier and more effective.
I’ve tested dozens of solutions over the years, and these five consistently deliver results without damaging your shower head’s finish. Here’s what I keep in my toolkit and recommend to homeowners dealing with hard water deposits.
1. Earthworm Mold And Mildew Treatment
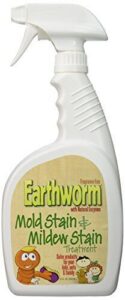
If you’re dealing with mold stains alongside mineral buildup, Earthworm Mold And Mildew Treatment brings a different approach to the table. This enzyme-based cleaner breaks down organic residues on bathroom surfaces, including tiles, grout, and shower heads.
At $24.99 for 22 ounces, it’s fragrance-free and biodegradable, which means you won’t be breathing harsh fumes while you work. The enzymes keep working after you apply it, helping prevent stains from coming back. Just spray it on, let it sit, then wipe clean—no scrubbing required in most cases.
| Best For | People looking for a safer, enzyme-based option to tackle mold stains without harsh chemicals, especially if they have kids or pets at home. |
|---|---|
| Brand | Earthworm |
| Item Form | Liquid |
| Size | 22 oz |
| Eco-Friendly | Biodegradable |
| Multi-Purpose | Yes |
| Price Range | $24.99 |
| Additional Features |
|
- Works on its own after you spray it—enzymes keep breaking down mold even after application
- No harsh fumes or chemical smell, so it’s easier on your lungs and safe around the family
- Biodegradable formula that’s better for the environment than traditional bleach cleaners
- Struggles with larger mold problems or soft surfaces like rubber gaskets
- Might need several applications to see results, which adds up given the price
- Some users say it’s not as strong as it used to be, possibly due to formula changes
2. Heinz White Vinegar
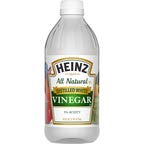
Heinz White Vinegar is the workhorse you’ll reach for most often when tackling mineral buildup. At $6.50 for 16 fluid ounces, this all-natural product delivers 5 percent acidity—strong enough to dissolve limescale without damaging chrome or plastic fixtures.
Pour it straight into a gallon bag, secure it around your shower head with a rubber band, and let it work for a few hours. The glass bottle is sturdier than plastic alternatives, and you’ll find it works just as well for laundry or salvaging salt-caked equipment.
| Best For | People dealing with hard water stains and mineral deposits who want an affordable, multi-purpose cleaner that works on everything from shower heads to laundry. |
|---|---|
| Brand | Heinz |
| Item Form | Liquid |
| Size | 16 oz |
| Eco-Friendly | Natural ingredients |
| Multi-Purpose | Yes |
| Price Range | $6.50 |
| Additional Features |
|
- Works effectively on limescale and mineral buildup without damaging fixtures
- All-natural with multiple uses beyond cleaning (marinades, pickling, hair rinse)
- Comes in a durable glass bottle that’s sturdier than plastic
- 16-ounce bottle is smaller than some users expect for the price
- Not as strong as specialized chemical cleaners for tough clogs
- Glass bottle may not appeal to those who prefer lighter, unbreakable containers
3. Bioclean Hard Water Stain Remover
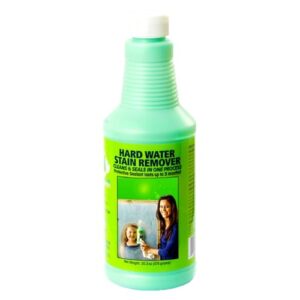
When vinegar alone won’t cut through years of stubborn scale, Bioclean Hard Water Stain Remover steps in as your heavy-duty option. This biodegradable cream, priced around $20 for 20.3 ounces, works on limescale, calcium, and iron stains that resist gentler methods.
Apply it with a soft brush directly onto affected areas, scrub with moderate pressure, and rinse thoroughly. It’s formulated for glass, chrome, and tile, making it adaptable for the entire shower enclosure, not just the head itself.
| Best For | People dealing with years of built-up hard water stains that won’t respond to vinegar or regular cleaners. |
|---|---|
| Brand | Bio-Clean Products |
| Item Form | Cream |
| Size | 20.3 oz |
| Eco-Friendly | Biodegradable |
| Multi-Purpose | Yes |
| Price Range | Mid-range |
| Additional Features |
|
- Works on tough mineral deposits like limescale, calcium, and iron that resist other methods
- Biodegradable formula is better for the environment than harsh chemical alternatives
- Versatile enough to use on glass, chrome, tile, and grout throughout your bathroom
- Requires significant scrubbing and elbow grease to work effectively
- Some users report it only lightens stains rather than removing them completely
- Can cause skin irritation, so you’ll need to wear gloves during use
4. Arm And Hammer Pure Baking Soda
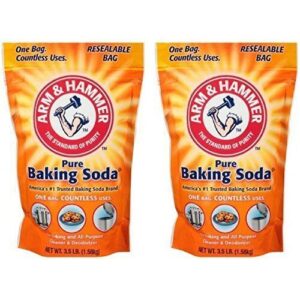
Baking soda works as a mild abrasive that loosens mineral buildup without scratching your shower head’s finish. Arm & Hammer Pure Baking Soda, sold in resealable bags from 1 lb to 3.5 lb, offers 100 percent sodium bicarbonate with no additives.
Mix it with water to form a paste for stubborn grime, or combine it with vinegar for stronger cleaning action. It’s food-grade, non-toxic, and safe on metal, ceramic, and enamel surfaces. At around $5 to $10 depending on size, it’s an affordable workhorse you’ll use throughout your home.
| Best For | Budget-conscious households looking for a versatile, non-toxic cleaner that works on everything from shower heads to laundry without harsh chemicals. |
|---|---|
| Brand | Arm & Hammer |
| Item Form | Powder |
| Size | 112 oz |
| Eco-Friendly | Pure baking soda |
| Multi-Purpose | Yes |
| Price Range | Budget-friendly |
| Additional Features |
|
- Pure sodium bicarbonate with no additives makes it safe for food prep, cleaning, and personal care
- Large resealable bag (up to 3.5 lb) offers better value than small boxes and stays fresh longer
- Gentle abrasive action cleans mineral deposits and grime without scratching surfaces
- Some customers report receiving incorrect products or incomplete orders
- Weight discrepancy between product name (3.5 lb) and listed specs (7 lb) may cause confusion
- Larger sizes aren’t available in most stores, so you’ll need to order online
5. Ziploc Gallon Freezer Bags
You’ll need a gallon-sized bag to submerge your shower head in cleaning solution, and Ziploc Gallon Freezer Bags get the job done. These bags feature a triple-seal Grip ‘n Seal system that won’t leak when you fill them with vinegar, and the stay-open design makes pouring easy.
At roughly 10.5 by 10.75 inches, they fit most standard shower heads. The durable plastic resists punctures from metal parts. You’ll find them in packs of 14 to 80 for around $5 to $15.
| Best For | People looking for leak-proof bags to soak shower heads in vinegar or other cleaning solutions without dripping or spilling. |
|---|---|
| Brand | Ziploc |
| Item Form | Plastic |
| Size | 66 count |
| Eco-Friendly | Recyclable plastic |
| Multi-Purpose | Yes |
| Price Range | Mid-range |
| Additional Features |
|
- Triple-seal Grip ‘n Seal system prevents leaks when filled with liquids like vinegar
- Stay-open design makes it easy to pour cleaning solution without fumbling
- Durable plastic resists punctures from sharp shower head parts
- Some users report the seal doesn’t always work reliably
- May not prevent freezer burn effectively if not sealed properly
- Higher priced compared to similar storage bags on the market
Shower Head Maintenance and Cleaning Schedule

Staying ahead of mineral buildup isn’t complicated, but it does require a consistent routine that matches your home’s water conditions. The key is knowing how often to tackle the problem before it affects your water pressure and shower performance.
Let’s break down a simple maintenance schedule that’ll keep your shower head working like new, no matter what kind of water you’re dealing with.
How Often to Clean Based on Water Hardness
Your water hardness scale directly determines your cleaning frequency and descale intervals. Very hard water (10+ gpg) demands shower head maintenance every 4 to 8 weeks, while hard water (7 to 10 gpg) needs mineral removal every 2 to 3 months.
Moderately hard water (3 to 7 gpg) works fine with cleaning every 4 to 6 months, and soft water stretches to biannual or yearly mineral deposits removal.
Routine Inspection Tips
Setting a schedule is one thing, but visual checks catch problems before they snowball. Monthly quick inspections help you spot mineral signs like white crust or uneven flow rates before pressure drops considerably.
Five-Minute Shower Head Inspection Tools and Routine Cleaning Tips:
- Run your finger across nozzles to feel for rough mineral deposits
- Turn on the spray and watch for weak or missing jets
- Check threads and gaskets for chalky buildup or corrosion
- Test flow with a bucket—measure gallons per minute against the label
- Wipe surfaces with a microfiber cloth as part of bathroom cleaning tips
Simple Habits to Extend Shower Head Life
Beyond those monthly checks, a few simple daily habits make a real difference. Wipe your shower head dry after each use to slow mineral deposits from hard water.
Consider water softening if scale forms fast, and choose fixtures with silicone nozzles that resist buildup. Regular descale treatments every few months keep things flowing smoothly—preventive maintenance beats emergency repairs every time.
Frequently Asked Questions (FAQs)
What dissolves calcium buildup on shower heads?
Distilled white vinegar dissolves calcium deposits through mild acetic acid that breaks down calcium carbonate.
A vinegar solution works as a safe, effective descaling method for limescale removal, tackling mineral buildup without harsh chemicals or scrubbing.
How to remove stubborn limescale from shower head?
Stubborn limescale needs extended soaking, at least three to four hours in distilled white vinegar, followed by scrubbing with a soft brush to break down hardened deposits that shorter treatments won’t dissolve completely.
How to decalcify a shower head without removing it?
You don’t need special tools or hours of work to tackle this.
Fill a plastic bag with distilled white vinegar, secure it around your shower head with a rubber band, and let it soak for an hour.
Can vinegar damage chrome or nickel finishes?
Yes, vinegar can dull chrome or nickel finishes if you soak them too long.
Dilute distilled white vinegar, limit contact to a few minutes during showerhead cleaning, and rinse thoroughly to protect chrome protection and finish durability.
What causes colored stains on shower heads?
Hard water effects create colored stains when iron oxidizes to reddish-orange, copper forms blue-green deposits, and calcium deposits mix with soap scum to produce yellow or brown mineral deposits and limescale buildup.
Do filtered shower heads still get buildup?
Filters slow down mineral accumulation, but calcium and magnesium still sneak through most cartridges, forming limescale on nozzles and filter media.
Filtration efficiency drops as deposits build up, requiring regular maintenance and cartridge replacements.
How to clean rainfall or multi-function heads?
Rainfall and multi-function shower heads have dozens of nozzles that trap mineral deposits faster than standard models, so you’ll need to submerge the entire head in a vinegar solution for 30 to 60 minutes.
Are electronic or LED shower heads cleanable?
LED shower heads need careful exterior cleaning with a damp cloth and gentle descaling around accessible nozzles, but sealed electronics mean you can’t submerge the entire unit without risking water damage and voiding your warranty.
Conclusion
A strong shower shouldn’t feel like a luxury reserved for the Colosseum’s finest bathhouses—it’s basic plumbing maintenance you can handle yourself.
Now that you know how to remove mineral buildup from shower head fixtures using vinegar, scrubbing, and simple preventative habits, you’ve got the tools to keep water flowing strong for years. Twenty minutes of attention today beats months of weak pressure and eventual replacement costs tomorrow.