This site is supported by our readers. We may earn a commission, at no cost to you, if you purchase through links.

Most barbers can spot a bad fade from across the room—those telltale lines screaming amateur hour, the awkward patches where someone skipped a guard level, the abrupt shift that looks more like a shelf than a gradient.
The difference between those disasters and a fade so clean it could be airbrushed? Fade haircut guard progression. This isn’t some mysterious art reserved for master barbers—it’s a systematic sequence of clipper guards, each creating a zone that blends seamlessly into the next.
Master the progression from zero to four, understand when to leverage that half-guard sweet spot, and you’ll control every millimeter from skin to length. Skip a step or rush the blend, and you’ll spend twenty minutes fixing what should’ve taken five.
Table Of Contents
- Key Takeaways
- What is Fade Haircut Guard Progression?
- Essential Clipper Guard Numbers Explained
- Choosing The Right Guard Length for Fades
- Step-by-Step Fade Haircut Guard Progression
- Blending Techniques for Flawless Fades
- Common Mistakes When Using Fade Guards
- Advanced Fading Tips and Variations
- Maintenance and Upkeep for Fade Haircuts
- Top 10 Fade Haircut Tools and Kits
- 1. Aomgd Hair Trimming Guide Template
- 2. Self Haircut Kit for Men
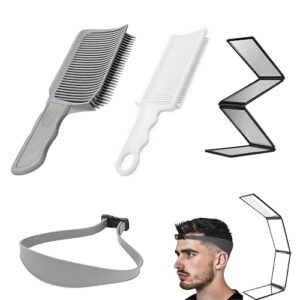
- 3. Fade Comb Set for Hair Cutting
- 4. Blend Friend Fade Comb Set
- 5. Fadeking Hair Clipper Guards Set
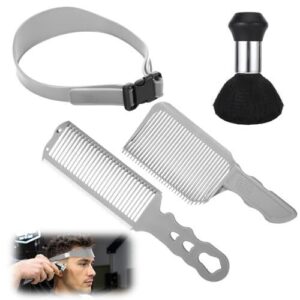
- 6. Fade Combs Haircut Kit For Men
- 7. Fade Comb Haircut Kit for Men
- 8. Fade Comb For Men Haircut Tool
- 9. Dliojhl Gradient Hair Fade Comb
- 10. Blend Friend Hair Fade Comb Tool
- Frequently Asked Questions (FAQs)
- Conclusion
Key Takeaways
- Guard progression is the exact sequence of clipper guards (zero through four, including half-guards) that you climb through from skin to length—skip a single step and you’ll create harsh lines that demand twenty minutes of damage control instead of a clean five-minute blend.
- Each guard number adds precisely 1/8 inch of length, and your fade type (low, mid, or high) plus hair texture dictate where you start and how fast you progress through these increments to control blending zones without choppy disasters.
- Flawless fades demand four blending techniques working together: clipper-over-comb for surgical control, corner-blade work for micro-adjustments, lever manipulation for fractional length tweaks between guards, and symmetrical cross-checking every thirty seconds to prevent lopsided collapses.
- Maintenance determines longevity—zero to two guards need touch-ups every 7-14 days, while guards three and four stretch to 21-35 days, and keeping blades clean plus oiled after every cut separates precision from patchy failures.
What is Fade Haircut Guard Progression?
Guard progression is the roadmap that separates a clean fade from a choppy disaster—it’s the systematic climb from skin-tight to longer lengths using specific clipper guard numbers in precise order.
A well-executed fade haircut length guide walks you through the exact guard numbers to use at each stage, ensuring smooth transitions without awkward lines.
You can’t skip steps and expect flawless blending, because each guard creates a zone that transitions into the next without harsh lines. Master this progression and you control every millimeter of the fade, fail to respect it and you’re left fixing mistakes that scream amateur hour.
Master guard progression or you’re left fixing mistakes that scream amateur hour
Definition and Purpose of Guard Progression
Guard progression is your roadmap—the exact sequence of clipper guards you’ll switch through from skin to longer lengths. It dictates which guard number hits each horizontal zone on the head, keeping length jumps controlled and repeatable.
Nail this framework and you’ll build smooth blending zones without choppy disasters. Skip steps or rush the progression and harsh lines destroy the fade every time.
How Guard Numbers Relate to Hair Length
Guard numbers map directly to hair length—each step up adds exactly 1/8 inch until guard eight hits one full inch. Zero leaves skin exposed. Guard one gives 1/8 inch. Guard two doubles that to 1/4 inch.
These increments control your blending zones and dictate how fast the fade transitions from scalp to bulk. Hair texture changes how each length reads visually—thicker strands hide more scalp at identical guard settings.
Barbers rely on the principles of the haircut number system explained to guarantee accurate guard choices for precise blending.
Key Role in Seamless Fades
Flawless fades live or die in the blending zones—those narrow bands where guard selection shifts by micro-increments and fading technique determines whether you get butter or train tracks.
Guard length controls elevation between each pass. Skin preparation stops irritation when you’re working tight.
Clipper maintenance keeps blades sharp enough for clean blending zone techniques. Miss one step and the whole fade screams amateur. Clipper guards don’t forgive sloppy progression.
Essential Clipper Guard Numbers Explained

Guard numbers aren’t random—they’re the blueprint for every fade you’ll ever cut. Each one controls a specific length measured in millimeters, and knowing what they do separates clean blends from choppy disasters.
Master these three guard categories and you’ll own the foundation of fade progression.
Zero Guard, Half Guard, and Lever Adjustments
You need total blade control before you can own a fade—zero guard and half guard deliver that. Zero guard opens the blade to near-skin length, perfect for establishing your starting line. Half guard bridges the gap between guards, smoothing transitions the full guard can’t touch.
Your lever is the secret weapon here—opening it adds micro-length, closing it tightens the cut:
- Zero guard keeps the blade at minimum cutting length for skin-close blending
- Half guard sits between no guard and full guard for light transitions
- Lever adjustments control micro-length changes without swapping guards
- Consistent finger pressure prevents blade misalignment and scalp snags
- Regular blade alignment checks stop chattering and maintain clean fade transitions
Guards One Through Four
Your foundation lives in Guards One through Four—master these guard numbers or watch your fade fall apart. Guard One cuts 1/8 inch, Guard Two hits 1/4 inch, Guard Three reaches 3/8 inch, and Guard Four stretches to 1/2 inch.
Each guard length controls your blending zones and fade techniques. Hair texture dictates how fast you progress between clipper guards—dense hair demands tighter transitions, fine hair forgives wider jumps.
Fractional Guards and Micro-Blending
Fractional guards slam the door on choppy transitions—your 0.5 and 1.5 guards bridge the gaps your standard clipper guards leave behind. Micro blend techniques eliminate harsh lines between guard numbers through precise blending zone control and clipper lever adjustments.
Master these fractional guard sizes or your skin fade maintenance becomes a weekly disaster:
- Size 0.5 bridges zero to one for ultra-tight skin fade transitions
- Size 1.5 connects one to two without visible guard length jumps
- Lever adjustments fine-tune effective blade exposure within each blending zone
- Corner blade work creates diagonal transitions using fractional guards for flawless fade techniques
- Symmetry checks after each micro-blend pass prevent uneven guard progression
Choosing The Right Guard Length for Fades

You can’t pick the right guard based on guesswork — your face shape, hair texture, and fade type dictate where you start and how fast you progress.
Get this wrong and your fade collapses into a choppy mess before you finish the sides. Here’s what controls your guard selection before you touch a single hair.
Face Shape and Fade Starting Point
Your face shape dictates fade placement—oval faces thrive with mid to high fades, preserving balanced proportions, while round faces demand higher fades for elongation and jawline enhancement. Square faces need low to mid fades, softening that edge.
Start your blending zone at the top of your ear—that’s your natural boundary line for scalp contour and hairline design. Face mapping controls guard length before you ever touch clippers.
For more details on tailoring fades to specific face shapes, consult this guide on choosing the best fade style.
Hair Texture and Density Considerations
Straight hair reflects light evenly—you’ll see every guard misstep because it lays flat.
Curly and coily textures exhibit greater shrinkage after washing, forcing you to account for hair porosity and cuticle health during scalp preparation.
Density levels control how fast skin shows through—sparse coverage demands tighter blending techniques between guards, while thick hair types forgive small errors during texture analysis.
Low, Mid, and High Fade Differences
Your fade placement dictates drama—low fades hug the skin near your ears, mid fades split your temple zone, and high fades start above your parietal ridge.
Contrast Levels shift with each choice:
- Low fades use guards 0 to 2—minimal drama, maximum Fade Haircut Maintenance required weekly
- Mid fades blend guards 2 to 4—balanced Contrast Levels across Blend Zones
- High fades run guards 4 to 6—bold silhouette, forgiving Hair Texture transitions
- Guard Length determines visual weight around your crown
- Blending Zone Techniques vary by Fade Guards selected
Pick wrong and your fade collapses.
Step-by-Step Fade Haircut Guard Progression
You don’t build a fade by guessing — you execute it through precise guard progression and lever control. Every clean fade starts at the skin and climbs through deliberate steps that prevent choppy lines and amateur mistakes.
Here’s the exact sequence you need to nail blending from the bottom up.
Establishing The Skin Line

Your trimmer hits bare scalp first—everything else follows. Set the skin line by stretching skin tight, tilting the client’s head forward at the nape, and using T blade trimmers for precision around ear curves. Foil shavers erase stubble below the line.
This anchor point defines where your blending zones begin and how dramatic your fade haircut becomes.
| Tool | Purpose | Technique |
|---|---|---|
| T Blade Trimmer | Initial outline precision | Narrow blade traces curves |
| Foil Shaver | Remove remaining stubble | Creates smooth bald finish |
| Straight Razor | Sharpen edge definition | 30° angle micro-cleanup |
Creating The Initial Guideline

Once the skin line lives clean, your next move locks the fade’s entire structure—grab a guard one or two sizes above your lowest point and carve a horizontal Initial Guideline around the head.
This blunt edge marks where Blending Zones begin, separating bare Scalp Mapping from longer Fade Layers above, and your Guard Numbers climb from here with zero room for guesswork.
Gradual Blending Between Guard Levels

Now you climb—stack Guard Numbers one millimeter apart and overlap each Blending Zone three inches above the last to kill every line.
Dense Hair Texture demands tighter Guard Leveling intervals or you’ll see bulky shadows between Fade Transitions, while fine strands tolerate wider jumps.
Never skip a guard—those gaps create disaster zones no Blend Techniques can rescue without reworking the entire fade from scratch.
Using Clipper Lever for Fine Adjustments

Your Lever Control rescues every stubborn line—flip that lever halfway to create Micro Adjustments between guards and watch Blade Exposure shrink by 0.2 to 0.5 millimeters for Smooth Blending.
Fine Tuning Guard Length through Lever Technique lets you dial fractional cuts without swapping Clipper Guards, keeping Blending Zones uniform across every Fade Techniques pass you make.
Blending Techniques for Flawless Fades

Guard progression gets you close—blending locks it in.
Master these four techniques and you’ll turn choppy guard lines into butter-smooth transitions that look professionally done.
Each method attacks the fade from a different angle, and you need all of them working together to eliminate every visible line.
Clipper-Over-Comb Method
You won’t master fade blending without clipper-over-comb techniques—this method gives you surgical control over blending zones where guard length alone fails.
Hold your comb at a steady angle, run the clipper along its spine, and watch protruding hair vanish. Switch guards gradually, repeating across each panel. This haircutting technique transforms choppy transitions into flawless fades—no lever control wizardry required yet.
Using The Corner of The Blade
The corner of your clipper blade lets you deliver micro blending strategies without guard swapping—slide this edge into tight zones where full blade contact creates harsh lines. Blade angle tips matter here: tilt fifteen degrees off perpendicular, and you’ll control each fade shift with surgical precision.
- Position the corner near hairlines for gradual length transitions without deep cuts
- Apply light pressure during corner blade control to avoid scalp irritation
- Use short, controlled passes instead of long sweeps when blending guard length differences
- Check both sides constantly to maintain symmetry across fade techniques
Removing Harsh Lines
Harsh lines scream amateur—you fix them by shifting to a half-guard above your visible stop point and flicking light upward strokes across the trouble zone.
This line softening and edge refining approach uses blending techniques that demand patience, not force.
Gradual blending happens when you barely kiss the scalp with your blade during fade smoothing passes, erasing every stair-step your guard length left behind through controlled fading technique repetition.
Working Symmetrically
Symmetry techniques demand you balance each side against a vertical centerline—skip this and your fade haircuts collapse into lopsided disasters that scream neglect.
Mirror imaging means running identical guard length sequences on both temples, cross-checking visual alignment every thirty seconds to catch drift before it ruins even blending.
Balanced cuts rely on matching your clipper guards’ angle and pressure across both sides using hair fading techniques that respect natural contours.
Common Mistakes When Using Fade Guards

You mess up fades when you ignore the basics — and the damage shows instantly. Skipping guard levels turns smooth gradients into choppy disasters, while dull blades rip hair instead of cutting clean lines.
Rush the blend or skip critical steps and you’ll spend twice as long fixing what should’ve been right the first time.
Skipping Guard Levels
Skipping guard numbers—jumping from a zero guard straight to a two—saves time but introduces blending challenges most rookies can’t handle. You’ll get sharper contrast between guard length zones, which demands aggressive lever work to eliminate the harsh line your shortcut created.
Guard size gaps expose sloppy technique instantly. Time-saving benefits vanish when you’re spending twenty minutes fixing what proper guard progression would’ve prevented in clipper guards from the start.
Using Dull or Dirty Blades
Dull blade risks destroy fade haircuts before you finish the first pass—tugging yanks hair instead of cutting clean, creates uneven guard sizes transitions, and forces you into damage control mode.
Dirty clipper guards clog mid-blend and harbor bacteria that irritate fresh scalps. Blade maintenance isn’t optional—sanitization techniques, sharpness tips, and proper cleaning methods separate barbering tools that deliver impeccable haircutting techniques from junk that ruins your work.
Poor Blending or Rushing Steps
Rush cutting creates visible bands between guards and burns precision out of your fading technique—skipping guards or racing through blending errors leaves bulky changeover zones you can’t fix.
Clipper fatigue kills steady hand control during critical passes, and uneven shifts expose every shortcut you took. Slow down your fade haircuts or watch clean work turn into banded disasters.
Advanced Fading Tips and Variations

You’ve nailed the basics — now it’s time to weaponize those lever adjustments and master specialized fade variations that separate pros from weekend warriors.
The techniques below push guard progression into territory where millimeter precision creates dramatic visual impact. Master these three expert moves and you’ll handle any fade request that walks through your door.
Lever Manipulation for Micro-Tweaks
Dial in fade haircuts with lever calibration—those tiny micro adjustments separate amateurs from pros. Your clipper’s lever isn’t decoration; it’s precision actuation for fine tuning between guard length steps.
- Half-guard increments shave 0.5mm off any guard—critical for blending tight zones
- Lever-open positioning extends cutting depth without swapping clipper guards
- Calibration methods demand testing on scrap sections before committing to the client’s fade
Master this fading technique and watch harsh lines vanish.
Burst Fade Guard Progression
Burst Fade Techniques demand circular guard selection—start skin-tight at the temple, then arc upward using guards 0, 1, and 2 in tight progression around the ear. Your clipper adjustment controls that fanlike sweep; wide jawlines need lower starting points while rounder faces want gentler curves.
Fading technique requires constant motion along the burst radius—stop moving and you’ll carve divots. Skin preparation prevents razor burn when working this close.
Taper Vs. Fade Differences
Tapers keep hair at the base—fades strip it to skin. That’s the line you can’t blur. Fade techniques demand aggressive guard selection from zero upward; tapers start longer and never expose scalp. Hair texture dictates how fast blending zones collapse between steps.
Guard length separates clean fades from soft tapers:
- Fades expose skin or stubble at bottom
- Tapers maintain consistent base coverage
- Fades need 3-6 guard progressions
- Tapers use 2-4 gentler transitions
- Scalp preparation matters more with fade haircut styles
Maintenance and Upkeep for Fade Haircuts

Your fade looks sharp today — it’ll look like hell in ten days if you ignore maintenance.
Guard length dictates how fast your haircut falls apart, and keeping your tools clean determines whether your next cut delivers precision or patchy disaster.
Here’s what you need to lock down between sessions.
Touch-Up Frequency by Guard Length
Your Guard Length dictates how often you’re back in the chair—zero to two guards demand touch-ups every 7 to 14 days because Hair Regrowth exposes lines fast.
Guard three holds 14 to 28 days. Guard four stretches to 21 to 35 days.
Skin fades collapse fastest—expect weekly visits. Coarse texture accelerates visible regrowth, shortening your Fade Maintenance cycle. Skip appointments and your Blending vanishes.
Cleaning and Oiling Clippers and Guards
Brush debris from your Clippers after every cut—Hair Clippings lodge between blade teeth and kill cutting precision. Apply Clipper Maintenance Oil across the blade surface, run the Trimmer briefly to spread Blade Lubrication, then wipe excess with a clean cloth.
Sanitizing Tools between clients with clipper-safe disinfectant prevents cross-contamination. Remove Clipper Guards, clean inside contact surfaces, inspect for cracks monthly—damaged Guard Sizes ruin blending and scalp safety.
Scalp Care After Close Fades
Your Skin Fade demands serious Scalp Health attention—close cuts expose skin that craves Scalp Hydration through lightweight moisturizers twice daily. Use Gentle Cleansing with sulfate-free formulas and Soothing Treatments like aloe vera to calm redness across all Fade Heights.
Protective Practices matter—sleep on satin pillowcases, avoid harsh chemicals for two weeks, and maintain Scalp Longevity through proper Haircare and Grooming plus consistent Scalp Health and Maintenance routines.
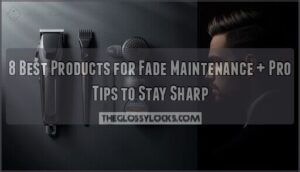
Top 10 Fade Haircut Tools and Kits
Your clippers won’t mean anything if you don’t have the right support tools — templates, guides, and specialty combs turn guesswork into precision.
The wrong kit leaves you fighting lines and wasting time on fixes that shouldn’t exist. Here are ten fade tools that give you control over every blend zone and guard shift.
1. Aomgd Hair Trimming Guide Template
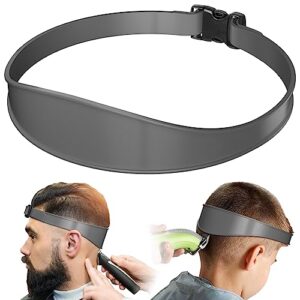
You need a framework that stops guesswork and locks in consistency—that’s exactly what the Aomgd Hair Trimming Guide Template delivers. This silicone band wraps your dome and maps out your neck line to crown progression in real time. At 1.76 ounces and fully adjustable, it clicks onto razors, trimmers, and clippers without slipping.
Clean lines demand clean tools—this one’s portable, washable, and built for adults or kids. Practice the band placement twice before your first pass—amateur tension ruins symmetry fast.
| Best For | DIY haircutters who want consistent neck lines and fades at home without dropping salon cash every few weeks. |
|---|---|
| Material | Silicone/Elastic |
| Primary Use | DIY haircuts at home |
| Adjustability | Adjustable length |
| Portability | Portable |
| Ease of Cleaning | Easy to clean |
| Weight | 1.76 ounces |
| Additional Features |
|
- Adjustable sizing works with different head shapes and clicks onto most trimmers and razors
- Lightweight silicone design (under 2 ounces) makes it portable and easy to clean between cuts
- Helps beginners nail straight lines and symmetrical fades without years of practice
- Loses grip on larger heads or slides around if you don’t dial in the tension correctly
- Takes a few practice runs to figure out proper placement—first attempts usually look rough
- Adjustable mechanism can loosen mid-cut, which kills your line consistency fast
2. Self Haircut Kit for Men
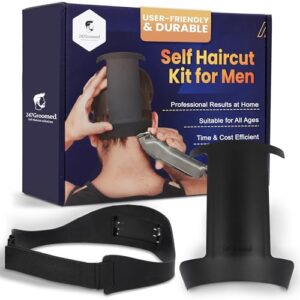
Cordless clippers with guard sets ranging from zero to four eliminate shop dependency and slash yearly haircut costs to near zero.
Your kit needs lithium ion power for forty to one-twenty minutes of runtime—anything less dies mid-fade and wrecks your blend. Most kits bundle cleaning brushes, blade oil, and waterproof housings so you rinse guards after each session without corroding the motor.
Oil those blades every third cut or friction kills precision fast. Store everything in the included case—loose guards vanish when you need them most.
| Best For | People who want to save money on barber visits and get clean, professional-looking fades and lineups at home—especially if you’re willing to practice a bit. |
|---|---|
| Material | Plastic/Silicone |
| Primary Use | Self-haircuts/fade guide |
| Adjustability | Adjustable size (XS-XXL) |
| Portability | Suitable for home use |
| Ease of Cleaning | Standard maintenance |
| Weight | 82 Grams |
| Additional Features |
|
- Saves hundreds of dollars a year once you get the hang of it
- Adjustable sizing fits most head sizes from kids to adults
- Includes templates for clean necklines and fade guides so you don’t have to eyeball everything
- Plastic build feels cheap for the price point
- Cutting the back of your own head takes serious practice and patience
- The adjustment mechanism can be clunky and frustrating to use mid-cut
3. Fade Comb Set for Hair Cutting
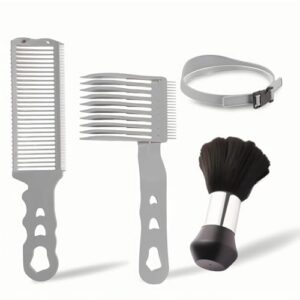
Plastic fade combs with flexible bands lock onto your skull and hold the exact curve you need for smooth guard transitions—no more chasing that perfect angle with your free hand while your clipper drifts off course.
You get consistent spacing from temple to nape because the teeth grip fine segments and guide your blade position through every fade stair without guesswork. Most sets pair two geometries so you switch between finer or wider teeth mid-cut, and the matte coating stops slippage when your palms sweat during longer sessions.
| Best For | Home barbers and DIY enthusiasts who want professional-looking fades without the salon price tag, especially if you’re willing to practice and don’t mind a learning curve. |
|---|---|
| Material | ABS Plastic |
| Primary Use | Fade comb/neckline tool |
| Adjustability | Adjustable 25-inch design |
| Portability | Perfect for home/salon |
| Ease of Cleaning | Waterproof and washable |
| Weight | 7.05 ounces |
| Additional Features |
|
- Locks onto your head to maintain consistent fade angles, so you’re not fumbling with hand positioning while trying to blend guard lengths
- Flexible design follows your head shape naturally, making it easier to nail those tricky curved sections around the ears and nape
- Comes with a soft cleaning brush and adjustable sizing, plus everything’s washable—solid value for basic home fading gear
- Takes real practice to get smooth results; beginners will likely need several attempts before their fades look clean
- Won’t work well on very short hair or buzz cuts since the comb needs length to grip and guide effectively
- Build quality feels budget-level—some users report the plastic feels flimsy compared to pro-grade tools
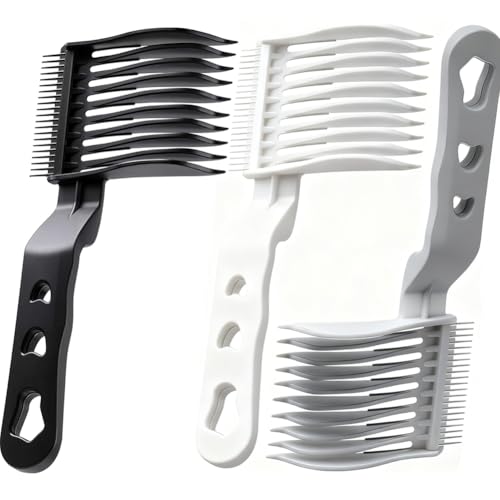
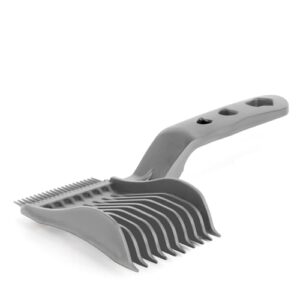
4. Blend Friend Fade Comb Set
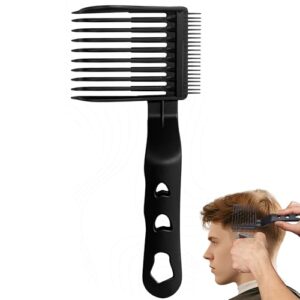
Two triangular-arched combs built from heat-resistant ABS plastic deliver micro-blending precision where your clipper needs a steady guide. You hold the ergonomic non-slip handle while outer tines anchor the fade baseline—inner tines flex around skull curves so you blend near the ears and neckline without fighting the contour.
Rounded teeth slide through hair without snagging scalp, and the matte finish kills static that ruins clean lines. Wipe them down with standard disinfectant after every cut, then store dry to prevent warping that destroys tooth spacing.
| Best For | Home barbers and DIY enthusiasts who want to create professional-looking fades and layered cuts without paying for salon visits every time. |
|---|---|
| Material | ABS Plastic |
| Primary Use | Barber-quality fade haircuts |
| Adjustability | Precision-graded sizes |
| Portability | Portable for travel |
| Ease of Cleaning | Simple cleaning |
| Weight | 2.08 ounces |
| Additional Features |
|
- Triangular-arched teeth follow your head’s natural curves, making it easier to blend around ears and the neckline without awkward angles
- Heat-resistant ABS plastic holds up to clipper friction and wipes clean with standard disinfectant between cuts
- Ergonomic non-slip handle gives you solid control during detailed fade work, especially helpful if you’re still learning the technique
- Several users reported the plastic cracking or becoming brittle after regular use, so longevity might be hit-or-miss
- Takes practice to get comfortable holding and angling the comb correctly—not instant results on your first try
- May struggle with very fine or fragile hair types that need a gentler touch than these combs provide
5. Fadeking Hair Clipper Guards Set
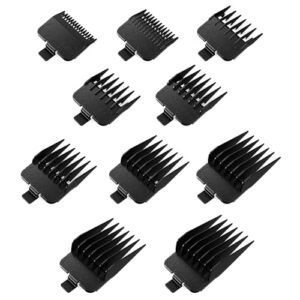
Six precision guards—1.5mm through 13mm—snap onto most major-brand clippers and eliminate the guesswork between skin and bulk. You get metal or polymer construction that won’t warp mid-fade, plus rounded edges that slide past scalp without irritation. Visible sizing marks let you grab the right guard in three seconds flat.
The 3-in-1 mounting system cuts switching time in half, so you blend faster without hunting for the next length—perfect when every second counts during tight fade work.
| Best For | Barbers and home users who need reliable guards for consistent fades and a wide range of cutting lengths. |
|---|---|
| Material | Plastic |
| Primary Use | Consistent grooming results |
| Adjustability | Multiple sizes (1/16-1 inch) |
| Portability | Practical addition |
| Ease of Cleaning | Water and mild soap |
| Weight | 4.66 ounces |
| Additional Features |
|
- Six guard sizes (1.5mm to 13mm) cover everything from close skin fades to longer cuts
- Rounded edges and secure snap-on design reduce irritation and stay put during blending
- Quick-switch mounting system saves time when moving between lengths during detailed fade work
- Universal fit doesn’t work with every clipper brand despite the claims
- Some guards measure off from their labeled sizes, which throws off precision
- Build quality varies—a few users found them flimsy or ineffective for clean cutting
6. Fade Combs Haircut Kit For Men
The elpha four-piece kit arms you with flat- and curved-edge combs, a 360-degree mirror, and a silicone band that locks fade lines in place—no wavering, no guessing.
Polished teeth glide through hair without snagging while you build clean transitions from guard zero to four.
At 10.58 ounces and 9.92 inches long, the kit drops into any bag and delivers professional control whether you’re touching up at home or between barber visits.
| Best For | DIY groomers who want barber-quality fades at home and need a portable system that works between professional cuts. |
|---|---|
| Material | Plastic |
| Primary Use | Self-haircut precision |
| Adjustability | Flat and curved edges |
| Portability | Portable and compact |
| Ease of Cleaning | Standard cleaning |
| Weight | 10.58 ounces |
| Additional Features |
|
- Four-piece setup with flat and curved combs plus a 360-degree mirror gives you full visibility and fade control
- Lightweight at 10.58 ounces and compact enough to travel anywhere
- Polished teeth glide smoothly without snagging, making transitions from zero to four guards clean and even
- Takes practice to master, especially if you’re new to self-cutting
- No instructions or tutorials included, so you’re learning on your own
- Won’t handle highly textured hair or complex trendy styles as well as simpler cuts
7. Fade Comb Haircut Kit for Men
This four-piece Maahongh kit drops a curved fade comb, adjustable silicone headband, and angled teeth into your hands—tools that protect your scalp while you nail those guard-zero-to-four transitions.
The silicone band locks position so you’re not chasing crooked lines, and polished teeth slice through thick or coarse hair without snagging mid-blend.
Clean it fast, reuse it forever, and cut your barber costs in half—just don’t expect miracles if your clippers are trash or your blending skills need serious work.
| Best For | Home barbers with thick or coarse hair who want to save money on professional cuts and have the patience to practice blending techniques. |
|---|---|
| Material | Silicone |
| Primary Use | DIY fades at home |
| Adjustability | Adjustable silicone band |
| Portability | Easy to use anywhere |
| Ease of Cleaning | Reusable and easy clean |
| Weight | Not specified |
| Additional Features |
|
- Adjustable silicone headband keeps the guide steady so you’re not fighting crooked fade lines mid-cut
- Angled, polished teeth glide through dense hair without tugging or scraping your scalp
- Reusable kit pays for itself after a couple uses and cleans up in seconds
- Headband can slip off during cuts if you’ve got a smaller head or move around too much
- Combs sometimes trap hair instead of letting it flow through smoothly for clean blending
- Won’t fix bad clipper work or replace years of barber experience—you still need solid technique
8. Fade Comb For Men Haircut Tool

SQZQLD’s two-pack fade guide slaps a triangle ruler and hollow handle into ABS plastic—anti-static, ergonomic, and sharp enough to cut clean boundaries from your first guard-zero skin pass through mid-fade zones. At under three ounces and 8.94 inches, you can toss it in your kit for home touch-ups or salon marathons without hand fatigue killing your precision.
Practice matters—user error still births choppy lines—but once you nail the angles, this thing gifts you repeatable fade control and makes a killer present for DIY cutters chasing professional edges.
| Best For | DIY barbers and home users who want clean fade lines without dropping salon cash every two weeks. |
|---|---|
| Material | ABS Plastic |
| Primary Use | Professional styling boundaries |
| Adjustability | Ergonomic handle design |
| Portability | Portable and convenient |
| Ease of Cleaning | Standard maintenance |
| Weight | 2.89 ounces |
| Additional Features |
|
- Anti-static ABS plastic with ergonomic grip cuts hand fatigue during long sessions
- Triangle ruler guides help nail consistent fade angles from skin to longer guards
- Two-pack under three ounces makes it easy to keep one at home and one in your travel kit
- Takes practice to avoid choppy lines—first few fades might look rough
- Only works well for specific fade styles, not versatile for all haircut types
- Quality can be hit-or-miss based on user reports
9. Dliojhl Gradient Hair Fade Comb
Dliojhl’s three-pack gradient comb throws Black, White, and Grey into your kit—choose visibility against your client’s hair or just rotate when one snaps.
The curved edge guides your clipper blade through zero-to-four transitions without snagging thick texture, and at 3.3 inches it won’t cramp your palm during extended blending marathons.
Heat-resistant ABS plastic fights static frizz while you work clipper-over-comb magic around ears and necklines.
Master the angles first—this thing won’t auto-correct sloppy technique—but once you dial in placement, you’ll bang out uniform gradients that look salon-grade every pass.
| Best For | Home barbers and DIY fade enthusiasts who want consistent gradient cuts without dropping salon money every two weeks. |
|---|---|
| Material | Plastic |
| Primary Use | Gradient hairstyles |
| Adjustability | 3 color options |
| Portability | Suitable for various scenes |
| Ease of Cleaning | Standard cleaning |
| Weight | 4.48 ounces |
| Additional Features |
|
- Three-color pack lets you swap combs based on hair color for better visibility while you work
- Curved tooth design glides smoothly through clipper-over-comb techniques without catching or pulling
- Compact 3.3-inch size gives you control in tight spots like around ears and necklines
- Plastic construction can crack under pressure if you’re heavy-handed with your clippers
- Takes practice to nail the right angles—won’t fix bad technique automatically
- Struggles with really thick or coarse hair that needs more aggressive cutting tools
10. Blend Friend Hair Fade Comb Tool
Your clippers fight Wahl, Andis, or Oster guards—Blend Friend’s universal width slots onto all three without adapter gymnastics. The curved and flat sides adapt to skull contours around temples and crowns where static combs lose contact, and the unique tooth design locks your guideline exactly where you place it—no drift mid-pass.
At 1.45 ounces, fatigue won’t wreck symmetry during double-side blends. Beginners nail consistent transitions because the gradient teeth show you exactly where guard two ends and guard three starts, eliminating guesswork that creates harsh lines.
| Best For | Barbers and home users who want salon-quality fades without mastering freehand clipper work, especially helpful for beginners still building muscle memory around temple curves and crown transitions. |
|---|---|
| Material | ABS Plastic |
| Primary Use | Precise hair length control |
| Adjustability | Curved and flat sides |
| Portability | Suitable home/professional use |
| Ease of Cleaning | Standard maintenance |
| Weight | 1.45 ounces |
| Additional Features |
|
- Universal fit works with Wahl, Andis, and Oster guards right out of the box—no adapters needed
- Curved and flat sides maintain contact around temples and crowns where standard combs gap out
- Gradient teeth show exactly where each guard length transitions, removing the guesswork that creates harsh fade lines
- Takes practice to master, especially when cutting your own hair
- Not ideal for very short styles like crew cuts or stick-straight hair that needs more texture
- Curved/wavy hair types may find it awkward to use solo without a second set of hands
Frequently Asked Questions (FAQs)
What are the levels for the fade clippers?
Guard levels start at zero level—skin tight. Half guard sits between zero and one.
One cuts to one-eighth inch. Two reaches one-quarter. Three hits three-eighths. Each step adds exactly one-eighth inch of length.
What are the steps to a fade haircut?
Start at the bottom line—establish your skin line clean. Build your guideline with a short guard.
Blend upward through guard levels using light passes. Tweak with the lever.
Check both sides—symmetry wins.
What is the 3 2 1 buzzcut rule?
The 3 2 1 buzz cut uses three-millimeter, two-millimeter, and one-millimeter guards—crown to nape—to create a stepped taper that delivers clean, low-maintenance contrast without complex blending.
Can you do fades on curly hair?
Yes—but your curl pattern demands wider blending zones and slightly longer start points.
Guard three down to guard one protects curl volume while creating smooth transitions without flattening natural texture.
How do you fix an uneven fade?
Reestablish your guideline with a shorter guard at the problem area—then blend outward using small flicking motions.
Check both sides constantly with a handheld mirror to catch remaining inconsistencies before they become disasters.
Whats the best clipper brand for beginners?
Andis, Wahl, and Oster deliver rock-solid reliability for new cutters. They include multiple guards, sturdy blades, and helpful support—so you won’t waste money replacing flimsy junk after two haircuts.
Do skin fades damage your scalp long-term?
No—skin fades won’t wreck your scalp permanently if you’re using clean, sharp blades and moisturizing afterward. Neglect hygiene or skip post-fade care, though, and irritation becomes your new normal.
How do barbers blend without leaving lines?
Barbers kill harsh lines by flicking the clipper guard at guard edges, using lever adjustments for micro-blending, and working the blade corner to skim transitions—constant motion and fractional length changes erase demarcations before they settle.
Conclusion
A client walks in with a fade haircut that looks like someone carved it with a butter knife—harsh lines, choppy zones, zero flow.
You rebuild it using proper fade guard progression: zero to half to one to one-and-a-half to two. Twenty minutes later, he’s staring at a smooth gradient that photographs like studio work.
That’s the difference between guessing and systematically controlling every shift. Master the sequence—own every fade you touch.
- https://cuttersyard.com/zero-fade-vs-skin-fade-heres-what-you-need-to-know/
- https://www.revlonprofessional.com/blog/skin-fade-haircut/
- https://victorybarber.com/blogs/tutorials/how-to-fade-hair-the-easy-way
- https://www.bootleggedbarberco.com/blog/haircut-with-skin-fade
- https://www.manhattanbarbershopnyc.com/style-guide/fade-haircuts