
This site is supported by our readers. We may earn a commission, at no cost to you, if you purchase through links. This content is for general informational and educational purposes only and is not a substitute for professional medical, dermatological, or nutritional advice.
You turn around, and there it is: a streak of burgundy dye splattered across the wall, right where the towel rack used to look innocent. Your stomach drops. Take a breath, because that stain isn’t as permanent as it looks.
Paint is more forgiving than most people think, and the dye usually sits on the surface before it settles in. Whether the splash is five minutes old or five days old, how you handle the first few moments matters most. A gentle touch beats a hard scrub every time.
Here’s how to get hair dye off walls without damaging the paint underneath.
Table Of Contents
Key Takeaways
- Blot fresh dye right away with a clean white towel, pressing gently instead of rubbing, then dab with mild dish soap in warm water, because acting within the first four hours makes removal far easier.
- For dried stains, start with 70% isopropyl alcohol on a cotton ball or a thick layer of petroleum jelly, and always test a hidden spot first since gentle solvents work better than hard scrubbing.
- Match your method to your wall, since flat paint and wallpaper need light blotting while satin, gloss, and tile can handle a baking soda paste.
- If the paint is damaged after cleaning, seal the spot with a stain-blocking primer before touching up, because dye will bleed through ordinary paint, and prevent repeats by taping plastic sheeting along the walls before you dye.
How Can You Remove Hair Dye From Walls?
Hair dye on your wall looks like a disaster, but it’s usually fixable. How you tackle it depends on one thing: whether the splash is fresh or already dry. Here are the two situations you’ll likely face, so you can pick the right approach and keep your paint intact.
Blotting and Cleaning Fresh Dye Splashes
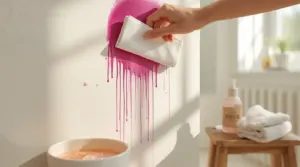
Grab a clean white towel and blot the splash right away. Press gently, lifting upward, so you don’t push dye deeper into the paint. Rubbing is tempting, but it just spreads the mess!
Then follow this routine:
- Mix a drop of mild dish soap into warm water.
- Dab the spot with a soft cloth, using light pressure.
- Rinse with a damp cloth, then dry.
Spot testing cleaners somewhere hidden first keeps your paint safe. For any dye that lingers after cleaning, a baking soda paste made from equal parts baking soda and water can be left to sit for a few minutes before you gently wipe it away.
Lifting Dried Stains Without Harsh Scrubbing
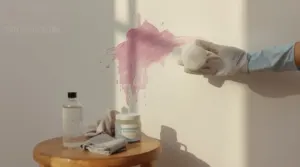
Still stained after cleaning? Dried dye needs patience, not muscle.
| Method | Wait time |
|---|---|
| Alcohol on cotton ball | 2-3 minutes |
| Damp magic eraser | Light circles |
Start with 70% isopropyl alcohol on a cotton ball. Test a hidden spot first, since flat paint soaks up liquid fast. Smear petroleum jelly thickly, wait 30 minutes, then wipe with microfiber. Gentle solvents beat scrubbing!
Essential Tools and Safe Household Cleaners
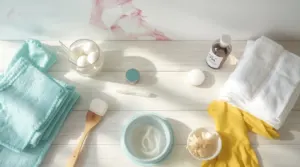
Good news: you probably own everything you need already. Skip the harsh chemicals and start with gentle household ingredients.
A simple sugar scrub or a soft washcloth can work wonders, and this guide to exfoliating to prevent ingrowns shows how to use them safely.
For tools, grab soft microfiber cloths, cotton balls or swabs, a soft-bristled toothbrush, and a white melamine foam eraser. Keep clean white towels nearby for blotting, plus rubber gloves and a small container for mixing.
Now the cleaners. A baking soda paste (three parts baking soda to one part water) lifts dye through mild abrasion. Diluted dish soap in warm water works for lighter marks. Rubbing alcohol on a cotton ball grips fresh splashes. For stubborn dried stains, try a 1:1 mix of hydrogen peroxide and baking soda.
Always run a spot test somewhere hidden first. Your paint will thank you.
Protecting Different Wall Surfaces During Dye Removal
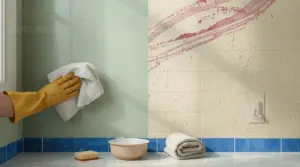
Not every wall reacts to cleaners the same way, and that’s good news once you know what you’re working with! Your wall surface matters as much as the cleaner you pick. Here’s how to protect the two main groups before you start scrubbing.
Flat Paint Versus Washable Finishes
Your walls aren’t all built the same, and that changes everything. A glossy kitchen wall shrugs off a scrub, while a matte bedroom wall bruises if you look at it wrong.
A slick kitchen wall laughs at scrubbing, but a matte bedroom wall will mark every careless swipe
On flat paint, blot gently with a vinegar-water mix. Skip the Magic Eraser, since it dulls the finish. Satin and gloss can handle baking soda paste. Always do spot testing first, somewhere hidden.
Tile, Wallpaper, and Textured Surfaces
On tile, a baking soda paste (three parts soda to one part water) lifts dye without hurting the glaze. Scrub gently with a soft brush.
Wallpaper is touchier. Blot fresh dye with a dry white cloth, never rubbing. Before using rubbing alcohol, do a spot testing round on a hidden corner.
For textured walls, try a soft toothbrush and mild soapy water. Skip abrasive pads!
Repairing Wall Paint After Hair Dye Stains
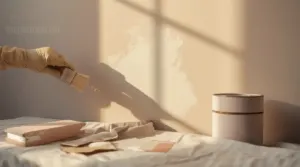
The stain is gone, but the wall might look a little tired where you scrubbed.
Start with a gentle rinse using mild soap and a damp cloth, then lightly sand any rough spots with 120-grit paper. Wipe away every bit of dust. Next, brush on a stain-blocking primer such as Zinsser 1-2-3 or Kilz, feathering the edges slightly. Let it dry for one to two hours.
For touch-up paint application, take a chip of your wall paint to a store for color matching, and match the sheen too. Do a spot test on cardboard first. Dab with a small angled brush, feathering outward from the center.
Wait 24 hours before judging the color. If it still shows, repaint the wall.
Preventing Future Hair Dye Stains on Walls
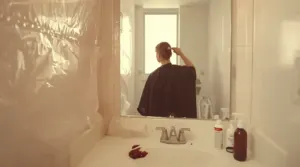
Imagine this: you’re halfway through a fresh coat of burgundy, and a single drip lands right on the bathroom wall. Annoying, but it doesn’t have to happen again!
Start with stain prevention before you ever open the box. Wipe the walls with a mild cleaner so oils don’t grab the dye, then tape plastic sheeting along the baseboards and nearest wall. Wear a cape and a dark, dedicated shirt.
Stand facing the mirror, not the wall, and work in daylight so you can see every splash. A tiled bathroom beats painted drywall every time.
For long-term surface protection, choose semi-gloss or satin paint, which resists dye better than flat. Do a quick spot test on a hidden corner if you’re unsure, and keep a damp white cloth within reach.
Frequently Asked Questions (FAQs)
Will repainting over dye stains cause bleed-through?
Yes, it will, if you skip primer. Hair dye keeps migrating through ordinary latex, even after several coats. Seal the spot with a shellac-based stain blocker first, like Zinsser BIN, then paint over the stain.
How long before hair dye stains become permanent?
Funny how hair dye promises to last for weeks on your head, then sets on your wall in hours. Act within the first four hours. After 24 hours, stain removal gets much harder and riskier.
Does hair dye color affect how hard it is to remove?
A black dye splash can fight back like a stubborn houseguest, while a pale pink one slips away with a wipe. Hair dye color matters: darker, red and vivid shades cling harder, so act fast!
When should you hire a professional painter instead?
Picture a gleaming shiny patch glaring back at you after you’ve scrubbed away the stain. That’s your cue. Call a pro when dye has sunk into the paint, the sheen has changed, or the wall needs repairs.
Conclusion
Blot fast. Test first. Rub gently. Those three habits turn a panic-inducing splash into a minor chore. You know how to get hair dye off walls, from fresh drips to stubborn dried streaks, and how to touch up any paint that suffers along the way.
Next time, tape down plastic and keep a damp cloth nearby. A little prep beats a lot of scrubbing. Your walls will stay clean, and your nerves will thank you!