This site is supported by our readers. We may earn a commission, at no cost to you, if you purchase through links.
 Balayage hair is a hand-painted highlighting technique that creates a natural, sun-kissed look with soft gradations.
Unlike traditional highlights, it doesn’t involve foil and offers a low-maintenance, customized finish.
The color is strategically swept onto sections of your hair for depth and dimension, making it perfect for beginners who want effortless, blended results.
It’s often confused with ombre, but while ombre fades from dark to light, balayage focuses on precise placement for a natural vibe.
If you’re planning to try it, start by considering your hair’s health and texture—prep is key. Curious about DIY options and expert tips? Keep reading!
Table Of Contents
- Key Takeaways
- What is Balayage
- Balayage Hair Technique
- Balayage Vs Other Techniques
- Preparing for Balayage
- Top 8 Balayage Kits
- 1. Garnier Nutrisse Golden Blonde Haircolor
- 2. Loreal Paris Colorista Ombre Hair Bleach
- 3. Jerome Russell Bblonde Highlighting Kit
- 4. Schwarzkopf Max Blonde Intense Lightener
- 5. Revlon Honey Frost and Glow Highlights
- 6. Loreal Paris Blonde Highlights Hair Color
- 7. Madison Reed Brown Hair Highlighting Kit
- 8. Caramel Lights Hair Gloss for Brown Hair
- Balayage Application Process
- Balayage Maintenance and Care
- Balayage at Home
- Balayage Hair Care Tips
- Choosing The Right Balayage
- Frequently Asked Questions (FAQs)
- How to do balayage step by step?
- What is the downside of balayage?
- Is $400 a lot for a balayage?
- What you need to know before getting a balayage?
- How long does balayage hair last?
- Is balayage hair damaging?
- Are there any special products needed for balayage hair?
- Are balayage hair extensions a good option?
- How often should balayage hair be maintained?
- How long does balayage typically last?
- Conclusion
Key Takeaways
- You’ll get natural-looking, sun-kissed highlights with balayage that’s low-maintenance and grows out gracefully.
- Balayage involves hand-painting color for soft, blended effects without harsh foil lines or consistent touch-ups.
- To keep your balayage looking fresh, use sulfate-free shampoos, deep conditioners, and schedule touch-ups every 3-4 months.
- DIY balayage is possible with the right tools and careful techniques, but always prioritize healthy hair preparation.
What is Balayage

Balayage is a hair coloring technique where color is hand-painted onto your hair to create natural-looking highlights with depth and dimension.
The term comes from the French word “balayer,” meaning to sweep, which perfectly describes the freehand method stylists use, creating a technique that results in natural-looking highlights.
Definition and History
Balayage hair has French roots, with the term “balayage” meaning “to sweep.”
Originating in the 1970s as “Balayage à Coton,” this hair coloring technique used cotton strips for precision.
It evolved into today’s modern balayage:
- A freehand hair painting technique
- Creates natural, sun-kissed highlights
- Focuses on depth and dimension
- Perfected for versatile, effortless beauty
Technique and Process
Think of the balayage technique as hand-painted art for your hair. Using hair painting and sectioning patterns, color is applied freehand to create natural depth.
This isn’t your average foilage technique—balayage focuses on delicate color melting. Root smudging blends shifts perfectly, ensuring hair grows out beautifully.
Here’s a quick comparison of techniques:
| Technique | Tools Used | End Result |
|---|---|---|
| Hair Painting | Freehand brushwork | Natural highlights |
| Foilayage | Foils and brushes | Dramatic contrast |
| Root Smudging | Color blending tool | Seamless root shifts |
Benefits and Comparison
Balayage offers natural-looking highlights with minimal effort, perfect if you love a sun-kissed look that’s low maintenance.
It’s gentle on hair compared to traditional methods and emphasizes customization for any style or color.
- Natural Highlights: Achieves a soft, blended effect.
- Low Maintenance: Less noticeable root growth.
- Less Damage: No harsh bleaching.
- Customization Options: Adapted to your hair type and preference.
Balayage Hair Technique
Balayage is all about hand-painting highlights onto your hair to create natural depth and dimension. This custom technique allows you to control placement for a beautifully blended, personalized look.
Hand-Painting Highlights

Mastering hand-painted hair is all about control and creativity.
This freehand technique lets you place color where it naturally belongs, enhancing a natural look effortlessly.
By blending balayage highlights with precision, you create dimension and artistic expression unique to each client.
Perfect for balayage beginners, it’s the go-to method in modern hair coloring techniques for soft, sun-kissed results.
Creating Depth and Dimension

To create depth and dimension in balayage hair, focus on color layering and shadow placement.
By blending tonal variations and emphasizing light reflection, you’ll achieve multi-dimensional color with natural blends.
The technique adds hair color depth, making strands appear fuller and more vibrant. Strategically placed highlights enhance texture, ensuring your hair radiates dimension and texture from every angle.
This can be achieved with natural sun-kissed highlights and seamless grow-out.
Customized Color Placement

To achieve a truly customized balayage hair look, focus on strategic color placement.
Personalized blends are all about complementing your features with seamless, natural tones.
- Use Face Framing highlights to emphasize your best features.
- Experiment with Tone Selection for subtle depth.
- Incorporate Root Shadowing for softness.
- Enhance texture with Dimension Creation.
- Balance everything by mastering Hair Color Contouring.
Balayage Vs Other Techniques
When comparing balayage to techniques like highlights or ombre, it’s all about the placement and effect.
You’ll notice balayage offers softer, more natural gradations, while highlights or ombre may create sharper contrasts or specific patterns.
Balayage Vs Ombre

Balayage hair offers a seamless shift with soft highlights hand-painted throughout for natural depth.
Ombre hair, however, focuses on bold color gradations from dark roots to lighter ends.
Both techniques have unique appeal but differ in application technique, maintenance needs, and cost comparison.
Here’s a quick breakdown:
| Technique | Color Transition | Maintenance Needs | Cost Comparison | Hairstyle Suitability |
|---|---|---|---|---|
| Balayage | Gradual and Blended | Low | Moderate | Suitable for All Styles |
| Ombre | Bold and Distinctive | Very Low | Lower | Best for Longer Hair |
The key differences between Balayage and Ombre hair techniques lie in their application technique, with Balayage offering a more subtle, natural look and Ombre providing a more dramatic effect.
Balayage Vs Highlights

Balayage hair uses freehand blending techniques, creating natural-looking highlights that evolve gracefully as it grows.
Freehand balayage blending creates soft, sun-kissed highlights that grow out beautifully, offering effortless, natural elegance over time.
Traditional highlights involve sectioning with foils for a structured root-to-tip effect but need frequent touch-ups.
| Aspect | Balayage | Highlights |
|---|---|---|
| Application | Freehand, surface technique | Uniform, root-to-tip foils |
| Maintenance Costs | Lower, fewer touch-ups | Higher, regular upkeep |
| Look Evolution | Soft, sun-kissed blending | Bold, defined streaks |
Key Differences and Similarities

Both balayage and traditional highlights enhance your hair, but their Technique Overlap and results vary.
Balayage offers natural-looking highlights with Color Blending and versatility, perfect for beginners.
Highlights, on the other hand, are more structured.
One key advantage of balayage is its low-maintenance style.
Here’s a quick comparison:
| Feature | Balayage | Highlights |
|---|---|---|
| Application Style | Hand-painted | Foil-wrapped |
| Maintenance Needs | Low | Medium to high |
| Color Blending | Seamless | Defined stripes |
| Damage Levels | Less damaging | Potentially damaging |
| Customization Options | Extensive | Limited |
Preparing for Balayage

Before you start balayage, make sure your hair is healthy and clean to avoid unnecessary damage.
Gather all your tools, section your hair evenly, and protect your skin to guarantee smooth application.
Assessing Hair Health
Before balayage, evaluating hair health guarantees your strands can handle lightening. Start with a Hair Strand Analysis to check for Previous Chemical Damage—dry, brittle hair may need extra care. Evaluate your Scalp Condition for irritations or sensitivities.
Here’s what to do before diving in:
- Perform a Hair Elasticity Test to verify strength.
- Check Porosity Levels to see how well your hair absorbs moisture.
- Strengthen weak hair with deep-conditioning treatments.
Healthy hair responds better, avoiding unnecessary damage.
Sectioning and Protecting Hair
Before sectioning, grab your sectioning clips and divide your hair into four equal parts—this Quadrant Division guarantees even application.
Protect your skin by applying petroleum jelly or barrier cream along your hairline and ears, reducing stains and irritation.
Use sectioning clips to secure each quadrant for a clean working area.
This step minimizes tangling and hair damage.
Proper hair preparation and skin protection lay the foundation for successful balayage while keeping your strands and scalp safe from harm.
Top 8 Balayage Kits
Choosing the right balayage kit can make your at-home hair transformation easier and more effective.
We’ve rounded up eight top-rated kits that offer reliable results, whether you’re aiming for subtle highlights or a bold, dimensional look.
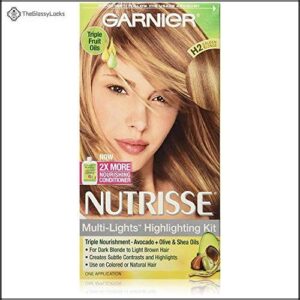
1. Garnier Nutrisse Golden Blonde Haircolor
 View On Amazon
If you’re looking for a beginner-friendly balayage kit, Garnier Nutrisse Golden Blonde Haircolor might be your match.
Enriched with nourishing avocado, olive, and shea oils, it leaves your hair 2x shinier and silkier while providing 100% gray coverage.
Its ColorBoost technology guarantees radiant, long-lasting color, delivering a golden blonde finish.
However, keep in mind it contains bleach, which can lead to damage if misused, causing some users to report shorter hair or breakage after use.
Always follow instructions carefully to ensure the best results and minimize potential damage.
Best For: Beginners looking to achieve a golden blonde balayage with nourishing benefits and 100% gray coverage.
- Enriched with avocado, olive, and shea oils for nourishment.
- Provides 100% gray coverage with long-lasting, radiant color.
- Leaves hair 2x shinier and silkier.
- Contains bleach, which may cause hair damage if misused.
- Some users report breakage and shorter hair after use.
- Non-returnable product with undisclosed developer content.
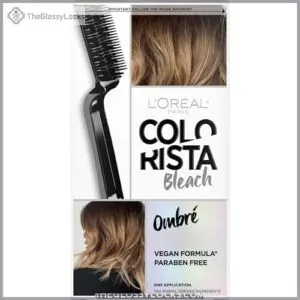
2. Loreal Paris Colorista Ombre Hair Bleach
 View On Amazon
L’Oreal Paris Colorista Ombre Hair Bleach is a user-friendly kit designed for soft ombre effects, lightening, or highlights.
With an ammonia-free formula enriched with oils, it’s kinder to your hair.
The kit includes a customized application tool and anti-brass purple conditioner to keep tones vibrant.
Ideal for first-timers, it blends custom results with ease.
For best effects, work in sections and monitor processing carefully.
It’s cost-effective, versatile, and loved by DIY enthusiasts aiming for professional-quality balayage results from home.
Best For: DIY enthusiasts and first-timers looking to achieve soft ombre, highlights, or hair lightening at home.
- Ammonia-free, oil-enriched formula reduces hair damage.
- Includes anti-brass purple conditioner for vibrant tones.
- Cost-effective alternative to salon treatments.
- Potential for uneven lightening if not applied correctly.
- May require multiple applications for darker hair.
- Risk of dryness or damage with repeated use.
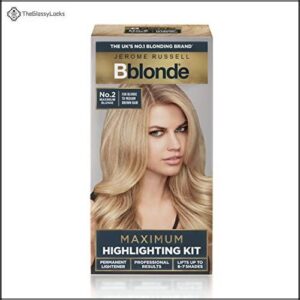
3. Jerome Russell Bblonde Highlighting Kit
 View On Amazon
The Jerome Russell Bblonde Highlighting Kit is a powerhouse for at-home balayage success.
It offers everything you need—highlight cap, metal hook, and tinting tools—for pro-level results.
With its 40-volume peroxide and powder formula, it lifts hair up to nine shades, making it ideal for light to dark brown tones.
Infused with avocado oil, it protects while delivering vibrant, natural-looking highlights.
Timing is key here; follow instructions carefully to avoid overly bright results.
Pair it with toner for a flawless finish.
Best For: Individuals with light to dark brown hair seeking salon-quality blonde highlights at home.
- Lifts hair color up to nine shades for noticeable results.
- Includes a complete set of tools for easy application.
- Infused with avocado oil for added protection during bleaching.
- Requires careful timing to avoid overly bright results.
- Thick mixture may be challenging for beginners to apply evenly.
- Toner is essential to achieve a balanced, natural finish.
4. Schwarzkopf Max Blonde Intense Lightener
 View On Amazon
In the case of serious lightening, Schwarzkopf Max Blonde Intense Lightener delivers impressive results, lifting hair up to 8 shades.
With a vegan formula, it’s gentle yet effective, leaving your hair soft and shiny thanks to its included nourishing conditioner.
Ideal for light to medium brown hair, this product is great for creating bright highlights or prepping for a bold balayage transformation.
Always perform a patch test 48 hours before use, and follow the instructions closely for safe, salon-quality results.
Best For: Individuals with light to medium brown hair looking to achieve up to 8 shades of lightening with a gentle, vegan-friendly formula.
- Lifts hair effectively up to 8 shades in one application.
- Includes a nourishing conditioner for soft, shiny results.
- Vegan formula suitable for cruelty-free beauty routines.
- Requires a patch test 48 hours before use.
- Not ideal for darker hair shades without multiple applications.
- May cause dryness; conditioning treatments recommended post-use.
5. Revlon Honey Frost and Glow Highlights
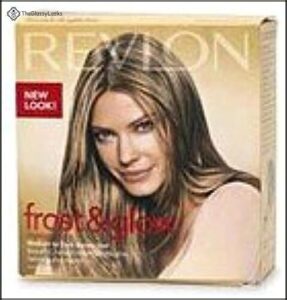 View On Amazon
Revlon Honey Frost and Glow Highlights is a standout choice for DIY balayage.
Designed for medium to dark brown hair, its ammonia-free formula guarantees less damage while delivering natural, sun-kissed highlights.
The kit features a LightZones cap and Create-A-Look Hook for customized results, but users often find alternative application methods like using a brush easier.
With its keratin moisture complex, it nourishes hair, though deep conditioning afterward is recommended.
If you’re after control and quality, this kit is worth considering, offering a natural look.
Best For: Those with medium to dark brown hair looking for affordable, customizable, and natural-looking DIY highlights at home.
- Included tools like the LightZones cap and hook may be challenging for some users.
- May cause dryness, requiring post-treatment deep conditioning.
- Can lead to hair damage if not applied properly, especially when pulling through the cap.
- Ammonia-free formula reduces hair damage.
- Keratin moisture complex nourishes and moisturizes hair.
- Allows controlled and personalized application for highlights.
6. Loreal Paris Blonde Highlights Hair Color
 View On Amazon
L’Oreal Paris Blonde Highlights Hair Color blends permanent color with harmonizing highlights for a natural, multi-tonal effect.
Ideal for DIY balayage, it’s beginner-friendly and delivers salon-like results in two steps.
The kit works well on fine or gray hair, though you may need extra boxes for thick or long locks.
For best results, moisturize around your hairline and apply highlights to dry hair. While the included conditioner helps, a deep conditioning treatment is recommended to improve softness and maintain your balayage.
Best For: Those looking for an easy-to-use at-home balayage solution with natural, multi-tonal results.
- Delivers salon-like results in two steps.
- Works well on fine or gray hair.
- Includes conditioner to maintain softness.
- May require extra boxes for thick or long hair.
- Limited highlighter might not suffice for full coverage.
- Occasional brassy or orange tones on darker hair.
7. Madison Reed Brown Hair Highlighting Kit
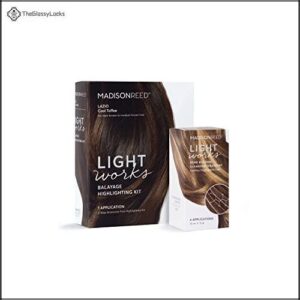 View On Amazon
Madison Reed’s Brown Hair Highlighting Kit offers an at-home balayage solution that balances simplicity and salon-quality results.
With a two-step process, it lightens and tones hair, creating soft, natural-looking highlights.
Infused with keratin, argan oil, and ginseng root extract, it strengthens and nourishes hair during the process, making it gentle on strands and free from sulfates, parabens, and ammonia.
While results vary, strict adherence to instructions minimizes risks like dryness or brassiness, and this kit suits blonde to light brown hair, perfect for subtle but stunning highlights.
Best For: Individuals with blonde to light brown hair seeking subtle, natural-looking highlights through an easy at-home balayage process.
- Ammonia-free, sulfate-free, and cruelty-free formula with nourishing ingredients.
- Two-step process offers salon-quality results at home.
- Includes Bond Building Cleansing Treatment to reduce breakage and maintain hair health.
- Potential for dryness or brassiness if instructions are not strictly followed.
- Results can vary, with the chance of undesirable color outcomes.
- Product is non-returnable, even if unsatisfactory results occur.
8. Caramel Lights Hair Gloss for Brown Hair
 View On Amazon
Caramel Lights Hair Gloss is perfect for enhancing balayage on medium to dark brown hair.
This semi-permanent gloss adds warm caramel tones, boosts shine, and deeply conditions with Vitamin E and Babassu Oil.
It’s vegan, cruelty-free, and free from harsh chemicals like sulfates and parabens.
Apply to damp hair, leave for 10 minutes, and rinse for vibrant, glossy results.
Ideal for revitalizing highlights between salon trips, it’s a low-maintenance upgrade.
One bottle lasts up to ten washes, giving luminous, healthy hair.
Best For: Medium to dark brown hair with highlights or balayage seeking to boost color, shine, and hydration.
- Enhances warm caramel tones and adds mirror-like gloss.
- Vegan, cruelty-free, and free from sulfates, parabens, and ammonia.
- Deeply conditions hair with Vitamin E and Babassu Oil.
- Not effective for gray hair or very damaged hair.
- Bottle design makes it hard to dispense the product.
- Results may vary and require multiple uses for noticeable effects.
Balayage Application Process

You’ll start by sectioning your hair to guarantee even application, then use a brush to hand-paint the dye or bleach onto selected strands.
Once the color processes, you’ll rinse and condition to reveal soft, natural highlights.
Sectioning and Painting Hair
Start by sectioning hair into four quadrants using sectioning clips for even distribution.
Work on one section at a time, painting highlights with a steady hand, and use the right angles for seamless color blending.
Focus on color saturation at the mid-lengths and ends, ensuring a natural look, and a painting brush helps with precision, creating effortlessly blended balayage hair sections.
Mixing and Applying Bleach or Dye
For balayage beginners, achieving the correct bleach consistency is key.
Mix bleaching powder and developer in a bowl until it’s creamy, like yogurt. Use a painting brush for precise application techniques, starting mid-lengths to ends.
Choose the right developer volume for your hair type. Skip root application initially—focus on blending for natural highlights.
Timing guidelines vary, so read instructions to ensure the best results for your hair type.
Processing and Rinsing Hair
Once the bleach or dye has finished its processing time, you’ll notice the gradient effect forming beautifully.
Follow these steps:
- Rinse with lukewarm water until the water runs clear.
- Use a sulfate-free shampoo to gently cleanse.
- Apply toner if needed to perfect the color.
- Finish with a deep conditioner for post-treatment moisture and shine.
Balayage Maintenance and Care

Keeping your balayage hair vibrant and healthy takes a little effort but is well worth it.
By using color-safe products and scheduling regular touch-ups, you can maintain that fresh, luminous look for months.
Minimizing Heat Styling and Damage
Avoiding hair damage from heat styling takes a bit of effort but pays off.
Stick to heatless styling whenever you can—braids, twists, and buns work wonders. When using hair styling tools, opt for low-heat tools and always apply heat protectants for hair protection.
Hydration is key too—use nourishing masks for moisture. Regular trims prevent split ends, keeping your balayage looking fresh.
Incorporate these hair styling techniques into your routine to maintain vibrant, healthy locks without unnecessary stress, and always prioritize hair protection.
Scheduling Regular Touch-Ups
Keeping your highlights fresh involves scheduling regular touch-ups.
A timely hair schedule guarantees your balayage maintenance stays on point, and here’s why regular visits matter:
- Root Visibility: Touch-ups blend regrowth, keeping your color seamless.
- Tone Revitalizing: Neutralize brassiness for a polished look.
- Color Fading: Restore vibrancy lost over time.
- Growth Assessment: Stylists adjust placement based on new lengths.
- Damage Prevention: Regular care avoids over-processing during balayage maintenance.
Plan hair salon visits every 3-4 months!
To maintain vibrant color, consider using sulfate-free shampoo.
Balayage at Home

You can achieve beautiful balayage highlights at home with the right tools and a careful approach.
By understanding the proper techniques and avoiding common mistakes, you’ll create a natural, salon-quality look without the expense.
DIY Kits and Tools
A great balayage kit includes essentials like a paddle brush, protective gear, a balayage board, and clear mixing ratios.
DIY kits simplify the process with tools like color bowls or hair dye kits that guide you. Using the right brush type guarantees smooth application, while balayage boards help control precision.
Quality materials make a salon-style look achievable at home. You can find a complete balayage kit online, which is a key factor in achieving a professional look.
Step-by-Step Application Guide
Start with proper sectioning techniques; divide hair into four parts for even coverage.
Mix bleach to yogurt-like consistency. Use a balayage brush at precise painting angles, focusing on mid-lengths and ends.
Follow development timing faithfully, checking progress frequently. Rinse thoroughly, then apply toner for a polished finish.
This balayage tutorial simplifies hair color application for beginners!
Common Mistakes and Tips
Overlapping sections, patchiness, and uneven application can ruin at-home balayage.
For beginners aiming for success:
- Always section hair carefully to prevent bleeding.
- Use consistent strokes for smooth blending.
- Avoid over-saturating to improve brassiness prevention.
- Test strand placements for color accuracy.
- Monitor processing time to avoid damage.
Mastering these basics elevates your balayage tutorial!
Balayage Hair Care Tips

You’ll need to protect your investment with proper care techniques that keep your balayage looking fresh between salon visits.
Using sulfate-free products and minimizing heat damage will extend the life of your color while preventing those dreaded brassy tones from appearing too quickly.
Using Sulfate-Free Shampoos
Longevity is the secret weapon for your balayage investment.
Switch to sulfate-free shampoos immediately to prevent color stripping. These gentle hair care products preserve your highlights’ vibrancy by avoiding harsh detergents.
Look for shampoo ingredients like coconut-based cleansers and color-locking polymers. To explore related products, consider shampoo for balayage.
Popular sulfate alternatives include Pureology Color Fanatic and Olaplex No.4, which promote scalp health while maximizing hair color protection and maintenance.
Deep Conditioning and Masking
Deep conditioning is your balayage’s best friend after coloring.
Apply a hydration-boosting mask weekly to replenish moisture lost during processing. Alternate between protein treatments and moisture masks depending on your hair’s needs.
DIY masks with ingredients like coconut oil work wonders too. For intense repair, try overnight masking once monthly.
Specialized products can further enhance your hair. Quality deep conditioners improve both hair texture and enhance shine, making your balayage look salon-fresh between appointments with the right hydration.
Protecting Hair From Sun and Heat
Regularly shield your balayage from environmental factors that cause color fading.
Use UV-protective sprays before sun exposure to prevent UV hair damage.
Always apply heat protectants when styling to break harmful heat styling habits.
Hydration is key during summer—deep condition weekly to maintain that sun-kissed hair look without actual sun damage.
Consider lightweight shine enhancers with UV filters for double protection against hair damage prevention.
Many find it beneficial to use leave-in conditioner as a heat protectant.
Choosing The Right Balayage

You’ll need to match your hair type and skin tone with the right balayage placement for truly flattering results.
Your face shape and lifestyle should guide your choice between subtle sun-kissed highlights or bold, dramatic color shifts.
Considering Hair Type and Color
Now that you’ve mastered hair care, let’s talk about finding your perfect balayage match. Your natural hair color and type will determine which balayage approach works best for you.
Consider these hair color compatibility factors:
- Dark hair needs stronger lightening formulas but shows dramatic dimension
- Fine hair requires gentler processing to prevent damage potential
- Curly textures benefit from strategic placement that enhances natural movement
- Redheads need special tone selection to avoid unwanted orange results
The key to a successful balayage is understanding how your hair type and color interact with the balayage approach, and making informed decisions based on these factors to achieve the desired look.
Placement and Style Options
Personalization defines successful balayage placement.
Face framing highlights brighten your complexion, while color melting creates seamless shifts between shades.
Choose ribbon highlights for dramatic contrast or babylights balayage for subtle dimension.
Root smudging offers a lived-in look with less maintenance.
Place lighter pieces where sun naturally hits—around temples, crown, and ends—for the most authentic balayage hair color that complements your features and lifestyle.
Finding a Qualified Stylist or Salon
The right stylist can make or break your balayage experience.
When searching for a qualified professional, consider these five critical factors:
- Check the stylist’s credentials and specific balayage training
- Review the salon’s reputation and online ratings
- Schedule a consultation before committing
- Examine their portfolio of previous balayage work
- Read client testimonials about their color services
This will help you find a professional who can provide you with the best balayage experience.
Frequently Asked Questions (FAQs)
How to do balayage step by step?
Start by sectioning clean, dry hair using clips.
Mix lightener and developer, then hand-paint onto hair’s mid-lengths and ends with a brush.
Blend for softness, let it process as directed, rinse, and condition.
What is the downside of balayage?
Balayage can cost more, take longer to apply, and may not suit super-short hair.
Highlights might fade faster on dark bases, requiring upkeep.
Without proper care, brassiness or dryness could ruin the look.
Is $400 a lot for a balayage?
Imagine this: balayage as an investment in stunning, effortless beauty.
For $400, you’re paying for a stylist’s expertise, time, and technique.
While it’s not cheap, the custom, low-maintenance results often make it worth it.
What you need to know before getting a balayage?
You’ll need healthy hair, a clear budget, and patience for the multi-step process.
Discuss your goals with a stylist, consider maintenance commitments, and use color-safe products to protect the gorgeous, dimensional look balayage delivers.
How long does balayage hair last?
Think of balayage as a long vacation for your hair, lasting about 3-4 months.
Its low-maintenance nature means fewer touch-ups, but regular care with color-safe products keeps the look vibrant and fresh for longer.
Is balayage hair damaging?
Balayage isn’t overly damaging when done right, but it still involves lighteners that can dry out your hair.
Use deep conditioners, heat protectants, and sulfate-free shampoos to keep strands healthy and prevent breakage, focusing on deep conditioners.
Are there any special products needed for balayage hair?
You’ll want quality products like a balayage kit, mixing bowl, professional-grade bleach, a 20-volume developer, toning supplies, and protective gloves.
Add a paddle brush, sectioning clips, and sulfate-free shampoo to maintain color vibrancy.
Are balayage hair extensions a good option?
Balayage hair extensions are a fantastic option if you’re craving the look without committing to dye.
They blend seamlessly, add depth and dimension, and are perfect for testing styles with minimal maintenance and damage.
How often should balayage hair be maintained?
It’s funny how hair care sneaks into your routine—balayage maintenance works best every 3-4 months.
Touch-ups refresh highlights and tone, while deep conditioning and color-safe products preserve vibrancy, keeping your hair salon-fresh longer.
How long does balayage typically last?
Balayage typically lasts 3-4 months before needing a touch-up.
Its natural, blended look grows out gracefully, so you won’t deal with harsh regrowth lines.
Regular care, like using color-protecting shampoo, helps maintain vibrancy.
Conclusion
Picture yourself with effortlessly sun-kissed strands, blending seamlessly for a polished yet natural look.
Balayage hair, the no-nonsense guide for beginners, offers you a path to customizable, low-maintenance highlights that enhance depth and dimension.
By understanding techniques, prepping your hair, and exploring DIY options, you can achieve salon-worthy results at home.
With proper care—like using sulfate-free shampoos and protecting against heat—you’ll keep your balayage vibrant and healthy.
Start your journey today and embrace the perfect glow!