This site is supported by our readers. We may earn a commission, at no cost to you, if you purchase through links.
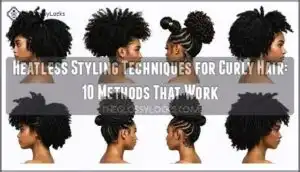
Braid-outs give you looser waves, while Bantu knots deliver tight, bouncy curls. Flexi rods work magic for uniform ringlets, and the plopping method enhances your natural texture using just a cotton t-shirt.
Don’t forget the pineapple technique—loosely gather curls at your crown before bed to prevent flattening. These heatless styling techniques for curly hair protect your strands while giving you salon-worthy results.
The secret lies in mastering timing and product application for each method.
Table Of Contents
- Key Takeaways
- Why Choose Heatless Styling for Curly Hair?
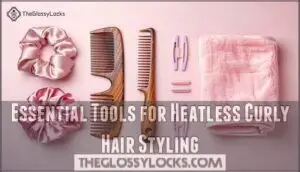
- Essential Tools for Heatless Curly Hair Styling
- Prepping Curly Hair for Heatless Styling
- Twist-Out Method for Defined Curls
- Braid-Out Techniques for Looser Waves
- Bantu Knots for Tight, Spiral Curls
- Flexi Rod Sets for Bouncy Curls
- Pineapple Method for Overnight Curl Preservation
- Plopping Technique for Enhanced Curl Definition
- Maintaining Heatless Curls Throughout The Week
- Frequently Asked Questions (FAQs)
- How to style curly hair without heat?
- What to put in your hair when doing heatless curls?
- Do heatless curls really work?
- Are heatless curls a good way to change up your hair?
- How do I create heatless curls through braiding?
- How do you do heatless curls?
- What is the best method for heatless curls?
- What is the scrunchie method for curls?
- Should I do heatless curls with wet or dry hair?
- Can heatless curls be achieved on very short hair lengths?
- Conclusion
Key Takeaways
- You’ll protect your curls from heat damage while achieving better definition and reducing breakage by up to 60% through methods like twist-outs, braid-outs, and Bantu knots that work with your natural texture instead of against it.
- You can create various curl patterns by choosing the right technique for your desired look—use twist-outs for defined spirals, braid-outs for loose waves, Bantu knots for tight corkscrews, or flexi rods for uniform ringlets.
- You’ll need essential tools like microfiber towels or cotton t-shirts, wide-tooth combs, leave-in conditioners, curl creams, and silk/satin pillowcases to achieve professional-looking results without heat styling equipment.
- You can maintain your heatless curls all week by using the pineapple method for overnight protection, refreshing with water and leave-in conditioner sprays between washes, and adjusting your routine based on weather conditions.
Why Choose Heatless Styling for Curly Hair?
If you’ve been frying your curls with heat tools, it’s time to give your hair a break and embrace techniques that actually work with your natural texture.
Heatless styling isn’t just gentler on your strands—it can actually enhance your curls’ definition, reduce breakage by up to 60%, and help you wake up with gorgeous hair that looks effortlessly styled, which can lead to a significant improvement in the overall health and appearance of your hair by using heatless styling.
Reduced Heat Damage
Heat styling is like playing with fire—literally damaging your precious curls.
Your curls are begging you to ditch the damage and embrace their natural beauty instead.
When you ditch the heat tools, you’re giving your hair health the love it deserves.
Here’s what happens when you embrace heatless styling techniques:
- Breakage reduction: Your strands stay stronger and more resilient
- Split end prevention: No more crispy, damaged ends ruining your look
- Moisture retention: Your hair keeps its natural oils and hydration
- Scalp health: Less heat means happier, healthier roots
- Natural curl pattern: Your curls bounce back to their gorgeous, authentic shape
Heatless curls aren’t just trendy—they’re your ticket to healthier, happier hair!
Natural Texture Enhancement
Your curl type determines everything! When you enhance your natural texture with heatless curls, you’re working with your hair’s blueprint, not against it.
Product layering starts with leave-in conditioner, followed by curl cream. Master scrunching techniques by gently squeezing upward, then air drying preserves those gorgeous spirals.
Protective styles like twists maintain curl definition overnight.
| Your Hair Says | Heat Styling Response | Heatless Response |
|---|---|---|
| "I’m naturally bouncy!" | "Sit down and behave!" | "Let’s dance together!" |
| "I have unique patterns!" | "You must be uniform!" | "Show me your magic!" |
| "I need moisture!" | "Here’s more damage!" | "Have some nourishment!" |
| "I want to shine!" | "You’re getting fried!" | "Glow, gorgeous!" |
Healthier Hair Growth
Scalp Health improves dramatically when you ditch heat styling.
Your follicles aren’t constantly stressed, allowing healthier hair growth to flourish. Think of it like giving your hair a vacation!
Protective styling through heatless curls means less product buildup and better hydration importance.
You’ll notice stronger strands and reduced trimming frequency. No heat styling lets your curly hair breathe and thrive naturally.
Essential Tools for Heatless Curly Hair Styling
You’ll need the right tools to make heatless styling work like magic for your curls.
Having these essentials on hand means you can create gorgeous, defined curls without ever reaching for that damaging blow dryer or curling iron, allowing you to achieve gorgeous results.
Microfiber Towels and T-shirts
Your trusty cotton t-shirt isn’t just for lounging—it’s your secret weapon for frizz reduction and curl definition.
Swap that rough terry cloth towel for a soft cotton tshirt or microfiber towels to slash drying time while boosting your heatless curls.
Here’s why this material comparison matters:
- Hair plopping with cotton creates defined spirals without roughing up your curly hair
- Microfiber’s smooth surface prevents friction that causes frizz
- Both materials absorb excess water gently, preserving your curl pattern
For those interested, you can explore options for achieving perfect curls with specific products.
Wide-tooth Combs and Detangling Brushes
Gentle detangling brushes and wide-tooth combs work wonders on curly hair, preventing breakage while tackling stubborn tangles.
Choose boar bristle brushes for dry detangling or flexible bristles for wet hair.
Start from the ends and work upward—your curls will thank you!
The right comb material matters too, and many users find a detangling brush essential.
Leave-in Conditioners and Curl Creams
Beyond just washing your hair, these essential products work double-duty to define curls and seal in moisture.
Leave-in conditioners and curl creams are your secret weapons for achieving bouncy, frizz-free heatless curls that last. Many users find success using a specially formulated cream for their hair type.
- Product Ingredients matter – look for shea butter, argan oil, and glycerin for maximum moisture retention
- Application Techniques make the difference – apply to damp hair using prayer hands or scrunching motions
- Curl Definition improves dramatically when you layer lightweight leave-in conditioner under curl cream for superior frizz control
Silk or Satin Pillowcases
Your bedroom’s secret weapon for frizz-free mornings? Silk or satin pillowcases work magic while you sleep!
These smooth surfaces reduce friction that causes breakage and frizz, letting you wake up with gorgeous curls intact. Think of them as your hair’s bodyguard, protecting overnight curls and boosting moisture retention.
- Frizz control: Silk pillowcases prevent hair tangles and preserve curl definition better than cotton
- Breakage prevention: Satin’s smooth texture reduces friction that damages delicate curly hair strands
- Skin benefits: Both materials are gentler on your face, reducing sleep wrinkles and irritation
Hair Ties and Bobby Pins
Your silk pillowcase is working overtime, but don’t forget about hair ties and bobby pins – your styling sidekicks for securing heatless curls.
Hair Tie Brands Bobby Pin Sizes
Choose fabric-covered hair ties over rubber ones for damage prevention. Look for seamless tie material that won’t snag your curls.
For pin placement, match bobby pin color to your hair and secure sections without crushing curl patterns. These alternatives explored guarantee style security while protecting your natural texture during heatless styling techniques.
Prepping Curly Hair for Heatless Styling
Before you start any heatless styling magic, you’ll want to prep your curls properly—think of it as laying the foundation for curl success!
Clean, conditioned, and properly sectioned hair makes all the difference between gorgeous, defined curls and a frizzy mess that’ll have you reaching for that flat iron, which can undermine your efforts towards achieving defined curls.
Proper Washing and Conditioning Techniques
Starting with the right foundation sets your curls up for success.
Choose sulfate-free shampoos that won’t strip your hair’s natural oils, and match your conditioner to your hair porosity.
Apply deep conditioning treatments weekly to boost hair elasticity.
This pre-styling prep with quality leave-in conditioners and curl-defining products gives your curly hair the moisture it craves for beautiful heatless styles.
Detangling Methods for Curly Hair
Once your hair’s clean and conditioned, detangling methods matter big time!
Work with wet vs. dry hair – damp works best for most curly hair types.
Apply detangling spray generously, then use tool selection wisely: wide-tooth combs or fingers work magic.
Break hair into manageable chunks because sectioning matters.
Use gentle techniques to gently detangle from ends upward.
Product application makes everything smoother, so don’t skimp!
Sectioning Hair for Easy Styling
Through careful sectioning hair into manageable chunks, you’ll discover the secret to stunning curls! Think of it like organizing your closet—everything has its place.
Sectioning Benefits include:
- Consistent Curls throughout your entire head
- Better Product Application for even coverage
- Reduced styling time and frustration
- Enhanced Hairstyle Complexity possibilities
- Defined Results from smaller, focused sections
Use clips to separate strands based on your curl pattern. For intricate styles, create smaller sections—your curls will thank you! Sectioning Patterns vary by technique, but consistency wins every time.
Twist-Out Method for Defined Curls
If you want curls that actually stay put and look amazing, twist-outs are your best friend.
This technique creates defined, springy curls by twisting damp hair into sections, then letting them dry completely before unraveling – and trust me, the results are worth the wait, giving you amazing curls.
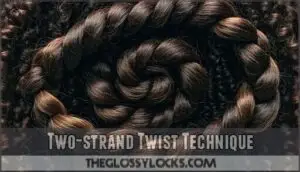
Two-strand Twist Technique
Now that you’ve prepped your curly hair, let’s tackle the two-strand twist technique! Start with damp hair and apply your leave-in conditioner. Take a small section—remember, twist size determines curl tightness.
Split it into two even strands, then twist them around each other like you’re braiding rope. Parting precision matters here! Product layering helps lock in moisture while drying time varies by thickness.
This twist variation creates springy, defined curls that’ll make you forget about heat styling altogether.
| Twist Size | Curl Result | Drying Time |
|---|---|---|
| Small (pencil) | Tight, defined curls | 6-8 hours |
| Medium (finger) | Loose, bouncy curls | 4-6 hours |
| Large (thumb) | Soft, flowing waves | 2-4 hours |
Flat Twist Variation
Ready to master flat twist styles? Unlike basic two-strand twists, flat twists lie flush against your scalp, creating gorgeous protective flat twists that last longer.
Start with damp curly hair, apply your favorite flat twist products, then twist sections close to your head. Flat twist size determines your curl pattern—smaller sections create tighter spirals, while larger ones give looser waves.
This heatless styling technique delivers stunning twist out results that’ll have everyone asking for your secret!
- Freedom from daily styling stress – wake up with gorgeous curls ready to go
- Control over your natural texture – enhance what you’ve got without fighting it
- Mastery of your curl game – become the curl whisperer you were meant to be
- Protection that actually works – shield your strands while looking fabulous
- Confidence boost that lasts – rock your natural curls with pure swagger
Multi-day Twist-Out Maintenance
Your twist-out journey doesn’t end after day one! Keep those natural curls bouncing with smart multiday twistout maintenance.
Here’s your game plan for revitalizing twists and frizz control:
- Day 2: Mist with water and scrunch in leave-in conditioner
- Day 3: Focus on scalp care while gently fluffing roots
- Day 4: Twist re-styling with silk pillowcases for night protection
- Day 5: Final refresh before your next wash day
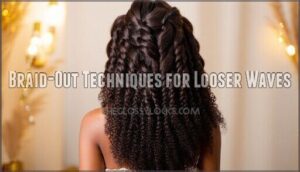
Braid-Out Techniques for Looser Waves
When you’re after soft, relaxed waves instead of tight curls, braid-outs are your best friend.
They’re incredibly versatile—you can create anything from beachy waves to more structured patterns just by changing your braiding technique.
French Braid Method
Your hair’s natural texture shines with the French braid method for heatless styling techniques.
Start with damp hair, then create one loose French braid to avoid scalp tension.
This styling variation works perfectly for curly hair when you adjust braid tightness based on your desired wave pattern.
Add product pairing with leave-in conditioner, then secure with gentle ties for sleep protection overnight, using the heatless styling techniques.
Dutch Braid Variation
While other braid styles create patterns on your scalp, the Dutch braid variation flips the script—literally! This inverted braid sits on top of your hair instead of underneath, creating more dramatic waves.
- Dutch braid variation works by braiding sections over instead of under for fuller texture
- Create accent braids or crown braids alongside your main Dutch braid for extra flair
- Try a waterfall braid technique within your Dutch braid for cascading curls
- Finish with a braided bun to secure loose ends and maximize your braid out results
Single Braid Vs. Multiple Braids
Looking at your Dutch braid success, you’re probably wondering about the single braid vs. multiple braids debate for your braid out.
Here’s the scoop on these Definition Differences:
Hair Length Single Braid Multiple Braids
Single braid offers convenience but creates uneven Wave Pattern – your ends get more curl than your roots.
Multiple braids provide superior Styling Versatility and Hair Health benefits through even tension distribution.
For best results, consider using leave-in conditioner to prep your hair.
The Time Investment pays off with overnight braids that last days.
Adjust braid tightness based on your desired results.
Bantu Knots for Tight, Spiral Curls
You’ll fall in love with Bantu knots if you want gorgeous, tight spiral curls without any heat damage.
This traditional African styling method creates stunning definition by twisting small sections of hair into compact knots that dry into perfect corkscrews.
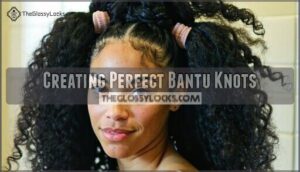
Creating Perfect Bantu Knots
Ready to nail those Bantu knots for gorgeous heatless curls? These spiral wonders transform your curly hair into defined perfection with the right approach!
- Knot Size: Choose smaller sections for tighter curls, larger for looser waves
- Sectioning Matters: Part hair into even triangular sections for uniform results
- Product Choice: Apply curl cream to damp hair before twisting
- Knot Placement: Position knots strategically across your head for balanced curl distribution
- Drying Time: Allow 6-8 hours for complete drying before unraveling.
To further protect your curls overnight, consider using a satin wrap.
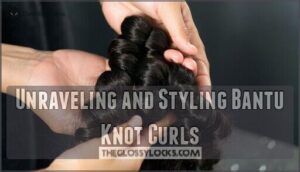
Unraveling and Styling Bantu Knot Curls
The moment arrives—carefully unraveling your Bantu knots reveals stunning defined curls.
Start from the bottom, gently separating each knot with your fingers.
Product Choice matters here: apply leave-in conditioner or curl cream to damp sections for maximum Curl Definition.
Don’t rush this process—your natural texture deserves patience.
These heatless curls will reward your gentle touch with gorgeous spirals that’ll make heads turn!
Adapting Bantu Knots for Different Hair Lengths
Hair length determines everything in the case of Bantu knots. Your sectioning techniques and knot size need to match your mane’s length for perfect curls every time.
Bantu knots are a popular protective hairstyle that shields hair from damage.
Here’s how to nail it:
- Short hair: Use ½-inch sections with micro Bantu knots for tighter curls, securing short knots with bobby pins or small elastics
- Medium hair: Go for 1-2 inch sections with creative parting patterns for balanced styling variations
- Long hair: Create 3-4 inch sections with larger knots to prevent scalp tension and overwhelming volume
Flexi Rod Sets for Bouncy Curls
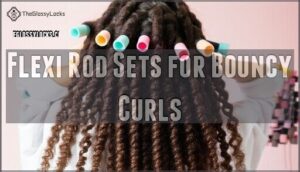
If you want curls that bounce with life and energy, flexi rods are your secret weapon.
These flexible foam tubes wrap around your hair sections to create gorgeous, springy curls that’ll have you feeling like you just stepped out of a salon.
Choosing The Right Flexi Rod Size
Rod diameter directly impacts your curl tightness—smaller rods create tight spirals while larger ones produce loose waves.
Your hair length determines which rod thickness works best; shorter curly hair needs smaller flexi rods to wrap fully, while longer hair can handle bigger sizes for desired volume.
For 4c hair, flexi rods enhance natural coils without heat. Match your section size to the rod diameter for consistent results.
Drying and Removing Flexi Rods
Patience pays off in the case of drying time – your flexi rods need at least 6-8 hours to work their magic.
Here’s how to master rod removal without turning your gorgeous curls into a frizzy mess:
- Let your hair dry completely before touching anything (seriously, resist the urge!)
- Gently twist each rod in the opposite direction of the curl pattern
- Work slowly to avoid tangles and preserve that perfect curl definition
- Use a microfiber towel to blot any stubborn damp spots for better frizz control
Take your time – rushing leads to product buildup and disappointed curls!
Pineapple Method for Overnight Curl Preservation
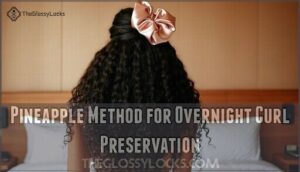
You’ll love the pineapple method—it’s like giving your curls a cozy little penthouse to sleep in.
Simply gather your curls loosely at the very top of your head with a silk scrunchie, creating a fountain-like spray that keeps your curls from getting crushed while you snooze, using the scrunchie.
Creating a Secure Pineapple Updo
Perfect pineapple security starts with gathering your curls at the crown, creating a loose fountain that won’t leave dents.
Use a silk scrunchie—it’s gentler than regular elastics and won’t snag your precious curls.
Position the pineapple high enough to avoid crushing curls against your pillow, ensuring maximum sleep comfort and style longevity for your curly hair.
Modifying The Pineapple for Short Hair
When your curly hair barely touches your shoulders, don’t let short length stop you from mastering the pineapple method!
These Short Pineapple Variations work wonders for achieving Scalp Comfort and Sleep Protection:
- Mini pineapple: Gather just the crown section loosely with a silk scrunchie
- Side pineapple: Pull curls to one side using bobby pins for security
- Multiple mini pineapples: Create two small sections instead of one large gather
Focus on gentle Product Application and positioning that won’t flatten your curls overnight while ensuring maximum Curl Revitalizing potential.
Regular trims can help maintain healthy curl definition.
Morning Styling After Pineappling
Wake up to gorgeous curls! Gently release your secure pineapple updo and shake out those roots for instant volume boost.
Scrunch in a light product refresh — think leave-in conditioner or curl cream — to tackle any overnight frizz.
Focus your product application on mid-lengths and ends for perfect curl definition. Your morning styling routine just became effortless, and your curls will bounce back beautifully!
Plopping Technique for Enhanced Curl Definition
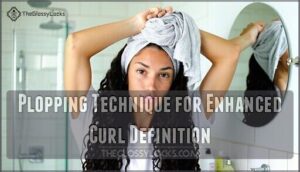
If you’re tired of frizzy, undefined curls that seem to have a mind of their own, plopping might just be your new best friend.
This simple technique uses a cotton t-shirt or microfiber towel to gently encourage your curls into their natural pattern while removing excess water—no heat required.
Selecting The Right Plopping Material
Material absorbency makes or breaks your plopping technique. Cotton t-shirts reign supreme—they’re gentle, absorbent, and won’t rough up your curls like regular towels.
Microfiber towels work too, but watch that fabric texture; some feel scratchy against delicate strands. Your hair porosity matters here: high-porosity hair needs more absorbent materials, while low-porosity benefits from lighter fabrics.
T-shirt alternatives include flour sack towels or muslin cloths—both gentle options that won’t disrupt your curl pattern during the process, making them suitable for maintaining your curl pattern.
Step-by-step Plopping Process
Now you’re ready to master the plopping technique! Follow this step-by-step plopping process for amazing curl enhancement:
Step Action Tips
- Plopping materials: Cotton t-shirts work great for beginners
- Drying time: Most hair needs 10-20 minutes of plopping duration
- Plopping technique: Practice makes perfect – your curls will thank you later
Timing and Drying Considerations
Perfect plopping timing depends on your hair’s unique needs, but here’s the scoop: fine hair loves 10-20 minutes, while thick curls need 30-45 minutes.
Some folks plop overnight for maximum curl power! Let your hair air dry completely afterward—patience pays off with gorgeous definition.
Key Timing Tips:
- Fine hair: 10-20 minutes prevents flattened curls
- Thick hair: 30-45 minutes allows proper product absorption
- Overnight protection: 4-6 hours creates amazing morning curls
- Humidity effects: High moisture extends drying time substantially
- Damp hair works best: Skip diffuser usage during plopping phase
Maintaining Heatless Curls Throughout The Week
You’ve mastered the art of heatless styling, but now comes the real challenge—keeping those gorgeous curls looking fresh all week long.
With the right maintenance tricks, you can stretch your wash day and wake up to bouncy, defined curls every single morning.
Refreshing Curls Between Washes
Between wash days, you’ll want to master these curl refresh methods to keep your locks looking fresh.
Start with a curl refresher spray – mix water with a drop of leave-in conditioner, then scrunch gently. This hair hydration trick works wonders for frizz control and curl definition.
One technique involves the hair plop method to minimize frizz.
| Refresh Method | Best For |
|---|---|
| Water + leave-in spray | Limp, dry curls |
| Curl cream scrunching | Frizzy, undefined curls |
| Oil patting technique | Scalp dryness, volume loss |
These volume revival tricks and product layering tips focus on scalp health too. Remember, less is more – you’re not washing again, just waking up those beautiful curls!
Protecting Curls While Sleeping
Your curls deserve sweet dreams too! Swap regular pillowcases for satin pillowcases – they’re game-changers for reducing friction and frizz.
Try silk bonnets or satin scarves for extra protection.
The pineapple method works wonders: loosely gather curls at your crown with a silk scarf.
Experiment with pineapple variations to find your perfect fit!
Adjusting Styling for Different Weather Conditions
Weather throws curveballs at your curls, but you’ve got this! Master these seasonal tweaks:
- High humidity environments: Add extra hold with anti-frizz cream to combat moisture absorption
- Cold weather: Layer hydrating leave-in conditioner to prevent brittleness and breakage
- Wind protection: Secure curls with a silk scarf to minimize tangling and disruption
- Seasonal changes: Switch product selection based on weather – lighter formulas for mild days, heavier for harsh conditions
Frequently Asked Questions (FAQs)
How to style curly hair without heat?
Good things come to those who wait, and your curls will thank you.
Try twist-outs on damp hair, braid-outs for waves, or Bantu knots for tight spirals.
Use flexi rods, silk scrunchies, or even socks as overnight curlers for gorgeous results.
What to put in your hair when doing heatless curls?
Apply leave-in conditioner to damp hair, then add curl cream or gel for definition and hold.
You’ll also want some lightweight oil for shine and moisture retention throughout your styling process.
Do heatless curls really work?
Yes, heatless curls absolutely work! They’re a game-changer for achieving beautiful, defined curls without damaging your hair. You’ll see lasting results with proper technique and products.
Are heatless curls a good way to change up your hair?
You’ll love switching up your look with heatless curls—they’re gentle on your hair while creating gorgeous, bouncy styles that last. Perfect for experimenting without damage or commitment!
How do I create heatless curls through braiding?
Want gorgeous waves without the heat damage? Start with damp hair, braid it into Dutch braids, and sleep tight! You’ll wake up with bouncy, beachy curls that’ll make everyone jealous.
How do you do heatless curls?
Start with damp hair and apply leave-in conditioner.
Braid wet hair into Dutch braids, twist sections into Bantu knots, or wrap around flexi rods.
Sleep overnight, then gently unravel for gorgeous curls.
What is the best method for heatless curls?
Like finding your hair’s sweet spot, the best heatless curl method depends on your curl type.
For loose waves, try overnight braids.
For defined spirals, use flexi rods or twist-outs on damp hair.
What is the scrunchie method for curls?
The scrunchie method wraps your hair around a large, soft scrunchie while damp, creating loose, voluminous curls overnight.
Simply twist sections around the scrunchie, secure gently, and wake up to bouncy waves!
Should I do heatless curls with wet or dry hair?
You’ll get better results using slightly damp hair instead of soaking wet or bone dry.
Damp hair holds curl patterns longer while avoiding the frizz that comes with overly wet strands dripping everywhere!
Can heatless curls be achieved on very short hair lengths?
Don’t let length limit your curl dreams! Yes, you can absolutely create heatless curls on pixie cuts and short styles using flexi rods, finger coiling, or twist-outs for gorgeous texture.
Conclusion
Picture your hair dancing freely in the morning breeze, every curl perfectly defined and bouncing with life.
These heatless styling techniques for curly hair aren’t just methods—they’re your ticket to gorgeous, healthy curls that actually thank you for the gentle treatment.
You’ve got ten amazing techniques now, from twist-outs to plopping, each one protecting your precious strands while delivering salon-worthy results.
Your curls deserve this love, and honestly, your hair will never look better with such gentle treatment!

