This site is supported by our readers. We may earn a commission, at no cost to you, if you purchase through links.

Your shower head’s spray pattern tells the story of what’s happening inside those nozzles. When water starts coming out sideways or certain holes go completely dry, calcium carbonate and mineral deposits have built a crusty fortress around the openings.
You don’t need harsh chemicals or expensive cleaners to break through that buildup—distilled white vinegar dissolves mineral deposits on contact, and it costs about three bucks. The vinegar bag soak method takes just five minutes to set up, works while you sleep, and restores water pressure without removing a single fixture from the wall.
Table Of Contents
- Key Takeaways
- Supplies Needed to Clean Shower Head With Vinegar
- Preparing The Shower Head for Cleaning
- Basic Cleaning Method: Vinegar Bag Soak
- Deep Cleaning: Removing and Soaking Shower Head
- Natural Alternatives to Vinegar Cleaning
- Frequency and Best Practices for Cleaning
- Troubleshooting Common Shower Head Issues
- Top Products for Cleaning Shower Heads
- Frequently Asked Questions (FAQs)
- Conclusion
Key Takeaways
- Distilled white vinegar dissolves calcium carbonate and mineral deposits without harsh chemicals, and the vinegar bag soak method works overnight without removing the shower head from the wall.
- You’ll need just five supplies for basic cleaning: distilled white vinegar, a Ziploc bag, rubber bands or zip ties, a soft brush or toothbrush, and a microfiber cloth for drying.
- Clean your shower head at least once a month in normal conditions, but switch to every two weeks if you have hard water that leaves white crust on nozzles or reduces water pressure.
- For stubborn buildup that vinegar can’t handle, remove the shower head completely to clean the filter screen and internal passages, or consider installing a water softener to prevent deposits at the source.
Supplies Needed to Clean Shower Head With Vinegar
You won’t need much to get your shower head sparkling again. Most of these supplies are already sitting in your kitchen or bathroom cabinet.
If limescale buildup is the problem, you can follow a simple vinegar-based method to dissolve stubborn deposits and restore water pressure.
Here’s what you’ll need to grab before you get started.
Distilled White Vinegar
Distilled white vinegar is your go-to cleaning solution for shower heads because it contains 5 percent acetic acid that dissolves calcium carbonate and mineral deposits effectively.
You’ll find this clear liquid in any grocery store, and its chemical properties make it ideal for breaking down hard water scale without damaging chrome or plastic finishes. It’s inexpensive, nontoxic, and highly effective.
For more details on the vinegar manufacturing process, you can learn how distilled white vinegar is produced and regulated.
Baking Soda
Baking soda enhances vinegar’s cleaning power by adding gentle abrasive action to your shower head treatment. This sodium bicarbonate compound with formula NaHCO3 reacts with vinegar’s acid to create fizzing carbon dioxide bubbles that lift stubborn mineral deposits and organic grime from nozzle surfaces.
Here’s why baking soda benefits your cleaning routine:
- Dissolves grease and soap scum effectively
- Creates natural chemical reactions with vinegar
- Provides mild scrubbing without scratching finishes
- Neutralizes odors trapped in shower heads
You’ll need roughly one-quarter cup for most cleaning jobs.
Ziploc Bags
A standard quart or gallon Ziploc bag works perfectly for soaking your shower head in distilled white vinegar without the mess of dismounting anything.
These low-density polyethylene bags feature double-seal technology that prevents leaks during the cleaning process. You can reuse the same bag for future maintenance cleanings if you rinse and air-dry it properly after each use.
Rubber Bands or Zip Ties
You’ll need large rubber bands or nylon zip ties to secure the Ziploc bag tightly around your shower head during the vinegar soak.
Rubber bands work best for regular maintenance since you can stretch them up to 100 percent of their length and reuse them multiple times. Zip ties offer stronger holding power with break strengths from 18 to 250 pounds, but you’ll need to cut them off after each cleaning session.
Soft Brushes or Toothbrushes
You’ll want a soft brush or old toothbrush to scrub away mineral deposits that vinegar loosens during the soak. Soft bristles protect chrome, brass, or nickel finishes from scratches while reaching between nozzles where scale hides.
The gentle cleaning action removes buildup without damaging delicate shower head components, making an old toothbrush your best tool for bathroom cleaning and routine brush maintenance.
Wrench and Old Rag
An adjustable wrench and old rag give you what you need for deep-cleaning jobs that require removing the shower head completely from the shower arm. The wrench grips the connector nut without damaging chrome or brass finishes, while the rag protects threads and wipes away debris.
This setup lets you handle stubborn mineral deposits that vinegar alone can’t reach, giving you full control over showerhead maintenance.
Soft Cloth for Drying
A cotton or microfiber cloth finishes the job by drying surfaces without leaving lint or scratches on chrome fixtures. Microfiber holds up to seven times its weight in water, giving you maximum absorbency in two to three passes across wet shower heads and tiles.
- Microfiber dries quickly between uses, staying fresh for your next cleaning session
- Cotton terry cloth offers plush texture that resists fraying through dozens of wash cycles
- Nonabrasive fibers protect glass doors and polished surfaces from scoring during bathroom maintenance
Preparing The Shower Head for Cleaning

Before you start soaking your shower head in vinegar, you need to get it ready for cleaning.
A quick inspection will tell you how bad the buildup is and whether you’ll need to remove the fixture completely.
These three prep steps take just a few minutes but make the actual cleaning process much more effective.
Inspect Shower Head for Clogs
Before you start cleaning, grab a flashlight and check each spray hole for white or yellowish buildup. Turn the water on briefly to spot uneven spray patterns—that’s your first clue there’s trouble. Use a pin or paperclip to probe blocked nozzles, and don’t forget to test different settings, since clogs can hide behind flow controls.
For best results, it’s important to address mineral buildup causes that can restrict water flow and lead to stubborn clogs.
| Inspection Step | What to Look For |
|---|---|
| Visual check with light | White mineral deposits around nozzles |
| Water flow test | Uneven spray or weak pressure |
| Pin probe | Obstructed holes that won’t clear |
| Diverter settings | Blockages masked by flow controls |
Remove Loose Debris
Before you dive into the vinegar soak, knock off the easy stuff first. A soft toothbrush and quick rinse remove loose particles that would otherwise float in your cleaning solution and reattach later.
- Use a soft brush to lift dust without scratching chrome or plastic finishes
- Rinse with warm water to soften debris before scrubbing
- Wipe with a microfiber cloth to prevent loosened buildup from reattaching
- Dry completely to stop new mineral deposits from forming on damp surfaces
- Inspect jets with a flashlight to spot stubborn particles hiding in spray holes
Decide Whether to Remove Shower Head
You’ll need to choose between a basic bag-soak or full shower head removal, and that decision depends on your water pressure issues and visible corrosion.
If mineral buildup clogs spray holes but the arm connections look clean, a vinegar bag works fine.
When thread inspection reveals rust or you see scale seizing the connection, remove the head completely for thorough cleaning with distilled white vinegar inside and out.
Basic Cleaning Method: Vinegar Bag Soak
The vinegar bag soak method is the simplest way to clean your shower head without removing it from the wall. This technique works well for regular maintenance and light to moderate mineral buildup.
Here’s how to get your shower head running like new again in just a few straightforward steps.
Measure and Mix Vinegar Solution

For basic cleaning, fill a measuring cup with undiluted distilled white vinegar—straight from the bottle at its standard 5 percent acid strength. You don’t need to mix vinegar solutions or adjust concentration levels for most shower heads.
If you prefer a milder approach, use a 1:1 vinegar dilution with water to reduce acid strength. Always follow mixing safety by adding vinegar to water, not the other way around.
Fill and Secure Ziploc Bag

With your vinegar measured, grab a gallon-size Ziploc bag and pour in enough distilled white vinegar to fully cover the shower head nozzles. Before securing it, make certain of proper seal alignment by starting at one corner and pressing firmly along the entire zipper track until you hear that reassuring click.
Here’s how to lock it in place:
- Fold the bag’s top edge inward by about one inch to create a drip guard
- Loop a rubber band or zip tie around the shower arm and bag neck
- Double-check the zipper for gaps by running your finger along the seal
Soak Shower Head for Several Hours

Once the bag hangs secure, let the shower head sit submerged for two to four hours—or overnight for stubborn deposits. This soak time allows the distilled white vinegar to dissolve calcium and mineral buildup without harsh scrubbing.
If you have hard water, lean toward longer soaks for better descaling results. The vinegar’s acidity quietly works through layers of grime while you handle other tasks.
Remove Bag and Wipe Down

After the soak, carefully untie the plastic bag and remove it from the shower head. You’ll notice loosened mineral deposits floating in the vinegar. Wipe down the entire surface with a soft cloth to remove vinegar residue and lingering debris from the nozzle openings.
Pay attention during your shower head inspection to these critical spots:
- Connection threads where moisture and minerals hide
- Each nozzle opening to confirm proper mineral removal
- Gasket area for complete drying before reassembly
- Chrome or metal finish requiring gentle surface finishing strokes
Use a clean microfiber cloth for the final pass, buffing away water spots while checking for any stubborn deposits that need another round of cleaning.
Deep Cleaning: Removing and Soaking Shower Head

When the bag method doesn’t cut it, you’ll need to remove the shower head completely for a thorough cleaning.
This process gives you access to hidden buildup inside the fixture and lets you clean parts that never see the light of day. Here’s how to safely detach, deep clean, and reinstall your shower head for maximum water flow.
Detach Shower Head Safely
Turn off the water supply to your shower before you start. Hold the shower arm steady with one hand while you loosen the nut with an adjustable wrench in the other. This prevents twisting the plumbing behind your wall. Apply gentle, steady pressure rather than sharp force to avoid snapping the pipe.
| Safe Removal Tips | Tools Required | Plumbing Precautions |
|---|---|---|
| Turn counterclockwise with moderate torque | Adjustable wrench | Hold shower arm steady during removal |
| Apply penetrating oil if stuck | Soft cloth for protection | Protect valve with towel before starting |
| Use two wrenches for stuck fittings | Plumber tape for reinstall | Check for rubber gaskets when detaching |
| Never twist under water pressure | Protective eyewear | Inspect threads before reassembly |
| Work in well-lit area | Penetrating oil (if needed) | Monitor for leaks after reconnecting |
If mineral deposits have seized the connection, apply a small amount of penetrating oil and wait a few minutes before trying again. Place a cloth between the wrench and the shower head to protect finishes from scratches. Check for any rubber gaskets or washer remnants when you remove the head—you’ll need to replace these during reinstallation to prevent leaks.
Clean Filter Screen and Threads
Once you’ve detached the shower head, pull out the filter screen from inside the housing. Rinse it under warm water, then use an old toothbrush to gently scrub away mineral deposits and debris.
For the threads on both the shower arm and the shower head, brush them clean with a soft toothbrush to remove scale buildup that blocks water flow and causes leaks.
Submerge in Vinegar or Cleaner
Fill a pot or bucket with enough distilled white vinegar to completely submerge the shower head. Drop the head into the solution and let it soak for two to four hours for light buildup, or overnight for heavy mineral deposits.
The acetic acid works through internal passages, dissolving limescale and freeing spray nozzles from blockages.
Scrub and Rinse Thoroughly
After the vinegar soak, grab an old toothbrush and scrub each nozzle gently to dislodge loosened mineral deposits. Work zone by zone to make certain every outlet gets attention.
Rinse the shower head under warm water—around 100°F works well—holding it at a downward angle so debris flows away from threads and seals. Check that water flows freely from all spray holes before drying with a soft cloth.
Reinstall Shower Head
Once you’ve scrubbed and rinsed the shower head clean, hand-tighten it back onto the shower arm by turning clockwise until snug. Check thread cleaning first—wipe away old tape residue before reattaching.
Run water on low to test leak prevention, then adjust shower head alignment so the spray pattern points where you want it. If drips appear, give it a quarter turn with your wrench to seal properly without overtightening.
Natural Alternatives to Vinegar Cleaning

Not everyone has vinegar on hand, or you might just prefer something else for cleaning your shower head.
The good news is there are other household ingredients that work just as well to break down mineral deposits and grime. Here are three natural alternatives you can use instead of vinegar.
Lemon Juice Method
You can swap vinegar for fresh lemon juice when you want a natural cleaning agent with acidic properties that tackle mineral deposits. The citric acid benefits include breaking down calcium carbonate and magnesium scale without harsh chemicals.
Fill a bag with room-temperature lemon juice concentrate, secure it around your shower head, and let it sit for several hours to loosen stubborn buildup.
Baking Soda and Water Paste
For a mild, homemade alternative, mix three parts baking soda with one part water until you get a thick paste. This gentle abrasive works well on mineral deposits without scratching chrome or ceramic surfaces.
Apply the paste composition to your shower head with a soft brush, let it sit for five minutes, then scrub in circular motions. The deodorizing properties neutralize odors while protecting surface safety—something vinegar alone can’t match during showerhead cleaning.
Baking Soda and Hydrogen Peroxide Paste
When stubborn stains resist plain baking soda, upgrade your paste composition by mixing two parts baking soda with one part 3 percent hydrogen peroxide. This cleaning mechanism releases oxygen bubbles that oxidize mineral deposits and mildew on contact.
As a safety precaution, test on a hidden spot first and avoid colored finishes. Apply with a soft brush, let it foam for five minutes, then rinse thoroughly during showerhead cleaning.
Frequency and Best Practices for Cleaning

Knowing when and how often to clean your shower head keeps it working at full pressure and prevents buildup from becoming a bigger problem. You don’t need to clean it every week, but waiting too long means you’ll face stubborn mineral deposits that take more effort to remove.
Let’s cover the cleaning schedule, warning signs to watch for, and simple habits that keep your shower head in good shape between deep cleans.
How Often to Clean Shower Head
Generally, you should clean your shower head at least once a month to prevent mineral buildup and maintain consistent water flow.
Homes with hard water may require cleaning every two weeks, while softer water quality allows three-to-six-month cleaning schedules. Adjust your maintenance frequency based on humidity effects and shower head materials—plastic heads with chrome plating accumulate deposits faster than metal ones.
Signs It’s Time to Clean
You’ll notice white crust forming on the nozzles when mineral deposits from hard water take hold. Reduced pressure, uneven spray patterns, and visible grime around the shower head all signal it’s time for a vinegar cleaning.
Watch for water spots on chrome surfaces, soap scum buildup, or foul odors—these mean mineral buildup is restricting flow and harboring bacteria.
Maintenance Tips for Prevention
Consistent shower head maintenance keeps mineral deposits from ever taking control. Spray your fixtures with vinegar every two weeks and wipe them down during your regular cleaning routine to stop scale before it hardens.
- Test your water quarterly to track mineral levels and adjust your vinegar cleaning schedule accordingly.
- Install a water conditioner to reduce mineral deposit buildup at the source.
- Scrub nozzles monthly with a soft brush to dislodge early-stage calcium before it restricts flow.
Troubleshooting Common Shower Head Issues

Sometimes vinegar and regular cleaning won’t solve every shower head problem, especially if you’re dealing with stubborn buildup or ongoing water quality issues.
Hard water can create thick mineral deposits that resist standard cleaning methods, and you might need a different approach.
Here’s how to handle the toughest shower head challenges and when it’s time to think about bigger solutions.
Dealing With Hard Water Build-Up
Hard water leaves chalky mineral deposits faster than you can scrub them away. When buildup gets stubborn, extend your vinegar soak to overnight and add a baking soda paste to tackle thick scale. For homes with severe hard water, installing a water softener protects your fixtures long-term and cuts cleaning time in half.
| Hard Water Treatment | Effectiveness |
|---|---|
| Vinegar soak (overnight) | Removes moderate calcium buildup |
| Baking soda paste | Scrubs tough mineral layers |
| Inline descaler cartridge | Reduces scale before it forms |
| Whole-house water softener | Prevents deposits at the source |
When Vinegar Isn’t Enough
Persistence sometimes hits a wall when acidic solutions can’t break through thick biofilm or rust-locked mineral deposits. If vinegar and baking soda fail after repeated soaks, reach for a commercial descaler formulated for hard water treatment—these stronger formulas tackle scale removal that household options miss.
You can also try hydrogen peroxide for biofilm control or swap to lemon juice for extra citric punch before replacing the showerhead entirely.
Water Softener Considerations
Hard water impact goes beyond your showerhead—it’s a whole-home problem. Installing a water softener cuts mineral buildup at the source, reducing vinegar scrubbing sessions and water spots on fixtures.
These systems use salt to exchange calcium and magnesium ions during regeneration cycles, with iron removal options for rusty supplies. Maintenance costs include periodic salt refills and occasional resin bed replacement.
Top Products for Cleaning Shower Heads
You don’t need fancy products to clean your shower head effectively. Most of the supplies you’ll use are probably already sitting in your kitchen or bathroom cabinets.
Here are the top products I recommend for getting your shower head spotless and keeping it that way.
1. Earthworm Mold And Mildew Treatment
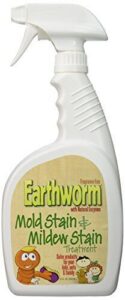
Earthworm Mold And Mildew Treatment takes a different approach from vinegar by using natural enzymes to break down mold and mildew stains. This 22-ounce fragrance-free spray works on tubs, tiles, grout, and fiberglass without harsh chemicals.
You’ll apply it directly to stained areas, let the enzymes work for several minutes, then scrub and wipe clean. At $24.99, it’s biodegradable and safe around kids and pets.
For stubborn shower head stains that vinegar hasn’t fully eliminated, this enzymatic option offers an effective alternative cleaning method.
| Best For | People looking for a chemical-free mold remover that’s safe around kids and pets, especially if vinegar hasn’t worked on their shower or bathroom stains. |
|---|---|
| Brand | Earthworm |
| Item Form | Liquid |
| Price Range | $24.99 |
| Eco-Friendly | Yes |
| Primary Use | Mold removal |
| Size | 22 oz |
| Additional Features |
|
- Natural enzymatic formula breaks down mold without harsh chemicals or strong fumes
- Biodegradable and safe to use around children and pets
- Works on multiple surfaces including tile, grout, and fiberglass
- At $24.99 for 22 oz, it’s pricier than basic cleaners like vinegar
- May need several applications for tough stains or large mold areas
- Some users report it’s less effective than earlier versions of the product
2. Heinz White Vinegar
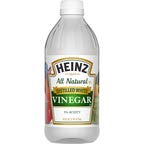
Heinz White Vinegar stands as your go-to cleaning staple for shower head maintenance. At 5 percent acidity, this 16-ounce bottle dissolves mineral deposits effectively while remaining food-safe for kitchen use. You’ll appreciate its corn-based formula with no artificial additives—just distilled vinegar and water.
For $6.50, it’s budget-friendly and adaptable. Mix it with baking soda for enhanced cleaning power, or use it straight to soak clogged nozzles. The clear liquid stores indefinitely in a cool, dry spot without refrigeration needed.
| Best For | Homeowners looking for an affordable, multi-purpose vinegar that works for both cleaning shower heads and everyday cooking needs. |
|---|---|
| Brand | Heinz |
| Item Form | Liquid |
| Price Range | $6.50 |
| Eco-Friendly | Natural ingredients |
| Primary Use | Cleaning & cooking |
| Size | 16 oz |
| Additional Features |
|
- All-natural corn-based formula with no artificial additives makes it safe for food and cleaning tasks
- 5% acidity level effectively dissolves mineral deposits and hard water buildup on shower heads
- Budget-friendly at $6.50 for 16 ounces with indefinite shelf life when stored properly
- 16-ounce glass bottle is smaller than some users expect for regular cleaning tasks
- Not as strong as heavy-duty drain cleaners like Liquid Plumber for severe clogs
- Glass packaging may be less convenient than plastic for those who prefer lighter, shatter-resistant bottles
3. Bioclean Hard Water Stain Remover
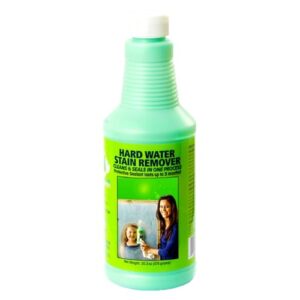
When vinegar alone won’t cut through stubborn mineral buildup, Bio-Clean Hard Water Stain Remover steps in with professional-grade power. This 20.3-ounce cream addresses years of limescale, calcium, and iron deposits on shower heads, glass, and tile.
You’ll need to scrub a bit—it’s abrasion-based, not a miracle spray—but it’s biodegradable and non-acidic. At around $20, it works where vinegar fails, especially on chrome and porcelain fixtures. Just wear gloves during application and rinse thoroughly afterward.
| Best For | Homeowners dealing with severe hard water buildup on shower doors, fixtures, and tile that vinegar can’t handle. |
|---|---|
| Brand | Bio-Clean Products |
| Item Form | Cream |
| Price Range | Mid-range |
| Eco-Friendly | Biodegradable |
| Primary Use | Hard water stains |
| Size | 20.3 oz |
| Additional Features |
|
- Professional-strength formula tackles years of limescale, calcium, and iron deposits
- Biodegradable and eco-friendly alternative to harsh chemical cleaners
- Works on multiple surfaces including glass, chrome, tile, grout, and porcelain
- Requires significant scrubbing effort—not a spray-and-wipe solution
- Can cause skin irritation, so gloves are necessary during use
- Some users report mixed results, with stains only lightening rather than completely disappearing
4. Arm And Hammer Pure Baking Soda
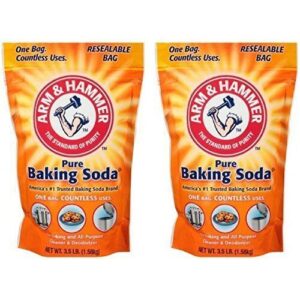
For a gentler scrub or tough mineral paste, grab Arm & Hammer Pure Baking Soda in the 3.5-pound stand-up bag. You’ll mix it with water or vinegar to create a mild abrasive that won’t scratch chrome or nickel finishes.
The powder form dissolves organic grime and neutralizes odors without harsh chemicals. At around $7 for 112 ounces, it’s budget-friendly and works on shower heads, tile grout, and faucet aerators. The resealable design keeps moisture out between cleaning sessions.
| Best For | Budget-conscious households looking for a versatile, non-toxic cleaner that tackles everything from bathroom grime to laundry odors without scratching delicate surfaces. |
|---|---|
| Brand | Arm & Hammer |
| Item Form | Powder |
| Price Range | Budget-friendly |
| Eco-Friendly | Multi-purpose |
| Primary Use | Multi-purpose cleaning |
| Size | 3.5 lb |
| Additional Features |
|
- Multi-purpose powder works as a mild abrasive, deodorizer, and cleaning agent throughout your home
- Resealable 3.5 lb bag offers excellent value at around $7 and prevents moisture damage between uses
- Gentle enough for chrome and nickel finishes while still dissolving tough mineral deposits and organic buildup
- Some customers report receiving incorrect products or incomplete orders
- Requires manual mixing with water or vinegar rather than being ready-to-use
- Shipping delays and product availability issues noted by multiple users
5. Ziploc Gallon Freezer Bags
You’ll need something to hold vinegar around a fixed shower head, and Ziploc Gallon Freezer Bags get the job done for about $8 per 66-count pack. The 10.5-inch by 10.75-inch opening fits over most standard fixtures, while the Grip ‘n Seal double zipper prevents leaks during overnight soaks.
The stay-open design lets you fill the bag hands-free, and the clear plastic shows you when mineral deposits start dissolving. Each bag accommodates multiple cleaning sessions before the seal wears out.
| Best For | Anyone needing an affordable, reusable way to soak shower heads in vinegar without making a mess. |
|---|---|
| Brand | Ziploc |
| Item Form | Plastic Bags |
| Price Range | Mid-range |
| Eco-Friendly | Not specified |
| Primary Use | Food storage |
| Size | 66 count |
| Additional Features |
|
- Stay-open design makes filling easy without needing extra hands
- Clear plastic lets you watch the cleaning process and see when mineral deposits dissolve
- Grip ‘n Seal double zipper actually prevents leaks during overnight soaks
- Some users report the seal doesn’t always work perfectly, which could cause drips
- Bags wear out after multiple uses, so you’ll need to replace them eventually
- Price runs a bit higher than generic freezer bags at around $8 for 66 bags
Frequently Asked Questions (FAQs)
How to clean your shower head with vinegar and baking soda?
Start by filling a plastic bag halfway with distilled white vinegar, then add a tablespoon of baking soda. Secure the bag around your shower head and let it soak overnight.
Can vinegar damage chrome or brass finishes?
Acids can eat away at protective layers if you’re not careful.
Chrome and brass won’t survive long soaks—stick to quick dips under thirty minutes, rinse fast, and dry right away.
What if my showerhead has electronic components?
You’ll need to skip vinegar soaks on electronic shower heads because moisture can damage internal circuits and sensors. Instead, wipe the exterior with a damp cloth and mild soap regularly.
How do I clean a rainfall showerhead?
Rainfall showerheads need the same vinegar soak approach, but pay extra attention to their wide spray plate.
The large surface area collects more mineral deposits, so scrub every nozzle carefully after soaking to restore even water flow.
Will vinegar remove pink or black mold?
Vinegar can kill some pink and black mold strains on nonporous surfaces when you apply it undiluted and let it sit for an hour, but porous materials often need professional treatment for complete removal.
Can I use apple cider vinegar instead?
You can use apple cider vinegar, but it’s less effective than white vinegar for mineral deposits.
Expect longer soak times and possible mild discoloration.
Stick with distilled white vinegar for best results.
Conclusion
The same vinegar sitting in your pantry right now is powerful enough to restore full water pressure and eliminate years of mineral buildup.
Learning how to clean shower head with vinegar means you’ll never waste money on specialized cleaners again. Set up your vinegar bag soak tonight, run the water tomorrow morning, and you’ll see exactly why this method has worked for decades.
Your shower head doesn’t need replacement—it just needs vinegar.