This site is supported by our readers. We may earn a commission, at no cost to you, if you purchase through links.

You don’t need bleach to transform black hair into fiery red tones, though most colorists will tell you otherwise. The truth is, strategic color removal paired with high-lift red dye can lighten your dark base by two to three shades, creating vibrant crimson or burgundy results without the damage bleach causes.
This approach takes patience—you’ll likely need multiple color remover treatments spaced weeks apart, and the red won’t appear as electric as it would on pre-lightened hair. But if you’re willing to embrace deeper, richer reds over bright cherry tones, you can skip the bleach bottle entirely. The key lies in proper preparation, choosing formulas designed to work on dark hair, and understanding that removing black dye is a gradual process, not an overnight transformation.
Table Of Contents
- Key Takeaways
- Preparing Black Hair for Red Dye
- Removing Black Hair Dye Without Bleaching
- Selecting The Perfect Red Shade for Dark Hair
- Step-by-Step Guide to Dyeing Black Hair Red
- Top Products for Dyeing Black Hair Red
- Frequently Asked Questions (FAQs)
- Can you put red dye over dark hair?
- How to treat hair whitening naturally?
- How to dye your hair at home without bleach?
- How do I make my hair red if I dyed black?
- What color hair can you dye without bleaching?
- Can I dye my hair if it has been dyed black?
- How long does red dye last on black hair?
- Can I mix different red dyes together?
- Should I dye my hair wet or dry?
- Will red dye show up differently on graying hair?
- Conclusion
Key Takeaways
- You can dye black hair red without bleach by using strategic color removal treatments paired with high-lift red dyes, which lighten your base by two to three shades and create rich burgundy or crimson tones instead of bright cherry reds.
- Multiple color remover sessions spaced one to two weeks apart are essential for stubborn black dye, since each treatment gradually lifts artificial pigment and reveals warm undertones that prepare your hair for red transformation.
- Choosing red shades one to two levels lighter than your current black base—like copper, scarlet, or vibrant crimson—ensures visible color payoff, while deeper burgundies sit too close to black and won’t show transformation.
- Deep conditioning after every color removal session and using sulfate-free, color-depositing products between applications protects your hair’s integrity while maintaining vibrant red tones that would otherwise fade within two to four weeks.
Preparing Black Hair for Red Dye
Your hair’s health and readiness determine whether you’ll get the vibrant red you’re chasing or a muddy, uneven mess. Before you crack open that dye, you need to prep your strands properly, removing buildup and strengthening the cuticle without overdoing it.
Once you’ve nailed the prep, maintaining that red means following long-term hair color preservation techniques that protect both the cuticle and pigment from fading.
Your hair’s condition determines whether you’ll achieve vibrant red or end up with a muddy, uneven disaster
Here’s what you need to do before applying red dye to black hair.
Assessing Hair Health and Suitability
Before you commit to red, assess your hair’s readiness for color. Check hair porosity by dropping a few strands in water—if they sink fast, you’ve got high porosity that’ll grab color quickly but fade faster.
Test elasticity by gently stretching a wet strand; if it snaps immediately, you’re dealing with damage that needs repair first, not dye.
Washing With Clarifying Shampoo
Once your hair passes the test, wash it with clarifying shampoo to strip away product buildup, oils, and minerals that block dye absorption.
Use it 24 to 48 hours before applying red hair dye, which gives your cuticle time to settle after opening. Don’t skip conditioner afterward, since clarifying formulas can dry out black hair and raise porosity levels that affect how color remover or dye takes hold.
Using Hot Water to Open Cuticles
After clarifying, rinse your black hair with water heated to 40 to 60 Celsius (104 to 140 Fahrenheit) for 60 to 120 seconds. This step increases hair porosity and preps the cuticle opening for dye penetration without risking thermal damage.
Three essential reminders:
- Test water temperature on your wrist first
- Don’t exceed 60 Celsius to avoid frizz
- Cool rinse afterward locks everything in place
Deep Conditioning to Prevent Damage
Once your cuticles open, lock in Moisture Balance with a deep conditioning mask for 15 to 20 minutes under gentle heat. This Deep Treatment rebuilds Hair Elasticity and improves Hair Porosity, setting up better Color Preservation and color deposit later. Choose high-moisture formulas over heavy proteins for hair damage prevention during your hair care routine.
| Treatment Type | Best For |
|---|---|
| High-moisture masks | Dry, porous hair needing elasticity |
| Weekly deep conditioning | Severely damaged strands pre-color |
| Biweekly sessions | Moderately healthy hair maintenance |
Avoiding Protein Masks Before Dyeing
Skip protein treatments 48 hours before dyeing—excess buildup coats the cuticle and blocks dye penetration, reducing color uptake on black hair.
Protein Mask Risks include:
- Stiffened strands resist even red hair color distribution
- Reduced hair porosity limits dye absorption into the cuticle
- Temporary hardening creates patchy, uneven results
- Buildup requires extra clarifying, stressing your hair care routine
- Poor color uptake means wasted product and disappointing vibrancy
Removing Black Hair Dye Without Bleaching

Getting black dye out of your hair without bleach takes patience, but it’s absolutely doable with the right approach. You’ll need to lift that dark pigment gradually using color removers, which work by shrinking the dye molecules so they can rinse away.
Here’s what you need to know about safely stripping that black color before going red.
Choosing The Right Color Remover
Your best bet is a bleach-free formula designed to shrink oxidative dye molecules without lifting your natural pigment. Look for color removers with aloe vera and conditioning agents to minimize dryness during the 15 to 30 minute processing time.
If you’re also exploring natural alternatives, mayonnaise hair masks offer a gentler conditioning option between color correction treatments.
These products focus on damage control by breaking down black hair dye gently, preparing your strands for that bold red transformation you’re after. For best results on dyed hair, consider using a product formulated specifically for removing oxidative hair color.
At-Home Color Remover Kits Vs Salon Treatments
At home hair dye kits offer the freedom to tackle color correction on your budget, usually costing 10 to 40 dollars per application, but be aware that porous or damaged strands may lift unevenly without salon equipment and professional assessment.
Professional dye removal delivers controlled results through higher-grade color remover formulas, bonding treatments, and technician-adjusted processing times, reducing at home risks like patchiness and excess dryness.
Multiple Treatments for Stubborn Black Dye
Stubborn black dye usually holds several pigment layers from repeated applications, so one color remover session rarely takes it all out. Plan for progressive lightening through layered treatments spaced one to two weeks apart, allowing your hair to recover between rounds.
Each dye removal cycle lifts more artificial color, gradually revealing warm brown and copper tones that prepare your strands for vibrant red without bleach.
To understand the significance of using color-safe, sulfate-free shampoos and conditioners, consider how they help preserve hair health after each removal stage.
Moisturizing and Protecting Hair After Removal
Your strands need serious hydration techniques right after color removal, since the process strips natural oils and leaves hair porous.
Apply a deep conditioning mask with ceramides within 24 hours, then use a leave-in conditioner daily for one week to lock moisture and support color protection. Pair with lightweight argan oil on damp hair for color preservation without weighing down your recovering strands.
Waiting Periods Between Color Removal Sessions
Your scalp needs time to bounce back between color removal sessions, or you risk banding and irritation that derails your entire red transformation.
- Session Scheduling: Wait 2 to 8 weeks between color removal methods to allow proper scalp recovery and hair regeneration.
- Pigment Breakdown: Longer intervals help your system clear released dye particles for more uniform color correction.
- Hair Damage Prevention: Extend waits to 6–8 weeks for stubborn black pigment to reduce breakage risk.
- Recovery Signs: Pause if redness or burning persists beyond 3 days after color removal timing.
Selecting The Perfect Red Shade for Dark Hair

Choosing the right shade of red for black hair isn’t just about picking your favorite color, it’s about working with your natural tones and understanding what your hair can realistically achieve without bleach.
The wrong red can clash with your skin or fade into a muddy brown within weeks, wasting your time and damaging your hair. Here’s what you need to know to select a red that complements your features and actually shows up on dark hair.
Matching Red Tones to Skin Undertones
Your skin undertone determines which red shade selection creates true color harmony when dyeing black hair red. Cool undertones pair best with blue-based reds like burgundy or crimson, while warm undertones glow with copper or brick red shades.
Neutral undertones work with mid-tone reds like cherry. This undertone analysis prevents tone correction issues and ensures your hair coloring choice complements your natural skin tone matching.
Choosing Red Dyes 1-2 Shades Lighter
Once you’ve matched undertones, your red shade selection needs strategic planning. Choose a hair dye that’s 1 to 2 shades lighter than your current black hair, because darker bases absorb color differently due to hair porosity matters.
Vibrant red tones like scarlet or copper red work best for dyeing black hair red without bleach, while deep burgundies sit too close to black and won’t show transformation.
Considering Permanent Vs Semi-Permanent Options
After picking your shade, you’ll need to decide between permanent dye and semi-permanent hair dye, which affects color longevity, damage risk, and maintenance needs. Your choice determines how long your transformation lasts and how much upkeep you’ll commit to.
Key differences to weigh:
- Dye Durability: Permanent hair color grows out instead of washing away, while semi-permanent fades after 6 to 12 shampoos.
- Color Deposit: Semi-permanent options deposit color without lifting, making them gentler but less vibrant on black bases.
- Damage Risk: Permanent formulas open cuticles with developer, creating higher breakage potential if you skip conditioning.
- Maintenance Needs: Permanent red hair dye requires root touch-ups every 4 to 6 weeks, semi-permanent needs rejuvenating every 2 to 4 weeks.
- Cost Comparison: Permanent applications cost more upfront due to developer and potential salon visits, but semi-permanent boxes offer budget-friendly at-home rejuvenation options.
Be aware that permanent color delivers longer-lasting results but demands bond-strengthening aftercare, while semi-permanent gives you flexibility to experiment without major chemical commitment.
Tips for Achieving Vibrant Red Without Bleach
Once you’ve locked in your formula, enhance color vibrancy by prepping your base correctly. Wash 24 hours before application to balance hair porosity for better dye adherence, then skip conditioner that morning so red tone maintenance starts strong.
| Prep Step | Purpose | Impact on Red Hair |
|---|---|---|
| Clarifying wash 24 hours prior | Removes buildup blocking dye adherence | Deeper color deposit, richer permanent dye results |
| Skip day-of conditioner | Keeps cuticles receptive to pigment | Prevents slippery barriers that cause fading prevention failure |
| Strand test on hidden section | Confirms color depositing treatments work on your base | Avoids hair color correction disasters before full application |
| Section into 6 parts | Ensures saturation in dense areas | Eliminates patchy spots that dull hair dye vibrancy |
Don’t be afraid to leave the formula on for the maximum recommended time, as dark bases need every minute to grab those red pigments without bleach lifting your natural melanin.
Step-by-Step Guide to Dyeing Black Hair Red
Now that you’ve prepped your hair and chosen your shade, it’s time to get your hands dirty.
The actual application process requires precision, patience, and a few protective measures to avoid staining everything in sight.
Follow these steps carefully to achieve even, vibrant red color from root to tip.
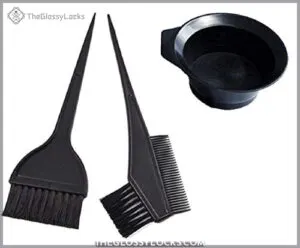
Brushing and Sectioning Hair for Application

You’ll want your hair dry or slightly damp before you start hair sectioning, since wet strands slip too easily and throw off dye application. Use a wide tooth comb to detangle from ends to roots, removing knots without yanking.
Create four to six vertical panels from crown to nape, clipping each section to prevent mixing during hair coloring and guarantee full saturation on dark hair.
Applying Vaseline to Prevent Skin Stains

Before you uncap that Red Hair Dye, slick a thin layer of Vaseline along your Hairline and ears, and neck to create a protective Barrier Methods shield against Skin Stains. This simple Skin Protection step blocks pigment from bonding to your skin during Hair Dyeing Techniques, making cleanup easier and preventing the need for aggressive Stain Removal later.
Keep a cotton swab handy for precision Vaseline Tips application around delicate areas.
Mixing Red Dye and Developer Properly

Squeeze equal parts permanent dye and developer into a non-metallic bowl, following the 1:1 Developer Ratios printed on your hair color box, to guarantee proper Color Activation and Pigment Deposit.
Stir the mixture with a brush for 60 seconds until you see a smooth, uniform consistency that allows Dye Penetration and controls Processing Times, setting the stage for vibrant red hair that lasts.
Applying Dye for Even Coverage

Start your Dye Application at the mid-lengths, sweeping toward the ends with a wide brush dense enough to guarantee uniform Color Distribution across each 1-inch section.
Use Sectioning Techniques that create vertical panels from crown to nape, clipping each after application to prevent overlap.
Proper Brush Selection and methodical strokes guarantee every strand receives equal color deposit, setting up vibrant red hair that won’t look patchy.
Processing and Rinsing Red Hair Dye

Set your timer for 30 minutes to allow full Dye Penetration without overprocessing dark hair. Heat opens the Cuticle Care layer, letting red hair dye molecules lock into the cortex.
Rinse with cool water using proper Rinse Techniques until it runs clear, then apply sulfate-free shampoo. Follow with deep conditioner for Moisture Balance and Color Locking on your vibrant hair color.
Top Products for Dyeing Black Hair Red
You can’t transform black hair to red without the right arsenal in your hands, period. The products you choose will make or break your color journey, determining whether you end up with vibrant crimson locks or a muddy, disappointing mess.
Here are the essential tools and formulas you need to pull off this bold transformation without bleach.
1. Atb Professional Hair Coloring Kit
The ATB 3-piece kit delivers everything you need for a smooth, professional-quality red dye application at home. This compact set includes a 13cm mixing bowl with volume markers at 50ml, 80ml, 100ml, and 200ml, making developer ratios foolproof.
The 20cm angled comb separates hair strands cleanly during application, while the brush’s 2.5cm bristles distribute red dye evenly across dark bases. All tools resist staining from vibrant red pigments, stay durable through repeated sessions, and clean up easily with warm water and soap.
| Best For | Home users and DIY enthusiasts looking for an affordable, complete hair coloring kit that makes mixing and applying red dye straightforward without professional training. |
|---|---|
| Brand | ATB |
| Item Form | Plastic Kit |
| Primary Use | Hair dyeing application |
| Dimensions | 5.12 x 2.36 inches |
| Color | Black |
| Reusability | Reusable |
| Additional Features |
|
- Complete 3-piece set with measuring markers on the bowl takes the guesswork out of mixing developer ratios
- Easy to clean and stain-resistant even with vibrant red pigments
- Compact tools (20cm brush/comb) make precise application and sectioning simple for beginners
- Brush bristles lack sturdiness and may not hold up well with frequent use every 6-8 weeks
- Bowl is made of flimsy plastic that feels cheap and may crack over time
- Quality can be inconsistent depending on the batch you receive
2. Perfehair Reusable Latex Gloves
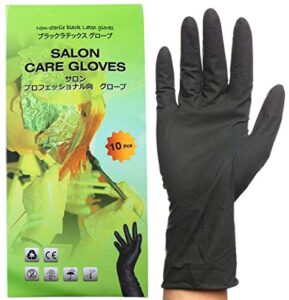
Your hands need just as much skin protection as your hair does during the dyeing process. Perfehair’s reusable latex gloves feature a textured finish that grips brushes and bottles securely, even when working with slippery red dyes.
The medium-sized, ambidextrous design fits either hand comfortably, while extended cuffs shield your wrists from splashes. Rinse them with cool water after each session, air dry away from heat, and they’ll stay flexible through multiple applications, cutting down on waste and keeping your skin stain-free.
| Best For | Salon professionals and at-home hair colorists who want durable, reusable gloves that provide grip and wrist protection during dye applications. |
|---|---|
| Brand | SL001 |
| Item Form | Latex |
| Primary Use | Hand protection |
| Dimensions | 9.84 x 4.72 inches |
| Color | Black |
| Reusability | Reusable |
| Additional Features |
|
- Textured finish grips tools securely even with slippery dyes, and the extended cuffs protect wrists from splashes
- Reusable and washable design saves money and reduces waste compared to disposable gloves
- Ambidextrous fit works for either hand and rinses clean easily without snagging hair
- Sizing runs slightly loose for some users, so they may not fit as snugly as expected
- Not suitable for heavy-duty chemicals or bleach, as repeated exposure can cause cracking
- Cuff length in the actual product may differ from what’s shown in product images
3. Loreal Technique Red Hair Color
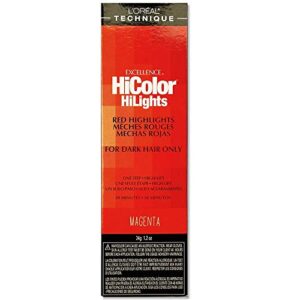
Once you’ve protected your hands, you’ll need dye for dark hair that actually shows up on dark hair without pre-lightening. L’Oréal Technique HiColor in Magenta delivers vibrant red tones in just 30 minutes, thanks to its rich, no-drip crème formula designed specifically for dark bases.
The targeted red dye system deposits color evenly from roots to ends, creating stunning crimson or garnet hues that resist fading. At $14 per bottle, it’s a salon-quality option that works without bleach, though you’ll want gloves and a smock to avoid stains.
| Best For | People with dark hair who want vibrant red tones without the damage and hassle of bleaching first. |
|---|---|
| Brand | L’OREAL TECHNIQUE |
| Item Form | Liquid |
| Primary Use | Hair coloring |
| Dimensions | Bottle size |
| Color | Magenta |
| Reusability | Single use |
| Additional Features |
|
- Shows up on dark hair without pre-lightening, saving time and reducing damage
- Fast 30-minute processing time with a no-drip crème that’s easy to apply
- Budget-friendly at $14 while delivering salon-quality, long-lasting color
- Fades over time and needs regular touch-ups to maintain vibrancy
- Has a strong chemical smell during application
- Stains easily, so you’ll need gloves and protective clothing
4. L’Oreal Hair Color Developer
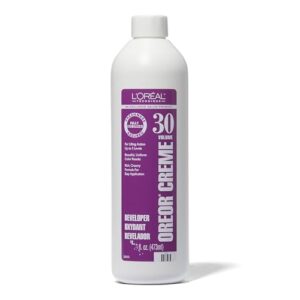
Your dye activator won’t work without the right activator. L’Oréal 30 Volume Developer lifts dark hair 2-3 levels while depositing red pigment, which means you’ll see actual color payoff on black bases.
Mix it 1:1 with your HiColor dye until you get a smooth, creamy consistency. At $12 for 16 fluid ounces, it’s formulated with odor-trapping technology to minimize that harsh ammonia smell.
Be aware that 30 volume is stronger than lower volumes, so don’t leave it on longer than directed.
| Best For | Anyone dyeing dark hair with vibrant reds who needs reliable lift and color deposit without dealing with overpowering chemical smells. |
|---|---|
| Brand | L’OREAL TECHNIQUE |
| Item Form | Liquid |
| Primary Use | Color development |
| Dimensions | 8.68 x 2.53 inches |
| Color | Clear/White |
| Reusability | Single use |
| Additional Features |
|
- Lifts dark hair 2-3 levels while depositing color, so reds actually show up on black hair
- Odor-trapping technology cuts down on that harsh ammonia smell that makes your eyes water
- Creamy consistency makes it easy to mix and apply, especially around tricky spots like your hairline
- 30 volume is pretty strong and can be more damaging than gentler developers like Wella
- You need to watch your timing carefully since higher volume means higher risk of damage
- Results depend heavily on your specific hair type and current condition
5. Vaseline Petroleum Jelly
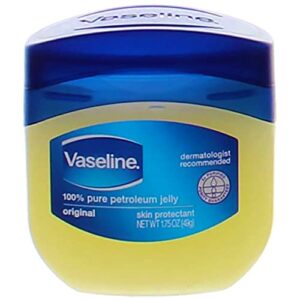
You’ll need a barrier between your skin and that red dye, or you’ll walk around with stained ears and hairline for days. Apply Vaseline petroleum jelly along your hairline, ears, and neck before you start mixing.
The 1.75 oz size gives you enough for multiple applications, and at under $5 for a two-pack, it’s the cheapest insurance you can buy. This occlusive formula creates a protective seal that stops pigment from penetrating your skin, which means quick cleanup with a damp towel after rinsing.
| Best For | Anyone dyeing their hair at home who wants to protect their hairline, ears, and neck from staining without spending a fortune. |
|---|---|
| Brand | Vaseline |
| Item Form | Cream |
| Primary Use | Skin protection |
| Dimensions | 4.9 x 1.9 inches |
| Color | Clear |
| Reusability | Multi-use |
| Additional Features |
|
- Creates an effective barrier that prevents hair dye from staining skin and makes cleanup simple
- Two-pack provides enough product for multiple dye sessions at an affordable price point
- Works on hairline, ears, neck, and anywhere else you need protection from pigment transfer
- Small 1.75 oz size means you’ll need to restock more frequently than larger containers
- May cost more per ounce compared to buying bigger jars at retail stores
- Some quality inconsistencies reported with certain batches or internationally sourced versions
6. Disposable Plastic Shower Cap
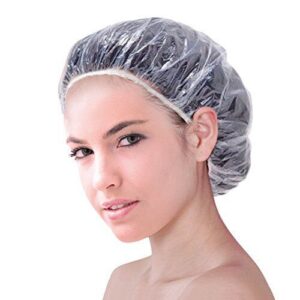
Heat accelerates the dyeing process, and a shower cap traps that heat right where you need it. These disposable plastic caps come in a 100-pack for under $10, giving you enough for every color session, deep conditioning treatment, and touch-up for months.
The elastic band secures the cap over your sections while the waterproof polyethylene barrier locks in warmth and prevents drips. Be aware that these run small and may tear on thick hair, so don’t be afraid to double up for better coverage and durability.
| Best For | Anyone who regularly dyes their hair at home or does deep conditioning treatments and wants an affordable, no-fuss way to trap heat without worrying about cleanup. |
|---|---|
| Brand | Generic |
| Item Form | Plastic |
| Primary Use | Hair coverage |
| Dimensions | 10.6 x 9.1 inches |
| Color | White |
| Reusability | Disposable |
| Additional Features |
|
- Incredibly affordable at 100 caps for under $10, giving you months of supply
- Waterproof barrier locks in heat to speed up dyeing and conditioning while preventing drips
- Individually wrapped so they stay clean and hygienic until you need them
- Runs small and may not fit larger head sizes or thick hair comfortably
- Tears easily, so you might need to double up for durability
- Single-use design means they’re not the most eco-friendly option
7. Joico Red Hair Shampoo And Conditioner Set
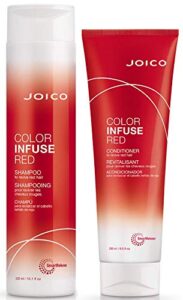
Color vibrancy fades fast without targeted maintenance, so sulfate-free formulas deposit fresh pigment with every wash. Joico’s Color Infuse Red Shampoo and Conditioner duo refreshes red tones while the Multi Spectrum Defense Complex shields against UV damage and environmental washout.
Each 10.1 oz bottle delivers gentle cleansing that won’t strip color, though you’ll need more product since it doesn’t lather heavily. Be aware that red pigments may stain shower surfaces and skin, so rinse thoroughly and wipe down walls immediately after use.
| Best For | Anyone with natural or color-treated red hair who wants to maintain vibrant, fade-resistant color between salon visits. |
|---|---|
| Brand | Joico |
| Item Form | Liquid |
| Primary Use | Color maintenance |
| Dimensions | 10.1 Fl. Oz |
| Color | Red-enhancing |
| Reusability | Multi-use |
| Additional Features |
|
- Deposits fresh red pigment with every wash while protecting against UV and environmental fading
- Sulfate-free formula cleanly refreshes color without stripping or damaging treated hair
- Works on all red shades and adds noticeable shine and vibrancy
- Low lather means you’ll use more product per wash than traditional shampoos
- Red pigments can stain shower walls, skin, and nails if not rinsed immediately and thoroughly
- Higher price point compared to standard color-safe shampoos and conditioners
Frequently Asked Questions (FAQs)
Can you put red dye over dark hair?
Yes, you can apply red dye directly over dark hair without bleaching, but expect subtle, gradual color shifts.
Results lean toward burgundy or pinkish tones depending on your hair’s porosity and underlying pigment.
How to treat hair whitening naturally?
Silver linings start with scalp care—massage with lightweight oils like coconut or almond to boost circulation, then apply avocado masks weekly to moisturize lightened strands and keep them strong throughout their natural growth.
How to dye your hair at home without bleach?
Choose a semi-permanent dye designed for deposit-only application, which allows you to add red tones to dark hair without harsh lightening agents, protecting your strands while achieving noticeable color transformation.
How do I make my hair red if I dyed black?
You’ll need a color remover to strip the black dye first, then apply a warm-toned red shade designed for dark hair, like copper or ruby, for best results.
What color hair can you dye without bleaching?
Dark hair accepts deeper red shades like burgundy, crimson, and mahogany without bleaching.
You can also achieve auburn tones using semi-permanent or demi-permanent dyes that deposit rich color over your existing pigment, such as copper and wine-red tones.
Can I dye my hair if it has been dyed black?
Yes, but black pigments lock stubbornly into your cuticle layers, resisting new color like armor.
You’ll need to strip or fade that dye first, or red won’t show up at all.
How long does red dye last on black hair?
Red dye on black hair usually lasts 2 to 4 weeks before noticeable fading begins. Semi-permanent shades hold color for 4 to 6 weeks, while permanent dyes extend up to 8 weeks.
Can I mix different red dyes together?
You can combine different red dyes, but stick to the same brand and formula type to avoid unpredictable results.
Test a small mix first to confirm the shade looks vibrant and even.
Should I dye my hair wet or dry?
Like choosing between canvas and sandpaper for painting, applying red dye to dry hair ensures maximum pigment deposit and intense color saturation, while wet application dilutes the formula and weakens the final result.
Will red dye show up differently on graying hair?
Gray strands tend to grab red dye more intensely due to their porous texture, producing brighter, sometimes uneven tones.
You’ll notice cooler or warmer hues depending on how light reflects off those strands.
Conclusion
Think of dyeing black hair red without bleaching like brewing espresso—patience and precision matter more than speed. You’ve learned the exact steps, from color removal to selecting deep burgundy tones that work with your natural base.
This method won’t give you neon cherry overnight, but it protects your hair’s integrity while delivering rich, dimensional color. Start with one color remover treatment, wait two weeks, then apply your chosen red dye using the techniques outlined above.
- https://www.glamot.com/blog/36198/12-things-you-should-to-know-about-hair-color-remover
- https://www.wikihow.com/Dye-Dyed-Black-Hair-Red-Without-Bleach
- https://www.beautycon.com/article/i-tried-7-ways-i-strip-my-hair-color-this-is-what-really-works
- https://curlwarehouse.com/blogs/news/what-s-the-difference-between-a-bonding-and-protein-treatment