This site is supported by our readers. We may earn a commission, at no cost to you, if you purchase through links.

Whether you’re dealing with semi-permanent color that’s overstayed its welcome or a permanent dye disaster, the removal process requires more than wishful thinking. You’ll need the right combination of techniques, timing, and hair care knowledge to coax that stubborn pink out without turning your hair into straw.
The methods range from gentle vitamin C treatments to more aggressive bleach baths, each with specific protocols that determine whether you’ll end up with healthy hair or a chemical nightmare.
Table Of Contents
- Key Takeaways
- Why is Pink Hair Dye Hard to Remove?
- What Should You Prepare Before Removal?
- How Does Clarifying Shampoo Remove Pink Dye?
- Can Vitamin C Treatments Fade Pink Hair?
- Are There Other At-Home Removal Methods?
- When Should You Use Professional Color Removers?
- Is Bleach Bathing Necessary for Stubborn Pink?
- What to Do if Pink Dye Won’t Budge?
- How to Care for Hair After Dye Removal
- How to Prevent Future Pink Dye Staining
- Frequently Asked Questions (FAQs)
- How long should I wait before trying a hair dye remover?
- Is it safe to use a color remover kit on my hair?
- Are there any risks associated with a bleach bath?
- How long between removal attempts to avoid damage?
- Will pink dye transfer to clothes or pillowcases?
- Can I swim in chlorinated pools after removal?
- Conclusion
Key Takeaways
- Pink dye molecules penetrate deep into your hair’s cortex and form stubborn bonds that require targeted removal methods—semi-permanent formulas fade in 3–10 washes while permanent dyes survive 50+ washes and need aggressive techniques like bleach baths.
- Your hair’s porosity level determines both how quickly pink dye absorbs (high porosity hair grabs color 30% faster) and how difficult removal becomes, with damaged or bleached hair showing uneven staining and increased breakage risk during treatment.
- Removal strategies range from gentle vitamin C and clarifying shampoo combinations that lift 40–60% of semi-permanent color over multiple sessions to professional sulfur-based removers and carefully monitored bleach baths that can eliminate up to 90% of stubborn permanent pigment.
- Post-removal hair care isn’t optional—chemical stripping increases protein loss by up to 356% and reduces tensile strength by 15–30%, making weekly deep conditioning treatments and bond-building products essential for preventing breakage and restoring elasticity.
Why is Pink Hair Dye Hard to Remove?
Pink dye clings to your hair because of how the pigment molecules interact with your hair’s structure. The removal challenge depends on the dye formula you used, your hair’s condition, and how deeply the color penetrated.
Let’s break down the three main factors that make pink so stubborn to remove.
Differences Between Dye Types
When you’re dealing with pink hair dye removal, the type of dye matters more than you’d think. Here’s why different formulas behave so differently:
- Semi-permanent dye sits on your hair’s outer cuticle with pigment molecules around 400–800 Daltons—they wash out in 3–10 shampoos because they only use weak surface bonds.
- Demi-permanent dye uses low peroxide to nudge smaller molecules (250–400 Daltons) into your outer cortex, lasting 20–30 washes with moderate penetration depth.
- Permanent dye locks color deep in your cortex through oxidation, surviving 50+ washes but causing up to 30% structural damage potential.
- Intended use varies: semi works for pastel pink on pre-lightened hair, demi blends tones gradually, permanent delivers full coverage and wash resistance.
These dyes offer different levels of color change, with demi-permanent lasting longer than semi-permanent options. Semi-permanent pigments release easily during hair dye removal, while removing pink hair dye that’s permanent requires aggressive methods.
Factors Affecting Dye Staining
Pink hair dye stains due to several interacting factors. Hair porosity determines absorption—damaged hair at pH 8–10 grabs pigment faster than healthy hair at pH 4.5–5.5. Chemical composition matters: azo compounds in pink resist fading, while ammonia raises pH above 9, opening cuticles for deeper penetration.
Environmental factors like pH, heat, and humidity loosen semi-permanent dye molecules, causing them to transfer to fabric. Product additives, such as silicones, reduce staining, while hard water (over 180 mg/L calcium) locks dye in by preventing proper rinsing.
Understanding hair porosity levels is important for effective dye removal and hair care.
Hair Porosity and Texture Impact
Your hair’s structure plays a major role in how pink dye grabs hold and refuses to let go. High porosity hair absorbs color up to 30% faster than low porosity hair because raised cuticles let dye molecules penetrate deeper. Once inside, those same open cuticles make removal difficulty vary dramatically.
Texture matters just as much:
- Fine or curly hair types show faster absorption and more rapid fading due to natural porosity
- Coarse hair absorbs dye 25% slower but holds residual pigment longer during removal
- Highly porous hair loses 45% of semi-permanent dye after five washes versus under 20% for low porosity strands
- Hair damage from bleaching can triple pore surface area in one minute, creating uneven staining and breakage risk
Porosity assessment helps predict whether your pink will fade in days or linger for months.
What Should You Prepare Before Removal?
Getting pink dye out of your hair isn’t something you want to wing—gathering the right supplies ahead of time makes the process safer and more effective. You’ll need specific tools to protect yourself and mix removal solutions properly.
Here’s what to have on hand before you start.
Essential Tools and Supplies
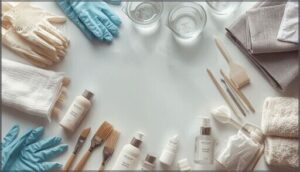
You’ll need the right gear to tackle pink dye removal without turning your bathroom into a chemical disaster zone. Start with a non-metallic mixing bowl—plastic or silicone resists corrosion from color remover and bleach mixtures. Grab nitrile or latex gloves to shield your hands, application brushes with synthetic bristles for precise placement, and sectioning clips to separate hair evenly. Stock up on clarifying shampoo, vitamin C tablets (crush them with a mortar and pestle), deep conditioner, and a plastic cap to trap heat during processing.
| Tool Category | Examples | Purpose |
|---|---|---|
| Mixing & Application | Non-metallic bowl, tint brush, sectioning clips | Guarantee even saturation and prevent chemical corrosion |
| Protective Gear | Nitrile gloves, old towels, barrier cream | Block skin contact with acidic or peroxide-based removers |
| Cleansing Products | Clarifying shampoo, vitamin C tablets, color remover | Lift pigment molecules trapped in the cuticle layer |
| Processing Aids | Plastic cap, warm towel, spoon | Maintain consistent heat to improve remover performance |
| Post-Treatment Care | Deep conditioner, leave-in treatment, hair mask | Restore moisture and repair damage from chemical processing |
Biodegradable kits are gaining traction for their reduced staining risk and eco-friendly edge.
Protective Measures for Skin and Scalp
Before you touch a single chemical, your scalp needs serious backup. Hair dye allergies cause roughly 5% to 7% of all cosmetic reactions in dermatology clinics each year, and p-Phenylenediamine triggers 90% of those cases. A patch test 48 hours before removal cuts severe reaction risk by over 80%. Here’s your shield:
- Patch Test: Apply remover to a small area behind your ear to screen for redness or swelling.
- Barrier Creams: Petroleum jelly or silicone-based protectants along your hairline slash dye stains by 70% to 95%.
- Gloves: Nitrile or latex gloves prevent chemical absorption and sensitization during application.
- Post-Dye Care: Rinse with cool water and baby shampoo, then apply aloe vera gel to soothe irritation.
Safe application means keeping removers at least 1 cm from your scalp and rinsing thoroughly to eliminate 85% of residual irritants.
Setting Up a Safe Work Area
Your mixing zone needs smart setup to protect both you and your space. California’s Board of Barbering and Cosmetology recommends isolating chemical areas from general zones to limit vapor spread. Position your station near a window or exhaust fan—poor ventilation raises salon air contaminants to 3600 µg/m³.
Lay anti-skid mats by sinks to cut slips by 35%. Store removers in cool, sealed containers below 25°C, and keep a fire extinguisher within 10 meters of your workspace to meet code.
How Does Clarifying Shampoo Remove Pink Dye?
Clarifying shampoo works like a reset button for your hair—it strips away buildup, oils, and yes, stubborn pink pigment that clings to your strands.
The process isn’t complicated, but choosing the right formula and using it correctly makes all the difference. Here’s what you need to know about which shampoos work best, how to apply them properly, and how often you’ll need to repeat the process.
Recommended Shampoo Types
When you’re trying to strip out pink pigment, not all shampoos work the same way. Clarifying shampoo with sulfates like sodium lauryl sulfate lifts color fastest—around 25% lighter in three to five washes—because it opens the cuticle and pulls pigment from the cortex.
Chelating shampoos with EDTA or citric acid remove mineral buildup that locks in dye, boosting fade by 15%.
For gentler approaches, sulfate-free or color-safe shampoos combined with warm water offer controlled fading, while protein restoration formulas rebuild structure after aggressive treatments.
Step-by-Step Clarifying Method
Start by wetting your hair thoroughly for at least 30 seconds with warm water—around 37°C to 40°C—to open the cuticle. This preps the strand for deeper pigment lifting.
Here’s your application technique for removing pink hair dye:
- Massage 5–10 mL of clarifying shampoo into saturated hair, concentrating on areas with the darkest pigment for maximum shampoo saturation
- Work the formula for 2–3 minutes in circular motions to activate surfactants and break down dye molecules
- Cover with a plastic cap for heat application, letting it process 10–15 minutes to boost fading by up to 20%
- Rinse thoroughly for 60–90 seconds until water runs clear, then condition with a pH-balanced product
Follow with fading assessment after each wash to track progress.
Frequency and Effectiveness
Plan on clarifying shampoo once per week to balance fading with hair health—overuse beyond three weekly sessions can spike breakage risk by 20%. Semi-permanent pink usually shows 40–60% reduction after 3–6 washes, while permanent dye holds firm at 85% retention even after repeated treatment duration. High porosity hair fades 50% faster than low-porosity strands.
Water hardness and product buildup can slash effectiveness by 20–30%, so consider chelating treatments between hair dye removal methods. For stubborn pigment, alternate with color remover or bleach bath strategies rather than daily clarifying.
Can Vitamin C Treatments Fade Pink Hair?
Vitamin C treatments offer a gentler alternative to harsh chemical removers when you’re trying to fade pink hair dye. The method works by using crushed vitamin C tablets mixed with shampoo to break down dye molecules without the damage of bleach.
Here’s how to mix the treatment, apply it correctly, and protect your hair if it’s already compromised.
Mixing Vitamin C and Shampoo
You’ll need half a cup of clarifying or dandruff shampoo plus 15 to 30 crushed vitamin C tablets—the uncoated kind works best.
Grind the tablets into a fine powder using a mortar and pestle or seal them in a bag and crush with a rolling pin.
Mix everything in a non-metal bowl until you get a thick, spreadable paste. This simple ratio helps the ascorbic acid work as a reducing agent alongside the shampoo’s surfactants, lifting pigment from your hair shaft without harsh chemicals.
Application and Processing Time
Once your paste is mixed, apply it to soaking wet hair from roots to ends using a tint brush or gloved hands. Massage thoroughly, then cover with a shower cap—the slight heat application boosts the fading process.
Let it sit for 30 to 60 minutes, checking progress at the halfway mark. Don’t exceed one hour to avoid dryness. Rinse with lukewarm water, then follow with deep conditioner.
Space treatments 48 to 72 hours apart; most people see results after two to four sessions.
Precautions for Sensitive Hair
If your hair reacts easily to treatments, take extra care with vitamin C methods. Allergic reactions to acidic treatments are rare but possible—patch-test the mixture on your inner arm 24 hours before full application.
Protective measures include diluting the paste with extra conditioner and limiting processing time to 30 minutes maximum. Safe selection means avoiding formulas with added fragrances or preservatives that trigger sensitivities.
Minimizing damage requires deep conditioning immediately after rinsing to restore moisture balance. Avoiding sensitizers like PPD in follow-up color prevents compounding irritation and promotes gentle removal methods focused on hair care rather than aggressive stripping.
Are There Other At-Home Removal Methods?
If vitamin C didn’t fully strip your pink, you’re not stuck with just one option.
A few other household staples can help fade stubborn color when you apply them correctly. Here’s what else you can try before reaching for professional products.
Baking Soda and Shampoo Mix
You can combine baking soda’s alkaline pH with clarifying shampoo to strip pink dye, but proceed with caution. This method works by opening your hair cuticle, allowing trapped pigment molecules to escape during washing.
- Mix equal parts (2 tablespoons each) baking soda and anti-dandruff shampoo in a non-metallic bowl
- Apply to damp hair for 5–10 minutes, then rinse thoroughly with lukewarm water
- Expect 2–4 applications over several days to achieve noticeable color fading
- Follow immediately with deep conditioning treatment to counteract dryness and cuticle damage
Vinegar Hair Mask Technique
White vinegar’s acidic properties—hovering around pH 2.5–3.0—can fade semi-permanent pink by disrupting weak bonds between dye molecules and your hair cuticle.
Mix equal parts white vinegar and warm water (about 100–150 mL for medium hair), saturate thoroughly, and cover with a shower cap for 15–30 minutes. You’ll see moderate fading, especially on porous or freshly dyed hair, but expect to repeat 2–3 times weekly for cumulative results.
Always follow with deep conditioning—vinegar can drop moisture retention by 12% and irritate sensitive scalps if overused.
Sun Exposure and Swimming
Over time, natural exposure works like a slow-release color eraser—UV radiation oxidizes pink pigments while chlorine and saltwater strip protective oils, accelerating fading by 25–40% within two to four weeks. If you’re willing to wait, strategic outdoor activities can lighten stubborn dye without harsh chemicals, though you’ll sacrifice some hair health in the process.
- Saturate hair with fresh water before swimming—it blocks chlorine absorption by up to 50% and reduces saltwater-induced pigment leaching.
- Apply UV-protective sprays or serums with sunflower extract to cut oxidative fading by 20–35%, especially during peak sun hours.
- Rinse immediately after ocean or pool exposure—post-swim conditioning restores moisture and prevents up to 40% of cuticle roughness.
- Wear a swim cap or hat for prolonged outdoor sessions—physical barriers reduce UV fading by roughly one-third over six weeks.
When Should You Use Professional Color Removers?
Professional color removers are a step up from home remedies when pink dye refuses to budge after multiple attempts with gentler methods. These products are designed to reverse oxidative dye molecules without the harshness of straight bleach.
Here’s what you need to know about selecting and using them effectively.
Choosing The Right Remover
You’ll face two primary remover types when targeting professional dye removal techniques. Sulfur-based removers contain sodium hydrosulfite and work best for semi- or demi-permanent pink by reducing dye molecules without touching your natural color—they’re gentler on pre-bleached or fine hair. Bleach-based options rely on hydrogen peroxide and lift up to 90% of stubborn permanent pigment but increase porosity by around 40%.
Check the product pH—it should fall between 4.5 and 6.0 to limit damage. Look for remover ingredients like bond-protecting agents or amino acids if your hair’s already compromised. Always run a strand test 48 hours before full application to gauge lift and assess your hair condition.
How to Apply Color Remover Safely
Before mixing color remover, complete patch testing 48 hours in advance to catch allergic reactions early. Work in a well-ventilated space—sulfur dioxide fumes released during dye removal and correction can irritate your respiratory system. Put on protective gear like gloves and apply petroleum jelly along your hairline to prevent chemical burns.
Follow the manufacturer’s mixing ratios exactly, usually 1:1, to maintain stability and avoid overheating. Keep temperature control between 30°C and 35°C during processing—higher heat swells the cuticle and increases hair damage prevention risks.
These chemical hair processing steps protect your scalp and hair while maximizing dye removal techniques effectiveness.
Is Bleach Bathing Necessary for Stubborn Pink?
When at-home methods and professional removers don’t eliminate every trace of pink, a bleach bath might be your next move. This technique sits between gentle removal and full bleaching, offering a middle ground for stubborn pigment.
Let’s break down how it compares to traditional bleaching, how to mix and apply it correctly, and what risks you need to think about before you start.
Bleach Bath Vs. Full Bleach
If you’re facing stubborn pink that won’t fade with gentler methods, you’ll need to understand the difference between these two hair lightening approaches.
A bleach bath combines bleach powder, low-volume developer, and shampoo—diluting the oxidative power to lift one to three levels while causing roughly 15–20% less hair damage than full bleach. Full bleaching penetrates deeper into the cortex, removing up to seven levels but increasing breakage risk by up to 40%.
For color correction of semi-permanent pink on fragile or previously treated hair, bleach alternatives like bleach baths offer safer chemical risks with controlled results.
Mixing and Applying a Bleach Bath
Precision determines success when you’re mixing a bleach bath to lift stubborn pink. Start by combining bleach powder and a 10–20 volume developer in a 1:1 ratio, then fold in an equal part clarifying shampoo to create a thick, creamy mixing consistency.
Apply the mixture section by section with a tint brush on damp hair, working from ends to roots to prevent uneven lift. Monitor your processing time closely—check every five minutes for tone development, aiming for 10–20 minutes total to avoid excessive hair damage.
Rinse thoroughly once you’ve achieved the desired lightening, then immediately follow with post-bath care using a deep conditioning hair treatment to restore moisture and balance pH levels.
Risks and Safety Considerations
Bleach baths carry real consequences if mishandled. Hair color removers containing bleach can raise porosity and increase hair breakage risk by 25% after a single treatment, while oxidative processes reduce tensile strength by 15–30%.
You’re also facing potential chemical burns, skin irritation, and scalp damage if the mixture contacts your skin too long. Allergic reactions to bleach components affect some users, and repeated treatments within 30 days double your chances of long-term brittleness.
Always wear gloves, avoid overlapping with previous hair dye removal attempts, and never exceed recommended processing times during hair color correction.
What to Do if Pink Dye Won’t Budge?
Sometimes even your best efforts hit a wall, and that stubborn pink refuses to fade. When standard removal methods don’t work, you have two solid options left on the table.
Let’s look at how to move forward when pink dye proves more resilient than expected.
Covering With Semi- or Demi-Permanent Color
When pink tones just won’t lift, you can shift gears and cover them instead of fighting a losing battle. Semi-permanent and demi-permanent color offer smart alternatives that work with—not against—those stubborn pigments. Here’s how shade selection and the color wheel play into your strategy:
- Green-tinted dyes neutralize pink since green sits opposite pink on the wheel, though you’ll likely end up with muted brown or olive tones
- Ash or beige level 7–8 dyes create natural-looking hair color correction by masking remaining pink without over-darkening
- Red or burgundy shades blend pink undertones into warm lowlights, ideal if you want richness instead of neutral
Demi-permanent dyes last 24–28 washes and work well for high-porosity concerns since they deposit pigment gently. Always run a strand test—processing time usually caps at 10–20 minutes to avoid patchiness.
Post-application, use sulfate-free shampoo and weekly hair conditioning treatments to lock in tone and repair damage from earlier removal attempts.
When to Seek Professional Help
Sometimes covering pink isn’t enough—you’ll need a hair stylist when your hair screams for backup. Book a salon visit if you see severe damage signs like less than 50% stretch recovery, patchy discoloration spanning three color levels between sections, or scalp sensitivity lasting beyond 24 hours.
Professional hair dye removal becomes necessary when hair breakage rates hit 10% or fading stalls below 20% after three clarifying washes. Bleach overlap from repeated at-home attempts raises protein loss risk by 40%, and limited elasticity signals overprocessing.
Hair color correction often requires two to three spaced sessions, but salon-grade methods protect hair integrity while lifting stubborn pigment by 70–90%.
How to Care for Hair After Dye Removal
After you’ve stripped that pink from your hair, the real work begins. Your strands have been through the wringer, and they need some serious TLC to bounce back.
Let’s walk through the three key steps that’ll help repair the damage and get your hair feeling healthy again.
Deep Conditioning Treatments
After stripping pink from your hair, deep conditioning treatments become your best defense against dryness and breakage. These formulas boost hydration improvement by up to 65% and restore elasticity by around 32%, reversing damage from harsh removal methods.
Treatment frequency matters—aim for once or twice weekly to rebuild strength without overloading strands. Ingredient efficacy counts too: keratin-rich deep conditioner options repair cuticles, while oils reduce friction.
Long-term effects include smoother texture and healthier hair health restoration within three weeks of consistent hair conditioning and targeted hair treatments.
Repairing Protein Loss and Damage
Chemical removal processes strip more than just color—permanent dyes can increase protein loss by up to 356% compared to untreated hair. Keratin treatments and bond builders reverse this damage by repairing disrupted disulfide and hydrogen bonds within each strand. Amino acids paired with enzyme repair systems restore amide bonds and boost tensile strength by up to 40%, preventing hair breakage.
Focus your protein treatment routine on these approaches:
- Apply hydrolyzed keratin weekly to penetrate the cortex and improve elasticity
- Use bond builders like bis-aminopropyl diglycol dimaleate after every wash
- Choose formulas with serine or transglutaminase enzymes for crosslinking support
- Rotate between protein efficacy boosters and hair conditioning to balance moisture
This targeted hair health restoration strategy cuts breakage by 50% and strengthens heat resistance, supporting long-term hair damage prevention.
Reducing Heat and Chemical Exposure
After dye removal strips your hair, limiting further stress becomes critical. Heat styling above 150 °C reduces tensile strength by 35% and compounds existing damage. Minimize heat by air-drying when possible and keeping tools below 60 °C at 15 cm distance. Apply protective products before any thermal styling to cut direct temperature transfer by 20–30%.
Choose chemical alternatives like semi-permanent dyes over permanent formulas, spacing treatments six to eight weeks apart. Pair hydration treatments with gradual changes in your hair care and maintenance routine, supporting natural hair remedies and safer hair treatment and processing methods after removing hair dye or hair bleaching.
How to Prevent Future Pink Dye Staining
You’ve worked hard to remove pink dye, so it makes sense to protect your hair from future staining headaches.
A few smart choices before you color can save you hours of stripping and damage down the road.
Let’s walk through the preparation steps, product picks, and maintenance habits that keep your hair healthy and your color easy to manage.
Pre-Dye Hair Preparation Tips
Before you dye your hair next time, think about porosity equalization. Test your hair’s moisture balance and apply a protein boost if it’s damaged—this prep work reduces pigment absorption by up to 25%.
Protect your scalp with barrier serums, work in a well-ventilated space, and make sure your hair type is properly conditioned.
Smart hair care and maintenance now means easier color removal later.
Choosing Easily Removable Dyes
If you want less drama during color removal, start by thinking about dye composition and pigment size. Semi-permanent dyes with larger pigment molecules stay on the surface and fade faster—usually losing 60–80% intensity in ten washes. Temporary dye washes out in one to three shampoos, giving you maximum flexibility.
Market trends show 60% of at-home users now prefer semi-permanent dye for reversible effects. Check wash resistance claims and opt for plant-based formulas that fade 40% faster than synthetic options.
Best Practices for Long-Term Hair Health
Your hair thrives when you treat it like a garden—consistent care beats occasional rescue missions. Strong hair nutrition with 45 g daily protein aids keratin production, while zinc and B vitamins prevent thinning. Scalp care through weekly cleansing removes buildup without stripping oils. Healthy habits make all the difference:
- Damage repair routines: Alternate deep conditioner and protein treatments weekly for 30% stronger strands.
- Gentle styling practices: Limit heat tools to twice monthly and use moisturizing shampoo to preserve integrity.
- Environmental protection: Shield hair from UV and chlorine, which degrade melanin and weaken fibers.
These hair care tips after dye removal help prevent future dye stains while maintaining elasticity.
Frequently Asked Questions (FAQs)
How long should I wait before trying a hair dye remover?
Patience isn’t just a virtue—it’s damage prevention. Wait at least 2 weeks before attempting hair dye removal methods.
This waiting period allows your cuticle recovery and reduces scalp sensitivity, minimizing color patchiness and breakage risks that come from removing hair dye prematurely.
Is it safe to use a color remover kit on my hair?
Color remover kits are generally safe when used correctly, but they carry risks. The sulfur-based ingredients can irritate your scalp and weaken hair structure, reducing tensile strength by up to 30%. Always perform a patch test 48 hours beforehand to check for allergic reactions.
Are there any risks associated with a bleach bath?
A stylist once left bleach on too long, causing her client’s scalp to blister and peel—a chemical burn requiring medical care. Bleach baths carry real risks: scalp chemical burns affect roughly 5% of users, protein loss can reach 50%, and hair fragility increases dramatically. Follicle damage may cause permanent hair loss, while allergic dermatitis occurs in about 5% of cases.
Bleach baths cause scalp burns in 5% of users, can trigger 50% protein loss, and risk permanent follicle damage alongside allergic reactions
Hair breakage, cuticle peeling, and moisture loss are common. Always protect your scalp, monitor processing time, and condition deeply after bleach bath treatments to minimize hair dye removal risks.
How long between removal attempts to avoid damage?
Wait at least two weeks between removal attempts to allow cuticle recovery and proper damage assessment.
For severely compromised hair showing high porosity or breakage, extend treatment intervals to four to six weeks, supporting regrowth promotion and minimizing hair dye removal risks.
Will pink dye transfer to clothes or pillowcases?
Yes, pink dye stains fabrics frequently—especially when hair’s wet. Water loosens hair pigments, causing dye transfer to pillowcases and clothing.
Prevention effectiveness improves considerably with petroleum jelly barriers, cold-water rinses, and color-depositing conditioner to seal cuticles and minimize fading hair color bleeding.
Can I swim in chlorinated pools after removal?
You can swim after removing pink dye, but your hair’s post-removal porosity greatly increases chlorine absorption rates.
Wait at least two weeks and use swim caps (reducing chlorine absorption by 70%) plus pre-swim treatments for damage mitigation and hair breakage prevention.
Conclusion
Getting pink hair dye out of hair is like trying to coax a cat out from under the bed—it takes patience, the right approach, and sometimes multiple attempts before you see results.
The techniques you’ve learned offer a range of options, from gentle vitamin C treatments to more aggressive bleach baths, each suited to different dye types and hair conditions.
Success depends on understanding your hair’s porosity, choosing methods that match your situation, and committing to proper aftercare that rebuilds what the removal process strips away. Your hair’s health always matters more than speed.
- https://trademarksalon.com/semi-permanent-vs-permanent-hair-color/
- https://arcticfoxhaircolor.com/blogs/news/how-to-get-pink-out-of-hair
- https://www.lorealparisusa.com/beauty-magazine/hair-color/hair-color-tutorials/how-to-get-back-to-your-natural-hair-color
- https://pmc.ncbi.nlm.nih.gov/articles/PMC10232955/
- https://www.hairdyeforum.com/bleaching-lightening-hair/getting-red-pink-out-of-bleached-hair/

