This site is supported by our readers. We may earn a commission, at no cost to you, if you purchase through links.

A messy neckline can wreck an otherwise solid beard. Most guys spend time shaping the sides and front, then rush the neck—and that one sloppy edge drags the whole thing down. The frames your face more than any other part of the beard.
Get it wrong, and even a full, healthy beard reads as unkempt. Get it right, and a short beard can look sharper than a long one twice its size. The line you draw below your jaw controls how your beard sits, how your jaw looks, and how polished your overall appearance comes across.
Knowing how to shape your beard neckline correctly takes about ten minutes—once you know exactly where to look and what to do.
Table Of Contents
- Key Takeaways
- How to Shape Beard Neckline
- Find Your Natural Beard Neckline
- Prepare Before Trimming
- Trim The Beard Neckline
- Fade Your Beard Neckline
- Top 6 Beard Neckline Tools
- Avoid Common Neckline Mistakes
- Maintain Your Beard Neckline
- Frequently Asked Questions (FAQs)
- How often should I trim my beard neckline?
- What are some common mistakes to avoid when trimming my beard neckline?
- How do I maintain a consistent neckline between trims?
- How should a neckline transition with sideburns?
- What impact does face shape have on neckline style?
- Is it necessary to fade the neckline into the beard?
- How do hair thickness variations affect neckline trimming?
- Are there specific products for reducing neckline irritation?
- How often should I trim my neckline?
- Can I fix an over-trimmed neckline quickly?
- Conclusion
Key Takeaways
- Place your neckline two fingers above the Adam’s apple and follow a soft U-curve — never a straight line, never on the jawline itself.
- Trim dry hair only, comb it down first, and use good lighting with two mirrors so you actually see what you’re cutting.
- Move from center outward in short passes, check symmetry after every few strokes, and finish below the line with a razor for a clean edge.
- Touch up every 3–7 days using the same guard, mirrors, and lighting each time — consistency is what keeps the line sharp.
How to Shape Beard Neckline

Your neckline does more for your beard than most guys realize. Get it wrong and even a full, healthy beard can look unkempt.
A clean neckline is the foundation of a polished beard — and this guide on how to shave a neckbeard properly shows you exactly where to draw the line.
Here’s what you need to know before you pick up a trimmer.
Why Neckline Shape Changes The Entire Beard Look
Your neckline does more than end your beard — it frames your entire face. A symmetrical neckline sharpens your jawline and balances your cheek lines. Get it wrong, and light reflection exposes every flaw.
Visual balance shifts fast: a beard line too high compresses face proportions, while the right natural-looking faded neckline adds fullness. Hair density and psychological perception do the rest.
Difference Between a Clean Neckline and Natural Neckline
Two styles, two different jobs. A clean neckline delivers sharp skin-beard contrast — crisp, structured, photo-ready. A natural beard neckline softens that edge, prioritizing growth hiding over precision.
- Sharpness vs softness — clean cuts hard, natural blends easy
- Symmetry demands — clean styles need frequent touch-ups
- Styling adaptability — natural suits low-maintenance routines
- Natural looking faded neckline — sits lower, hides regrowth longer
Best Neckline Shape for Short, Medium, and Long Beards
Beard length drives every neckline decision. A short beard needs a tight U-curve sitting 1–2 finger widths above the Adam’s apple — any lower, and it looks sloppy. Medium beards want a softer arch. Long beards need a deeper pocket to preserve volume.
| Beard Length | Neckline Shape | Guard Length Ratios |
|---|---|---|
| Short (under 1 cm) | High, tight U-curve | No guard or 1–2 mm |
| Medium (1–3 cm) | Defined arch, blended | 3–6 mm |
| Long (4+ cm) | Deep V-pocket, natural | 6–10 mm |
| Round face | Higher placement | 1–3 mm |
| Square face | Lower, fuller frame | 4–8 mm |
Face Shape Matching matters too — rounder faces benefit from a higher line. Hair Growth Patterns affect how quickly that line blurs, so use Symmetry Checking Techniques after every session.
When to Trim Your Neckline Yourself Versus Visiting a Barber
Knowing your beard length helps, but so does knowing your limits.
DIY beard neckline shaping works fine for small touch-ups — stubble growing 2–5 mm past your line, nothing more.
Factor in your Growth Rate, Skin Sensitivity, and Tool Availability.
Patchy Growth or major reshapes? Leave that to a professional barber.
Budget Constraints aside, beard grooming experts handle what mirrors and steady hands can’t.
Find Your Natural Beard Neckline
Before you grab that trimmer, you need to know exactly where your neckline belongs. Get this wrong, and even a well-groomed beard will look off.
Here’s how to find the right spot.
Use The Two-finger Rule Above The Adam’s Apple

Here’s the move that keeps everything honest: place two fingers flat above your Adam’s apple, press lightly, and hold them level. That’s your boundary. This two-finger rule gives you instant finger width calibration without guesswork.
Keep your jaw relaxed — jaw tension check matters because skin shifts when you’re tense. Use the mirror symmetry technique to confirm both sides match before you ever start trimming.
Locate The Lowest Point of The Neckline

Once you’ve set your two-finger position, that top edge becomes your Adam’s Apple marker — the exact center point marking for your entire neckline. From there, use this process to nail it:
- Feel for the neck skin fold where jaw meets throat.
- Use one finger as your finger width gauge.
- Check mirror angle alignment from front and 45 degrees.
- Confirm it’s neck skin — not jaw skin — below the mark.
Visualize a Soft U-shape Under The Jaw

Picture a shallow smile hanging under your jaw — that’s your soft U shape.
It shouldn’t dip too low or point like a V.
Use facial contour mapping: let the curve follow your natural hair flow alignment, staying consistent side to side.
Depth perception cues from light shadow contrast help reveal the true curve.
| Zone | Guide |
|---|---|
| Center (chin) | Highest point of the U |
| Left corner | Sweeps upward toward ear |
| Right corner | Mirrors the left exactly |
| Throat area | Stays above Adam’s apple |
| Overall shape | Smooth, never angular |
Comb down first. Head tilt adjustment — chin slightly down — makes visualizing and drawing beard guide lines easier.
That shadow line where dense hair meets bare skin? That’s your beard shaping guideline telling you exactly where the U belongs.
Check The Side Profile Before Trimming

Your front mirror only tells half the story. Before you trim, grab a handheld mirror and check your side profile — this is where ear alignment and jawline reference actually show up. Use consistent lighting on both sides.
Turn your head slowly left and right, watching for movement symmetry. One side riding higher than the other means you adjust before the trimmer ever touches skin.
Avoid Placing The Neckline Directly on The Jawline

The jawline isn’t your neckline — that’s the golden rule every barber will drill into you. Touch that natural jawline with your trimmer and suddenly your beard looks chopped, not shaped. Instead, follow the Neck Hollow Reference and let the Soft U‑Curve Guidance pull your line lower.
Your neckline belongs below the jaw, not on it — trim there and your beard looks chopped, not shaped
- Stay inside the Neckline Clearance Zone — below the jaw, not on it
- Use a Jawline Avoidance Buffer so hair continues under the chin
- Reference the neck hollow for Gradual Fade Edge placement
- Never use jawline contouring or cheek lines as your baseline
Prepare Before Trimming

Before you pick up the trimmer, a few quick steps will save you from mistakes that are hard to fix. Getting this right doesn’t take long — it just takes the right setup.
Here’s what to do before you start cutting.
Trim Only When The Beard is Completely Dry
Always do your dryness check before you touch the trimmer. Wet hair clumps together and looks longer than it really is — so your neckline trimming technique gets thrown off the moment the hair dries.
Dry trimming benefits are simple: dry hair separates cleanly, your guard reads true length, and you cut what you actually see. No guessing, no stubble shadows, no skin irritation from uneven passes.
Wash The Beard and Neck Area First
Before you trim, wash up. A Warm Water Rinse softens the hair and opens up the skin beneath. Follow it with a beard shampoo or facial cleanser — work it in with a Neck Massage for about 20–30 seconds.
A Light Conditioner helps if your beard tangles. Then Pat Dry completely. Damp hair lies flat and hides your true neckline.
Comb Beard Hair Downward Before Shaping
Once the beard is dry, grab your comb before anything else. The Downward Comb Technique straightens lifted or wavy hairs so your beard trimmer reads the true length — not a flared-out illusion.
Here’s what proper combing does:
- Uneven Edge Prevention — flat hair exposes hairs crossing your trim path
- Guard Contact Accuracy — the guard sits evenly against aligned strands
- Hair Alignment Benefits — consistent direction stops one side from reading longer
- Comb Motion Tips — short downward strokes near the neckline, light grip, no sideways fanning
Use Good Lighting and Two Mirrors
Good combing sets up your eye — but only if you can actually see what you’re doing. Mirror Angle Setup matters more than most guys think.
Use a wall mirror plus a handheld mirror for Side Mirror Symmetry. Position bright white LED light slightly above eye level — Even Lighting Placement kills jaw shadows that trick you.
| Setup Element | Why It Works |
|---|---|
| Wall + handheld mirror | Catches both front and profile angles |
| White LED above eye level | Removes misleading shadows under jaw |
| Dry Beard Illumination check | Reveals true stubble edges clearly |
Same lighting every session — Lighting Consistency Schedule keeps your neckline honest.
Choose The Right Trimmer Guard Length
Now that your lighting is dialed in, your trimmer guard is next.
Guard Size Matching starts simply: short beards need 0.5–2 mm guards, medium beards suit 2–3 mm, and longer beards want 3–5 mm.
Watch out for Guard Brand Variations — a "2" on one trimmer isn’t always 2 mm on another. Check the stamped millimeter rating first.
Trim The Beard Neckline

Now it’s time to actually put the trimmer to work. The steps below are straightforward, but the order matters — skip one and you’ll likely end up fixing a mistake instead of finishing a clean line.
Follow each step and you’ll have a sharp neckline without second-guessing yourself.
Start at The Center Above The Adam’s Apple
Your Adams Apple is the anchor — start every trim there. Place your trimmer directly above it for perfect center alignment, keeping the blade parallel to your skin.
Use light pressure guidance so you control exactly how much neck hair trimming happens. Do a quick mirror check before moving anywhere else.
Get this center point right, and everything else follows naturally.
Move Outward Toward Each Ear
From the center point, angle your clipper outward — one side at a time. Keep your pass length to about 1–2 cm per sweep.
Use your ear as a reference point: stop where the jawline curves upward toward it.
Short passes maintain U-shape consistency on both sides. Do a quick symmetry check before switching sides.
That’s how you get clean jawline definition without guessing.
Follow The Natural U-shaped Guide Line
Think of the U-shaped line as your beard’s foundation — get it wrong and everything above it suffers.
Use finger placement precision for comb-guided contour, following the natural dip from ear-level landmarks down to center.
Skin tension control keeps the line clean as you guide along the U-curve symmetry.
Trust the shape your face already gives you.
Trim Slowly to Keep Both Sides Even
Speed is the enemy of symmetry. Keep your pass length control tight — move in 5–10 mm strokes, not long sweeps. Use the center outward method, trimming one side, then matching the other. A handheld mirror catches what your wall mirror misses.
- Symmetry verification: Stop every few strokes to compare both sides
- Guard switching rhythm: Switch guards on both sides simultaneously, never one at a time
- Micro adjustments: Correct in 0.5–1 mm increments, then recheck before continuing
Clean The Skin Below The Neckline With a Razor
The trimmer gets you close. A beard razor takes you the rest of the way.
Apply a thick lather below the line — Lather Consistency matters more than most guys think. Use downward strokes with Shave Angle Control: shallow, not steep. One or two passes. Rinse the blade often for proper Razor Blade Hygiene.
| Step | What to Do |
|---|---|
| Prep skin | Wash and lather below the neckline |
| Blade angle | Hold shallow — let it glide |
| Stroke count | One to two passes max |
| Rinse blade | Clear it after every stroke |
| Aftercare | Cool water, then moisturizer |
Pat dry, then hit the area with an alcohol‑free lotion. That aftercare routine provides Post‑Shave Soothing and keeps skin irritation prevention working in your favor. This lets you shave cleanly without wrecking the skin underneath.
Recheck Symmetry From The Front and Side
Both sides lie. That’s why Symmetry Timing matters — check after every pass, not just at the end.
Stand straight, head level. Use a handheld mirror for Profile Curve Verification on each side.
Apply Finger Gap Measurement to confirm even height left and right. Mirror Angle Check under consistent Lighting Consistency catches what your eye misses.
Beard line symmetry doesn’t happen by accident.
Fade Your Beard Neckline

A sharp line works great, but sometimes a fade looks cleaner — especially if your beard transitions into shorter hair on the neck.
Getting it right just takes the correct guard sequence and a little patience. Here’s how to do it step by step.
When a Faded Neckline Looks Better Than a Sharp Line
Not every beard needs a hard edge. If you’re dealing with patchy growth camouflage needs or jawline definition softening, the beard fade technique wins every time.
A natural beard fade blends stubble gradually upward — the stubble gradient benefits here are real: less contrast, fewer flaws visible.
It’s also a visual neck extension trick and offers serious low maintenance appeal versus sharp or rounded edges.
Start With The Lowest Guard Near The Neck
Now that you know a fade beats a sharp line in the right situations, here’s where it actually starts: the bottom.
Set your lowest guard at the neck base and work the guard edge alignment flat against the skin.
Pressure consistency matters — press too hard and you cut past your guard. One clean pass. Confirm the border. Then stop.
Use Higher Guards as You Move Upward
Once your lowest guard finishes the base strip, step up one guard size and trim the next half-inch upward. That’s the Guard Ladder Technique — and it’s how you get Gradual Length Change without harsh lines.
Each guard size progression keeps more hair higher up, which manages Skin Exposure Reduction naturally.
Think of it as U-Shape Blending built into every pass. Mistake Minimization follows automatically.
Blend The Neckline Into The Main Beard Length
Once the guard ladder gets you close, the real work is blending. This is where the Guard Gradient Technique pays off — overlapping passes with Feathered Shift Strokes soften any hard edge left behind.
- Follow Hair Grain Alignment — always trim with the growth direction
- Use the clipper fade technique with light, overlapping strokes
- Run a Blend Symmetry Check on both sides before finishing
- Apply Layered Fade Timing — pause between passes to reassess
- Stop blending 1–2 cm above the neckline to protect main beard length
That’s how fading the beard neckline for a natural look actually works — trim bulk and blending lengths meet in the middle, no harsh line left behind.
Keep Fade Sections Small for Better Control
Smaller is smarter when you fade your beard neckline. Use Micro Guard Steps — move the adjustable guard up just one or two sizes at a time.
Each Incremental Length Adjustment keeps your Narrow Fade Band tight and your Precise Shift Zones clean.
The Gradual Blend Technique and clipper fade technique only work when you stay in control of a precision trimmer, one small section at a time.
Ask a Barber for Very Short or Detailed Fades
Some fades are better left to a pro. If you want a skin fade or a very detailed neckline on a short beard, bring a reference photo and tell your barber exactly where you want the fade height to start.
Walk them through your desired contrast level and ask for a guard ladder explanation. That clear communication turns professional beard fading from guesswork into precision.
Top 6 Beard Neckline Tools
The right tools make neckline shaping a lot less frustrating. You don’t need a full barber cart — just a few solid picks that do their job well.
Here are the six worth keeping in your kit.
1. Isner Mile Beard Grooming Kit

The Isner Mile Beard Grooming Kit packs everything a beginner needs into one compact box.
You get shampoo, oil, balm, a boar-bristle brush, wooden comb, stainless-steel scissors, and a travel pouch — all for under $20.
The brush distributes oil evenly, the comb aligns hairs before trimming, and the scissors handle detail work around your neckline.
It’s not a professional-grade setup, but for daily maintenance and clean touch-ups, it covers the basics without overthinking your shopping list.
| Best For | Guys just starting out with beard care who want a solid all-in-one kit without spending a lot. |
|---|---|
| Product Type | Complete Grooming Kit |
| Primary Use | Beard care & grooming |
| Scent Profile | Unscented/Sandalwood |
| Portability | Travel pouch included |
| Skill Level | Beginner-friendly |
| Price Range | $19.97 |
| Additional Features |
|
- Everything you need in one box — oil, balm, shampoo, brush, comb, scissors, and a travel pouch
- Under $20 makes it a no-brainer gift for birthdays, Father’s Day, or the holidays
- The travel pouch keeps things tidy whether you’re at home or on the road
- A few buyers got shipments with missing items, so it’s worth checking the box when it arrives
- The scent is marketed as unscented but leans sandalwood, which won’t be everyone’s thing
- The razor and some extras feel more like bonus items than tools built to last
2. Philips Norelco Multi Groomer Kit for Men
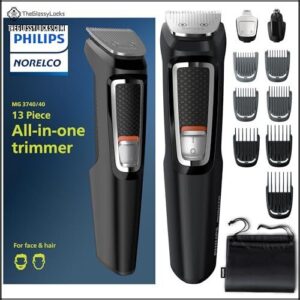
The Philips Norelco Multi Groomer Kit for Men is the workhorse of home grooming kits. It comes with 13 pieces — covering beard, nose, ear, and body trimming — all driven by self‑sharpening steel blades that never need oil.
The waterproof design makes cleanup simple: just rinse it under the tap.
You get a solid 60 minutes of battery life per charge.
One slide switch feels clunky compared to push‑button trimmers, but the performance more than makes up for it.
| Best For | Anyone who wants one kit to handle all their grooming needs — beard, nose, ears, and body — without a lot of fuss or upkeep. |
|---|---|
| Product Type | Multi-Tool Trimmer |
| Primary Use | Trimming & cutting |
| Scent Profile | None |
| Portability | Storage bag included |
| Skill Level | Intermediate |
| Price Range | Mid-range |
| Additional Features |
|
- 13 pieces cover basically every grooming job you can think of
- Self-sharpening blades mean zero maintenance — no oiling, no hassle
- Waterproof build makes cleanup as easy as a quick rinse
- The slide switch feels outdated compared to a simple push-button
- The storage bag is flimsy and probably won’t last long
- It trims, but won’t give you a clean shave — you’ll need a razor for that
3. Philips Norelco Multigroom 5000 Grooming Kit
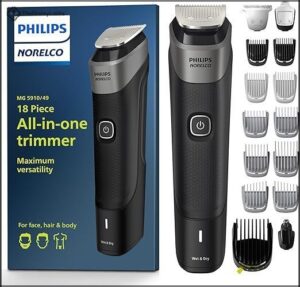
Want one kit that covers everything from your neckline to your nose hairs? The Multigroom 5000 delivers exactly that.
All 18 pieces — beard trimmer, precision trimmer, nose and ear trimmer, body guards — run off the same handle. The titanium-coated, self-sharpening blades stay sharp without oil.
You get up to 3 hours of cordless runtime on a single charge. Heads rinse clean under the tap.
Light at 2.47 oz; it won’t tire your hand mid-trim.
| Best For | Anyone who wants one no-fuss kit to handle beard, body, and nose trimming without juggling a drawer full of tools. |
|---|---|
| Product Type | Advanced Trimmer System |
| Primary Use | Full-body trimming |
| Scent Profile | None |
| Portability | Soft bag included |
| Skill Level | Intermediate |
| Price Range | Mid-range |
| Additional Features |
|
- 18 attachments cover basically every grooming need from head to toe — all on one handle
- Self-sharpening, titanium-coated blades mean zero oiling and consistent cuts over time
- Up to 3 hours of runtime plus washable heads makes it easy to use and clean
- No charging dock or stand — just a soft bag, which isn’t ideal for counter storage
- Wall adapter isn’t included, and some users have run into issues with the USB cable
- The on/off button sits on the back of the handle and can get bumped mid-trim
4. Beard Shaping Comb Tool

Getting your lines straight without a barber nearby? A beard shaping comb tool makes that easier.
This lightweight guide — barely 0.63 oz and just 0.19 inches thin — gives you a physical reference for your neckline, cheek line, jaw, and sideburns.
It works with any razor or trimmer you already own. Multiple edge styles let you switch shapes by repositioning the guide.
It won’t replace skill, but it removes a lot of guesswork, especially when you’re still learning your angles.
| Best For | Anyone learning to shape their own beard at home who wants cleaner lines without booking a barber every few weeks. |
|---|---|
| Product Type | Beard Shaping Tool |
| Primary Use | Line-up guidance |
| Scent Profile | None |
| Portability | Fits any travel bag |
| Skill Level | Beginner with learning curve |
| Price Range | Budget-friendly |
| Additional Features |
|
- Works with whatever razor or trimmer you already have — no extra gear needed
- Multiple edge styles in one tool, so you’re not locked into one look
- Light and slim enough to toss in a travel bag and forget about until you need it
- Takes some practice to get the positioning right — it won’t do the work for you
- Doesn’t cut hair itself, so you still need a separate razor or trimmer
- May not suit every beard style or face shape, depending on what you’re going for
5. Viking Revolution Sandalwood Beard Oil

A sharp neckline looks great. But dry, itchy skin underneath? That’s a problem no trimmer can fix.
Viking Revolution Sandalwood Beard Oil addresses this issue. A few drops of its argan and jojoba oil blend absorbs fast, leaving no greasy residue and preventing transfer onto your collar. It softens the beard, calms post-shave irritation, and maintains healthy skin underneath.
The sandalwood scent is warm and subtle. At $7.90 for 3.2 oz, the product offers long-lasting value.
| Best For | Anyone with a dry, itchy beard who wants a simple, affordable daily oil that conditions without leaving a greasy mess. |
|---|---|
| Product Type | Beard Oil |
| Primary Use | Conditioning & softening |
| Scent Profile | Sandalwood |
| Portability | Compact 3.2 oz bottle |
| Skill Level | Beginner-friendly |
| Price Range | ~$7.90 |
| Additional Features |
|
- Argan and jojoba oils absorb fast and actually moisturize the skin underneath, not just the hair
- Warm sandalwood scent is subtle enough for everyday wear without being overpowering
- At $7.90, a little goes a long way — great value for the price
- The sandalwood scent won’t work for everyone, and it can feel mild to those who prefer something stronger
- 3.2 oz runs out quicker if you’ve got a thick or long beard
- Too many drops and you risk that oily transfer onto your shirt collar
6. Honest Amish Beard Balm Conditioner

Beard oil treats the skin. Beard balm treats the hair itself — and that’s where Honest Amish Beard Balm earns its spot.
Rub a small amount between your palms and work it into your beard, focusing on the neckline area. The blend of argan, avocado, and shea butter softens coarse hairs and lays them flat, making your neckline shape cleaner and easier to maintain.
At $11.43 for 2 oz, it’s solid daily conditioning with a subtle cedarwood-spice scent.
| Best For | Guys with coarse, wiry, or itchy beards who want daily conditioning without a greasy feel. |
|---|---|
| Product Type | Beard Balm |
| Primary Use | Moisturizing & styling |
| Scent Profile | Cedarwood, anise, clove |
| Portability | Compact 2 oz tin |
| Skill Level | Beginner-friendly |
| Price Range | $11.43 |
| Additional Features |
|
- All-natural, organic ingredients — no synthetics or mystery chemicals
- Softens rough hairs and kills beard itch and flaking
- A little goes a long way, so the small tin lasts longer than you’d think
- Very light hold — won’t tame a wild or longer beard on its own
- Can get soft and runny in warm temps, so storage matters
- The anise and clove scent is subtle but noticeable — not for everyone
Avoid Common Neckline Mistakes

Most neckline problems don’t come from bad tools — they come from easy-to-avoid habits. Knowing what goes wrong is half the battle.
Here are the seven mistakes that trip people up most often.
Shaving The Neckline Too High
Trimming too high is one of the most common mistakes when trimming beard neckline — and it costs you more than you’d think. You lose the neck shadow that makes your beard look full, expose patchy upper neck growth, and create a too angular jawline.
Fix it by following proper guidelines for beard neckline height. Recovery means an extended regrowth period of several weeks.
Cutting a Straight Horizontal Line
A straight horizontal line is just as damaging as going too high. Your jaw curves — your neckline should, too. A flat cut fights your face shape and looks unnatural, like someone drew it with a ruler.
Watch for these mistakes when trimming the beard neckline:
- Keeping the blade angle flat instead of following your jaw’s curve.
- Ignoring skin tension, which distorts how straight the line actually sits.
- Expecting edge crispness without using proper razor technique and a sharp blade.
- Skipping after-shave soothing, leaving irritated skin along the cut.
Use a beard trimmer with your beard shaping tool to trace a soft U-curve. Follow the guidelines for beard neckline height — never a ruler-straight horizontal line.
Trimming Too Close to The Jawline
Cutting right up to the jawline is a trap. That tiny buffer below the jaw isn’t extra hair — it’s your margin for error. Without it, skin irritation risks spike, ingrown hair prevention becomes harder, and symmetry challenges multiply quickly.
Your beard neckline needs room to breathe. Shave too close and stubble returns rough within 48 hours, forcing constant touch-ups.
Removing Too Much Beard Under The Chin
Here’s a mistake that sneaks up on you fast. When you trim too high or too low under the chin, you reduce Under‑Chin Density — and that bare strip creates Contrast Ratio Issues that photographs brutally expose.
The Hair Growth Cycle means recovery takes weeks, not days.
Visual Symmetry Checks reveal the problem quickly: look eye‑level and see if a gap forms.
The Impact of OverTrimming Beard Neckline is a narrowed, hollow look instead of a full natural jawline.
Using Dull Razors or Dirty Trimmers
A dull blade doesn’t just cut poorly — it tears. Blade Sharpness Effects show up immediately as jagged, uneven neckline edges and razor burn. Clogged Trimmer Problems are just as bad; dirty blades skip strands, leaving inconsistent density. Both are major Skin Irritation Triggers.
Follow basic Cleaning Maintenance Tips: brush your trimmer after every use and replace razor blades the moment they tug.
Rushing Without Checking Both Sides
Speed is the enemy of symmetry. Rapid Stroke Errors compound fast — Pressure Imbalance makes one side cut shorter, while Guard Angle Drift tilts your trimmer without you noticing. One‑Side Bias locks in early mistakes. Mirror Angle Omission hides all of it.
- Stop after each section — center, mid, near ear
- Check front and side profile every time
- Apply equal pressure on both passes
- Never "match" the second side without verifying the first
Over-trimming While Growing a Full Beard
Growing a full beard demands one thing most guys underestimate: Psychological Patience. Trim the neckline too often, and Hair Density Loss compounds quickly — your Growth Rate Impact stalls before thickness arrives.
| Over-Trimming Risk | Better Strategy |
|---|---|
| Guard Size Strategy too short | Stay one guard size higher |
| Regrowth Timeline disrupted | Wait 2–4 weeks between cuts |
| Neckline creeps upward | Follow Guidelines for Beard Neckline Height |
| Common Mistakes When Trimming Beard Neckline | Check density before shaping |
| Impact of OverTrimming Beard Neckline | Maintaining Beard Neckline While Growing a Beard means trimming less |
Let it breathe.
Maintain Your Beard Neckline

Getting the neckline right is only half the job — keeping it that way is where most guys slip up. Maintenance doesn’t have to be complicated, but it does needs to be consistent.
Here’s what to stay on top of.
Touch Up The Neckline Every 3–7 Days
Your neckline doesn’t need a full reset every time — just a light pass trimming the new growth every 3–7 days, keeps it sharp. That’s your beard trimming schedule sweet spot.
Use quick mirror alignment front and side, before you touch anything.
After neck hair trimming, rinse and apply post‑trim hydration to avoid irritation.
Consistency beats correction every time — that’s solid over‑trim prevention built into your grooming routine.
Adjust Frequency Based on Hair Growth Speed
Not everyone’s beard runs on the same clock. Your hair growth pattern sets the rules — not a calendar.
- Fast Growth Touchups: Stubble back in 2–3 days? Trim every 2–3 days.
- Slow Growth Gaps: Still sharp after a week? Wait 5–7 days.
- Growth Rate Tracking: Log your hair regrowth period across 2–3 cycles.
- Seasonal Frequency Changes: Summer heat speeds things up — adjust accordingly.
- Guard Length Adjustments: Fast growers should bump up one adjustable length setting to avoid over-cutting.
Use Moisturizer After Shaving The Neck
Your razor just finished the job — now your skin needs something back.
Moisturizer timing matters here: apply within one to five minutes while skin is still slightly damp. This locks in hydration and helps skin barrier repair fast.
For irritation prevention, use a fragrance-free formula with glycerin or ceramides. Pat it on gently — don’t rub. That’s solid shaving aftercare, full stop.
Keep Short Beard Necklines Sharper
Short beards demand precision. Every millimeter shows.
Keep your neckline tight with these five habits:
- Micro trim every 3–5 days — don’t wait for regrowth to blur the line
- Use a precision trimmer with clean, sterilized blades for consistent results
- Refine your lighting angle — side lighting reveals unevenness fast
- Monitor your growth pattern and adjust the curve, never raise it
- Choose sharp versus rounded edges — avoid a rounded beard neckline for a sharper look
Let Long Beard Necklines Grow Lower
Long beards play by different rules. While short beards need a tight, high line, a long beard benefits from letting the beard neckline sit lower — supporting balancing volume under the chin.
Use this guide for growth cycle timing and gradual length reduction:
| Beard Length | Neckline Position | Maintenance Approach |
|---|---|---|
| Short (under 1 in) | Just above Adam’s apple | Trim every 3–5 days |
| Medium (1–2 in) | 1–2 cm below jawline | Trim every 5–7 days |
| Long (2–4 in) | Natural hang point | Shape every 7–10 days |
| Full (4+ in) | Low U-curve | Occasional clean-up only |
| Growing out | Leave it alone | No neckline shaving |
Lower placement prevents that disconnected "bib" look. Apply beard balm for adjustment styling — it helps the line blend softly. Keep skin below the line clean for skin irritation prevention, but don’t over-scrub. Good beard maintenance here means doing less, not more.
Reassess Neckline Shape as Your Beard Grows
Your beard isn’t static — and your neckline shouldn’t be either. Growth pattern tracking keeps you ahead of the mess. Check these three things every trim cycle:
- Mirror angle verification — look straight ahead, not chin-up
- Posture impact — head-forward stance shifts the line lower than it really is
- Incremental adjustment steps — move 1–2 mm at a time, never big jumps
Seasonal density shifts change how your neckline reads month to month. Reassess it.
Fix a Neckline Shaved Too High by Regrowing It
Shaving too high happens — don’t panic. Stop trimming the neckline completely and let regrowth run its course.
The regrowth timeline is roughly two to four weeks for visible coverage. Meanwhile, use blending techniques with longer guards to soften the gap.
Moisturize daily for skin healing and skip alcohol-based products. Patience strategies win here: small steps, slow corrections, full recovery.
Frequently Asked Questions (FAQs)
How often should I trim my beard neckline?
Trim your beard neckline every 3–7 days for the sharpest look. Fast growers need touch-ups every 2–4 days. Slow growers can stretch to 10–14 days comfortably.
What are some common mistakes to avoid when trimming my beard neckline?
Most guys ruin their neckline before the trimmer even touches skin. Wrong blade angle, inconsistent hand pressure, and overlooking the growth pattern are the quiet culprits.
Skipping moisturizer application and ignoring skin irritation only make it worse.
How do I maintain a consistent neckline between trims?
Consistency is the old barber’s secret. Touch up your neckline every 3–7 days.
Use the same guard, lighting, and mirror placements each time to keep trimming the beard neckline sharp and symmetrical.
How should a neckline transition with sideburns?
sideburn blend angle should follow a diagonal, not a sharp drop.
Use guard stepping — one size down as you near the neckline — then finish with a feathered edge for a clean gradient curve.
What impact does face shape have on neckline style?
Your face shape drives everything.
A round face needs a lower neckline for length.
Square jaws want a soft curve.
Oval faces stay balanced either way.
Long faces need it higher.
Heart shapes need chin fullness.
Is it necessary to fade the neckline into the beard?
No, fading isn’t mandatory. A sharp neckline works fine.
But if you want beard blending that looks smooth, fading the beard neckline softens the boundary and improves visual proportion benefits naturally.
How do hair thickness variations affect neckline trimming?
Hair thickness changes everything. Coarse hair handling needs extra passes. Sparse zone blending means going lighter near thin spots. Always do a density symmetry check on both sides before finishing.
Are there specific products for reducing neckline irritation?
Yes. A barrier balm, anti-itch moisturizer, or fragrance-free conditioner soothes neckline irritation fast.
Post-shave soothing with an aftershave moisturizer prevents stinging.
Use an ingrown hair treatment or gentle exfoliant weekly to stay clear.
How often should I trim my neckline?
Trim every 3–7 days as part of your beard maintenance routine. Fast growers need guard trim frequency checks sooner.
Your personal comfort threshold and skin irritation management guide the schedule better than any fixed trim guide.
Can I fix an over-trimmed neckline quickly?
Not really — but you can mask it fast. Use Beard Oil Masking to reduce the gap’s look, or try the Guard Blend Technique for Temporary Edge Softening.
True fixes need regrowth.
Conclusion
Your beard’s reputation lives and dies below the jaw. Knowing how to shape a beard neckline correctly is what separates a polished look from a forgotten one—and now you have no excuse to cut corners.
Find your line, follow the U-shape, trim slowly, and touch it up every few days.
A sharp neckline doesn’t just clean up your beard. It sharpens how the world sees you. Keep that line tight.
- http://beardbrand.com/
- https://manuals.plus/asin/B0BQN79PH9
- https://www.officedepot.com/a/products/3390224/Philips-Norelco-Multigroom-5000-Trimmer-Black/?bvstate=pg%3A12%2Fct%3Ar
- https://www.usa.philips.com/c-p/MG5700_49/norelco-multigroom-series-5000-face-head?reviews-page=33
- https://cart2india.com/beard-mustache-trimmers/philips-norelco-multigroom-5000-series-allinone-trimmer-beard-trimmer-and-hair-clipper-18piece-mens-grooming-kit-for-beard-face-nose-ear-body-with-titanium-blades-travel-pouch-mg597049/00000000004395410048