This site is supported by our readers. We may earn a commission, at no cost to you, if you purchase through links.

I’ve watched too many clients walk into my chair with bleach damage that could’ve been avoided—fried ends, snapped strands, that telltale straw texture that makes you wince. The truth is, bleaching doesn’t have to wreck your hair if you choose the right formula.
Modern bond-building bleaches work differently than the harsh formulas your mom used in the ’90s. They contain polymers that actually repair disulfide bonds while lifting color, plus conditioning agents that keep your cuticle intact during the process.
The difference between a least damaging hair bleach and a standard drugstore powder often comes down to three things: ammonia levels, pH balance, and whether it includes protective technology. I’ve tested dozens of formulas on every hair type imaginable, and some genuinely deliver lighter color without the brittleness and breakage you’d expect.
Table Of Contents
- Key Takeaways
- What Makes a Hair Bleach Least Damaging?
- Factors to Consider Before Bleaching Hair
- Top 5 Least Damaging Hair Bleaches
- Safe Techniques for Minimizing Bleach Damage
- Essential Pre-Bleach Hair Preparation
- Aftercare for Bleached Hair Health
- Common Mistakes That Cause Excessive Damage
- Comparing Professional Vs. DIY Bleaching Results
- Frequently Asked Questions (FAQs)
- What is the difference between hair bleach and hair dye?
- How long does it take to bleach hair?
- What are the side effects of hair bleaching?
- Can I bleach my hair at home?
- What is the best way to care for bleached hair?
- Can bleached hair be safely colored darker later?
- How long should I wait between bleach sessions?
- Does hair type affect bleach damage severity?
- Are natural bleaching alternatives effective for lightening?
- Conclusion
Key Takeaways
- Modern bond-building bleaches use polymers and conditioning agents to repair disulfide bonds during lightening, delivering measurable results like reduced breakage and improved elasticity compared to harsh drugstore formulas.
- The least damaging bleach formulas prioritize low ammonia levels, pH balance, and protective technology—while gradual lightening spaced 6-8 weeks apart preserves hair integrity far better than aggressive single-session approaches.
- Pre-bleach preparation with deep conditioning 24-72 hours beforehand and protein treatments 1-2 weeks prior can reduce breakage by 15-25% and boost elasticity by up to 30%, making prep work non-negotiable for healthy results.
- Post-bleach aftercare demands weekly bond-repair treatments, sulfate-free shampoos, and hydrating masks to prevent the 20-40% moisture loss that occurs without proper maintenance—skipping this routine spikes breakage rates by 30%.
What Makes a Hair Bleach Least Damaging?
Not all bleach is created equal, and the difference between a healthy transformation and a fried disaster often comes down to what’s actually in that powder or cream.
The least damaging formulas work smarter, not harder—protecting your hair’s internal structure while still lifting color effectively.
Let’s break down exactly what separates the gentle bleaches from the ones that’ll leave you crying in the mirror.
Key Ingredients That Minimize Damage
The secret to gentle hair bleach lies in its ingredients. Look for bond-building polymers that repair disulfide bonds during processing—they’re game-changers for damage control. Hydrolyzed proteins strengthen your cuticle health and improve elasticity, while humectants like glycerin boost moisture retention. Plant oils such as argan or coconut create a protective barrier, minimizing hair damage and keeping strands flexible throughout the lightening process.
Understanding the importance of methodological rigor is essential for developing effective hair care products.
The Role of Bond-Building Technology
Bond-building technology trains your hair’s disulfide bonds to resist breakage during bleaching—think of it as fiber restoration in real-time. These hair bonding products deliver measurable damage mitigation by reinforcing the cortex while pigment lifts. When combined with proper timing between sessions, bonding treatments maximize your hair’s ability to handle multiple bleaching rounds safely without compromising elasticity.
Independent studies confirm reduced snap and improved elasticity, making bond repair essential for bleach optimization.
You’ll notice stronger strands and better hair fortification when you choose formulas with integrated bond-builders for genuine hair damage prevention. After bleaching, make sure you know when to shampoo properly to avoid stripping away those protective treatments too soon.
Low-Ammonia and Ammonia-Free Bleaches
Low-ammonia and ammonia-free bleaches deliver gentler lightening with less scalp irritation and that harsh chemical smell. These formulas swap traditional ammonia for alternative alkalizers or dial concentrations under 4%, so you’re preserving disulfide bonds while still achieving lift. Look for labels that say “no ammonia” or pair low-ammonia systems with bond-builders:
- Reduced scalp burn and sensitivity
- Lower odor during processing
- Compatible with bond-repair ingredients like cysteine
- Safer irritation scores in consumer safety data
How Formulation Affects Hair Health
Beyond ammonia levels, the entire formulation drives your hair health outcomes. pH-balanced bleaches with buffered oxidizers prevent cuticle damage and minimize oxidative stress during processing. Post-bleach care, like using semi-permanent dyes such as Arctic Fox, helps restore moisture and vibrant color without additional chemical stress.
Bond strengthening complexes protect disulfide links, while humectants tackle moisture retention—studies show 24–72 hour recovery improves dramatically with conditioning polymers. Combining these treatments with compatible chemical processes requires careful timing to avoid overworking that sponge-like structure.
Gel carriers distribute product evenly, preventing localized over-processing that leads to hair damage and breakage.
Factors to Consider Before Bleaching Hair

Before you open that bleach bottle, you need to take an honest look at where your hair stands right now. Skipping this step is like ignoring the check engine light—you might get away with it, or you might end up with a disaster that takes months to fix.
Let’s walk through the three big factors that’ll determine whether your bleach job turns out stunning or becomes a cautionary tale.
Assessing Your Hair’s Condition
Think of your hair like a rubber band—healthy strands should bounce back when you stretch them gently. Before bleaching, run a strand analysis by performing elasticity and porosity tests at home.
Check your scalp for redness or flaking, then assess overall hair health and visible damage. This damage assessment is vital for bleach safety, helping you decide if your hair can handle chemical processing.
Understanding Hair Porosity and Texture
Your hair porosity—the cuticle structure’s ability to absorb and hold moisture—dictates how bleach penetrates each strand. Fine texture tends to lift faster but risks breakage, while coarse hair demands longer processing for even results.
High porosity hair grabs product quickly yet loses moisture levels rapidly, throwing off protein balance.
Understanding these factors prevents hair damage and aids hair strengthening strategies that protect overall hair health during lightening.
Choosing Between At-Home and Professional Bleaching
Deciding where to bleach comes down to Cost Comparison and Skill Levels—plus your willingness to handle Damage Control solo. Professional Hair Bleach services run $100–$300 but include Safety Measures like strand tests and bond-building agents that protect Hair Health. At-Home Hair Bleach kits cost $10–$60 yet demand precise Hair Bleaching Techniques and Time Management you mightn’t have mastered.
- Over-processing at home often leads to irreversible Hair Damage and uneven lift.
- Expert colorists tailor formulas to your porosity, reducing breakage risk.
- DIY mistakes can cost more long-term when you need corrective salon visits.
Top 5 Least Damaging Hair Bleaches
You’ve prepped your hair and you’re ready to lighten—now you need a bleach that won’t leave your strands feeling like straw. I’ve worked with dozens of lightening products over the years, and some genuinely do less damage than others when used correctly.
Here are five options that balance lift with hair integrity, giving you the brightness you want without completely wrecking your cuticle.
1. Bold Uniq Purple Hair Mask

Wait—a purple mask isn’t actually a bleach, but it’s a breakthrough for tonal maintenance after you lighten your hair. Bold Uniq’s purple formula deposits cool pigments that neutralize brassiness while conditioning with soy protein, vitamin B5, coconut oil, and marula oil.
It’s paraben and sulfate-free, so you’re protecting color-treated strands instead of stripping them. Apply it post-bleach to keep blonde, platinum, gray, or silver tones fresh and vibrant without the drying effects traditional lightening products bring to your hair health.
| Best For | Anyone with bleached or color-treated blonde, platinum, gray, or silver hair who wants to keep brassiness away while conditioning their strands at the same time. |
|---|---|
| Price Range | $29.99 |
| Form Type | Lotion |
| Hair Type | Dry, Color-Treated |
| Material Quality | Natural Oils |
| Primary Use | Tone Maintenance |
| Professional Grade | Salon-Quality |
| Additional Features |
|
- Neutralizes yellow and brassy tones without the harsh chemicals found in sulfates or parabens
- Conditions while it tones thanks to soy protein, vitamin B5, coconut oil, and marula oil
- Helps maintain vibrant color and protects against fading between salon visits
- Can stain your skin, towels, or bathroom surfaces if you’re not careful during application
- Results vary depending on how long you leave it on, so there’s some trial and error involved
- Not going to work for every hair type or color—it’s really made for lighter, cooler tones
2. Hair Dye Coloring Kit

If you’re new to at-home hair bleach, a complete hair dye coloring kit gives you brushes, bowls, gloves, and capes in one package—no scrambling for supplies mid-lift. The Poen kit includes 20 pieces for tidy dye application, though you’ll need to buy your color formulas and hair lightening powder separately.
Patch-test any kit ingredients 48 hours before full color correction to catch allergies early, and always follow safety guidelines on timing and ventilation to protect your scalp and strands.
| Best For | DIY hair color enthusiasts who want an affordable, all-in-one accessory kit for mess-free dyeing at home—just add your own bleach or color formula. |
|---|---|
| Price Range | $15-25 (estimated) |
| Form Type | Kit/Tools |
| Hair Type | All Types |
| Material Quality | Plastic |
| Primary Use | Application Tools |
| Professional Grade | DIY/Salon Use |
| Additional Features |
|
- Includes 20 reusable pieces (bowls, brushes, clips, capes, gloves) so you’re not hunting for tools mid-application
- Works for multiple hair types and techniques—highlights, balayage, root touch-ups, or full color
- Washable and reusable design cuts down on waste and saves money over time
- Dye and developer sold separately, so you’ll need to shop for your actual color products
- Some users report the bowls and ear caps feel flimsy or smaller than expected
- Gloves may not fit all hand sizes, and a few reviewers mentioned durability issues
3. Clear Disposable Shower Caps
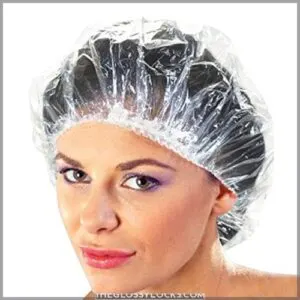
You might wonder why I’m listing shower caps in a bleach roundup—but hear me out. Clear disposable shower caps from brands like Reneebeautytan (100-count packs, PE or LLDPE material) trap heat during bleach application, speeding processing time by a few minutes while preventing product evaporation.
That containment means more even lift and less wasted formula. Choose caps with reinforced seams to avoid tearing mid-session, and pair them with bond-building bleach formulas for maximum hair protection. They’re single-use, so toss after processing to maintain hygiene.
| Best For | Stylists and DIY bleachers who want faster, more even processing and less product waste during chemical treatments. |
|---|---|
| Price Range | $10-15 (estimated) |
| Form Type | Caps/Accessories |
| Hair Type | All Types |
| Material Quality | Plastic |
| Primary Use | Hair Protection |
| Professional Grade | Salon Essential |
| Additional Features |
|
- Traps heat to speed up processing time while preventing bleach from drying out or evaporating
- Clear material lets you monitor lift progress without removing the cap mid-session
- Affordable bulk packs (100 counts) make them cost-effective for regular salon or home use
- Single-use design creates waste and isn’t eco-friendly for repeated treatments
- Some caps run small and may not fit larger head sizes comfortably
- Thin material can tear easily if you’re not careful when stretching it over your head
4. Loreal Quick Bleach Powder
L’Oreal Quick Bleach Powder packs persulfate compounds that kick off controlled chemical reactions when you mix it with a 20-volume developer. I like its powder-based formula because it gives you more control over consistency than pre-mixed kits—adjust the ratio for fine hair or stubborn roots. You’ll see quick results in 25–35 minutes, but always do a strand test first.
The L’Oreal Paris Feria Hyper Platinum Hair Bleach Kit shares similar lift technology while minimizing hair damage through gentler powder ingredients and clear mixing instructions.
| Best For | Home users who want fast, controlled bleaching results and don’t mind mixing their own formula for precise consistency. |
|---|---|
| Price Range | $30-40 (estimated) |
| Form Type | Towel |
| Hair Type | Fine, Delicate, Curly |
| Material Quality | Microfiber |
| Primary Use | Drying |
| Professional Grade | Professional Quality |
| Additional Features |
|
- Adjustable powder-to-developer ratio lets you customize thickness for different hair types and problem areas
- Delivers visible lift in 25–35 minutes without excessive processing time
- Compatible with standard 20-volume developers you probably already have
- Requires strand testing and careful mixing—not as foolproof as pre-mixed kits
- Persulfate compounds can irritate sensitive scalps if you’re not careful with application
- Regional availability varies, so you might have trouble finding it depending on where you live
5. Manic Panic Hair Bleach Kit
Manic Panic Hair Bleach Kit bundles powder bleach with persulfate activators, a developer, gloves, mixing bowl, and applicator brush—everything you need for at-home hair lightening. I appreciate that it includes bond-support additives to cushion your strands during the chemical lift.
The kit works well if you’re prepping hair for vivid color, but you’ll want to perform a strand test to gauge processing time and avoid bleach damage. Section carefully, skip your scalp, and rinse thoroughly after 20–30 minutes.
It’s a solid AtHome Hair Bleach option when you follow application tips and respect your hair’s condition before you bleach your hair.
| Best For | Anyone looking to lighten hair at home before applying vivid colors, especially if you want a complete kit with bond-support additives to help protect your strands during the process. |
|---|---|
| Price Range | $44.00 |
| Form Type | Cream |
| Hair Type | Damaged, All Types |
| Material Quality | Vegan, Paraben-Free |
| Primary Use | Repair Treatment |
| Professional Grade | Salon-Grade |
| Additional Features |
|
- Includes everything you need in one box—bleach powder, developer, gloves, mixing bowl, and applicator brush—so you don’t have to hunt down supplies separately.
- Contains bond-support additives that help reduce breakage and damage while lightening, which is a nice touch for at-home kits.
- Works well for prepping hair for bright, vivid dyes if you follow the strand test and timing instructions carefully.
- Results can vary widely depending on your hair type and condition, so it’s not always predictable without experience.
- Requires careful application and sectioning to avoid uneven lift or overlapping that can cause extra damage.
- Not ideal for damaged or previously treated hair without professional guidance, since bleach can compromise already weak strands.
Safe Techniques for Minimizing Bleach Damage

Even with the gentlest bleach on the planet, your technique makes all the difference between healthy-looking blonde and a fried disaster. I’ve seen people wreck their hair with premium products simply because they rushed the process or skipped essential steps.
Let’s walk through the three game-changing techniques that’ll help you lighten safely without turning your hair into straw.
Gradual Lightening Vs. Single Session
Choosing between gradual lightening and a single-session approach shapes your damage control strategy. Gradual processes involve spacing sessions six to eight weeks apart with lower-volume developers, preserving bond integrity, and reducing porosity shifts. Single sessions achieve faster lift but risk uneven results and greater structural stress.
Here’s how lift techniques compare:
| Approach | Key Benefits |
|---|---|
| Gradual Lightening | Minimizes cuticle damage, allows recovery time |
| Single Session | Achieves full lift quickly, fewer appointments |
| Multiple Low-Volume Passes | Better moisture retention, less scalp irritation |
| One High-Volume Treatment | Immediate results, higher porosity loss risk |
| Incremental Bleach Timing | Preserves hair porosity, aids bond repair |
When you bleach your hair gradually, strand tests between sessions let you adjust processing time and prevent over-lifting.
Sectioning and Application Methods
Once you’ve dialed in your lightening pace, proper sectioning techniques become your next line of defense.
Divide your hair into 4-6 parts using a tail comb—this hair partitioning prevents overlap and patchy lift during the bleaching process.
Apply bleach to mid-lengths first with a specialty brush, saving roots for last to control heat buildup and minimize scalp irritation throughout hair lightening.
Monitoring Processing Time Closely
Watch your timer like a hawk during the bleaching process—check strand progress every 5-10 minutes to prevent cuticle damage and over-processing.
Your monitoring routine should include:
- Timer checks aligned with peroxide strength and hair porosity
- Visual indicators like color lift progression and texture changes
- Real-time adjustments based on how each section responds
- Immediate rinsing when you’ve achieved the desired lift to protect structural integrity
Essential Pre-Bleach Hair Preparation
Your hair needs to be in fighting shape before bleach ever touches it. Think of pre-bleach prep like building a fortress—you’re strengthening your strands so they can handle the chemical process without falling apart.
Here’s what you need to do in the weeks leading up to your bleach session.
Deep Conditioning Before Bleaching

Think of deep conditioning as armor for your hair shaft. Twenty-four to seventy-two hours before you bleach, apply a treatment with humectants like glycerin and emollients such as shea butter—this pre-bleach care boosts hair moisture and reduces breakage risk. Over-conditioning right before can dilute bleach effectiveness, so timing matters for peak hair health.
| Conditioning Tips | Key Ingredients | Timing Window |
|---|---|---|
| Moisture retention | Glycerin, propylene glycol | 24–72 hours before |
| Cuticle integrity | Shea butter, ceramides | Avoid same-day saturation |
| Bond reinforcement | Soluble tint treatments | Pre-lightening protocol |
| Hair Porosity prep | Bond-building formulas | Strategic Bleach Preparation |
Protein Treatments for Strengthening

Fortification starts from the inside out. One or two weeks before your bleach session, work a protein treatment into your routine to shore up hair structure—keratin repair masks or amino acid therapy conditioners can reduce breakage by 15–25% and boost elasticity by up to 30%.
Here’s your protein roadmap:
- Hydrolyzed Protein Masks – These penetrate the cortex and reinforce your strands from within, improving hair health before chemical stress hits.
- Bond-Building Treatments – Polymers like polyquaternium lock in strength and cut protein loss by 10–40% during processing.
- Amino Acid Therapy – Cysteine and methionine supplements aid disulfide bond reformation, giving you resilient, damage-resistant hair.
Balance is key—overdoing protein treatments leads to stiffness, so space them evenly and follow with moisture-based products for ideal hair fortification and restoration.
Avoiding Heat Styling and Chemical Treatments

Think of your hair like a sponge that’s already been wrung out—adding heat or more chemicals before bleaching pushes it past its breaking point.
Before bleaching, your hair is like a wrung-out sponge—more heat or chemicals will push it past its breaking point
Heat styling can cause up to 50% more cuticle damage in bleached hair, so air-drying cuts breakage risk by around 30%.
Skip flat irons, curlers, and chemical relaxers for at least two weeks pre-bleach to protect your strands and support post-bleach recovery.
Moisture Masks for Added Protection

Moisture masks packed with humectants like glycerin lock in hydration and can boost strand moisture retention by 30–45%, prepping your hair for bleach recovery.
Lightweight argan or safflower oil formulations deliver nourishment without weighing down fine hair, while ceramides restore cuticle integrity and reduce hair porosity.
Apply weekly on towel-dried hair for 10–20 minutes to fortify color protection and minimize hair damage before you lighten.
Aftercare for Bleached Hair Health

Your bleach job doesn’t end when you rinse out the lightener—that’s actually when the real work begins. Bleached hair needs a complete overhaul in your care routine to stay strong, shiny, and healthy-looking instead of turning into straw.
Let’s walk through the essential aftercare steps that’ll keep your newly lightened hair in the best shape possible.
Hydrating Masks and Conditioners
After bleaching, your hair craves serious hydration. Deep conditioning masks, used once or twice weekly, can boost moisture retention by up to 30%.
Look for protein-rich formulas with hydrolyzed keratin for cuticle repair and hair restoration. Silicone-based conditioners seal in moisture, while pH-balanced treatments support color protection.
These targeted products transform damaged strands, improving hair health and elasticity with consistent use.
Weekly Bond-Repair Treatments
Beyond masks, bond-repair treatments are your secret weapon for damage control. Applied weekly, these formulas rebuild disulfide bonds shattered during bleaching, restoring tensile strength and reducing breakage by measurable margins.
Look for cysteamine or cysteine-based products that target keratin bonds directly. Consistent weekly treatments markedly improve hair health and elasticity, transforming brittle strands into resilient, manageable hair over six to eight weeks.
Using Sulfate-Free Shampoos
Pairing bond treatments with sulfate-free shampoos amplifies your hair’s recovery. Harsh sulfates strip natural oils and compromise cuticle integrity, making gentle cleansing non-negotiable post-bleach. Sulfate-free benefits include preserved hair moisture, reduced scalp irritation, and extended color preservation—especially essential for ammonia-free lightening that minimizes hair damage upfront.
- Look for mild surfactants like cocamidopropyl betaine or decyl glucoside
- Choose formulas enriched with glycerin, panthenol, or amino acids
- Validate ingredients through independent safety databases before purchasing
Regular Trims to Prevent Split Ends
Your sulfate-free routine sets the stage, but trim schedules matter just as much. Bleached hair shows split end prevention benefits when you trim every 6–8 weeks—cutting away frayed ends before they travel up the shaft.
Higher hair porosity from lightening means faster breakage, so consistent trimming techniques preserve length while controlling hair damage. Sharp shears and point-cutting methods support ongoing hair maintenance and repair without sacrificing your hard-won blonde.
Common Mistakes That Cause Excessive Damage

Even with the gentlest bleach formulas, certain application errors can turn a smooth lightening session into a damage disaster. I’ve seen perfectly healthy hair become brittle and broken because of a few preventable mistakes that happen more often than you’d think.
Let’s walk through the most common missteps that compromise your hair’s integrity so you can avoid them completely.
Overlapping Bleach Applications
Reapplying bleach on already-processed sections is one of the fastest routes to breakage. When you overlap during a bleach job, you’re doubling down on chemical risks—your hair loses more protein, porosity skyrockets, and those ends turn to straw.
Here’s how to dodge this trap:
- Map your sections before you start lightening.
- Use foils or clips to isolate treated areas.
- Check processing times religiously—don’t re-wet lifted strands.
- Space sessions six to eight weeks apart for bleach recovery.
- Apply bond-building treatments immediately after to support damaged zones.
Precision beats speed every time when you’re chasing that platinum dream.
Using High-Volume Developers Unnecessarily
Jumping straight to 40-volume developer when you don’t need it is like using a sledgehammer to crack a walnut. Higher developer volume lifts faster, sure, but it also tears through your hair cuticle, triggers scalp irritation, and can cause chemical burns if you’re not careful.
Unnecessary bond disruption means more breakage down the line. Start low, monitor closely, and only increase peroxide strength when lift demands it.
Insufficient Aftercare Routines
Neglect is where real hair damage compounds. Your cuticles can’t bounce back if you skip the recovery work, and bleached strands lose 20-40% of their moisture without proper hydration. Here’s what you’re missing:
- Moisture restoration with humectant-rich leave-ins
- Protein replenishment to rebuild tensile strength
- Bond repair treatments weekly
- Scalp health maintenance with pH-balanced products
- Color preservation routines that lock pigment in
Without consistent aftercare, breakage rates spike by 30%, split ends multiply, and your hair restoration efforts stall completely.
Comparing Professional Vs. DIY Bleaching Results

You’ve probably stood in the hair aisle wondering if you should just do it yourself or bite the bullet and book that salon appointment. The truth is, both paths come with their own set of trade-offs that directly impact your hair’s health and your wallet.
Let’s break down what you’re really signing up for with each option so you can make the call that works for your hair and your life.
Risks of At-Home Bleaching
AtHome Hair Bleaching can turn into a nightmare when you skip professional oversight. Chemical burns and scalp irritation from high-peroxide formulas occur when you misjudge timing or dilution. Bleach overuse accelerates hair fracture, stripping protein and leaving strands brittle. Without damage control, you’re gambling with your hair health—uneven lift, breakage, and fried ends become the price of DIY experimentation gone wrong.
| Risk Factor | Common Cause | Hair Health Impact |
|---|---|---|
| Chemical Burns | High peroxide levels | Scalp inflammation, permanent scarring |
| Hair Fracture | Overlapping applications | Increased breakage, split ends |
| Bleach Damage | Prolonged processing time | Severe porosity, moisture loss |
| Scalp Irritation | Incomplete rinsing | Dermatitis, ongoing sensitivity |
Cost and Maintenance Considerations
Budget planning for bleach isn’t just about the initial kit—Hair Maintenance expenses add up fast. At-Home Hair Bleaching runs $10–$40 per session, while salons charge $150–$350. Factor in bond-building treatments at $15–$40 weekly, plus sulfate-free shampoos and masks costing $20–$60 monthly.
The Financial Implications of hair damage? Repair sessions hit $40–$120 each, making Damage Prevention through smart Cost Analysis and Maintenance Schedules your wallet’s best friend.
| Expense Category | DIY Cost Range | Professional Cost Range |
|---|---|---|
| Initial bleaching | $10–$40 per kit | $150–$350 per service |
| Monthly upkeep | $20–$60 (products) | $40–$150 (salon visits) |
| Damage repair | $30–$120 (treatments) | $100–$350 (correction) |
When to Seek Professional Help
Chemical burns or Hair Damage spiraling beyond your control? That’s when Professional Hair Care becomes non-negotiable. Scalp Assessment catches underlying conditions home kits miss, while expert Damage Evaluation determines if Color Correction or Hair Restoration is possible without further harm.
| Warning Sign | Professional Solution |
|---|---|
| Severe burns or breakage | Clinician-guided Hair Repair protocols |
| Unexpected color results | Controlled Color Correction sessions |
| Excessive structural damage | Bond-building Professional Guidance |
Frequently Asked Questions (FAQs)
What is the difference between hair bleach and hair dye?
Bleach breaks bonds to lift natural color and lighten hair structure, while hair dye deposits pigment to change your shade without greatly altering your base lightness through different chemical reactions.
How long does it take to bleach hair?
Processing time varies wildly—anywhere from 20 to 60 minutes depending on your starting color, desired lift, and hair porosity. A strand test beforehand helps nail the exact timing your hair needs.
What are the side effects of hair bleaching?
Playing with fire has consequences. You might feel scalp irritation, burning, or redness during processing.
Hair breakage, dryness, and allergic reactions like contact dermatitis can follow, demanding serious hair repair and restoration efforts.
Can I bleach my hair at home?
You can definitely bleach at home, but DIY safety tips matter—strand tests prevent surprises, sectioning ensures even lift, and lower-volume developers reduce hair damage. Skip the bleach job if your strands are already compromised.
What is the best way to care for bleached hair?
You’re going to need sulfate-free shampoo, weekly bond-repair treatments, and a solid leave-in conditioner.
Trim every six weeks, ditch the hot tools when possible, and deep-condition religiously—your hair porosity demands it.
Can bleached hair be safely colored darker later?
Darker dyeing definitely delivers dimension post-bleach—your porous strands grab pigment fast, so semi-permanent formulas work best.
Bond-building prep plus color-safe shampoos extend longevity while post-bleach toners neutralize brassiness for smoother color deposit dynamics.
How long should I wait between bleach sessions?
Wait at least two to four weeks between bleach sessions so your hair can rebuild its strength. If you notice excessive shedding or brittle strands, push that interval even longer.
Does hair type affect bleach damage severity?
Fine hair overprocesses faster than coarse strands—hair porosity and texture influence bleach sensitivity.
Chemical reactions vary by hair type, amplifying damage severity in porous or previously treated hair, while thicker textures show more resilience.
Are natural bleaching alternatives effective for lightening?
Natural bleaching methods like lemon juice rarely lift more than two shades and risk uneven results.
They lack the predictable oxidation power of conventional bleaches, often weakening cuticles without delivering the true blonde heights you’re after.
Conclusion
Look, we’re not living in the Wild West of bleaching anymore—you don’t have to sacrifice your hair’s integrity for lighter color. The least damaging hair bleach options I’ve covered here prove that bond-building technology actually works.
Your strands can survive this transformation if you prep right, choose wisely, and commit to aftercare. Stop gambling with drugstore powder and start treating bleaching like the chemical process it is. Your hair will thank you.