This site is supported by our readers. We may earn a commission, at no cost to you, if you purchase through links.

A low fade can make or break a haircut. The same hair on top, the same overall shape — but shift that fade placement up or down by even half an inch, and the entire look changes. That’s the kind of precision this style demands, and it’s exactly why so many guys get it wrong at home.
The good news? A low fade works with nearly any hair type, face shape, and style on top. Once you understand the technique behind it, nailing low fade styling tips becomes less about guesswork and more about knowing exactly where to start. From the right tools to step-by-step blending, everything you need to own this cut is right here.
Table Of Contents
Key Takeaways
- Fade placement precision is everything — shifting the taper even half an inch above or below your ears completely changes the look, so nail that starting point before you touch anything else.
- Your blend transition lives and dies in the transition zone: stack guards in small increments (0→1→2) and use upward flicking motions instead of straight passes to avoid harsh lines.
- Maintenance isn’t optional — most guys need a trim every 2–4 weeks depending on hair density, and skipping it means your clean fade blurs fast.
- Product buildup is a silent killer; a pea-sized amount of pomade or matte clay is all you need, and a weekly clarifying wash keeps your fade looking sharp.
What is a Low Fade Haircut?
A low fade isn’t just another haircut—it’s a precision technique that gives you control over your look.
Mastering this technique is a lot like perfecting any grooming skill—patience and the right guidance make all the difference, much like when you’re learning short beard neckline grooming techniques.
The fade starts low, just above the ears, creating a gradual taper that works with nearly any style on top. Before you commit to the cut, you need to understand what sets it apart and whether it matches your goals.
Key Features of a Low Fade
The defining characteristic of a Low Fade lies in its starting point—temples and back of the head—where the taper begins just above ear level. This Fade Haircut creates a subtle, polished shift using specific Clipper Settings between guards 1 and 3, producing a controlled slope that blends seamlessly into longer top sections.
- Strategic fade placement: The taper starts 0 to 1 inch above your ears, maintaining a fuller crown silhouette while the sides drop quickly
- Controlled transition zone: Your blend spans only 1 to 2 inches, creating that signature tight gradient Low Fade Styles demand
- Adaptable Hair Texture compatibility: Works across curl patterns and densities when proper Fade Techniques guide the blend
- Skin exposure option: Traditional Low Fade keeps stubble, while Low Skin Fade takes sides to bare skin for maximum contrast
- Symmetrical architecture: Mirror-image fades curve gently around your head, requiring precise Taper Maintenance to preserve balance
Low Fade Vs. Other Fades
Understanding Low Fade against Mid Fade and High Fade reveals critical Contrast Levels in Fade Comparison.
Mid Fade starts near temple level, delivering moderate Style Versatility through balanced transitions. High Fade begins higher on the head, creating sharp edges with aggressive Cutting Techniques.
Low Fade blends gradually above ears over 2–4 weeks between trims, while Taper Fade preserves natural length. Each Fade Hairstyle demands distinct approaches to achieve Haircut Evolution.
For a thorough overview of the differences, see this guide on fade haircut types and maintenance.
Who Should Try a Low Fade
Your face shape and hair type determine whether a low fade will work for you. Oval and square faces benefit from reduced bulk at the sides, while wavy or curly hair types blend seamlessly with the gradual transitions.
Busy schedules favor this cut—touch-ups stay brief, and the style resists sweat during active lifestyles, making it ideal for professionals seeking polished , minimal-maintenance mens hairstyles.
Essential Tools for Low Fade Styling

You can’t master a low fade without the right gear in your hands. The difference between a sharp, clean fade and a choppy mess often comes down to using proper clippers, trimmers, and a few smart styling essentials.
Let’s break down exactly what you need to own this cut from start to finish.
Clippers and Guard Attachments
Clippers are your foundation for any low fade. Guard types range from zero to eight, letting you dial in the exact length as you taper. Attachment systems vary—plastic clip-ons for standard work, magnetic guards for quick swaps.
A good comb and mirrors round out your kit—check out how to fade a beard down the neck once you’re ready to blend everything seamlessly.
Proper clipper maintenance and regular blade sharpening keep your fade techniques crisp. Barbers know that consistent guard lengths eliminate patchy transitions and harsh lines.
For more on achieving a flawless result, see these tips for using clipper guards for fading.
Trimmers and Edgers
Precision around your hairline separates amateur work from pro-level sharpness. Trimmers handle detail cuts along the ears and neckline, while edgers carve clean boundaries near your temples.
Blade maintenance keeps cutting techniques smooth—dull trimmer blades create jagged lines. Power options include cordless battery models or corded setups, each offering different runtime for your barber tools.
Edge control depends on steady hands and quality grooming tools.
Styling Products for Low Fades
The right styling products transform a crisp fade into a statement. Hair pomades deliver high shine for sleek looks, while matte pastes provide textured hold without obvious gloss.
Styling creams offer flexible control for casual wear. Choose your product texture based on the finish you want—hold levels range from light to firm, letting you reshape throughout the day.
Mirrors and Maintenance Tools
You can’t dial in your fade without a clear view. A full-length mirror with at least 3 mm thickness provides honest feedback, while a handheld mirror reveals the back angles.
LED lighting around 4000K shows natural tones for precision cuts. Keep microfiber cloths and glass cleaner ready—daily wipe-downs prevent product smudges.
Portable mirrors with magnification tackle detailed touch-ups between barber visits.
Preparing Your Hair for Low Fade Styling

Your fade won’t look sharp if your hair isn’t properly prepped before you start cutting or styling. Whether you’re heading to a barber or handling it yourself at home, the preparation work makes the difference between a clean fade and a patchy mess.
Here’s what you need to do before anyone picks up the clippers.
Washing and Drying Techniques
Clean hair is your foundation for a sharp low fade hairstyle. Wash with lukewarm water and sulfate-free shampoo two to three times weekly to preserve hair moisture and scalp care. Pat dry with a microfiber towel using gentle drying methods to reduce frizz.
In high humidity, apply anti-humidity spray for humidity control before styling. Finish with a cool rinse to seal the cuticle and improve grooming results.
Detangling and Sectioning Hair
Tackle hair tangles before you style to avoid uneven fades and broken strands. Start detangling at the ends using a wide-tooth comb or specialized detangling tools, working upward to prevent knot removal stress.
Section your hair into manageable quadrants based on hair texture. Apply leave-in conditioner to smooth each area. This haircare routine sets up impeccable haircut maintenance and sharp hair styling results.
Prepping for At-Home or Barber Styling
Your success with a Low Fade hinges on solid Hair Preparation whether you’re hitting the Barber or going solo. Clean, dry hair gives your Styling Tools a fighting chance at precise Fade Techniques.
- Blow-dry on cool to lock in direction before any Clipper Maintenance begins
- Mark three horizontal guide lines for symmetry using a barber pencil
- Apply light styling spray to hold hair in place during shaping
- Massage your scalp gently to boost comfort and blood flow
This Scalp Care and strategic setup transforms Haircut Maintenance into an art form, not a gamble.
Step-by-Step Low Fade Styling Tips
You’ve prepped your hair and gathered your tools—now it’s time to bring the low fade to life.
Getting this cut right means understanding how each section works together, from the tapered sides to the styled top. Here’s how to execute each step with precision and confidence.
Achieving a Clean Tapered Look

Your taper fade starts with hairline precision—a trimmed edge that curves naturally around your temples and neck. Use clipper guards in a stepwise sequence for gradient blending, avoiding chunky transitions.
Keep sideburn alignment even with the top of your ear, tapering inward toward your jaw. These barbering techniques deliver a polished low fade that stands out.
Hair maintenance? Simple: fresh edges, smooth tapers, consistent styling tips.
Blending and Gradual Transitions

Blending tools make or break your low fade haircut. Stack clipper guards in small increments—0 to 1 to 2—across the fade height to create gradual transitions without harsh lines.
Use upward flicking motions, not straight passes, to soften edges. Hair texture matters: coarse strands need slower strokes, while fine hair shows every mistake.
These fade techniques deliver barbering techniques that command respect.
Styling The Top for Various Looks

Once your low fade blending looks smooth, the top transforms everything. Straight hair on top holds sleek styles with pomade, while wavy texture creates natural separation using matte paste.
Build hair volume by lifting at the crown with mousse before blow drying. Styling techniques depend on your look—central parts suit formal vibes, messy bedhead needs fiber paste, and textured tops command attention with sea salt spray.
Using Product for Definition and Hold

Product types make or break your final look. Pomade delivers medium hold with shine that sharpens your hairline, while matte wax grabs strands for texture without grease. Apply styling products to damp hair, warming them between your fingers first. Focus men’s grooming products near the fade line to boost contrast. Layer light hold before heavy formulas—grooming tips that prevent clumping and keep your finish options flexible.
- Control your crown with fiber paste that thickens without stiffness
- Lock in shape using medium hold that survives your full day
- Eliminate frizz by choosing humidity-resistant hair styling products
- Rework anytime with flexible formulas that don’t demand a wash
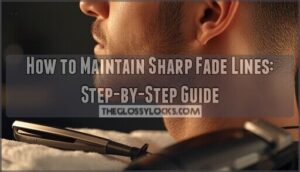
Maintenance Tips to Keep Your Low Fade Sharp

Your low fade won’t stay sharp on its own. Without consistent upkeep, those clean lines blur and the whole style loses its edge.
Here’s what you need to lock down to keep your fade looking fresh between barber visits.
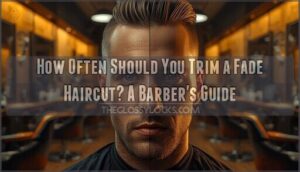
Scheduling Regular Trims
Your fade maintenance starts losing its edge the moment you leave the chair. That’s just how hair growth patterns work—and regrowth management starts with smart barber scheduling. Most barbers recommend trims every 2 to 4 weeks for trim frequency that keeps your low fade sharp. Fine hair softens faster; thick or coarse hair may hold longer.
| Hair Type | Recommended Trim Frequency |
|---|---|
| Fine Hair | Every 2 weeks |
| Thick/Curly Hair | Every 2–3 weeks |
| Coarse Hair | Every 2–3 weeks |
| Normal Density | Every 3–4 weeks |
| Slower Growth | Every 3–6 weeks |
Stick with the same barber for consistent fade maintenance. Lock grooming tips like these into your routine—not just your calendar.
At-Home Touch-Up Techniques
Between barber visits, you can keep your low fade looking fresh with the right touch-up tips. Use a trimmer with a zero-guard for fade correction along the sides, working in short upward strokes for clean DIY blending.
Home trimming stays sharp when your clipper maintenance is consistent. These barber tips give you full control over your fade haircut between appointments.
Daily Hair and Scalp Care
Consistent daily routines are what separate a sharp low fade from one that loses its edge fast. Your scalp health directly impacts how well your hair holds shape and blends.
- Scalp Health & Gentle Exfoliation: Use a mild scrub once or twice weekly to clear dead skin and keep follicles open.
- Hair Hydration: A lightweight, non-comedogenic moisturizer prevents dryness without disrupting your fade’s clean lines.
- Smart Product Selection: Match products to your hair type—keep it simple, keep it effective.
Preventing Product Buildup
Even the best low fade loses its edge when residue takes over. Heavy pomades and gels leave invisible buildup within 24 hours — clogging follicles and dulling your blend.
Product buildup can wreck your low fade fast, leaving follicles clogged and your smooth blend dull within a day
That’s why gentle cleansing and regular hair clarifying should anchor your haircare maintenance routine. For effective product removal and scalp care, a weekly clarifying wash strips everything cleanly.
Own your grooming process — consistency in buildup prevention keeps your styling products working, and your low fade looking sharp.
Avoiding Common Low Fade Mistakes

Even the sharpest fades fall apart when small mistakes go unchecked. The good news is that most of these errors are easy to spot and even easier to fix once you know what to look for.
Here’s where the most common ones trip people up.
Preventing Uneven Fades and Harsh Lines
A single uneven pass can unravel your entire low fade. That’s why blade alignment and fade depth control matter so much.
Keep your clipper flat against the scalp, work in short upward strokes, and reduce guard sizes gradually. Use a reference point at your temple to stay symmetrical. These shifting techniques and consistent maintenance scheduling keep harsh lines from creeping back in.
Managing Product Overuse
More product doesn’t mean a better low fade—it means a messier one. Overuse masks your fade’s clean blend and adds buildup fast.
Product minimization is the move here. A pea-sized amount of pomade or matte clay delivers definition without weighing things down.
Embrace waste reduction and sustainable packaging choices too. Smart mens grooming starts with using less, not more.
Adapting Styles to Face Shape and Hair Type
Using less product opens the door to the next level of mastery: knowing your face shape and hair type. A low fade isn’t one-size-fits-all.
Oval faces handle most fade customization with ease, while round faces need vertical length on top. Coarse hair holds fades longer, but fine hair demands softer blending.
Custom styling through face shape analysis and a hair texture guide unlocks real style versatility across all fade hairstyles and hairstyle trends.
Frequently Asked Questions (FAQs)
What is the 3 2 1 rule for haircuts?
The 3 2 1 rule is a simple barbering guide for tapered cuts. Your barber uses clipper guards—3, 2, then 1—top to bottom, building a smooth hair gradient.
It’s one of the best fade techniques out there.
What is the 3 2 1 buzzcut rule?
Picture sharp Clipper Guards humming at the Barbershop.
The 3 2 1 Buzzcut Styles guide uses three guard lengths — 3mm on top, 2mm mid-sides, 1mm at the base — creating a clean, tapered Low Fade Haircut with minimal effort.
Can a low fade work with beard styles?
Absolutely. A low fade pairs naturally with beards.
The key is blending the beard edge just above the fade line. This keeps facial hair blending smooth and the overall silhouette sharp and balanced.
What hairstyles pair well with low fades?
Your hair type holds the key here. Low fade beautifully complements styles such as buzzed tops, textured crops, and wavy styles—each bringing unique dimension.
Match your face shape for the sharpest results.
How long does a low fade last?
A low fade usually lasts four to six weeks before hair regrowth alters the sharp lines.
Your fade longevity depends on growth rate and texture. Stay on top of maintenance schedules, and your style durability stays strong.
Can beginners attempt a low fade at home?
Yes, beginners can attempt a low fade at home. Start with the lowest guard setting and work up gradually. Steady hands and patience are your best tools.
Mistakes happen—just trim conservatively and blend carefully.
Do low fades suit all hair textures equally?
Every texture brings something different to the table.
The short answer: not equally, but almost universally.
Fine, coarse, curly, and wavy hair each need adjusted fade techniques and customized styling products to nail that clean shift.
Conclusion
A sharp low fade isn’t luck — it’s layered knowledge turned into muscle memory. Every technique covered here strips away the guesswork and hands you real control over your cut.
From choosing the right tools to blending seamlessly and maintaining sharpness between visits, these low fade styling tips build on each other. Master the fundamentals, stay consistent with your routine, and your fade will always speak for itself.