This site is supported by our readers. We may earn a commission, at no cost to you, if you purchase through links.
A quality straight razor demands respect, but it rewards you with a shave that cartridge razors can’t touch: closer, cleaner, and genuinely satisfying. The catch? Technique matters.
Mastering straight razor shaving techniques takes practice, but the fundamentals are learnable. Once you understand how to prep your face, hold the blade at the right angle, and execute controlled strokes, you’ll see why people abandon disposables for this old-school approach.
It’s not just about the shave—it’s about reclaiming control over something you do every day.
Table Of Contents
- Key Takeaways
- Essential Tools for Straight Razor Shaving
- Preparing Your Face for a Straight Razor Shave
- How to Hold and Angle a Straight Razor
- Step-by-Step Shaving Techniques
- The Three-Pass Shaving Method
- Avoiding Nicks, Cuts, and Irritation
- Straight Razor Maintenance and Longevity
- Frequently Asked Questions (FAQs)
- How do you shave with a straight razor?
- Why should you choose a straight razored shave?
- How to use a straight razor?
- Should you learn to shave with a straight razor?
- How much does it cost to shave a straight razor?
- How long does it take to shave a straight razor?
- How long does it take to become proficient with a straight razor?
- What should I do if my razor becomes dull or damaged?
- Conclusion
Key Takeaways
- The 30-degree blade angle is your foundation—stick to it religiously, as angles above 45 degrees or below 20 degrees double your laceration risk and create drag that forces extra passes.
- Proper skin preparation (hot towels, pre-shave oil, quality lather) reduces blade friction by 25–40% and cuts irritation by 35%, making the difference between a frustrating shave and a controlled one.
- Master the three-pass method (with grain, across grain, against grain) to remove stubble progressively without excessive irritation, with each pass requiring fresh lather and adjusted skin tension.
- Stropping before every shave and honing every 3–6 months keeps your blade sharp enough to do the work, preventing the dull-blade tearing that causes most beginner mistakes and nicks.
Essential Tools for Straight Razor Shaving
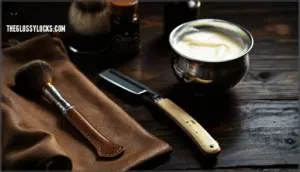
You can’t just grab any razor and start shaving—the right tools make all the difference between a smooth shave and a painful mistake. Before you even touch blade to face, you’ll need to understand what separates a quality straight razor from a dull disappointment, and why the gear you choose sets you up for success or struggle.
Let’s break down the essential equipment that’ll become your foundation for mastering this skill.
Recommended Straight Razors and Blades
Your blade selection makes or breaks your shaving experience. Start with a 5/8-inch full hollow-ground razor—it’s your perfect entry point. Feather’s Artist Club SS leads 2025 with replaceable blades and stainless steel that won’t rust. For serious edge retention, Naked Armor’s Solomon uses VG-10HZ Japanese steel rated 59–61 HRC. Dovo and Thiers-Issard dominate European markets with carbon steel blades that deliver legendary sharpness.
Here’s what matters:
- Carbon steel dominates for exceptional sharpness and durability—accept nothing less if you want real control
- Full hollow-ground designs balance maneuverability with coverage, letting you command every stroke
- Blade width between 5/8 and 7/8 inch gives you the precision and power to shape your technique
Importance of Strops and Hones
Your blade is only half the equation. The strop and hone are what keep it commanding. Stropping realigns microscopic burrs on the edge between shaves—think of it as tuning your instrument. You’ll do 10–30 passes per side before each shave to maintain keenness. Honing removes metal when stropping alone won’t cut it, usually every 2–3 months for daily users.
Here’s what separates masters from amateurs: Using a leather strop compound can improve the sharpening process.
| Tool | Function | Frequency |
|---|---|---|
| Strop (Leather) | Realigns edge burrs | Before each shave |
| Hone (Stone) | Restores sharpness | Every 2–3 months |
| Dual Strop (Linen) | Preliminary alignment | Before each shave |
Skip this maintenance, and you’ll chase a dull blade forever. Master it, and your razor stays sharp for years.
Shaving Brushes and Creams
Now comes the brush and cream—the foundation of your lather. Your brush matters more than you’d think. A quality brush increases lather volume by 68% compared to applying cream by hand. Badger hair dominates premium production at 60%, prized for water retention and softness. Synthetic brushes grow faster each year and now rival natural hair in performance, lasting 30% longer under wear testing.
Your cream choice matters too. Look for products free of parabens and sulfates—62% of users prefer them. Plant-derived ingredients like aloe and shea butter appear in nearly half of new launches.
This combination—the right brush pulling cream into rich lather—gives you control and protection. That’s your setup locked in. For best results, consider the shaving brush guide to select the best brush for your needs.
Preparing Your Face for a Straight Razor Shave
Your skin is the canvas for a great shave, and preparing it properly makes all the difference. The right prep routine opens your pores, softens your beard, and creates the ideal surface for your razor to work.
Here’s what you need to know to get your face ready.
Cleansing and Exfoliating The Skin
Clean skin is your foundation for a close, safe shave. Start by washing your face with warm water to soften hair shafts by 10–15%, then exfoliate 2–3 times weekly using gentle methods. This removes dead skin cells that clog your blade and reduces ingrown hairs by 40%. Avoid over-cleansing, which strips protective oils and compromises your skin’s microbiome balance.
Why skin prep matters:
- Cleansing removes dirt and sebum, clearing follicles for smoother razor glide
- Light exfoliation opens pores and improves shave uniformity by up to 30%
- Dead cell removal keeps your blade sharp 25% longer
- Proper preparation reduces irritation and micro-injuries by 35%
- Gentle methods protect skin hydration and barrier function
Using Hot Towels and Pre-Shave Oils
Thermal preparation is a game changer—it opens your pores and softens whiskers. Applying a hot towel between 38–43°C for 60–90 seconds increases skin hydration by 10–15% and boosts hair pliability by 35%. This simple step can cut your razor passes in half.
Follow up with a pre-shave oil containing jojoba or argan to reduce friction by 25–40%. It forms a protective barrier that drops razor burn risk by 30%. Together, these steps create a foundation for control and a close shave.
Creating a Quality Shaving Lather
Your lather is everything—it’s the foundation for control and a close shave. Consistency matters more than volume. You want a texture like whipped cream: shiny, creamy, with soft peaks that hold. Too dry and you’ll feel drag; too wet and you’ve lost grip on the blade.
Use a badger or quality synthetic brush with distilled water. Load your shaving soap first, then gradually add water using the Load/Hydrate method—about 50 to 60 brush rotations gets you there in roughly 30 seconds. Alternate your mixing direction to boost air incorporation.
The result? A stable lather that protects your entire shave without reapplication and reduces blade-to-skin friction by up to 40%. That’s your edge.
How to Hold and Angle a Straight Razor
The grip and angle of your straight razor are everything—they’re what separate a smooth shave from a frustrating one. Get these right, and you’ll have the control and confidence you need.
Below, we’ll break down the proper grip, the ideal angle, and how to adapt your technique depending on which hand you’re using.
Proper Grip for Control and Safety
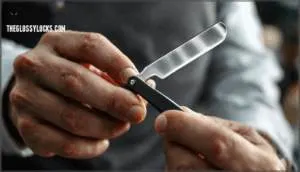
Your grip makes or breaks the shave. Place your first three fingers on the blade’s back, with your index finger near the pivot—this maximizes control. Rest your pinky on the tang for counterbalance and position your thumb on the side near the middle for lateral stability. This foundation reduces unintentional blade movement and prevents accidental cuts. Keep your wrist slightly flexed and fingers relaxed; firm but gentle pressure wins over a white-knuckled grip, which increases slip-related injuries by 23%.
Here’s what separates masters from beginners:
- Finger Placement: Three fingers on blade back, index toward pivot, pinky on tang for ideal pressure distribution
- Thumb Positioning: Side of blade near middle provides lateral stability during each stroke
- Grip Pressure: Moderate, firm-but-gentle hand positioning reduces blade chatter and maintains consistency
- Wrist Flexibility: Slight flexion allows smoother blade pivoting and controlled motion across facial contours
- Tang Control: Keep it consistently below the handle so the blade’s flat side contacts skin evenly for safety
Your hand positioning determines whether you’ll dominate or struggle. Close your razor between passes—this is non-negotiable for accident prevention.
Achieving The Ideal 30-Degree Angle
The 30-degree angle isn’t a rigid rule—it’s your sweet spot for cutting hair without irritating skin. Here’s how you find it: place your blade flat against your face, then slowly lift the spine until you feel the edge just kiss your skin. That’s roughly 30 degrees.
Your angle control depends on blade alignment and skin tension working together. As you stroke, keep consistent pressure and let your wrist stay slightly flexed. You’ll know you’ve nailed the angle when the razor glides smoothly without tugging or skipping. Practice this positioning until it becomes instinctive.
Techniques for Dominant and Non-Dominant Hands
Most shavers start with their dominant hand—it’s natural. But here’s where you break free: mastering both hands gives you complete control and a genuinely better shave.
Your dominant hand executes freehand and backhand strokes with the blade held between your third and fourth fingers, thumb anchoring the shank. Keep your wrist slightly flexed and elbow relaxed for consistent angle control. Non-dominant hand work takes deliberate practice—start with mirror drills before using a live blade. Use reverse strokes on the opposite face side, maintaining skin tension opposite your stroke direction. The payoff? Bilateral shaving reduces nicks by 40% and cuts shave time by 20% once you nail it.
Key techniques:
- Dominant hand: high-precision zones like jawline and cheeks with confident, stable strokes
- Non-dominant hand: reverse strokes on opposing side using short, 2–3 cm movements with safety adjustments
- Both hands: consistent 30-degree angle and opposite skin stretching prevents blade catch and unevenness
Step-by-Step Shaving Techniques
Now comes the actual work—the part where technique meets precision. The moves you’re about to learn are fundamental to a clean, safe shave.
Master these three areas, and you’ll have control over your blade and your face will thank you.
Stretching The Skin Correctly
Think of your facial skin as the foundation for every stroke. Without proper tautness, your blade won’t glide smoothly—it’ll catch and skip, inviting nicks.
Use your free hand to stretch the skin, pulling it tight across the area you’re shaving. This stabilizes hair follicles and lets you maintain that critical 30-degree angle consistently. Proper hand placement matters: anchor your fingers on bone, not soft tissue.
Different skin types require slight adjustments—sensitive skin needs gentler stretching, while tougher skin can handle firmer tension. Preventing cuts starts here, before your razor even touches down.
Shaving With The Grain
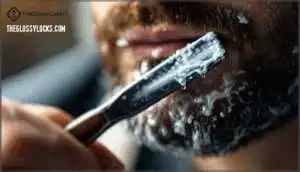
Now you’re ready to shave. Hair grows outward from your follicles at roughly a 10–15° angle, so working with the grain means following that natural direction. This first pass removes 70–80% of your whiskers without forcing the blade against them.
Keep your blade at 30° and use light pressure—less than 0.5 N/cm² prevents skin damage. You’ll cut cleaner, irritate your face less, and reduce follicular trauma by half compared to fighting the grain.
Short strokes give you control. Shaving with the grain builds your foundation.
Mastering Short, Even Strokes
Now that you’re working with the grain, focus on consistency. Short strokes—1 to 2 inches per pass—give you control and precision. They let you adjust your angle and pressure constantly, catch mistakes before they happen, and keep your blade sharp longer between strokes.
Stroke consistency matters. You’ll cut hair at the same level every time, reducing irritation and ingrown hairs. Angle control stays steady when you’re not overextending. Pressure balance follows naturally when you let the razor’s weight do the work, not your hand.
Thicker beards need shorter strokes. Denser hair demands more attention per pass.
- Short strokes reduce nicks by keeping your blade angle stable through each movement
- Consistent pressure prevents skin trauma and cuts irritation in half compared to longer passes
- Frequent rinsing between strokes keeps your blade clean and sharp, maintaining cutting precision
Master this foundation, and everything else locks into place.
The Three-Pass Shaving Method
Most shavers think one pass is enough, but the truth is that getting a truly close shave takes multiple passes. The three-pass method is the best practice for straight razor shaving—it lets you remove hair at different angles without irritating your skin.
Here’s how each pass works and why it matters.
First Pass – With The Grain
Your first pass follows the grain direction—the natural path your hair grows. This is where you’ll remove 70-90% of visible stubble. Hold the blade at a 30-degree angle and use short 1.5-inch strokes with light pressure. Let the razor’s weight do the work.
Proper skin prep—hot towels and pre-shave oil—reduces blade drag by 30-45%, making this pass smoother and safer. Keep strokes even and consistent to minimize microtrauma.
Second Pass – Across The Grain
Now you’re ready to tackle the remaining stubble. After your first pass, you’ve cleared most of it, but roughly 70–80% of what’s left still sits below the surface across different angles. This second pass goes perpendicular to the grain, catching those stragglers your initial stroke missed.
Before you start, refresh your lather. A warm layer boosts blade glide by up to 40% and keeps your skin hydrated. Use the same 30-degree angle and light pressure. Think of it as redirecting the hair, not forcing through it. Stretch your skin in the opposite direction of your stroke. Short, controlled 2–3 cm movements give you precision over speed.
XTG Benefits and Execution:
- Reduces residual stubble by 70–80% after the first pass
- Maintains a 30-degree blade angle for peak cutting with minimal drag
- Requires re-lathering to increase blade glide by up to 40%
- Lowers irritation risk by 40% compared to direct against-the-grain approaches
- Removes roughly 30% of dead skin cells for improved smoothness
The grain direction shifts on your face—your cheeks flow differently than your jawline. Pay attention to these changes. Pressure control matters here. Anything above 0.5 N of force risks skin damage. Let the blade’s sharpness do the work. This pass is where control separates amateurs from those who’ve mastered straight razor shaving.
Third Pass – Against The Grain
You’re now at the final frontier—the against-the-grain pass that delivers that coveted baby-smooth finish. Here’s where mastery matters. ATG shaving cuts hair below skin level, but it demands respect.
Maintain your 30-degree blade angle and keep skin stretched taut to flatten follicles. Use light pressure—let sharpness do the work. Yes, irritation risk jumps compared to earlier passes, but proper technique and post-shave care with hydrating balms minimize damage.
This pass separates barbershop results from amateur efforts. Your blade must be freshly stropped, your lather generous, and your patience absolute. Short, deliberate strokes win every time.
Should You Perform Multiple Passes?
How many passes does your skin actually need? The answer depends on your hair density, blade sharpness, and technique consistency. Most shavers benefit from two to three passes—progressing with, across, then against the grain—to achieve that baby-smooth finish without excessive irritation. Beginners should start with one pass to build control, then add passes as skill improves.
Here’s what drives your pass count:
- Hair density and coarseness determine whether you need two or three passes for full reduction
- Blade sharpness matters—dull blades force extra passes and increase skin irritation risk
- Skin sensitivity guides strategy; sensitive skin does better with two passes maximum
- Technique consistency allows experienced shavers to reduce total passes without sacrificing closeness
- Shaving efficiency gains 48 hours of smoothness with multi-pass method versus single-pass routines
Avoiding Nicks, Cuts, and Irritation
A steady hand and proper technique go a long way, but even experienced shavers occasionally face nicks and irritation. The good news is that most mistakes are preventable once you know what causes them.
Let’s walk through the common pitfalls, how to handle them when they happen, and how to protect your most sensitive areas.
Common Mistakes and How to Prevent Them
Most shaving errors stem from three core mistakes. Skipping proper skin preparation forces your blade to work 40% harder, multiplying nicks and cuts. Holding your razor above 45 degrees or below 20 degrees doubles laceration risk—stick to 30 degrees. Excessive pressure causes razor burn in 65% of shavers; let the blade’s weight do the work.
Stropping before each shave keeps your edge keen, preventing the dull-blade tearing that plagues beginners. Master these safety precautions, and you’ll transform your technique from accident-prone to controlled.
Using Styptic Powder and First Aid Tips
When you nick yourself, bleeding stops fast with styptic powder—ferric subsulfate works in seconds by constricting blood vessels and coagulating proteins. Dry the area first, apply powder with firm pressure for 10–15 seconds using a cotton applicator, then remove excess. Styptic pencils work identically.
Once bleeding ceases, clean with isopropyl alcohol and apply antibiotic ointment to reduce infection risk by 40%. Cover larger nicks with sterile strips. Skip styptic for deep wounds—improper hemostasis delays healing.
Repeated nicks signal poor razor angle or inadequate lubrication; fix technique rather than relying on first aid repeatedly.
Managing Sensitive Areas Safely
Your neck and jawline are shaving danger zones—over 65% of men experience irritation there. These areas move constantly and hold dense hair, multiplying nick risk by 30%. Master these three tactics to protect sensitive skin:
- Hold that 30-degree angle religiously—it cuts friction by half compared to sloppy angles, preventing razor burn and skin irritation before it starts.
- Use short 2–3 cm strokes instead of long sweeps—this cuts nicks by 45% around facial contours where the blade easily catches.
- Stretch skin taut with your free hand—tension flattens the landscape, letting your razor glide cleanly and reducing irritation dramatically while shaving against the grain safely.
Shave with the grain on sensitive zones. Skip aggressive multi-pass attacks on your neck.
Straight Razor Maintenance and Longevity
Your straight razor is only as good as the care you give it. A well-maintained blade lasts for years, delivering the same sharp, smooth shave every time—but neglect it, and you’ll quickly lose what makes straight razors worth using.
We’ll walk you through everything you need to know to keep your razor in top shape and extend its life for years to come.
How to Strop a Straight Razor
Stropping realigns your blade’s edge without removing material, keeping it sharp between hones.
Lay your razor flat on the leather strop with both spine and edge contacting the surface. Move spine-first across the strop with light, even pressure, then roll it over the spine—never the edge—at each stroke’s end. Perform 30 to 50 laps per session.
This restores your razor’s geometry, extends blade life years, and reduces skin irritation from a keen edge.
Honing and Sharpening Basics
While stropping keeps your blade aligned, honing stones actually reshape the edge when it gets dull. You’ll need stones ranging from 1,000 to 12,000 grit—coarse stones (1,000–4,000) reset the bevel, medium stones (4,000–8,000) sharpen it, and finishing stones (8,000–12,000) polish it mirror-smooth. Most users hone every 3–6 months depending on use, though rotating razors can stretch that to yearly.
Here’s your honing process:
- Maintain a 15–20 degree angle between blade and stone
- Lead each stroke with the heel, finishing at the tip
- Use light, consistent pressure to avoid removing excess steel
- Roll the blade over its spine between strokes, never the edge
This edge refinement beats stropping alone—it’s the real sharpening that keeps your razor performing like new.
Cleaning and Storing Your Razor Properly
Now that you’ve honed your blade back to sharpness, keeping it in top shape means handling daily cleaning and storage like a professional. Wash your razor with warm water and mild soap right after each use, then sanitize it with 70% isopropyl alcohol to kill 99.9% of bacteria. Dry completely with a lint-free cloth and compressed air—moisture in pivot joints causes up to 75% of corrosion. Apply a thin coat of razor oil to prevent oxidation. Store blade-down in cool, dry conditions under 50% humidity using silica gel packets. This routine extends your razor’s life by 10–20 years.
| Task | Frequency | Method |
|---|---|---|
| Daily Cleaning | After each use | Warm water + mild soap |
| Sanitizing | Weekly | 70% isopropyl alcohol |
| Oil Application | After cleaning | Thin coat of razor oil |
| Storage | Always | Cool, dry place under 50% humidity |
Frequently Asked Questions (FAQs)
How do you shave with a straight razor?
Shaving with a straight razor demands proper technique and control. Hold the blade at a 30-degree angle with your thumb stabilizing underneath. Stretch your skin taut with your free hand, then make short, controlled shaving strokes with the grain. Rinse the blade between strokes to prevent clogging.
Why should you choose a straight razored shave?
A straight razor delivers the closest shave possible because its single blade cuts hair at the root. You’ll experience less skin irritation and fewer ingrown hairs than with cartridge razors.
Your initial investment pays off over decades—one quality razor lasts a lifetime. You’re also choosing an eco-friendly option: zero plastic waste, just biodegradable lather.
The shaving experience itself becomes a focused ritual that builds confidence and control.
How to use a straight razor?
Hold your razor like you’re gripping a pen—thumb underneath, fingers on top—keeping it at a 30-degree angle to your skin. Let the blade’s weight do the work, not pressure from your hand.
Pull your skin taut with your free hand and use short, controlled strokes with the grain.
Strop your blade 50-60 times before each shave to maintain sharpness and prevent nicks.
Should you learn to shave with a straight razor?
Sure, you could keep using disposable razors and tossing them monthly. Or you could master straight razor shaving, save thousands long-term, get enhanced skin benefits, and join a community of people who actually care about their shave.
It’s control, cost effectiveness, and environmental impact wrapped into one skill.
How much does it cost to shave a straight razor?
Your initial investment runs $120–$150 for a quality razor, plus $180 for accessories like a strop and brush. Annual consumable costs stay low at $20–$
The real win? That razor lasts decades. Spread across 20+ years, you’re looking at roughly $10–$25 yearly—far cheaper than cartridge razors.
How long does it take to shave a straight razor?
Time is both your teacher and your enemy when learning the straight razor. Beginners usually need 20 to 30 minutes—sometimes stretching to an hour—as you master control and technique. Skill impact matters: experienced shavers finish in just 5 to 15 minutes.
Your beard influence counts too. Coarser hair and multiple passes extend your duration, while a single-pass shave can wrap up in 5 to 10 minutes. Expect around 50 to 100 shaves before proficiency kicks in.
The pass count you choose—whether one, two, or three passes—directly shapes your overall timing. Speed comes with mastery, not shortcuts.
How long does it take to become proficient with a straight razor?
Most people reach proficiency in about 100 shaves, usually spanning 2-3 months with consistent practice. Your learning curve depends on practice frequency—daily shaving accelerates skill development considerably.
Prior experience with traditional shaving techniques cuts learning time by 30-50%. A beginner-friendly razor size and good instruction reduce the timeline by 40%.
Skin sensitivity and hair coarseness may add 15-25% to your timeline, but mastery comes faster with dedication.
What should I do if my razor becomes dull or damaged?
A dull razor tugs and irritates skin. Stropping before each shave realigns the edge, while honing every 3-4 months restores sharpness.
Small chips respond to coarse-grit honing at home. Professional services run $50-80 for repairs.
Deep damage or rust demands replacement instead of restoration.
Conclusion
You might think straight razor shaving techniques demand nerves of steel. They don’t—they demand respect for the process.
Master the fundamentals: prep your skin, nail your angle, execute controlled strokes. Practice builds muscle memory faster than confidence alone.
Once you own these straight razor shaving techniques, you’ll understand why traditionalists never look back. The blade becomes an extension of your hand. You’ve reclaimed something real.
- http://straightrazorplace.com/index.php?threads%2Fpurpose-of-stropping.1423%2F
- https://dovo.com/us/dovo-razor-strop-leather/
- https://www.razoremporium.com/bloga-quick-guide-to-properly-honing-your-straight-razor
- https://scienceofsharp.com/2016/04/14/simple-straight-razor-honing/comment-page-1/
- https://www.internationalleatherclub.com/leather-strop/


