This site is supported by our readers. We may earn a commission, at no cost to you, if you purchase through links.

Most people blame their soap when lather falls flat—wrong bar, cheap brand, bad batch. The real culprit is usually the water-to-soap ratio, a small detail that controls everything from foam density to how long bubbles hold together.
Get it wrong by even a modest margin and you’re either scrubbing with a watery film or wrestling with a thick paste that rinses poorly. Water hardness complicates things further, since dissolved minerals actively compete with surfactants and suppress lather before it even forms.
Dialing in the right balance means understanding your soap’s chemistry, your water supply, and your skin—then adjusting all three together.
Table Of Contents
- What is The Ideal Water to Soap Ratio?
- How Water Quality Affects Soap Lather
- Factors Influencing Lather Quality
- Techniques to Enhance Soap Lather
- Adjusting Soap to Water Ratio for Skin Types
- Soap Formulation and Lather Optimization
- Top 10 Products for Better Soap Lather
- 1. GoTo Foam Firm Upholstery Cushion
- 2. FoamTouch High Density Upholstery Foam
- 3. Loctite Tite Foam Gap Sealant
- 4. DAT 12×12 Foam Cushion Sheets
- 5. FLOFARE Floral Foam Blocks
- 6. Alin Foam Packing Pouches and Sheets
- 7. GOCHANGE Foam Cutter with Digital Voltage Controller
- 8. ONREVA Polyethylene Toolbox Foam Inserts
- 9. Creative Hobbies Hand Shredder Rasp for Pottery
- 10. YIENFBEV High Density Polyurethane Foam
- Common Soap Lather Problems and Solutions
- Frequently Asked Questions (FAQs)
- Conclusion
What is The Ideal Water to Soap Ratio?
Getting the water-to-soap ratio right is what separates a rich, satisfying lather from a watery, disappointing one.
Once you nail that balance, you’ll get the most out of whichever non-aerosol shaving cream type you’re working with—each one responds a little differently to water.
A few key principles guide this balance, and once you understand them, you can dial in your formula with confidence.
Here’s what shapes the ideal ratio.
Standard Ratios for Bar and Liquid Soap
Bar soap and liquid soap don’t follow the same rules. For liquid hand soap in a foam pump, a 1:3 soap-to-water ratio is your reliable starting point; soft-water areas can stretch that to 1:6 without sacrificing lather quality. Hard-water compensation usually means dialing soap concentration back up.
Bar soap skips fixed ratios entirely — contact time and rubbing pressure do the work. Understanding the surfactants backbone role is essential for effective formulation.
Importance of Critical Micelle Concentration
Every surfactant has a micelle formation threshold — the point where soap stops merely sitting at the water surface and starts building the micelles that trap oil and stabilize foam. Think of it as the tipping point for lather quality.
Every surfactant has a tipping point where soap stops sitting idle and starts building the micelles that make real lather possible
- Below this threshold, foam stability drops quickly
- Sodium Lauryl Sulphate hits it at around 2 g per liter
- Exceeding it improves formulation cost optimization without wasteful overuse
That water ratio determines everything. Understanding the critical micelle concentration(https://www.biolinscientific.com/blog/what-is-critical-micelle-concentration) helps fine‑tune the water‑to‑soap ratio.
Adjusting Ratios for Different Uses
Once you understand micelle formation, adjusting the soap to water ratio becomes a practical skill.
For dishwashing dilution, a 1:4 mix balances lather quality and cleaning. Body wash ratio sits at 1:2 for comfort. Foam dispenser tuning needs a 1:5 blend for foam stability. Household surface blends use 1:10, while facial cleanser mix prioritizes mildness.
| Use Case | Ratio |
|---|---|
| Dishwashing Dilution | 1:4 |
| Body Wash Ratio | 1:2 |
| Foam Dispenser Tuning | 1:5 |
| Household Surface Blend | 1:10 |
| Facial Cleanser Mix | 1:6 |
How Water Quality Affects Soap Lather

Water quality plays a bigger role in your lather than most people realize.
The difference between soft and hard water can completely change how your soap performs, no matter how good the formula is.
Here’s what you need to know about how minerals and water type affect your lather.
Lather Formation in Soft Vs. Hard Water
Water type quietly controls your lather before you’ve even picked up the bar.
In soft water, soap hits the micelle threshold faster, building large, creamy bubbles with less product — so soap consumption drops noticeably. Hard water ties up surfactants, shrinking bubble size and weakening foam stability.
That directly affects your skin rinse feel, leaving a draggy, residue-heavy finish instead of a clean, slick one.
Impact of Minerals on Lather Quality
hidden saboteurs of your lather.
Calcium scum formation begins the moment calcium ions bind to soap molecules, pulling surfactants out of action before any foam builds.
Magnesium bubble inhibition weakens air cell walls, causing faster collapse.
Iron discoloration effects add an orange-brown tinge to suds.
At hardness threshold levels above 180 ppm, you’ll need two to three times more soap just to match normal foam output.
Solutions for Hard Water Challenges
Hard water doesn’t have to win. Water Softening through whole-house ion exchange systems removes calcium and magnesium, cutting your soap usage by up to 50 percent while boosting lather.
Chelating Additives like sodium citrate or phytic acid bind problem minerals directly in your formula. Shower Filters, Acidic Boosters like citric acid, and Synthetic Detergents all offer practical, targeted fixes depending on your setup.
Factors Influencing Lather Quality

Lather doesn’t come from water alone — what’s in your soap matters just as much.
ingredients you choose, from surfactants to oils, each play a distinct role in how your foam behaves.
drives lather quality and what you can do to control it.
Role of Surfactants and Additives
Ever notice how some soaps lather like a dream while others fall flat?
Surfactant Synergy is the secret; blending anionic and amphoteric boosters boosts Lather Enhancement and Foam Stability Agents.
Chelating Agents tackle mineral interference, Glycerin Conditioning softens skin, and precise Soap Making Techniques let you fine‑tune Surfactant Properties and Applications.
Adjust Water Quality and Temperature for richer, longer‑lasting foam.
Effects of Soap Base and Oils
Think of your soap base as the engine behind lather—each oil drives performance differently.
Lauric‑rich oils like coconut and palm kernel deliver quick Lather boosting and palm kernel foam. Castor lather boost stabilizes bubbles, while Olive creamy foam coats skin gently. Animal fat hardness keeps bars solid and lather dense.
- Lauric‑rich oils (coconut, palm kernel)
- Castor Oil (for lather stability)
- Olive Oil (creamy, gentle foam)
- Animal fats (hardness, dense lather)
- Palm kernel foam (quick bubble action)
Superfatting and Its Impact on Lather
Superfat changes the whole game—add too much, and your creamy lather turns dense, bubbles shrink, and foam stability drops.
A 5% superfat keeps bar hardness and bubble size balanced, but push higher and you’ll need lather enhancement methods or foam boosters to keep things lively.
Tweak your oil balance and soap ingredients for the right mix of cushion and cleansing.
Techniques to Enhance Soap Lather
Getting a rich lather isn’t just about the soap itself — how you use it matters just as much.
A few small adjustments to your technique can make a noticeable difference in how your soap performs.
Here are the key methods that actually move the needle.
Proper Mixing and Application Methods

Mixing technique makes or breaks your lather before a single ingredient changes. Start with direct skin application using just a pea-sized amount, then build foam through incremental water drops — not all at once.
- brush loading technique with 20–30 firm swirling seconds
- foam consistency by adding water in small drops
- hand lather timing: scrub 20 seconds minimum
- water temperature warm for better foam production
- handwashing techniques for full coverage
Using Tools: Loofahs, Washcloths, and Pouches

Your application tool changes everything about lather.
Loofah texture creates more surface area, stretching a small amount of soap into dense foam.
Washcloth absorbency produces a creamier, wetter foam — better for sensitive skin.
soap saver pouch uses pocket friction to build thick lather while preserving bar soap ends.
| Tool | Best For |
|---|---|
| Loofah | Oily skin, stronger exfoliation |
| Washcloth | Sensitive skin, hygiene replacement ease |
| Soap Pouch | Skin type matching, bar soap savings |
Water Temperature and Lather Formation

Your tool shapes lather texture, but water temperature shapes everything underneath it.
Warm water lowers surface tension and pushes surfactants past their Krafft temperature, where micelle solubility jumps sharply and foam formation becomes easy. Lukewarm water — around 37 to 40°C — hits the sweet spot: rich foam texture without stripping skin oils.
Cold water fights you; very hot water collapses the foam almost immediately.
Adjusting Soap to Water Ratio for Skin Types

Not all skin types work well with the same soap-to-water balance, and using the wrong ratio can leave your skin feeling stripped or greasy.
A few small adjustments can make a real difference depending on whether your skin runs sensitive or oily.
Here’s how to dial in the right ratio for your specific needs.
Ratios for Sensitive Vs. Oily Skin
Your skin type shapes everything about how you dilute and use soap.
Sensitive skin needs a gentler Oil Balance Ratio — think 1:10 soap to water — with a lower Surfactant Percentage around 8% caprylyl glucoside for soft Foam Texture and calm Lather.
Oily skin manages a tighter 1:5 Dilution Guidance, boosting Foaming power without over‑stripping, while a 5–8% Superfat Level keeps pH Adjustment balanced across both types.
Customizing Lather for Personal Needs
Beyond skin type, your personal routine shapes your ideal Skin Type Ratios further. Fragrance Lather preferences, Allergy‑Safe Additives, and Seasonal Lather Adjustments all shift what works best.
- Use Eco‑Friendly Lather Boosters like castor oil at 5% for richer Foam Texture and Consistency
- Adjust Water Temperature to 100–110°F for faster lather
- Lower Superfat to 5% in summer, raise to 10% in dry winter months
- Swap fragrance oils for allergy‑safe alternatives if lather irritates your skin
- Match your Skin Type to dilution ratios before adding any booster
Soap Formulation and Lather Optimization

Getting your soap formula right is the difference between a bar that performs and one that just sits there.
A few key decisions — which calculator you use, how you balance oils, and what ingredients you choose — shape everything about your lather.
Here’s what you need to know to get each one right.
Using Soap Calculators for Precise Ratios
soap calculator takes the guesswork out of cold process soap formulation. You enter your Oil Weight Input, set your Superfat Percentage Settings anywhere from 0–10%, and the lye calculator instantly computes precise lye and water ratios.
Batch Scaling Automation adjusts every ingredient proportionally, so your recipe stays consistent at any size.
Tools like SoapCalc.net default the Water‑to‑Lye Ratio to 2:1, giving you a reliable, repeatable starting point.
Balancing Cleansing and Moisturizing Properties
Getting cleansing power and moisturizing properties to coexist takes deliberate choices.
Keep Superfat Levels between 5–8% so that free oils condition without killing lather. Nail your Fatty Acid Balance by limiting coconut oil to 15–25%. Add Humectant Inclusion through glycerin.
Consider pH Adjustment or Syndet Blends with mild Surfactants to protect your barrier while still delivering a rich, effective lather.
Selecting Ingredients for Maximum Foam
Choosing the right ingredients controls everything about your lather.
Use a 20–30% coconut oil ratio for fluffy, cleansing foam, then add a 5–8% castor oil boost to stabilize bubbles and add creaminess.
A small honey sweetener addition, around 1–2 teaspoons per batch, strengthens foam stability.
Palm kernel foam performs similarly to coconut.
Finish with a balanced surfactant blend for consistent, reliable foam production.
Top 10 Products for Better Soap Lather
The right products can make a real difference in how your soap performs. Whether you’re working on lather quality, texture, or consistency, having the right tools on hand saves time and guesswork.
Here are ten products worth keeping in your formulation toolkit.
1. GoTo Foam Firm Upholstery Cushion
If your leather setup needs a solid surface to work on, the GoTo Foam Firm Upholstery Cushion delivers reliable support where it counts.
Made in the USA and CertiPUR certified, it carries a 44 ILD compression rating — firm enough to resist deep sink-in without feeling like a board.
It’s latex-free, easy to cut to size, and works across poker tables, boat seats, and furniture cushions.
At 1.72 pounds, it’s lightweight but built to hold its shape through years of regular use.
| Best For | Anyone who needs a firm, reliable foam for upholstery projects like poker tables, boat seats, or replacing worn furniture cushions. |
|---|---|
| Material | Polyurethane foam |
| Primary Color | White |
| Weight | 1.72 lbs |
| Use Case | Upholstery/cushioning |
| DIY Friendly | Yes |
| Indoor Use | Yes |
| Additional Features |
|
- Made in the USA and CertiPUR certified, so you know what you’re getting quality-wise
- Easy to cut and shape, which makes it flexible for all kinds of DIY projects
- Lightweight at 1.72 lbs, but holds its shape well over time
- Pretty firm, so if you like a softer feel, this probably isn’t your pick
- Cutting it cleanly can be tricky depending on what tools you have
- Comes compressed, which can make returns or storage a bit of a hassle
2. FoamTouch High Density Upholstery Foam
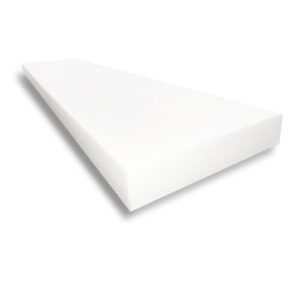
FoamTouch High Density Upholstery Foam gives you a reliable work surface when precision matters.
With a density of 1.79 pounds per cubic foot and a 45 ILD firmness rating, it holds its shape under consistent pressure without breaking down. That means fewer interruptions and more control during your work.
It cuts cleanly, customizes easily, and manages daily use without sagging.
Rated for 7 to 10 years of performance, this foam is a practical, long‑term investment for any upholstery setup.
| Best For | DIY enthusiasts and professional upholsterers who need a firm, reliable foam for couch cushions, chair cushions, or custom upholstery projects. |
|---|---|
| Material | Polyurethane |
| Primary Color | White |
| Weight | 1.8 lbs |
| Use Case | Upholstery/cushioning |
| DIY Friendly | Yes |
| Indoor Use | Yes |
| Additional Features |
|
- High-density build (1.79LB, 45 ILD) holds its shape well under daily use without sagging
- Easy to cut and customize, so it works for a wide range of project sizes and shapes
- Made in the USA, which tends to mean tighter quality control and more consistent materials
- Only comes in one size (1" x 24" x 72"), so bigger or oddly shaped projects may need extra cuts or multiple pieces
- No warranty or guarantee mentioned, which is worth noting for a long-term investment
- At just 1 inch thick, it may not be enough on its own for deep cushion projects that need more support
3. Loctite Tite Foam Gap Sealant
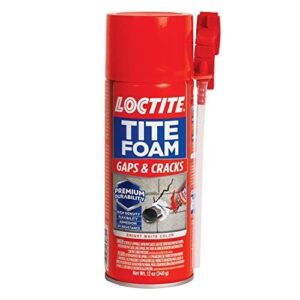
Loctite Tite Foam Gap Sealant isn’t a soap product, but it earns a place here as a workshop essential for serious formulators.
When you’re sealing your workspace — filling gaps in basements, crawlspaces, or around plumbing penetrations — this polyurethane foam manages openings up to 1 inch wide and bonds to wood, concrete, metal, and PVC.
It goes tack-free in 6 to 8 minutes, sands and paints once cured, and holds up against UV exposure and building movement without failing.
| Best For | Homeowners and DIYers who need a reliable, heavy-duty foam sealant for closing up gaps in basements, crawlspaces, or around plumbing and electrical penetrations. |
|---|---|
| Material | Polyurethane |
| Primary Color | Red |
| Weight | 12 oz |
| Use Case | Gap sealing/insulation |
| DIY Friendly | Yes |
| Indoor Use | Yes |
| Additional Features |
|
- Fills gaps up to 1 inch wide and bonds to most common surfaces like wood, concrete, and PVC
- Dries fast, then sands and paints easily once cured
- Holds up against UV rays and building movement, so it stays put long-term
- The nozzle tends to clog after the first use, which makes getting a second application out of the same can a hassle
- It can get messy fast — gloves are a must, and cleanup off skin or surfaces is no fun
- Not the right pick for larger cracks or openings beyond that 1-inch sweet spot
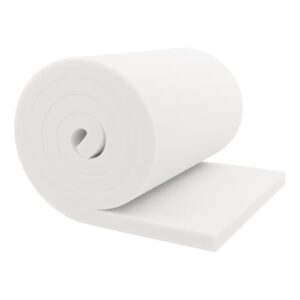
4. DAT 12×12 Foam Cushion Sheets
If you need something more practical for organizing your formulation workspace, DAT’s 12×12 foam cushion sheets are worth keeping on hand.
Each pack includes 100 pre-cut polyethylene sheets, measuring 12 inches square at 1/16-inch thickness — thin enough to layer, firm enough to protect.
They’re reusable, non-abrasive, and dust-free, which matters when you’re storing fragile equipment like glass beakers or ceramic molds.
Lightweight at around 10 ounces per pack, they won’t add bulk to your supply setup.
| Best For | Anyone who regularly packs and ships fragile items like glassware, plates, or ceramics and needs a reliable, affordable cushioning solution in bulk. |
|---|---|
| Material | Polyethylene |
| Primary Color | White |
| Weight | 10 oz |
| Use Case | Packing/shipping |
| DIY Friendly | Yes |
| Indoor Use | Yes |
| Additional Features |
|
- You get 100 pre-cut sheets right out of the box — no cutting, no measuring, just grab and wrap.
- Polyethylene is lightweight, reusable, and won’t scratch or leave residue on delicate surfaces.
- At 10 ounces for the whole pack, they’re easy to store without taking up much space.
- For really fragile or high-value items, one sheet might not cut it — you may need to double or triple up.
- They’re not perforated, so you can’t easily tear off smaller pieces if the full 12×12 is more than you need.
- Foam isn’t the most eco-friendly material, which could be a sticking point if sustainability matters to you.
5. FLOFARE Floral Foam Blocks
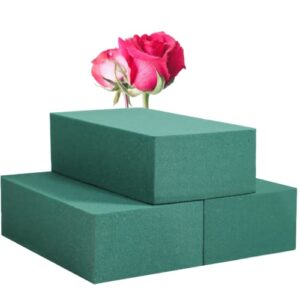
For workspace organization, floral foam blocks might seem out of place — but in a formulation setup, they’re surprisingly handy for staging molds and containers.
FLOFARE’s blocks come in packs of 3, measuring 5.5 × 3.1 × 1.7 inches, lightweight at 0.634 ounces each. They cut cleanly to fit custom container shapes and hold their structure without crumbling under light pressure.
Whether you’re propping up molds at an angle or keeping small containers stable during pour, these blocks handle the job quietly and reliably.
| Best For | Crafters, florists, and DIY enthusiasts who need an affordable, easy-to-use foam base for floral arrangements, centerpieces, or special event décor. |
|---|---|
| Material | Floral foam |
| Primary Color | Green |
| Weight | 0.634 oz |
| Use Case | Floral arranging |
| DIY Friendly | Yes |
| Indoor Use | Yes |
| Additional Features |
|
- Cuts and shapes easily to fit just about any vase or container
- Works for both fresh and artificial flowers, so it’s flexible for different projects
- Budget-friendly and comes in a pack of 3, so you get solid value
- On the smaller side, so large arrangements might need multiple blocks
- Requires soaking before use with fresh flowers, which adds prep time
- Can get crumbly if you’re not gentle, and the mess can add up quickly
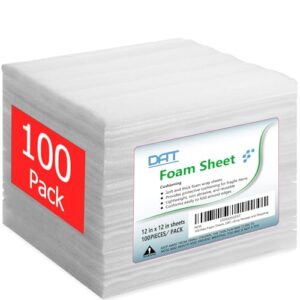
6. Alin Foam Packing Pouches and Sheets
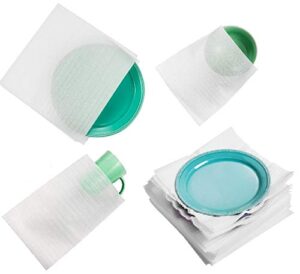
When your workspace calls for something more protective, Alin’s foam packing pouches and sheets step up reliably. This 100-count set covers three pouch sizes — 7.5" × 7.5", 7.5" × 12", and 12" × 12" — plus flat 12" × 12" sheets, so you’re not stuck improvising coverage for odd-shaped molds or finished bars.
The 1/12" foam is thick enough to cushion without bulk, and the non-abrasive surface won’t scratch polished containers. Weighing just 9.2 ounces total, the whole pack stays manageable and ready to use.
| Best For | Crafters, movers, and collectors who need reliable, flexible protection for fragile items like dishes, glassware, and finished soap bars or candles during storage or transport. |
|---|---|
| Material | Foam |
| Primary Color | White |
| Weight | 9.2 oz |
| Use Case | Packing/moving |
| DIY Friendly | Yes |
| Indoor Use | Yes |
| Additional Features |
|
- 100 pieces in multiple sizes means you’ve got coverage for almost anything, from small trinkets to larger dishes, without buying separate packs.
- The non-abrasive foam is gentle on polished or delicate surfaces, so no scratches on your finished work.
- At just 9.2 ounces, the whole set is lightweight and easy to store until you need it.
- The foam can rip if you stretch it too far, so bulky or oddly shaped items need a little extra care when wrapping.
- Thin sheets may not cut it for really heavy or extremely fragile pieces — you might need extra padding.
- No adhesive, so you’ll want tape or another fastener on hand to keep wraps secure during a move.
7. GOCHANGE Foam Cutter with Digital Voltage Controller

Precise cuts matter when you’re shaping foam molds or custom soap forms. The GOCHANGE Foam Cutter gives you four cutting attachments — a 12cm straight knife, 7cm wand, 5cm bending cutter, and 18cm bow blade — each matched to a specific voltage between 5V and 9V.
That range keeps your cuts clean and your materials intact. It heats to 150°C in under 15 seconds, processes EPS, styrofoam, and KT board, and weighs just 350 grams.
| Best For | Hobbyists, artists, and DIYers who need clean, precise foam cuts for crafts, model making, signage, or custom molds. |
|---|---|
| Material | Stainless Steel |
| Primary Color | Black |
| Weight | 15.1 oz |
| Use Case | Foam cutting |
| DIY Friendly | Yes |
| Indoor Use | Yes |
| Additional Features |
|
- Heats up fast — ready to cut in under 15 seconds, so you’re not sitting around waiting
- Four attachments give you real versatility, from straight cuts to curves and longer bow cuts
- Works across a solid range of foam types, including EPS, styrofoam, and KT board
- Not great for thick or large foam blocks — it has its limits on heavier material
- Voltage has to be dialed in manually for each attachment, which takes some trial and error
- Some users have run into durability issues, with parts breaking or malfunctioning over time
8. ONREVA Polyethylene Toolbox Foam Inserts
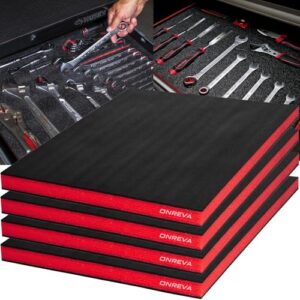
Organization is half the battle in any workspace. ONREVA’s polyethylene foam inserts let you carve out exact spots for each tool, so nothing shifts during transport or gets scratched from contact.
The closed-cell PE material resists water and absorbs impact well, supporting heavy items like wrenches without compressing. You get sheets in multiple sizes — from 18x12x1 inch up to 48x24x2 inches — and the red-on-black layering makes missing tools obvious at a glance.
Customization takes only a utility knife.
| Best For | DIY enthusiasts, mechanics, and tradespeople who want to keep their toolbox organized and protect their gear from damage. |
|---|---|
| Material | Polyethylene PE Foam |
| Primary Color | Red/Black |
| Weight | Not specified |
| Use Case | Tool organization |
| DIY Friendly | Yes |
| Indoor Use | Yes |
| Additional Features |
|
- Cuts easily with a utility knife, so you can make a custom fit without any special tools
- The red-and-black layering makes it instantly obvious when a tool is missing
- Works in just about any toolbox, cabinet, or case you already own
- The actual color can look different from what you see in the product photos
- Separating the foam layers can be tricky — the glue holds on tight
- Getting clean, precise cuts may take a little practice or extra effort
9. Creative Hobbies Hand Shredder Rasp for Pottery
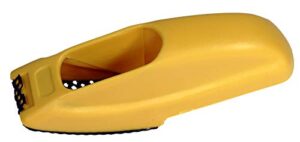
Clay work demands precision, and the Creative Hobbies Hand Shredder Rasp delivers it. Weighing just 2.4 ounces and measuring 6 inches long, it’s compact enough for detailed shaping yet effective across larger surfaces.
The open blade design stops clay from clogging mid‑stroke, while the curved teeth handle efficient stock removal on leather‑hard clay. You can clean up edges, smooth rims, or add textured patterns — all with one lightweight tool that fits naturally in your hand.
| Best For | Potters, sculptors, and hobbyists who need a lightweight, versatile tool for shaping and smoothing leather-hard clay and other materials. |
|---|---|
| Material | Polypropylene |
| Primary Color | Yellow |
| Weight | 2.4 oz |
| Use Case | Shaping/sculpting |
| DIY Friendly | Yes |
| Indoor Use | Yes |
| Additional Features |
|
- The open blade design keeps clay from clogging, so you’re not stopping every few strokes to clean it out.
- At just 2.4 ounces, it’s easy to hold for long sessions without wearing out your hand.
- Works on more than just clay — foam, drywall, and auto body filler are all fair game.
- It only shaves in one direction, which can slow you down depending on your workflow.
- Clay can still get stuck in the tool and kill its effectiveness if you’re not careful.
- Some users find tools like graters or Surform blades do the job better, especially for heavy stock removal.
10. YIENFBEV High Density Polyurethane Foam
The YIENFBEV High Density Polyurethane Foam pulls double duty in a soap-making setup. Each sheet measures 16 x 12 x 1 inch and resists sagging under pressure, so it holds its shape through repeated use.
You can cut it to size with a utility knife, then shred scraps into mesh pouches to create lather-boosting soap savers. It comes vacuum-packed in two sheets and expands fully within 24–48 hours — straightforward and ready to put to work.
| Best For | DIYers, crafters, and anyone needing affordable foam for upholstery, cushion replacements, or custom padding projects. |
|---|---|
| Material | Polyurethane |
| Primary Color | White |
| Weight | 8.1 oz |
| Use Case | Cushioning/padding |
| DIY Friendly | Yes |
| Indoor Use | Yes |
| Additional Features |
|
- Comes in two sheets and cuts easily to any shape or size you need
- Holds up well under regular pressure without sagging or losing form
- Ships vacuum-packed, so it arrives compact and expands ready to use
- Takes 24–48 hours to fully expand before it’s usable
- May need extra layers for anything requiring heavy-duty support
- Actual dimensions can run slightly off from what’s listed
Common Soap Lather Problems and Solutions

Even the best soap formula can fall flat if something’s off with your lather.
Most problems trace back to handful of fixable causes — wrong ratios, hard water, or the wrong mix of oils.
Here’s what’s likely going wrong and how to correct it.
Troubleshooting Poor Lather Formation
Poor lather usually traces back to four fixable causes:
- Water Ratio Errors — Too much water dilutes surfactants below the critical micelle concentration, collapsing foam production fast.
- Excess Superfat — Above 8%, unsaponified oils smother bubbles; drop to 5% for airier lather.
- Hard-Water Scum — Calcium binds surfactants, so you’ll need 50% more soap just to see suds.
- Inadequate Mixing — Under two minutes won’t fully activate your foam soap base; warm water at 100–110°F speeds things up considerably.
Fixing Thin or Unstable Foam
Thin foam usually means your surfactants need backup. Add cocamidopropyl betaine at 10% for better foam stability, or try castor oil balance at 5–10% to anchor bubbles without stickiness.
Salt thickening at 1% firms the base; sodium lactate use tightens the foam structure further. A sugar foam boost lowers surface tension, while warmer water temperature accelerates foam production for richer, longer‑lasting lather.
Preventing Soap Scum and Residue
Soap scum isn’t inevitable — it’s a formulation and maintenance problem you can solve. Soft water treatment alone triples lather efficiency and cuts mineral deposits considerably. Pair that with these five habits:
- Switch to liquid soap benefits: fewer fatty acids mean less residue
- Daily squeegee usage removes 90% of water droplets from surfaces
- Apply surface coating application, like carnauba wax every three months
- Run ventilation control fans 60 minutes post-shower
- Choose foam soap or soap bases with synthetic surfactants for cleaner rinsing
Frequently Asked Questions (FAQs)
How to get more lather in homemade soap?
Add coconut oil at 20–30%, castor oil at 5–10%, and 1 teaspoon of sugar per pound of oils. Use warm water and a loofah for maximum lather in homemade soap.
How much soap to water ratio?
The right ratio depends on your goal. Handwashing dilution guidelines suggest 1:50, shaving lather ratios run about 1:4, and foam soap proportions work best at 1:
Does soap lather more in hard or soft water?
Soft water wins every time. Without calcium and magnesium causing mineral interference, your surfactants stay free to trap air and build foam.
Hard water diverts soap into soap scum instead of lather.
Why is my homemade soap not lathering?
Your homemade soap isn’t lathering due to hard water minerals, insufficient curing, excess superfat, wrong oil selection, or low lye concentration — each quietly sabotaging surfactants before a single bubble forms.
How does soap lather affect shaving comfort?
Good soap lather cuts razor friction, cushions your skin, and locks in moisture so the blade glides cleanly. That protective foam barrier means fewer nicks, less burn, and a noticeably smoother shave every time.
Does lather quality vary between skin cleansers?
Yes, lather quality varies considerably between skin cleansers.
Surfactant type impact, pH level differences, and skin type compatibility all shape foam density, stability, and feel across bar soaps, liquid washes, and facial cleansers.
How long should soap lather stay on skin?
Lather should stay on skin for 20 to 30 seconds — long enough for germ reduction timing to peak, but short enough to stay under the skin irritation threshold and preserve your skin’s natural barrier.
Conclusion
Picture a home brewer switching from tap to filtered water, then nudging their liquid soap from 10% down to 7% concentration—suddenly the lather is dense, stable, and rinses clean.
That single adjustment is what mastering the water to soap ratio lather balance actually looks like in practice.
Your water, your soap type, and your skin all pull in different directions.
Align them correctly, and every wash does exactly what it’s supposed to.
- https://pmc.ncbi.nlm.nih.gov/articles/PMC4125272/
- https://www.yxsprayers.com/news/did-you-know-that-people-use-less-water-when-washing-their-hands-with-foaming-soap-instead-of-liquid-soap/
- https://www.lisabronner.com/the-science-of-lather-exploring-the-fun-and-function-of-suds/
- https://waterfallglensoap.com/blogs/news/hard-water-vs-soft-water-bar-soap
- https://www.chagrinvalleysoapandsalve.com/blogs/idas-soap-box-blog/how-does-natural-soap-create-lather