This site is supported by our readers. We may earn a commission, at no cost to you, if you purchase through links. This content is for general informational and educational purposes only and is not a substitute for professional medical, dermatological, or nutritional advice.
That blowout you paid $60 for? You can recreate it in your bathroom with a round brush, a cool-shot button, and the right tension. Most people blame their tools when the real culprit is technique, like skipping the 90-degree pull that gives a blowout its sleekness.
Learning professional hair styling step by step changes everything: your flat iron sections shrink to 1.5 cm, your hairspray floats 20 cm above your roots, and your style lasts days instead of hours.
Below, you’ll find the five steps stylists actually use, from sectioning to that final 30-minute set.
Table Of Contents
- Key Takeaways
- Step 1: Choose Professional Hair Styling Tools and Products
- Step 2: Prepare, Protect, and Section Hair Properly
- Step 3: Blow-Dry Hair for Salon-Quality Smoothness and Volume
- Step 4: Create Curls, Braids, Half-Up Styles, and Updos
- Step 5: Finish, Set, and Maintain Your Hairstyle
- Frequently Asked Questions (FAQs)
- What is the 3:2:1 rule for haircuts?
- Is $10 a good tip for $100 salon?
- What is the 25 rule for hair?
- How to make $100,000 as a hairstylist?
- How do I become a professional hairstylist?
- How do you style a hairstyle?
- How do I get my first hairstyle?
- How do I become a hairdresser?
- How do you make a good hair stylist?
- What are easy hair styling guides for beginners?
- Conclusion
Key Takeaways
- Salon-quality blowouts at home depend far more on technique than expensive tools—key moves include the pull-and-roll brush method at 90-degree tension, root lift with mousse at the crown, and a 10-second cool-shot blast per section to lock in shine and prevent a midday collapse.
- Proper prep is non-negotiable: use a clarifying shampoo weekly, apply heat protectant from mid-lengths to ends, section hair into four quadrants (working bottom to top), and always do a hidden strand test to find the right temperature before applying heat.
- Match your tools and temperatures to your hair type—fine hair needs lower heat (170–190°C) and ionic dryers, thick hair needs higher wattage and 190–210°C—and work in small 1.5–2 cm sections with a single smooth glide, never re-passing a strand.
- Finishing determines longevity: stylists say 80% of a hairstyle’s staying power comes from prep and finishing, so mist flexible-hold spray 20–30 cm from mid-lengths (not roots), press palms on each section for 5–7 seconds, apply serum only to ends, and wait 30 minutes before brushing.
Step 1: Choose Professional Hair Styling Tools and Products
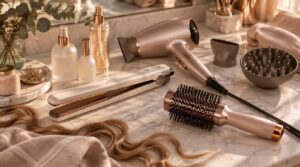
Great hair starts before you touch a single tool, and tool quality makes the difference. Professional Hair Styling Step by Step begins with smart shopping: invest in a ceramic or titanium flat iron, a boar-bristle round brush, and a dryer with multiple heat settings. Cheap tools snag, overheat, and sabotage your hair texture.
And since heat can subtly strip color over time, this guide on why your hair is getting lighter explains how to protect your shade.
Great hair starts before any tool touches it—invest in quality tools, because cheap ones sabotage your texture
Match your hair tools to your hair type. Fine hair loves lower heat and ionic dryers; thick or coarse hair needs higher wattage and wider plates. Curly hair? Grab a diffuser.
Then build your hair products lineup: a heat protectant, a lightweight leave-in, and a flexible-hold spray. Read labels and skip drying alcohols. Choose wisely now, and salonquality results follow at home. You’ve got this!
Step 2: Prepare, Protect, and Section Hair Properly
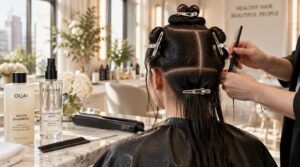
You’ve got your tools, so now let’s set the stage! Start with a clarifying shampoo once a week to strip buildup, because clean hair holds style better. On damp hair, apply your heat protectant evenly, one to two pumps from mid-lengths to ends. Fine hair? Go lighter. High porosity? Layer a bit more.
Next comes smart sectioning. Clip your hair into four quadrants: crown, sides, back, and nape. Work bottom to top so nothing gets missed. Keep a baseline parting line consistent, and handle strands gently to avoid frizz.
Before any heat, do a quick strand test on one hidden piece. If it sizzles, lower your temperature. Master this prep, and you’re already running a salon at home!
Step 3: Blow-Dry Hair for Salon-Quality Smoothness and Volume
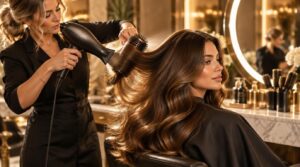
Here’s where your blowout gets its professional polish. You’ve prepped and sectioned, so now it’s time to master the techniques that turn a basic dry into salon-quality smoothness. These three moves will change how you use your dryer forever!
If you’re unsure about nozzle angles or tension while drying, this guide on how to use a hair dryer properly breaks it all down step by step.
Pull-and-Roll Brush Method
Imagine this: your round brush glides through a damp strand, rolling smoothly as your blow dryer follows like a spotlight. That’s the pull-and-roll method in action!
Start with sectioning your hair into four parts. Keep proper tension at 90 degrees to the scalp, pull down, and roll slowly.
Remember heat styling safety: pause 15–20 seconds between passes. You’ve got this!
Root Lift and Baby Hairs
Now for the crown, where root lift lives! Apply volumizing mousse at your roots before sectioning around the crown. Aim your blow dryer upward while your round brush pulls each section taut, so heat-activated polymers swell and lift.
For those wispy baby hairs along your hairline, skip heavy product, use a light cool pass, and backcomb gently with a fine comb.
Perfect!
Cool-Shot Setting Technique
Setting your style with the cool-shot button locks each section as you go. After a pass with your blowdrying techniques, hit cold air for 10 seconds; this contracts the cuticle, boosts shine, and preserves hair elasticity. If your dryer uses ionic technology, you’ll smooth frizz even faster. Skip this step and your blowout falls flat by lunch!
Step 4: Create Curls, Braids, Half-Up Styles, and Updos
Your hair is smooth, dry, and ready to be styled, so now comes the fun part! In this step, you’ll learn four gorgeous styles you can create at home, from bouncy curls to elegant updos. Pick the look that matches your mood, grab your tools, and let’s get styling!
Curling and Straightening
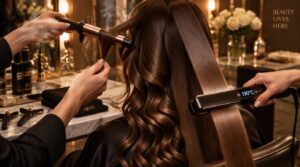
Your curling wand methods and flat iron skills separate pros from amateurs. Work in 1.5–2 cm sections, alternating curl directions for volume.
For straightening, clamp near the root and glide to ends at a slight downward angle, no creases. Keep your flat iron at 170–190°C for fine hair, 190–210°C for thick. Never re-pass a strand. One smooth glide, gorgeous results!
French and Dutch Braids
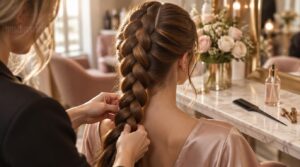
Imagine a rope of plaits running down your back, each ridge crisp and even. That’s what good braiding techniques deliver!
- French braid: cross strands over, feeding hair at the crown
- Dutch braid: flip strands under for that raised, puffed plait
- Hair sectioning: vertical partings keep tension even
- Styling tools: tail comb, light texturizing spray
- Finish with flexible-hold spray
You’ve got this!
Half-Up Boho Styles
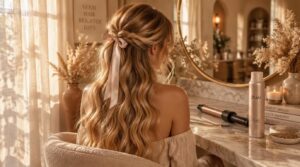
Here’s a fun one: searches for boho hairstyles jumped over 60% in recent years, and it’s easy to see why.
Grab your 1.25-inch curling iron and create loose waves, alternating curl directions for that easy dimension. Section your half-up pieces with satin ties, pull face-framing wisps loose, and finish with flexible-hold spray from 40–50 cm.
Gorgeous, undone beauty!
Low Rolled Updo
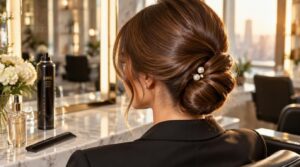
Want elegance in five minutes? The low rolled updo is your secret weapon for professional hair styling at home.
Gather hair into a low ponytail, then roll it upward, tucking ends under as you go. Secure with pins, smooth flyaways with serum, and finish with light hold hairspray.
Master this, and you’ll own one of the most timeless updo styles ever!
Step 5: Finish, Set, and Maintain Your Hairstyle
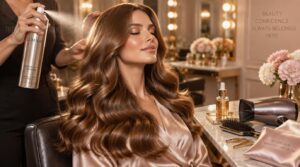
Here’s the secret: a great style isn’t finished until it’s locked in properly. You’ve done the hard part, so don’t let it fall flat in an hour!
Start with a flexible-hold hairspray, misting from mid-length to ends, 20–30 cm away. Skip the roots; they’ll stay bouncy. Then press your palms along each section for 5–7 seconds. That brief pressure seals everything crease-free. Follow with a cool blast for 10–15 seconds to set the finish.
Want shine without grease? Smooth a hair serum or antifrizz serum through mid-ends only. Never roots. A leave-in conditioner tames static on dry days.
Now leave it alone for 30 minutes before brushing. Sleeping on silk, touching up within 24 hours, and trims every 6–8 weeks keep your look perfect. You’ve earned it!
Frequently Asked Questions (FAQs)
What is the 3:2:1 rule for haircuts?
The 3:2:1 rule divides hair into 3 crown sections, 2 side sections, and 1 back section, balancing proportion and graduation. This hair tutorial for beginners trick keeps your weight distribution even and symmetrical!
Is $10 a good tip for $100 salon?
Is $10 a good tip for $100 salon service? Honestly, it’s on the low side. Take Maya, who tips $20 flat after her color appointments. For good service, aim for 18–20%, so $18–$
What is the 25 rule for hair?
The 25 rule means sectioning hair into 25-inch segments before styling. It keeps tension even, boosts blow-dry control, and prevents overlap errors. Grab your styling tools, measure, section, and watch your precision soar!
How to make $100,000 as a hairstylist?
How do top stylists hit six figures? Book 30 hours weekly at $70–$100, keep 18–22 clients, upsell treatments, and master hair texture analysis. Track your average ticket, raise prices yearly, and watch retention climb!
How do I become a professional hairstylist?
How do I become a professional hairstylist? Enroll in an accredited cosmetology school (9–18 months), pass your state licensing exam, then sharpen your hair styling techniques through apprenticeships and entry-level salon work until you’ve mastered the craft!
How do you style a hairstyle?
How do you style a hairstyle? You don’t need a salon appointment, just technique. Start with clean, dry hair, apply heat protectant, then section systematically. Work each section methodically with your tools for polished, consistent results.
How do I get my first hairstyle?
How do I get my first hairstyle? Book an appointment and bring 2–3 photos of looks you love. Discuss your face shape, hair texture, and lifestyle with your stylist. They’ll recommend flattering, manageable options!
How do I become a hairdresser?
How do I become a hairdresser? Enroll in a licensed cosmetology program, complete your state’s required 1,500–2,000 training hours, then pass both written and practical licensing exams. Start as a junior stylist, build your portfolio, and keep learning!
How do you make a good hair stylist?
How do you make a good hair stylist? Picture a chair-side artist, shears gliding like a brush on canvas. You sharpen technical skills through weekly practice, master your hair texture knowledge, listen deeply, and improve your hair care routine relentlessly.
What are easy hair styling guides for beginners?
You’ll love these easy step by step hair tutorials: start with ponytails and loose braids, grab basic hair styling tools, then try DIY hairdos like half-up styles. These beginner hair tutorials build confidence fast!
Conclusion
Here’s a number worth remembering: stylists report that 80% of a hairstyle’s longevity comes from prep and finishing, not the styling itself. That’s why mastering professional hair styling step by step matters more than owning expensive tools.
You’ve learned the sectioning, the tension, the cool-shot trick, and the 30-minute set. Now practice them until they feel automatic. Your bathroom mirror is about to become your favorite salon chair!