This site is supported by our readers. We may earn a commission, at no cost to you, if you purchase through links.

Walk into any barbershop and ask for a fade—you’ll get twenty different results depending on who’s holding the clippers. The difference between a clean fade and a butchered cut comes down to understanding guard numbers, blend zones, and where the shift actually starts on your head.
Most guys request a fade without knowing whether they want it low, mid, or high, let alone which clipper lengths create the look they’re picturing. That confusion leads to disappointment in the chair and frustration when you can’t explain what went wrong.
Mastering fade haircut length means knowing the technical blueprint behind the style—the exact measurements, tools, and techniques that separate amateur cuts from professional results.
Table Of Contents
- Key Takeaways
- What is a Fade Haircut Length?
- Types of Fade Haircuts by Length
- Choosing The Right Fade Length
- Essential Tools for Fading Hair
- Understanding Clipper Guard Numbers
- Step-by-Step Fade Haircut Guide
- Techniques for Seamless Blending
- Common Mistakes in Fading Hair
- Maintaining a Fresh Fade Haircut
- Styling Options for Fade Haircuts
- Frequently Asked Questions (FAQs)
- Conclusion
Key Takeaways
- A fade haircut works by gradually transitioning hair from very short at the base to longer on top using specific clipper guard numbers (typically 0-8), with the fade line placement—low, mid, high, or skin—determining the overall look and maintenance frequency.
- Guard progression and blending techniques separate clean fades from botched cuts: use incremental guard sizes, clipper-over-comb methods for tight curves, and light feathering passes to eliminate visible lines between lengths.
- Maintenance schedules vary by fade type—skin and low fades need touch-ups every 1-3 weeks, while mid and high fades can stretch 2-4 weeks before regrowth blurs the blend and ruins the sharp lines.
- Your hair texture, face shape, and lifestyle dictate which fade works best: coarse hair holds fade lines longer, round faces need higher fades for length, and tight fades demand more frequent barber visits than longer variations.
What is a Fade Haircut Length?
A fade haircut means cutting hair so it gradually shifts from one length to another, creating a smooth blend from short to long. This technique gives you control over your look, whether you want something sharp and clean or soft and textured.
You can style a fade haircut in different ways depending on your hair type and the look you’re going for.
Understanding what makes a fade work starts with knowing its definition, why the gradual shift matters, and what components create that smooth effect.
Definition of Fade Haircut
A fade haircut creates a hair gradient where length transitions smoothly from very short near the scalp to longer on top. You won’t see hard stop lines—just smooth blending achieved through cutting methods and fade techniques. This haircut relies on clippers and controlled scalp management to step up length incrementally as you move upward.
Key fade components:
- Very close cut at the bottom baseline
- Progressive length increases using different guards
- Smooth transitions without visible demarcation lines
Purpose of Gradual Length Transitions
Gradual shifts build visual flow and hair symmetry across your head. Smooth layers prevent choppy gaps that scream ‘amateur hour.’
Gradual shifts build visual flow across your head—smooth layers prevent choppy gaps that scream amateur hour
Blend techniques using tapering methods let you control exactly where hair length shifts happen—temple, occipital bone, or higher. This gradual shift balances your top height with side proportions, creating harmony with your facial features.
Smooth blending means no harsh lines, just clean, natural-looking progression that works for any setting.
Key Components of a Fade
Every fade depends on three building blocks: your fade line placement, the guard size progression you choose, and how well you blend between lengths. Your fade line sits where one clipper guard stops and the next begins—position it wrong and you’ll see harsh demarcations instead of smooth flow.
Key fade techniques require:
- Consistent guard progression moving from shorter to longer lengths
- Proper hair texture assessment before selecting your blending methods
- Clean clipper maintenance for even cuts throughout the head
- Precise hairline detailing using tapered trimmers at the finish
Types of Fade Haircuts by Length

Fade haircuts aren’t one-size-fits-all—they come in several distinct styles based on where the fade starts and how high it climbs up your head. Each type creates a different look and vibe, from clean and understated to sharp and attention-grabbing.
Here are the main fade variations you need to know.
Skin Fade
Want the sharpest contrast in a fade haircut? A skin fade delivers a bald finish at the base—often using a zero guard clipper for maximum impact. This cut blends hair from nearly bare skin to longer lengths within half an inch, creating dramatic definition. Burst fade variations add circular transitions around the ears. Expect barber visits every 1–3 weeks to maintain those crisp lines.
| Skin Fade Feature | Detail |
|---|---|
| Base Length | Zero guard or bare clipper |
| Blend Distance | Less than 0.5 inches vertical travel |
| Maintenance Frequency | Every 1–3 weeks for sharp appearance |
| Common Variations | Burst fade, bald fade, temp fade |
| Best Pairing | Textured tops, pompadours, short crops |
Low Fade
Position matters when you’re gunning for subtlety over shock. A low fade starts half an inch above your ear and transitions only in that bottom third, keeping most coverage around your temples and back. You’ll run guards 0 through 2 at the base, then jump to 3 or 4 to hold shape higher up.
- Works with crew cuts, textured crops, and curly tops without screaming for attention
- Stays sharp 10–14 days before regrowth softens that crisp hairline
- Pairs well with professional settings—clean edge, less scalp exposure than higher fade variations
For more details on maintenance and styling options, check out these low fade haircut variations.
Mid Fade
A mid fade strikes the sweet spot—literally. Your fade line lands around temple height, blending guard sizes 1 through 4 to create smooth transitions from scalp to crown.
Nailing those smooth transitions becomes much easier when you follow proven low fade styling tips that help you choose the right guard sizes and blending techniques.
This clipper technique demands sharper blending strategies than a low fade, especially around the ear. You’ll control hair texture management through steady flicking motions and clipper maintenance between passes.
Expect 7–10 days before that fade line softens and demands a touch-up.
High Fade
A high fade starts 2 to 3 inches from your crown, creating razor-sharp contrast between bare skin and longer top hair. This vertical layering demands fade line precision—symmetry matters when you’re working this close to the hairline.
Master these high fade styling essentials:
- Start guard size at zero for skin-level blending
- Use clipper-over-comb for temple transitions
- Maintain contrast management between top and sides
- Schedule touch-ups every 7–10 days
Your hair texture impact determines how dramatic that fade appears.
Taper Fade
A taper fade keeps more length on your sides than aggressive skin fades—think controlled hair blending, not bare scalp. This fade haircut shifts gradually from crown to neckline using clipper guards in small increments. The clipper techniques create soft, rounded contours without harsh lines.
Barber tips: schedule taper maintenance every 2–4 weeks. Fade styling works with textured tops or slick-back looks, making hair length shift practically invisible.
Choosing The Right Fade Length

Pick the wrong fade length and you’ll either look like you’re trying too hard or like you gave up entirely. The right fade works with your face shape, hair type, and how much time you’re willing to spend keeping it sharp. Consider these factors before you commit to a length.
Factors to Consider (Face Shape, Hair Type)
Your face shape dictates which fade haircut flatters best. Oval faces handle most styles, while round faces need higher fades for length. Square jaws pop with tight low fades.
Hair texture matters too—coarse hair holds fade lines longer, fine hair shows contrast sharply. Hair type and personal style guide your choice.
Consider skin tone for clipper visibility and lifestyle needs for maintenance frequency.
Short Vs. Medium Vs. Long Fades
Short fades keep one inch or less on top and demand trims every one to three weeks—perfect for that rebellious, high-contrast skin fade look.
Medium fades stretch to 2.5 inches with maintenance every two to four weeks, balancing style versatility across low fade and mid fade options.
Long fades hit four inches, letting you ride three to six weeks between cuts while your hair texture impact stays bold.
Lifestyle and Maintenance Needs
Your Daily Routine dictates which fade you’ll own. If you’re chasing adventure with zero morning hassle, tight fades deliver—just splash water and go.
Guys grinding nine-to-fives benefit from mid fades that balance grooming advice with polish.
Scalp Health matters when clipping tight every two weeks, so grab lightweight conditioner between barber visits. Match your Hair Care commitment to your fade’s hunger for maintenance.
Essential Tools for Fading Hair

You can’t cut a proper fade without the right gear. Professional clippers, sharp scissors, and precision trimmers make the difference between a smooth blend and a botched job.
Here’s what you need to own the cut from start to finish.
Clippers and Guard Attachments
You need clippers with at least three guard sizes to build a proper fade. Guard materials matter—stainless steel and carbon fiber guards resist warping better than standard plastic. Match your attachment systems to your clipper brand for secure clicks.
Regular blade sharpening and clipper maintenance keep cuts clean and safe. Check guards for cracks before each session to avoid uneven lengths that wreck your work.
Scissors and Styling Combs
Styling scissors with hardened stainless steel blades hold their edge for months—sharp blades mean clean cuts without snagging. Point cutting and blending techniques require precision, so regular scissor maintenance keeps your tool reliable.
Choose offset ergonomic grips to reduce hand fatigue during scissor fade work.
Pair your scissors with a fine-toothed styling comb for lifting sections cleanly. The comb controls hair tension while you trim, giving you command over every cut.
Trimmers and Razors
Trimmers with lithium-ion batteries run 90 minutes per charge—perfect for detailing tight lines around your ears and nape after clipper work. Zero-gap blades on your trimmer let you push the taper fade closer to the skin without irritation.
Switch to a straight razor for ultra-sharp hairlines that define your look.
- Cordless trimmers deliver mobility for precision edgework and cleanup
- Zero gap razor blades provide the closest cut along the hairline
- Battery life of 90 minutes enables full sessions without interruption
- Proper clipper maintenance and blade cleaning extend tool lifespan
- Trimmer safety requires steady hand control and correct blade tension
Understanding Clipper Guard Numbers

Guard numbers determine how much hair you leave behind, and getting this right makes the difference between a clean fade and a choppy mess. Each guard size cuts to a specific length, so knowing which ones to use gives you total control over your fade.
Here’s what you need to know about matching guards to the fade you want.
Common Guard Lengths for Fades
Zero guard purpose centers on bare-skin cuts at the base of your fade haircut. Guards 1 through 3 handle the gradual shift zone, while higher guard lengths like 4 to 8 preserve volume on top. Guard progression logic runs from shortest to longest, creating that smooth blend.
Keep your clipper guards clean—debris affects length consistency and ruins your fade’s crisp lines.
How Guard Sizes Affect Hair Length
Guard size impact runs deeper than just blade distance. Each number you snap onto your clippers controls hair length by locking in a fixed millimeter measurement—a #1 leaves 3mm, a #3 leaves 9mm.
Smaller guard differences between zones give you buttery fade transitions, while jumping numbers fast creates harsh lines.
Master clipper mechanics and you’ll own blending techniques that keep every cut razor-sharp.
Matching Guards to Desired Fade
Before you reach for clippers, map your fade height to guard size selection. Skin fades demand no guard at the base, mid fades need balanced guard shifts, and high fades contrast dramatically with shorter clipper guards up top.
Your fade shift depends on strategic blending techniques:
- Start with your longest guard and step down gradually
- Match guard size to each section for hair length measurement precision
- Use clipper maintenance to keep cuts consistent
- Adjust blending between zones to avoid harsh lines
Step-by-Step Fade Haircut Guide
You can’t master a fade without knowing the right sequence. Prep work and proper cuts set the foundation for clean, professional results. Here’s how to execute each phase with precision.
Prepping Hair and Workspace

Start by setting up your clean workspace with all hair cutting tools within arm’s reach.
Wash the hair with warm water, then towel dry to about 70 percent damp—damp hair cuts cleaner. Use a comb to remove tangles without flattening texture.
Wipe clippers with sanitizing tools between uses. Apply styling product only if needed to hold sections without weighing down edges.
Sectioning and Initial Cuts

Divide the head into three vertical sections using your comb’s tail, working from crown to nape. Clip the top section upward, exposing lower portions for your initial cut methods.
Choose your baseline guard—usually #1 or #2—and run the clipper flat against the scalp at the nape. Move upward with even pressure through each vertical panel, establishing consistent layering before fade transitions begin.
Creating The Fade Line

Think of the fade line as your blueprint—it sets the boundary where short meets longer hair. Position it with a #3 or #4 guard, running your clipper horizontally around the head to mark this boundary zone.
Keep the line soft, not harsh, by angling your blade slightly outward. Check both sides constantly for symmetry before you start blending upward.
Techniques for Seamless Blending

Blending is where the magic happens in a fade—it’s what separates a clean cut from a choppy mess.
You’ll need to master a few core techniques to create those smooth transitions between guard lengths. Here’s how to blend like a pro and keep those lines invisible.
Blending Between Guard Lengths
Between guard lengths, your progression should appear soft progression, not stepped. Use light, grazing passes with a clipper set one guard size higher to erase harsh lines.
Tilt your clipper slightly at the boundary—this feathering method prevents abrupt jumps. Rapid, short strokes work better than long sweeps. Finish with zero-gap blending near each seam to smooth edges without creating gaps.
Clipper-Over-Comb Method
When guards can’t reach tight curves, clipper-over-comb gives you total fade precision. Hold your comb at the guide height and run the blade parallel across the teeth—cutting motion should be slow and deliberate.
This comb technique demands clipper control: lift hair away from the scalp, trim what’s exposed, then shift upward. Regular blade maintenance keeps your passes clean during clipper-over-comb blending work.
Detailing Edges and Hairline
After clipper-over-comb blending, detail trimming sharpens the fade’s final look. Use a fine-blade trimmer for hairline definition—shape edges along your natural hairline or carve precise angles for bold hairline shaping.
Razor edging delivers ultra-clean lines when you need maximum edge definition. Light passes create fade texture at the front, softening transitions without losing blend control.
Common Mistakes in Fading Hair

Even experienced cutters slip up when fading hair. Recognizing these errors helps you avoid them and fix problems before they wreck the haircut.
Watch for these three trouble spots that show up most often.
Uneven Blending
Uneven blending leaves a visible ridge where lengths meet instead of a feathered merge. Inconsistent hand pressure, incorrect clipper angles, or shifts in your technique create patches that disrupt the fade.
Hair texture matters—coarse strands show imperfections more than fine hair. Lighting effects can expose gaps you missed.
Master your blend techniques through steady arcs and proper clipper calibration to achieve flawless gradations.
Incorrect Guard Usage
Mismatched clipper guards sabotage your fade technique before you finish the first pass. Guard placement errors—loose attachments, tilted angles, or incompatible brands—deliver uneven length and expose the blade unpredictably.
- Snap each guard firmly before every stroke to prevent mid-cut shifts.
- Match guard compatibility with your clipper model to avoid wobble.
- Clean guards after each session to maintain consistent blade exposure.
- Follow safety precautions by checking alignment before engaging the motor.
Master your clipper technique through proper clipper maintenance and precise guard handling.
Overcutting or Visible Lines
Precision falters when you rush clipper passes or press too hard against the scalp. Overcut fix starts with slowing your stroke speed—controlled movement prevents harsh transitions that create visible demarcation.
Line prevention demands consistent sectioning and gradual guard progression. For fade correction, use blend technique with half-guard steps between lengths. Practice clipper control through lighter pressure and deliberate weaving motions.
Haircut maintenance requires trimming every two weeks before growth exposes your mistakes.
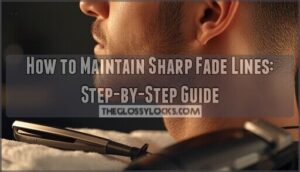
Maintaining a Fresh Fade Haircut

A fade doesn’t stay sharp on its own. The clean lines and smooth transitions you worked hard to create will blur and grow out within weeks.
To keep your fade looking fresh, you need to know when to trim, where to get it done, and what products actually work.
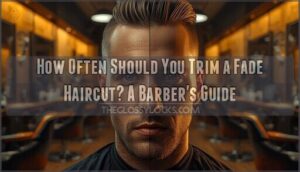
How Often to Trim Fades
Your fade maintenance won’t hold forever—regrowth shows up fast. Most fades demand a trim every 2 to 4 weeks to keep lines sharp and blending smooth. Skin and low fades need closer attention, often hitting the chair every 2 weeks, while mid and high fades stretch toward 3 or 4.
Keep these fade maintenance tips in mind:
- Shorter fades reveal regrowth faster due to contrast against skin
- Hair grows roughly 0.5 to 1.0 millimeters daily, blurring your blend
- Fast growers notice visible lines within 10 to 14 days
- Nape and temple areas grow quicker, affecting fade stability
- Regular touch-ups preserve symmetry and prevent uneven transitions
Stay ahead of regrowth to own that fresh-cut edge.
At-Home Vs. Barber Touch-Ups
You control your own fade durability—home maintenance with clippers every 2 to 6 weeks cuts barber costs and sharpens your DIY techniques. A DIY fade haircut guide teaches you barbering for beginners basics: clipper angles, guard transitions, and edge control.
Touch up frequency depends on your growth rate. For deep blends or tricky angles, hit the shop. Master home haircut skills through fade haircut tutorial videos and practice haircut maintenance and styling between professional visits.
Recommended Styling Products
Your fade won’t stay sharp without the right haircare products backing it up. Hair texture dictates which styling product works best—thick hair needs strong-hold options, while fine strands demand lightweight formulas to avoid product buildup.
- Hydration sprays deliver moisture without weight, keeping fade maintenance easy.
- Styling creams smooth frizz and add flexible hold for natural movement.
- Matte clays create separation and texture without shine or stiffness.
- Sea salt sprays boost volume and beachy waves with minimal effort.
- Leave-in serums seal ends and control flyaways for polished hair finishing.
Styling Options for Fade Haircuts

A fresh fade gives you a clean foundation, but the top is where you make it your own.
You can go textured for that lived-in look or slick it back for something sharp and polished. Here’s how to style your fade to match your vibe and hair type.
Textured Vs. Sleek Top Styles
Your choice between textured and sleek tops transforms how your fade haircut reads to the world.
Textured styles use choppy layers and matte clays to create separation and hair volume, perfect for a casual vibe that pairs well with fade maintenance routines.
Sleek looks demand pomades and precise hair cutting techniques to lock strands into smooth, directional flow—your daily routine and styling product choice make all the difference.
For more on the benefits of layered tops with natural texture, consider how this approach suits a wide range of face shapes and hair types.
Pairing Fades With Different Hair Types
Your hair texture dictates how your fade haircut behaves—coarse strands reveal blending lines faster, while curly hair demands guard adjustments to maintain even hair length.
Straight hair reflects light sharply, so tight fades pop.
High hair density needs smoother transitions to avoid visible steps. Factor in beard influence: fuller facial hair balances skin-level fades.
Match your fade maintenance and styling products to your unique hair type for lasting control.
Finishing Touches for a Polished Look
After matching your fade to your hair texture, lock in that sharp look with the right finishing touches. Apply matte finish clay for natural texture without shine buildup.
A light finishing spray tames flyaways in humidity while edge control sharpens your hairline. One quick pass with a soft brush smooths the top and enhances blending—your polished look stays dialed in all day.
Frequently Asked Questions (FAQs)
What length should my fade be?
Your fade length becomes your signature—pick skin for razor-sharp Desired Contrast, low or mid for subtle Blending Heights, or high for bold fade height variations.
Personalizing Fade depends on your Top length and hair length progression goals.
Can fade haircuts work with thinning hair?
Yes, taper fades work best with thinning hair. Gradual blending strategies and textured tops create scalp camouflage while adding hair thickness.
Softer transitions minimize sparse zones. Proper hair cutting tools and regular hair maintenance preserve volume and fullness.
How do you fix a botched fade?
A butchered cut feels like the end of the world, but fade restoration starts simple.
Reassess the blend in good lighting, identify harsh lines, then use clipper correction with progressively longer guards to rebuild symmetry and restore smooth transitions.
What products help blend grown-out fades temporarily?
Texture Sprays build grip to mask uneven transitions until your next trim.
Blending Products like tinted dry shampoo soften harsh lines.
Temporary Color sprays and Fade Fillers disguise Hair Growth while maintaining control over styling tools.
Are fades suitable for all hair textures?
Absolutely—though guard adjustments and texture tooling make all the difference.
Straight, wavy, curly, or coarse hair can rock a fade haircut, but each hair texture demands customized blending techniques and maintenance differences to nail that perfect look.
Should you fade wet or dry hair?
Fade on damp hair for better clipper control and predictable blending.
Dry cutting shows true length but risks hair stretch. Wet fading compresses texture, while damp styling balances moisture without the snap risk.
Conclusion
Stop walking into the barbershop hoping the barber reads your mind. Command the chair by knowing your fade haircut length guide—guard numbers, blend zones, and where that blend point hits your scalp.
The difference between looking sharp and looking sloppy isn’t talent or luck. It’s technical knowledge. Master the measurements, control the conversation, and you’ll never leave disappointed again. Your haircut stops being a gamble when you understand the blueprint.
- https://www.walmart.com/ip/The-Cut-Buddy-Nick-Wavy-Hard-Bristle-Brush/5023879294
- https://youtu.be/Z6_xuyE8ASg?feature=shared
- https://www.bsideuhair.com/s/stories/fade-haircuts-explained-from-low-to-skin-fade-with-visual-style-guides
- https://www.lorealparisusa.com/beauty-magazine/hair-style/hairstyle-trends/high-fade-vs-low-fade
- https://forteseries.com/blogs/hairstyles/low-fade