This site is supported by our readers. We may earn a commission, at no cost to you, if you purchase through links. This content is for general informational and educational purposes only and is not a substitute for professional medical, dermatological, or nutritional advice.
The salon industry lost an estimated $15 billion in revenue during pandemic closures—but something unexpected happened. Millions of people discovered they could cut their own hair, and many never went back.
That shift wasn’t just about saving money. It was about control. Knowing your own hair—its texture, its growth patterns, the way it behaves wet versus dry—puts you in a better position than any stranger with scissors who sees you once every eight weeks.
The gap between a clean home haircut and a choppy disaster comes down to technique, tools, and sequence. Get those three right, and you won’t be reaching for a hat on the way out.
Table Of Contents
- Key Takeaways
- Tools and Setup Before Cutting
- Prep and Section Your Hair
- Step-By-Step Cutting Methods
- Cut by Hair Type
- Top 3 Post-Cut Styling Products
- Frequently Asked Questions (FAQs)
- What is the easiest way to cut your hair yourself?
- What is the 3 2 1 rule for haircuts?
- Can cutting your hair help with headaches?
- What haircut does Ryan Garcia have?
- What hair products should I use during and after a DIY haircut?
- How often should I cut my hair at home?
- How can I make sure I don’t cut too much hair?
- What techniques should I use to cut different hair lengths?
- Is it harder to cut my own hair or someone else’s?
- How do I fix uneven sections after cutting?
- Conclusion
Key Takeaways
- Your tools set the ceiling on your results — sharp shears, the right clipper guards, a dual-mirror setup, and proper lighting aren’t optional extras; they’re what make a clean cut possible at home.
- Knowing whether to cut wet or dry is the single biggest technique decision you’ll make, since it determines whether you see your true length before the scissors close.
- Every hair type demands its own method — straight hair needs blunt precision on dry strands, curly hair cuts curl-by-curl dry, and coily hair must be stretched first to account for up to 75% shrinkage.
- Sectioning your hair into clean horizontal layers before you start isn’t just prep work — it’s the structural foundation that keeps your cut symmetrical and prevents the uneven patches you won’t notice until it’s too late.
Tools and Setup Before Cutting
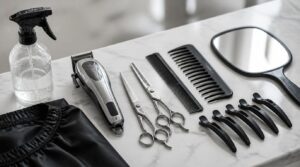
Getting the right tools before you pick up a single pair of scissors makes all the difference between a clean result and a regrettable one. Your setup is just as important as your technique, and skipping this step is where most at-home cuts go wrong. Here’s exactly what you need before you get started.
For the cleanest results, follow a step-by-step beard trimming guide that preserves your length so your scissors do precision work without sacrificing more than you intend.
Sharp Hair-cutting Shears
The single most important tool you’ll need is a pair of professional styling shears — not kitchen scissors. Look for blades made from high-quality Japanese stainless steel, which holds a sharp edge far longer than budget alternatives. A convex edge blade cuts cleanly with minimal resistance, reducing split ends.
Offset grips and an adjustable tension screw make a real difference during extended sessions. Using ergonomic designs can help prevent hand fatigue during use.
Clippers and Guard Sizes
Shears handle length and shape, but clippers are what give short styles their clean, controlled finish.
Guard numbers run from 0 (roughly 1.5mm) up to 8 (about 25mm), so you always know exactly how much hair stays. Use the taper lever between guards for micro-adjustments.
Clean your guards after every session — trapped oils dull performance fast.
Dual Mirror Setup
Clippers nail the cut, but without seeing the back of your head, you’re working blind.
A handheld and wall mirror positioned at opposing angles closes that blind spot. Align them so both reflections converge — no parallax errors, no guessing. Good overhead lighting matters here; glare flattens detail fast. A stable mount keeps the angle consistent while your hands stay free to cut.
Clips, Combs, Elastics
Once your mirrors are set, organizing your hair is next. The right tools keep each section clean and separate.
- Fine-tooth comb creates sharp, precise parts before you clip.
- Elastic spine clips flex to grip thick or curly hair without snagging.
- Small elastics hold horizontal sections flat while you work upward.
Rounded-tip clips prevent scalp scratching during insertion — a detail worth prioritizing.
Lighting, Cape, Cleanup
Good lighting changes everything. Aim for cool white LEDs around 4000–5000 Kelvin with a CRI above 90 — this renders true color and shadow-free visibility. Position lights at 45-degree angles to prevent glare on mirrors.
Your cape should be water-resistant and adjustable at the neck. Keep a lint roller and damp cloth nearby — fast cleanup means no missed hairs and a sanitized workstation every time.
Prep and Section Your Hair
Good prep is what separates a clean cut from a frustrating one. Before your shears touch a single strand, there are a few key steps that set you up for success. Here’s how to get your hair ready and sectioned properly before you begin.
Wash and Detangle First
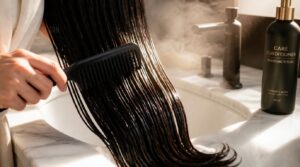
Tangled, dirty hair is a nightmare to cut — knots deflect your shears and give you uneven results.
Before reaching for the shears, detangle and prep curls properly — common hair gel mistakes on curly hair can leave strands stiff, clumped, or impossible to work with evenly.
Wash and condition first, then use a wide-tooth comb to work from ends to roots, loosening knots gradually. Conditioner adds slip that lets the comb glide through without tearing strands. Detangle in sections to stay organized and minimize breakage before a single snip happens.
Wet Versus Dry Cutting

Knowing whether to cut wet or dry changes everything about your results.
Wet hair stretches under the comb, which can hide how short you’re actually cutting. Once it dries, shrinkage surprises you.
Dry cutting shows the true final length immediately — no guessing.
Choose based on your texture:
- Straight hair: wet works well
- Curly or coily: always cut dry
- Wavy: dry reveals natural movement
Part Hair for Symmetry
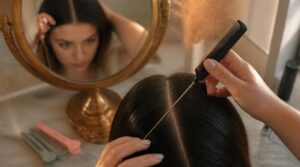
A straight part anchors your hair geometry before you section your hair. Use a tail comb for precision.
| Face Shape | Best Part Placement |
|---|---|
| Oval | Center part |
| Round | Deep side part |
| Square | Diagonal side |
| Heart | Slight off-center |
Sectioning clips hold each side once parted. For symmetry training, restyle your part weekly so hair learns to fall in place over time naturally.
Clip Horizontal Sections
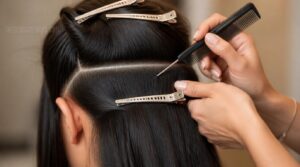
Think of horizontal sections as cutting lanes — each one keeps your crown-to-nape balance locked in.
- Use a tail comb for clean, even part lines
- Secure each layer with sectioning clips before moving down
- Space sections evenly to prevent section drift
Start near the crown and work downward. This approach gives your DIY trim the symmetrical sectioning accuracy that separates a clean result from a choppy one.
Check All Cutting Angles

Your angle is everything — a half-inch shift can create uneven layers you won’t catch until your hair dries.
Dry checking reveals what wet cutting hides, since shrinkage and clumping disguise unevenness.
| What to Check | How to Do It |
|---|---|
| Symmetry at temples | Match both sides at equal elevation |
| Layer balance | Hold sections at original lift angle |
| Crown-to-nape evenness | Inspect under consistent, direct lighting |
| Asymmetry corrections | Point cut small amounts at the same angle |
Step-By-Step Cutting Methods
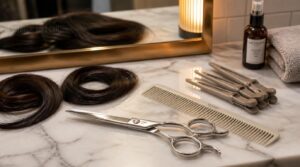
Now that your hair is prepped and sectioned, it’s time to actually cut. The method you use matters more than you might think — the wrong technique for your goal can leave things looking uneven or flat. Here are the five key cutting methods to know before you pick up your shears.
Trim Ends Safely
Start by twisting a small subsection and snipping just below any frayed or branching tips — this twist and snip method reveals hidden split ends without guessing. Use haircutting scissors held vertically, not horizontally, so the vertical cutting technique targets damage without creating a blunt shelf.
Remove only what’s damaged. After every few sections, unclip and compare both sides for symmetry.
Cut Bangs in Small Sections
Bangs demand patience more than skill. Separate a triangle front section from your hairline to your temples, then divide it into four to six narrow subsections of uniform thickness.
Hold your scissors vertical to the forehead and use incremental snips — no more than 1/8 inch per pass. Compare both sides constantly for symmetrical weight, whether you’re shaping curtain bangs, side-swept bangs, or blunt fringe.
Create Face-framing Layers
Once your bangs are set, face-framing layers are what pull the whole cut together.
Part hair down the center and pull two front sections forward from your hairline to the crown. Lift them at a 45-degree angle, then point-cut downward toward the cheekbone. For round faces, start layers slightly below the cheekbone. For square faces, begin near the jawline to soften angles.
Use The Unicorn Method
The unicorn ponytail method works by gathering all your hair toward your forehead and trimming just the tips while everything is held under vertical tension.
That single lifted position becomes your reference length anchor — every section gets compared to it before you cut. Release, check the fall, re-clip, repeat. Small passes only.
Blend and Check Evenness
Grab a handheld mirror and hold it behind your head while facing a wall mirror — this two-mirror check reveals uneven patches you’d otherwise miss entirely. Run your fingers through each section and compare lengths across both sides. If something feels off, it probably is.
Correct blending errors with small point-cut snips, never full straight cuts.
Cut by Hair Type
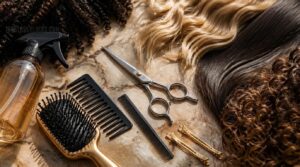
No two hair types cut the same way, and using the wrong technique for yours is how you end up with a result that looks nothing like what you planned. Your texture changes everything — from whether you cut wet or dry to how much length you’ll actually lose. Here’s what works best for each type.
Straight Hair Trimming
Straight hair has no curl to hide mistakes — every uneven snip shows. That’s why precision length control matters most here. Work on dry hair to avoid shrinkage surprises, divide into horizontal sections, and keep consistent tension while cutting. A blunt edge needs symmetry across all sections, so recheck after the hair falls naturally, then finish with a light serum to smooth flyaway ends.
- Work in small, deliberate increments rather than large cuts
- Always recheck the bottom edge symmetry after hair settles
- Use dry cutting to preserve exact length
Wavy Hair Shaping
Wavy hair punishes heavy, blunt cuts by flattening the S-pattern you’re trying to preserve.
Work in horizontal sections, hold shears at a gentle 0–15 degree elevation, and use point cutting along the ends to keep waves buoyant and natural. Dry hair shows the true wave shape, so trim curl by curl — small snips prevent accidental bulk removal.
Curly Curl-by-curl Cutting
Curly hair tells you exactly where to cut — if you know how to listen. Work on dry, natural hair so each curl cluster reveals its true shape before you snip.
- Trim curl by curl, not in bulk sections
- Use point cutting to avoid harsh, blunt lines
- Follow the curl boundary, not a straight geometric grid
- Snip small amounts to preserve curl memory
Staying precise minimizes frizz and keeps your natural curl pattern intact.
Coily Hair Shrinkage Tips
Coily hair can shrink up to 75% of its actual length — which makes trimming feel like a guessing game. Stretch before you snip using banding or twist-outs so you’re cutting the true length, not the shrunken version.
Coily hair shrinks up to 75%, so always stretch before you snip — cut the true length, not the illusion
Seal moisture first with a leave-in plus oil, then detangle gently with a wide-tooth comb. Defined, elongated coils give you a far more accurate trim line.
Short Hair Clipper Cuts
Clippers make home grooming manageable. Always cut dry — wet hair clumps and throws off guard length accuracy.
- Start with a number three guard to clear bulk from the sides first
- Use the taper lever for micro-adjustments between guard sizes
- Oil your blades regularly to keep passes snag-free
A cordless model with 90 minutes of battery life is plenty for most home cuts.
Top 3 Post-Cut Styling Products
A great cut deserves a great finish, and the right styling products make all the difference between polished and just okay. Whether you want volume, sleek edges, or frizz control, there are a few standouts worth keeping in your routine. Here are three products that consistently deliver after a fresh at-home cut.
1. Revlon One Step Volumizer Hair Styler
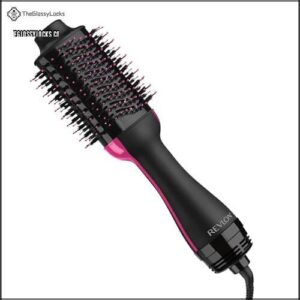
The Revlon One Step Volumizer is one tool that does the work of two. Its oval brush head combines drying and styling in a single pass, saving real time after a fresh cut.
Ionic technology cuts frizz while ceramic heat distributes evenly, so you’re not scorching one section while another stays damp. Hold it under your roots for two to three seconds and you’ll get noticeable lift. It works across all hair types and reduces breakage by 36% compared to leading competitors.
| Best For | Anyone who wants a salon-quality blowout at home without juggling a separate dryer and brush. |
|---|---|
| Frizz Control | Ionic technology reduces frizz |
| Hair Type Range | All hair types and lengths |
| Conditioning Benefit | Reduces breakage by 36% |
| Hold Strength | Adjustable (3 heat/speed settings) |
| Shine Enhancement | Increases shine by 22% |
| Volume Enhancement | Root lift and volume |
| Additional Features |
|
- Dries and styles in one step, cutting down your morning routine significantly
- Ionic and ceramic technology work together to reduce frizz and distribute heat evenly, protecting your hair
- Delivers real volume and root lift that works on all hair types and lengths
- Works best on damp hair, so it’s not a quick touch-up tool for dry styles
- You need to hold it under your roots for 2–3 seconds to get maximum lift, which takes a little practice
- Heat settings need to be dialed in for your hair type, or you risk damage over time
2. Ebin New York Edge Control
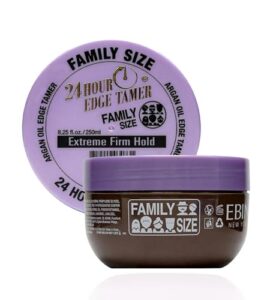
Once your cut is done, edges are often what people notice first. Ebin New York Edge Control delivers 24-hour extreme firm hold while staying water-based and lightweight — so you get control without the crunch.
The argan and castor oil mix keeps your hairline hydrated rather than dried out, and it rinses clean without buildup. Three hold levels — Ultra Super Hold, Extra Mega Hold, and Extreme Firm Hold — mean you can match it to your texture, from fine waves to dense coils.
| Best For | Anyone who wants sleek, polished edges that last all day without weighing their hair down — especially those with fine to medium textures looking for hydrating hold. |
|---|---|
| Frizz Control | Smooths flyaways all day |
| Hair Type Range | Types 1a to 4c |
| Conditioning Benefit | Hydrates with argan and castor oil |
| Hold Strength | 24-hour extreme firm hold |
| Shine Enhancement | Nourishing oils boost shine |
| Volume Enhancement | Lightweight non-weighing formula |
| Additional Features |
|
- Firm 24-hour hold that keeps edges laid without crunch or stiffness
- Argan and castor oil nourish the hairline instead of drying it out
- Rinses out cleanly with no buildup, making wash day a breeze
- May not hold up well enough for thick coils or very dense hair
- Can leave white flaking on some hair types
- The jar runs smaller than expected for the price
3. Style Factor Edge Booster Mousse
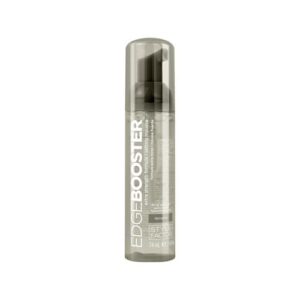
Where edge control locks down your hairline, mousse takes care of the rest. Style Factor Edge Booster Foam Mousse is built for curls, waves, and twists — giving you hold that moves with your hair instead of stiffening it.
Rosemary and peppermint oils add shine while biotin and shea butter work against breakage. At 2.5 ounces, it travels easily.
One heads-up: the scent runs strong, and some users notice dryness with repeated use, so start light.
| Best For | Anyone with curls, waves, or twists who wants flexible, long-lasting hold with added shine and moisture on the go. |
|---|---|
| Frizz Control | Smooth finish for curly hair |
| Hair Type Range | Curls, waves, and twists |
| Conditioning Benefit | Minimizes breakage with oils |
| Hold Strength | Extra strength long-lasting hold |
| Shine Enhancement | Rosemary and peppermint for shine |
| Volume Enhancement | Fuller appearance without weight |
| Additional Features |
|
- Extra-strength hold that keeps curls, waves, and twists defined without stiffening them
- Rosemary, peppermint, biotin, and shea butter work together to add shine and reduce breakage
- Compact 2.5oz size makes it easy to toss in a bag for travel
- Strong scent that some users compare to nail polish or cheap perfume
- Can cause dryness or frizz with repeated use despite its conditioning claims
- Leaves residue on hands after application
Frequently Asked Questions (FAQs)
What is the easiest way to cut your hair yourself?
Like most things worth doing, the easiest path starts with the right tools. Clippers with guard attachments give beginners the most consistent results — guards standardize your length, so there’s far less room for error.
What is the 3 2 1 rule for haircuts?
The 3-2-1 rule uses three consecutive clipper guard sizes — guard 3 on top, guard 2 in the middle, and guard 1 near the neckline — to build a smooth, graduated fade from short to long.
Can cutting your hair help with headaches?
For some people, yes — hair weight and traction are genuine physical triggers. If tight styles or long, heavy hair strain your scalp and neck, trimming can ease that tension and reduce headache frequency.
What haircut does Ryan Garcia have?
Ryan Garcia’s hair has shifted between a classic buzz cut, a high fade with styled top, and a textured quiff. His most recognized look keeps the sides tight and the top slightly longer.
What hair products should I use during and after a DIY haircut?
Wrong scissors, wrong products — and suddenly you’re one bad snip away from a hat collection. Use a lightweight serum mid-cut and a flexible hold spray after to keep things smooth and set.
How often should I cut my hair at home?
Trim frequency depends on your hair type. Straight hair needs cuts every 4–8 weeks; curly hair every 8–10 weeks. Bangs? Every 2–4 weeks. Growing it out? Dust ends every 12 weeks.
How can I make sure I don’t cut too much hair?
Less is always more. Start with a longer clipper guard or tiny scissor snips, check your results, then go shorter only if needed. You can always take more off — you can’t put it back.
What techniques should I use to cut different hair lengths?
Blunt cuts suit long hair, while point cutting works best for shoulder-length ends. Short hair calls for clippers first, then scissor detailing. For curly or coily hair, always cut dry to account for shrinkage.
Is it harder to cut my own hair or someone else’s?
Cutting your own hair is harder. The mirror reversal, limited back access, and awkward hand angles all work against you — someone else gets a clear view and natural positioning from the start.
How do I fix uneven sections after cutting?
Spot the longer side, then trim small amounts to match it. Use sharp shears, keep hair damp, and point-cut the ends to soften any harsh lines. Check symmetry after drying.
Conclusion
A thousand stylists couldn’t teach you what one honest mirror and a steady hand will. Learning how to cut your own hair hands you something no appointment ever could—real knowledge of your own texture, growth patterns, and what actually works.
The tools are simple. The technique is learnable. What changes is your relationship with your hair: from passenger to driver. Trust the process, follow the sequence, and the scissors will do the rest.