This site is supported by our readers. We may earn a commission, at no cost to you, if you purchase through links.

The average bathroom holds over 60 personal care products—yet most people can only find half of them when they need them. That missing moisturizer or the expired medication buried behind three bottles of shampoo isn’t a storage problem. It’s an organization problem.
A cluttered bathroom drains more time and mental energy than most people realize, turning a two-minute routine into a frustrating search mission.
The good news: knowing how to organize bathroom products efficiently doesn’t require a renovation or a Pinterest-worthy budget. A clear system, built once and maintained in seconds a day, changes everything.
Table Of Contents
- Key Takeaways
- Empty Every Bathroom Storage Area
- Declutter Expired and Unused Products
- Deep Clean Before Reorganizing
- Sort Products Into Clear Categories
- Place Items by Use Frequency
- Organize Drawers, Cabinets, and Counters
- Maximize Wall and Vertical Space
- Set Up Shower and Under-Sink Storage
- Label Bins and Create Product Zones
- Maintain a Simple Reset Routine
- Frequently Asked Questions (FAQs)
- Conclusion
Key Takeaways
- Start by pulling everything out and sorting into keep, donate, and discard piles — you can’t build a real system on top of hidden clutter.
- Where you put something should match how often you use it: daily items at eye level, weekly stuff in cabinets, and backup stock down low.
- Waterproof labels and color-coded zones aren’t just aesthetic — they’re what stop everything from slowly drifting back into chaos.
- A 30-second daily tidy-up and a quarterly expiry check are all it takes to keep the system running without a big weekly overhaul.
Empty Every Bathroom Storage Area

Before you rearrange a single thing, you need to start with a clean slate. That means pulling everything out so you can actually see what you’re working with.
Think of it like hair — before any styling, you need a clarifying wash to strip away buildup so you’re starting fresh, not layering over old mess.
Here’s how to empty your bathroom storage the right way.
Clear Cabinets, Drawers, Shelves, and Counters
Before anything else, pull everything out — every drawer, cabinet shelf, and counter surface need to be completely empty. Clear cabinets with adjustable shelf heights make this easier since you can see exactly what’s been hiding in the back.
Think of it as your step‑by‑step bathroom organization guide reset button.
Wall‑mounted shelves, drawer dividers, and acrylic organizer designs only work well when you’re starting completely fresh. Consider using non‑adhesive shelf liners to protect surfaces while you reorganize.
Use One Work Surface for Sorting
Once everything’s out, bring it all to one spot — ideally a table at waist height. That ergonomic height keeps your back happy during longer sorting sessions.
Choose a surface material that’s smooth and easy to wipe down for spill containment. A clear sorting flow — left to right — makes it easier to sort and categorize your bathroom essentials without losing track.
Check for Damaged Shelves, Leaks, or Wasted Space
With your shelves empty, this is the perfect moment for a quick shelf integrity inspection. Run your hand along each surface — feel for sharp edges, warping, or rust. Check corners for moisture detection signs like stains or mold.
Look up, too. A vertical space audit often reveals wasted room above fixtures. Load distribution review and corrosion prevention now save real headaches later.
Separate Personal Products From Household Supplies
Now that you know what’s in good shape, it’s time to sort what belongs where.
Personal care products — think toothpaste, shampoo, and deodorant — go into a Dedicated Hygiene Drawer. Cleaning supplies need Chemical Segregation in a separate cabinet.
Use Airtight Containers, waterproof labels, and Childproof Locking for Safety Storage. When you label storage for easy access and sort and categorize your bathroom essentials by grouping your items by category, everything just clicks.
Declutter Expired and Unused Products

Now that everything is out in the open, it’s time to make some honest decisions about what actually deserves a spot in your bathroom. Most people are surprised by how much expired, broken, or forgotten stuff has been quietly taking up space.
Here’s how to cut through it all.
Toss Expired Skincare, Makeup, and Medications
Here’s the written section:
expired products aren’t just taking up space — they’re a real safety risk. Check every item for a PAO (Period After Opening) symbol or printed date.
mascara after three months, liquid foundation after a year, and lipstick after one to two years.
For proper disposal of expired medications, use a community drug take-back program or mix them with coffee grounds before trashing. Good product expiration management and smart labeling strategies for bathroom organization keep your declutter process honest and your shelves safe.
Remove Empty Bottles and Broken Tools
Clearing out empty bottles and broken tools is one of the most satisfying parts of the process. Once you clear out unwanted items, your bathroom instantly feels lighter.
Before you toss anything, handle it safely:
- Rinse bottles completely for proper Bottle Recycling Prep
- Wear gloves — Safety Gear Use matters here
- Use Separate Material Bins for plastic and glass
- Seal Hazardous Fragments from broken tools in a rigid container
- Label sharp debris before adding it to your discard pile
Eliminate Duplicates and Rarely Used Items
Duplicates quietly eat up to 30% of your storage space. Scan for redundant items — three nail clippers, two half-used moisturizers — and consolidate similar products into one.
Duplicates quietly consume up to 30% of your storage space, so consolidate ruthlessly
Anything untouched for 12 months goes. Use a dedicated donation bin for unopened items and a discard pile for the rest.
A digital inventory log and quarterly rotation review keep the clutter from creeping back.
Create Keep, Donate, and Discard Piles
Three piles — keep, donate, discard — are the backbone of how you declutter your space and sort and categorize your bathroom essentials without second-guessing yourself.
- Keep pile — passes Keep Item Evaluation: used regularly, good condition
- Donate pile — meets Donation Readiness Criteria: unopened, safe, usable
- Discard pile — follows Discard Safety Protocols: expired, broken, leaking
- Pile Labeling Standards — label each bin clearly, waterproof if needed
- Pile Management Schedule — empty discard immediately; reassess donate quarterly
Deep Clean Before Reorganizing

Before you put a single product back, the space itself needs attention. A clean surface is the foundation everything else builds on. Here’s how to do it right.
Wipe Drawers, Shelves, and Cabinet Interiors
Before anything goes back in, give every interior surface a proper reset. Grab a microfiber cloth for microfiber dust removal first — it traps grime without scratching finishes.
Follow with eco-friendly cleaning solutions and anti-scratch wiping strokes.
For ceramic liner care, just wipe and dry.
Moisture-resistant drying prevents mold before your step‑by‑step bathroom organization process continues.
| Surface | Best Tool | Key Tip |
|---|---|---|
| Drawer interior | Microfiber cloth | Wipe with eco-friendly solution |
| Cabinet shelf | Removable liner | Replace if damp or stained |
| Ceramic liner | Soft cloth | Dry fully to resist moisture |
Clean Mirrors, Counters, and Sink Areas
Now clean the surface areas you’ll actually see every day. For mirror streak prevention, use a vinegar glass cleaner — equal parts vinegar and water — with a microfiber cloth technique: wipe vertically, then buff dry.
On counters and the sink, a non-abrasive sponge with mild soap does the job.
good lighting visibility helps you catch missed spots.
This cleaning and maintenance routine sets your step-by-step bathroom organization process up right.
Scrub Hard-to-reach Corners and Ledges
Those easy-to-see surfaces look great now — but corners and ledges collect grime fast. Your bathroom cleaning checklist isn’t complete without tackling them.
- Use angled brush techniques behind the toilet and under faucets
- Try steam crevice cleaning to dissolve buildup without harsh chemicals
- Apply vacuum dust removal along baseboards first
- Use flexible duster use for ceiling corners
These protective cleaning methods keep your decluttering and deep cleaning bathroom work thorough.
Start With a Clean, Dry Storage Base
Once the corners and ledges are done, don’t rush to put things back. Your storage base needs to be completely dry first — moisture left behind invites mold and corrodes metal organizers.
Focus on cleanliness here: wipe down base material choice surfaces, use anti-slip mats, apply surface sealants where needed, and run ventilation strategies to drop humidity. Moisture absorption products in cabinets help too.
Sort Products Into Clear Categories

Once everything is decluttered and the surfaces are clean, it’s time to bring some real order to what’s left. Grouping your products into clear categories is what turns a pile of stuff into a system that actually works.
Here’s how to break it all down.
Group Skincare, Haircare, Dental, and Body Products
Four clear zones make everything easier to find. Start grouping your items by category — skincare, haircare, dental, and body care — using drawer dividers or clear bins inside your bathroom vanity setup. Active ingredient grouping, dispenser hygiene, and product compatibility all improve naturally when like items live together. Label storage for easy access and aesthetic cohesion follows automatically.
- Skincare: serums, moisturizers, and actives together
- Haircare: shampoos separate from styling products
- Dental: toothpaste, floss, and mouthwash in one spot
Separate First-aid and Cleaning Supplies
Once your personal care items are sorted, pull first aid kits and cleaning supplies completely out of that mix. These two categories need dedicated zones — never share a shelf.
Use waterproof containers with child-resistant closures for first aid, and spill-proof bins for cleaners. Label each bin clearly, and store cleaners low with separate ventilation nearby.
Think of it as your bathroom cleaning checklist coming to life.
Keep Daily-use and Backup Products Apart
Daily items and backups living together on the same shelf are a recipe for confusion. Use shelf height differentiation — daily essentials at eye level, backups in a dedicated backup drawer or lower cabinet.
Clear bins and under-the-sink bins work perfectly here. Apply zoned storage labels for instant visual cue separation.
This frequency-based item placement approach makes organizing a bathroom vanity feel easy through smart inventory segregation and consistent labeling systems for bathroom drawers.
Create Categories for Each Family Member if Needed
When your bathroom accommodates a whole family, one-size-fits-all storage just doesn’t work. Individual care kits give each person their own zone, cutting down on the "who used my stuff?" moments. Age-specific supplies for kids, teens, and adults stay sorted without mixing. Use member label tags and family inventory sheets to keep everything trackable.
- Assign personal lockboxes for sensitive or private items
- Color-code bins using a labeling and bin system implementation
- Apply member label tags to each dedicated zone
- Update family inventory sheets every quarter
Place Items by Use Frequency

Once your products are sorted into categories, the next step is deciding where each one actually lives. The secret is simple: how often you use something should determine how easy it’s to reach.
Here’s how to set that up in your bathroom.
Keep Daily Essentials at Eye Level
Think of eye level as your bathroom’s prime real estate. That sweet spot — roughly 48 to 60 inches from the floor — is where your eyes naturally land first.
Use it for daily essentials like toothpaste, moisturizer, and soap.
Eye-level ergonomics and sightline prioritization make quick-grab zones easy.
Clear bins and wall-mounted shelves at this height turn visual accessibility into a real-time saver every morning.
Store Weekly Items in Cabinets or Upper Shelves
Weekly items don’t need prime real estate — cabinets and upper shelves are their sweet spot. Store them between 2 and 4 feet from the floor for easy standing reach.
- Add LED Cabinet Lights so you’re not guessing what’s inside.
- Use Clear Storage Bins and Slim Shelf Liners to keep things stable.
- Try Vertical Pull-out Drawers when organizing a bathroom cabinet with limited depth.
- Apply Magnetic Door Strips for tweezers and small metal tools.
Move Seasonal or Backup Stock to Lower Areas
Lower areas are basically your bathroom’s storage basement — perfect for seasonal items and backup stock you don’t need every day. Use Pull-out Bin Systems and Transparent Storage Bins to organize items by frequency of use without digging around. Under-the-Sink Bins and stackable containers work great here.
Weight Distribution Safety by keeping heavier items low, and label storage for easy access.
Add Sturdy Step Stools for Lower Shelf Accessibility.
Build a Quick-access Zone Near The Sink
A quick-access zone near the sink saves you from hunting for things at 7 a.m. Use a Sink-side Tray System to keep toothpaste, moisturizer, and soap contained.
Add Rolling Cart Placement within reach, a Magnetic Tool Strip for metal tools, and a Compact Soap Dispenser to cut counter clutter.
Label Storage for Easy Access, so everything lands back in the right spot.
Organize Drawers, Cabinets, and Counters

Once you’ve sorted your products by how often you use them, it’s time to give everything a proper home. Drawers, cabinets, and counters each play a different role in keeping your bathroom functional.
Here’s how to make each one work for you.
Use Drawer Dividers for Small Bathroom Items
Drawer dividers are a boon when organizing a small bathroom. Clear acrylic benefits you immediately — you can spot your bobby pins without digging.
For organizing a deep bathroom drawer, slot customization lets you shift sections as your routine changes. Prioritize material durability and compact compartment design for humid spaces.
Magnetic divider integration keeps metal tools secure, making your step-by-step bathroom organization guide truly functional.
Store Similar Products Together in Vanity Cabinets
Once your drawer dividers are set, the vanity cabinet is next. When organizing a bathroom vanity, group similar items together — skincare in one bin, haircare in another. Transparent stackable containers make categorizing bathroom essentials easy.
- Use uniform bin dimensions so shelves stay tidy
- Try color-coded dividers for label storage for easy access
- Apply frequency-based item placement to keep daily products front and center
Limit Countertop Items to Daily Essentials
Your vanity cabinets are sorted — now look at your countertop. If it holds more than your daily essentials, it’s working against you. A good Daily Essentials Checklist keeps only what you reach for every single day. When organizing a bathroom vanity, clear out unwanted items and organize items by frequency of use.
| Item | Frequency | Placement |
|---|---|---|
| Compact Soap Pump | Daily | Countertop |
| Toothbrush & Toothpaste | Daily | Near mirror |
| Moisturizer | Daily | Single-Item Tray |
| Tweezers | Weekly | Magnetic Tool Strip |
| Family Color Code tags | Monthly | Cabinet door |
Label storage for easy access keeps everyone on track.
Use Trays to Keep Surfaces Neat and Contained
Once your countertop holds only daily essentials, a tray keeps everything from drifting. Think of it as a home base — everything lands there, nothing wanders.
- Tray Material Choice – Clear acrylic resists moisture and wipes clean fast
- Tray Size Optimization – Match tray size to your counter zone, not your product count
- Tray Placement Strategy – Position near the faucet for daily-grab access
- Tray Cleaning Routine – Lift, wipe, done in under two minutes
Maximize Wall and Vertical Space

Most bathrooms have more usable space than you’d think — it’s just hiding on the walls and above your head. Instead of cramming everything into drawers and cabinets, you can go vertical and free up a surprising amount of room.
Here are four simple ways to make your walls work harder for you.
Add Floating Shelves Above The Toilet
The space above your toilet is basically free real estate. Mount floating shelves or wall-mounted shelves 14–18 inches above the tank, following proper height guidelines for easy reach.
Use moisture-resistant materials like sealed wood or acrylic, and always anchor into studs — brackets need a weight capacity of at least 25 pounds.
Match finishes to your fixtures for clean aesthetic integration.
Install Hooks for Towels, Robes, and Tools
Hooks are one of the easiest vertical storage solutions you can add today. Before you install, mounting surface prep matters — tile needs a masonry bit, while drywall needs anchors.
- Hook load capacity: towel hooks handle ~5 lbs; robe hooks need 10–20 lbs
- Anchor selection guide: match anchor type to your wall material
- Finish matching tips: brushed nickel or matte black hide water spots well
- Ideal hook placement: 48–52 inches from the floor works best for adults
Use hooks and hook above your tile near the shower — it keeps towels accessible without crowding your counters.
Use Cabinet-door Organizers for Brushes and Small Items
That dead space on the backs of the cabinet doors? It’s prime real estate you’re probably ignoring. Organizers on the backs of the cabinet doors hold brushes, razors, and small tools without touching your shelves. Look for Clear Acrylic Visibility, Adjustable Basket Heights, and Moisture-Resistant Materials — they make a real difference in the long term.
| Feature | What to Use | Best For |
|---|---|---|
| Brush storage | Clear Acrylic Visibility slots | Makeup & toothbrushes |
| Metal tools | Magnetic Brush Strips / use a magnetic strip | Tweezers, nail clippers |
| Small items | Use a cutlery tray or use a metal file box | Bobby pins, razors |
| Mounting style | Quick-Release Mounting hardware | Renters, easy removal |
This is your Step-by-Step Bathroom Organization Guide for small-bathroom wins.
Try Narrow Shelving Units in Tight Bathrooms
Tight bathrooms need vertical space utilization in bathrooms — and narrow shelving units deliver exactly that. A slim floor cabinet or ladder shelf fits a 6–8 inch footprint while stacking two to four levels of storage upward.
Prioritize material moisture resistance, adjustable shelf height, and aesthetic finish matching with your fixtures. For corner shelf installation, wall-mounted shelves with weight capacity guidelines of 15–25 lbs are your best space-saving ideas for bathroom interiors.
Set Up Shower and Under-Sink Storage
Two spots in your bathroom tend to collect the most chaos: the shower and the cabinet under your sink. Getting both of these areas under control makes a bigger difference than you’d expect.
Here’s how to set them up so everything has a place and stays there.
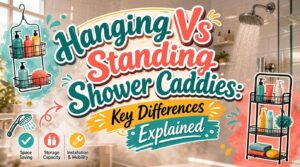
Use Shower Caddies or Hanging Baskets

A cluttered shower ledge is basically a bottle avalanche waiting to happen. The right shower caddy or hanging baskets fixes that fast — no drilling required.
Look for options with Tool-Free Mounting, Corrosion-Resistant Materials, and Drainage Holes to prevent mildew buildup.
Pick your best fit:
- Overhead hanging baskets — attach to the rod vertically
- Corner wall caddies — use Adjustable Shelf Levels for tall bottles
- Door-mount baskets — slim profiles for tight showers
Keep Shampoos, Razors, and Soaps in One Zone

Group your shampoos, soaps, and razors into one dedicated grooming zone — it’s a simple Product Categorization in Bathroom Spaces move that saves real time.
Compact Caddy with a Labeling system keeps everything visible through Clear Containers.
Mount a Wall‑Mounted Basket for Blade Drying and Child‑Proof Placement.
Ventilation Solutions like a vented shelf for Moisture Management, preventing rust and soap scum buildup.
Add Stackable Clear Bins Under The Sink

Once your shower zone is sorted, look under the sink — it’s usually the most chaotic spot. Under‑the‑sink bins with Interlocking Stability and BPA‑Free Materials keep things from sliding around. Choose clear bins with Depth Compatibility (6–8 inches) to fit around pipes without blocking the door.
- Use clear bins in Modular Configurations to build Transparent Visibility
- Stack vertical organizers for undersink shelving that double your space
- Pick UndertheSink Bins with Interlocking Stability for mess‑free access
Store Cleaning Products Separately From Toiletries

Once your under-sink bins are set, keep cleaning supplies completely separate from toiletries — mixing them up creates real safety risks. Use a dedicated cabinet with Child Safety Locks and Chemical Segregation in mind.
Store cleaners in Ventilated Storage at a Secure Shelf Height, away from heat. A simple color-coded labeling system on clear bins or bathroom drawers makes the difference instantly.
Label Bins and Create Product Zones

Once your products are sorted and placed, the last thing you want is for everything to slowly drift back into chaos. Labels and zones are what make the whole system stick.
Here’s how to set that up properly.
Label Drawers, Baskets, and Storage Containers
Once your zones are set, labeling locks everything in place.
Use a label maker to print clean, consistent tags for your drawer dividers, clear containers, and wall-mounted baskets.
Place each label at eye level on the front face of every bin.
Add color-coded label codes to separate categories at a glance — no guessing, no digging.
It’s a small step that saves real time every morning.
Use Waterproof Labels for Humid Spaces
Regular labels won’t survive a steamy bathroom for long — they peel, smear, and fade fast. That’s why label material selection matters more than most people think.
When building your labeling systems for bathroom items, choose:
- BOPP film or polyester labels for water and oil resistance
- Laminated labels for lamination benefits that lock ink behind a clear protective layer
- Wet-strength paper labels when you prefer a softer, paper-like look
- Humidity-rated adhesives for adhesive durability that won’t curl at the edges
- Placement guidelines: front-facing, eye-level, on dry surfaces for the strongest bond
Color-code Categories for Faster Access
Once you’ve got your waterproof labels in place, adding color is what makes your labeling systems for bathroom items truly click. Think of it like a traffic light — you just know what each color means without reading a word.
| Category | Assigned Color | Label Style |
|---|---|---|
| First Aid | Red | High Contrast Labels, white font |
| Skincare | Blue | High Contrast Labels, white font |
| Haircare | Green | Bold border, black font |
| Dental | Yellow | Bold border, black font |
| Cleaning Supplies | Orange | High Contrast Labels, white font |
Keep Palette Limitation in mind — stick to four to six colors max. Too many shades create confusion, not clarity. Use Family Member Colors if you share storage, and plan for Seasonal Color Updates during quarterly reviews. Post your Color Legend Placement inside a cabinet door so everyone stays on the same page.
Assign Fixed Zones for Each Product Type
Once your color-coded labels are set, give every product type a permanent home. Use Column Layout thinking — each category gets its own vertical space, defined by Boundary Measurements that match your shelf dimensions.
Apply Height Standards and Frequency-Based Item Placement, so daily items stay within easy reach.
Container Consistency across zones ties everything together, making your Labeling systems for bathroom items actually stick long-term.
Maintain a Simple Reset Routine

Getting your bathroom organized is one thing — keeping it that way is where most people slip up.
The good news is that staying on top of it doesn’t require a big weekly overhaul.
A few small habits, done consistently, are all it takes.
Do a 30-second Daily Tidy-up
Thirty seconds is all it takes. Set a timer — that’s your Timer Technique — and focus on one surface.
This Micro-Reset Habit keeps your daily essentials exactly where they belong. Use a Visual Cue System like labeled spots to guide your Surface Spotting and Quick Waste Management.
A consistent tidy up routine for Daily Bathroom Upkeep Strategies makes daily cleaning feel easy, not exhausting.
Recheck Expiry Dates Every Quarter
Every product in your bathroom has an expiration date — and ignoring them is how expired products quietly end up in your daily routine.
Pick one day each quarter for Expiry Tracking. Use a Digital Log to record dates and build an Audit Trail. Set Quarterly Reminders with Alert Automation, so nothing slips through. A simple quarterly review keeps managing expired toiletries and makeup completely stress‑free.
Restock Essentials Without Overbuying
Restocking isn’t about buying more — it’s about buying right.
Use a two-week consumption snapshot for simple Consumption Forecasting, then set a Minimum Stock Threshold so you only reorder when supplies actually run low.
Apply First Expire Out rotation and an Adaptive Reorder Point to avoid waste.
Check Supplier Bulk Discounts only for high-turnover staples.
Smart Inventory Management means less clutter, not more.
Rotate Backstock and Seasonal Products Regularly
Backstock that sits untouched quietly becomes waste. Rotate older products forward using FIFO Implementation, and apply FEFO Scheduling when expiry dates vary.
Designate Seasonal Rotation Zones for items like sunscreen or holiday sets, swapping them out monthly.
Regular Expiry Date Audits keep shelves honest. Pair this with Backstock Visibility through clear bins and solid labeling techniques, and nothing gets forgotten again.
Frequently Asked Questions (FAQs)
How do you organize a bathroom without cabinets?
Think of your bathroom like a blank canvas — no cabinets just mean more creative freedom.
Use wall-mounted baskets, vertical organizers, and a portable caddy cart to build smart, accessible storage from scratch.
What materials work best in high-humidity bathrooms?
Mold-resistant tiles, epoxy grout, waterproof cabinetry, and corrosion-proof fixtures hold up best.
Moisture-buffering walls, clear containers, and vertical organizers also survive humidity well without warping, rusting, or growing mold over time.
How do you share bathroom storage with roommates?
Sharing a bathroom with roommates is easy — until someone’s razor ends up next to your toothbrush. Personal allocation, shared bins, and clear labeling systems fix that fast.
Can renters install bathroom organizers without damage?
Yes, renters can install organizers without damage.
Adhesive mounting limits, tension rod safety systems, over‑door rack weight options, and suction cup reliability make it easy to stay organized while keeping your deposit intact.
How do you childproof bathroom product storage safely?
Childproof bathroom storage by installing secure latch installation on cabinets, using childproof lock mechanisms, storing hazards on elevated shelf installation, and reinforcing rules with labeled bins —
one simple family rule keeps everyone safe.
Conclusion
Now that you’ve taken the first step to transforming your bathroom into a serene oasis, imagine waking up every morning to a space that sparks joy, not chaos. By implementing these simple yet effective strategies on how to organize bathroom products efficiently, you’ll save time, reduce stress, and create a haven that sets you up for success.
Your future self will thank you for taking control of your bathroom’s clutter — start your journey today.
- https://www.fda.gov/cosmetics/cosmetics-labeling/shelf-life-and-expiration-dating-cosmetics
- https://www.cbc.ca/life/style/when-to-toss-old-beauty-products-according-to-a-cosmetic-science-expert-1.5370206
- https://health.osu.edu/health/skin-and-body/is-it-ok-to-use-expired-makeup
- https://gfacemd.com/the-dangers-of-using-expired-skincare-products-on-your-skin/
- https://www.makeupbrands.org/can-i-use-expired-makeup-products-or-is-it-safe-to-throw-them-away/