
This site is supported by our readers. We may earn a commission, at no cost to you, if you purchase through links. This content is for general informational and educational purposes only and is not a substitute for professional medical, dermatological, or nutritional advice.

Your lather decides your shave. Same blade, same razor, same soap, and two people can walk away with totally different skin. One glides through three passes. The other fights redness by the second.
The gap often comes down to how you build that lather. Bowl lathering gives you drop-by-drop water control. Hand lathering is quick and needs only a brush. Face lathering skips every step in between. Each one changes slickness, warmth, and how much soap you burn through.
Here’s how the shaving bowl vs hand lathering differences play out, so you can pick the method that fits your skin and your mornings.
Table Of Contents
- Key Takeaways
- Bowl, Hand, and Face Lathering Defined
- How to Build Lather With Each Method
- Lather Quality, Hydration Control, and Soap Use
- Skin Comfort, Brush Friction, and Warmth
- Speed, Equipment, Cleanup, and Travel Convenience
- Choosing Your Method: Beginners and Daily Shavers
- Frequently Asked Questions (FAQs)
- Conclusion
Key Takeaways
- Bowl lathering gives you the most control over water and consistency, so you get a dense, slick lather that holds up through every pass.
- Hand and face lathering save time, gear, and cleanup, which makes them better for travel and tight mornings, but they use more soap and are harder to judge.
- If your skin is sensitive or you’re new to wet shaving, start with the bowl, since warm, well-hydrated lather cushions the blade and cuts down on razor burn.
- Water hardness and soap loading matter as much as the method you pick, so add water slowly, load longer when needed, and choose the technique you’ll actually use each morning.
Bowl, Hand, and Face Lathering Defined
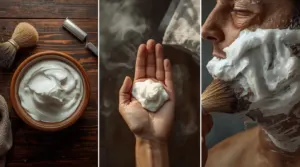
You have three ways to get lather onto your face, and they differ in where the lather gets made.
If you’re deciding between building lather on your skin or in a bowl, this face lathering vs. bowl lathering comparison breaks down how each method works and what it does for your shave.
With bowl lathering, you build it in a separate bowl or mug, then paint it on with your shaving brush. It gives you the most control over lather consistency.
Hand lathering uses your palm as the mixing surface. It needs less gear, but space is tight.
Face lathering skips the middle step. You work the loaded brush straight across your skin.
How to Build Lather With Each Method
Now let’s build some lather. You’ll work through three methods, each with its own steps and feel. Pick the one that fits your routine, and you’ll know exactly what to do.
Bowl Lathering Technique
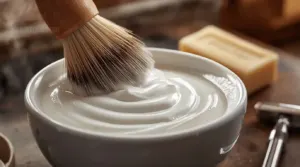
Building lather in a shaving bowl gives you full control. Here’s how it works:
- Add a little soap and a splash of warm water.
- Swirl your brush in small circles.
- Press down so the bowl resists the bristles.
- Add water drop by drop if it’s thick.
- Stop when it looks like yogurt.
Good water control makes this easy, and mistakes are simple to fix.
If you’d rather keep things simple, this guide to shaving your legs in the shower shows how steady warm water keeps skin soft and the whole routine easier.
Hand Lathering in Your Palm

If the bowl feels like too much gear, try your palm. Put a small amount of soap or cream in your hand and add a few drops of warm water. Work the brush in small circles until the lather turns thick and slick. Aim for a dense, yogurt-like lather with low aeration, since too much air reduces slickness and cushion.
Add water drop by drop. Your fingers tell you when it’s ready. Soft creams work best, and you’ll need both hands.
Face Lathering Directly on Skin

Want the simplest setup of all? Skip the vessel and use your face.
Once you’ve read your face straight on, this guide to matching a fade haircut to your face structure shows which cuts suit your proportions.
Load a damp brush generously with soap, then scrub in circles right on your beard. Start with a drier brush and add water slowly. Your skin’s warmth helps the soap dissolve, and the bristles lift whiskers as they work.
Keep the water lukewarm, 85 to 95°F. You’ll feel the lather improve as you go. If you’d rather not guess, a digital kitchen thermometer quickly confirms your water sits in that sweet spot before you start lathering.
Lather Quality, Hydration Control, and Soap Use

Consistency decides everything here, and bowl lathering gives you the most of it. You add water in small drops, so you won’t drown the soap. The lather comes out dense and stable, and it lasts through a full multi-pass shave.
Control over your water is what turns bowl lathering into a thick, steady foam that holds up for every pass of your shave
Hand lathering gives you instant feel, but your palm’s warmth dries lather fast.
- Bowl: best control, most shaves per loading
- Palm: quick feedback, needs frequent water
- Face: uses more soap, harder to judge
- Hard water: bowl corrects it fastest
Skin Comfort, Brush Friction, and Warmth

You’ll notice the difference in warmth first. Bowl lathering keeps your lather hot longer, especially in a ceramic or timber bowl. Warm the bowl with hot water before you start, and your skin comfort improves while razor burn drops.
Hand lathering gives you direct feedback and a mild exfoliation, but the extra friction can irritate sensitive skin. Lighter brush pressure helps. I’d pick the bowl if your skin reacts easily. Textured interiors build lather fast without wearing out your brush.
Speed, Equipment, Cleanup, and Travel Convenience
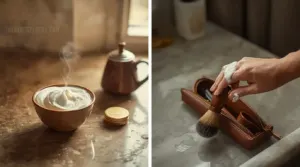
Bowl lathering feels slow, but it isn’t. Face lathering feels fast, and it usually is.
Once you’re practiced, a shaving bowl gets you lather in about 60 seconds. Beginners often need ten minutes, though, because warming the bowl and adjusting consistency add steps. You also rinse the bowl afterward.
Hand lathering and face lathering need only a brush and soap. That makes them far more travel-friendly. Face lathering means less mess on face and counter, since there’s nothing to clean.
Choosing Your Method: Beginners and Daily Shavers

Picture Mark, three weeks into wet shaving, staring at a dry, crumbly face lather. He switched to a bowl and fixed it in two days.
If you’re new, start with bowl lathering. You’ll see the texture and adjust water slowly.
Here’s what you’ll gain:
- Confidence with every pass
- Thick, dense lather you made yourself
- Less wasted shaving soap or cream
- A calmer face, free of irritation
- Pride in real progress
Speed-focused daily shavers can try face lathering when ready.
Frequently Asked Questions (FAQs)
Does water hardness change lather results in either method?
Hard water can cut your available soap by up to 50%. Yes, it changes lather in both methods. Bowl lathering gives you more control, so add water slowly and load longer.
Does lathering method affect razor burn or ingrowns?
A friend of mine swapped his dry, squeaky lather for a slick one and his razor burn faded in two weeks. Yes, your method matters. Slick, hydrated lather cushions the blade, so you press less and irritate less.
Can any shaving soap work with both methods?
Yes, nearly any well-made shaving soap works with both methods. Lather depends more on loading and water than on the vessel. Hard soaps just need a longer load and a bit more water.
How long should a brush soak before lathering?
Most shavers rush this step, and it shows in the lather. Soak a boar shaving brush for two to three minutes. A synthetic needs only a quick rinse. Shake out the extra water so it’s damp, not dripping.
Conclusion
Which lather will you trust with your face every morning? The shaving bowl vs hand lathering differences come down to control versus speed. Bowl lathering rewards patience with thick, slick foam. Hand lathering trades a little polish for speed.
If your skin runs sensitive, start with the bowl. If mornings run tight, lather in your palm. Try each for a week, and watch your skin answer. The best lather is the one you’ll actually make.