This site is supported by our readers. We may earn a commission, at no cost to you, if you purchase through links. This content is for general informational and educational purposes only and is not a substitute for professional medical, dermatological, or nutritional advice.
Your clippers start pulling hair instead of gliding through it. The motor whines louder, the blades run hot, and every pass leaves a ragged line. Dry steel grinding on dry steel is the culprit, much like a squeaky door hinge begging for attention.
A few drops of the right oil fix it fast, and they protect your blades, your skin, and your finish. Knowing how to oil hair clippers properly takes about a minute once you’ve got the routine down.
Here’s the exact process: the oil to buy, the cleaning to do first, and the steps that keep every cut smooth.
Table Of Contents
Key Takeaways
- Use a clipper-specific mineral oil (never cooking oil or WD-40), and clean and fully dry your blades first so you’re not turning leftover hair and gunk into paste.
- Put 2–3 drops across the blade teeth, run the clippers for 10–15 seconds to spread the oil, then switch them off and wipe away the excess, since too much oil traps hair and strains the motor.
- Match your oiling to how much you use them: once an hour or two during heavy use, or every few haircuts (roughly monthly) at home, and again whenever you hear extra noise or feel heat or drag.
- Dry your blades completely, add a thin film of oil, and store them somewhere steady and dry, like a box with a silica gel packet, to prevent rust and make them last 2–3 times longer.
Choose The Right Hair Clipper Oil
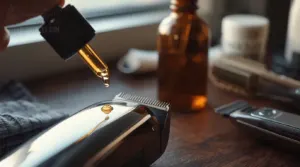
Pick a clipper-specific oil and skip anything from the pantry. Olive and coconut oil turn tacky, gum up the teeth, and leave your blades dragging.
With the right oil in hand, work out how often to oil your hair clipper blades so the routine becomes second nature.
Look for a refined mineral oil base. It’s thin enough to slip between the cutter and the stationary blade, much like a good pen glides where a dried-out one skips. That light oil viscosity keeps a smooth film without turning sticky when heat builds.
Check your manual first. Use the oil your manufacturer recommends, like wahl blade oil for Wahl models, for solid lubricant compatibility with your blades and motor.
Clean and Prepare Clippers Before Oiling
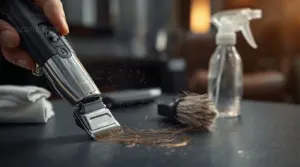
Oil only works on a blade that’s clean. Add it over packed hair and old gunk, and you’re just making a paste.
Start by switching the clippers off and unplugging them. Sweep loose hair from between the blades and the housing with a soft brush, holding the blades downward so nothing drifts back in. Tap the clippers gently over the trash to knock out the stubborn bits.
Next, wipe the teeth and housing with a dry microfiber cloth. For stubborn buildup, add a little blade wash to the cloth, and keep liquid away from the motor vents.
Spray on a clipper disinfectant like Andis Cool Care Plus, let it sit for its contact time, then wipe off the excess.
Finish by checking for bent teeth or nicks, and make sure the screws are snug. Then dry the blades completely with a lint-free cloth and let them air dry for a minute or two.
Oil Hair Clipper Blades Step by Step
Your blades are clean and dry, so now comes the part that keeps them running smooth. It takes about a minute, and it works a bit like greasing a squeaky door hinge. Here are the three simple steps to follow, in order.
Apply 2–3 Drops Across Blade Teeth
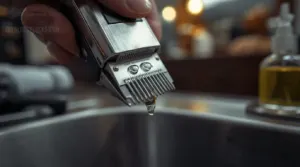
Picture a barber’s sink at closing time: the clippers sit there, a little warm and a little loud, begging for attention. That sound is dry metal rubbing on metal. Without lubrication, blades wear down in stages, so clipper-specific blade oil matters because WD-40 and cooking oils can damage both blades and motors.
Hold the blades facing down and add 2–3 drops of oil along the top edge of the blade teeth. Space them left, center, and right. Go light and even, because extra oil just attracts hair.
Run Clippers for 10–15 Seconds
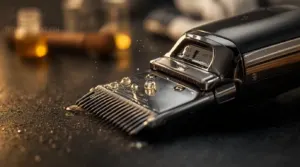
Now switch the clippers on and let them run for about 10 to 15 seconds. The motion pulls oil across the whole blade, into the tiny gaps your drops couldn’t reach on their own.
That short run builds a thin film where the blades rub. Less friction means less heat, a calmer motor, and smoother cutting efficiency with no tugging.
Switch Off and Wipe Excess Oil
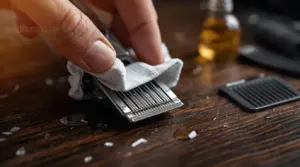
Press the power button to switch off your hair clippers before you touch the blades. It takes a second and keeps your fingers safe from a surprise start.
Grab a clean, dry cloth and wipe away the extra oil from the teeth and sides. Think of it like blotting a greasy slice of pizza. Too much oil traps hair, attracts dust, and can creep into the motor, so less is better.
Adjust Clipper Oiling Frequency to Usage

Clippers work as hard as you do, so your maintenance frequency should match how often you use them. A usage-based schedule keeps it simple.
If you cut hair all day, add a drop of clipper oil at the start of each shift and again every hour or two. At home, oil hair clippers every few haircuts, or roughly once a month.
Your blades will tell you when they’re thirsty. Heat, noise, or a drag through the hair means it’s time.
Stick to your oiling frequency and you’ll get:
- Smooth passes that glide through thick hair
- Calm confidence when a client sits down
- Blades that stay cool in your hand
- No more embarrassing snags or tugging
- Years of loyal service ahead
Prevent Blade Rust During Clipper Storage
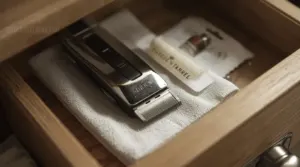
Leave a damp blade in a drawer for a weekend, and you’ll often find orange freckles waiting on Monday. Steel is thirsty for moisture, and hair clippers sit right in its path.
Moisture lingers on forgotten steel, and by Monday rust has quietly bloomed across clippers that were put away wet
Start by drying every blade completely, including the gaps between teeth and the hinge. Then add a thin film of clipper oil, which pushes out any leftover water. Wrap the blade in a clean cloth or oil-treated paper, and tuck it into a box with a silica gel packet.
Keep storage conditions steady. Skip bathrooms and sunny windowsills, since temperature swings cause condensation. Don’t let blades touch each other either.
Storing them long term? Recoat lightly every few months and check for rusting. A quick look beats replacement.
3 Hair Clipper Oiling and Grooming Essentials
Good clipper care starts with a few simple tools. You don’t need a drawer full of gear to keep your blades sharp, smooth, and rust-free. Here are three essentials worth having on hand, from a quick-clean spray to a full grooming kit.
1. Oster Kool-Lube 14oz Spray Cleaner
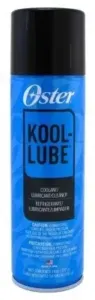
Think of this spray as a pit crew for your blades. One quick pass cleans and lubricates at the same time, so you’re not juggling a brush and a separate bottle mid-groom.
Oster’s non-greasy formula cuts friction and heat while you work, which keeps your clippers running steadily. It also suits animal grooming gear. You get two 14-ounce cans in a pack, so you won’t run out soon.
Keep it away from heat sources, since the aerosol is flammable. Use it in a ventilated space, and never spray motors or electrical parts.
| Best For | Groomers and pet owners who want a quick, non-greasy way to clean and lubricate their clipper blades without keeping a brush and a separate oil on hand. |
|---|---|
| Product Type | Aerosol clipper spray |
| Weight | 14 ounces per can |
| Brand | Oster |
| Clipper Use | Blade cleaning and lubrication |
| Blade Care | Reduces friction and heat |
| Limitations | Flammable; needs ventilation |
| Additional Features |
|
- Cleans and lubricates blades in a single step
- Non-greasy formula reduces friction and heat buildup during grooming
- Two-pack of 14-ounce cans, so it lasts a good while
- Flammable aerosol that must be kept away from heat sources
- Needs a well-ventilated area to use safely
- Cannot be used on motors or electrical components, so spraying must be careful
2. Premium Clipper Lubricating Oil Kit
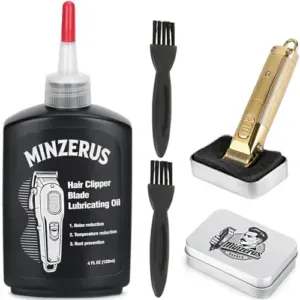
Think of clipper oil like a lube job for your car’s engine. Skip it, and things get loud, hot, and ugly fast.
This kit makes the job easy. You get a 4.05oz (120ml) bottle of mineral-based oil, two cleaning brushes, and a quick lubrication box that gets blades oiled in seconds. It fits all brands of electric hair clippers, so you can use it at home or in a barbershop.
Keep in mind it’s made for clippers only, and it isn’t a food-grade or synthetic lubricant. It also doesn’t come with refills.
| Best For | Home users and professional barbers who want an easy, affordable way to keep any brand of electric hair clipper running quietly and rust-free. |
|---|---|
| Product Type | Clipper oil |
| Weight | 5.61 ounces |
| Brand | N/A |
| Clipper Use | Electric clipper maintenance |
| Blade Care | Reduces noise and temperature |
| Limitations | Mineral-based; no refills included |
| Additional Features |
|
- Reduces operating noise and temperature of electric clippers
- Prevents rust on metal parts and extends clipper service life
- Includes two cleaning brushes and a quick lubrication box for fast oiling in seconds
- Designed only for electric hair clippers, not other tools
- Mineral-based oil may not suit users who need synthetic or food-grade lubricants
- Does not include replacement brushes or oil refills
3. Braun Series 5 All-in-One Grooming Kit
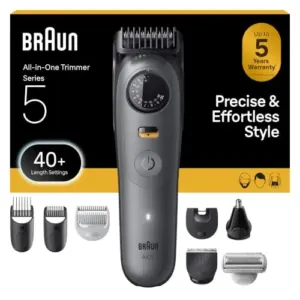
Think of this kit as a Swiss Army knife for your grooming routine. One cordless device trims your beard, hair, ears, nose, and body.
The PrecisionWheel gives you 40 length settings in 0.5 mm steps, and you can lock your choice. It’s waterproof, runs up to 120 minutes per charge, and comes with a Sensitive Body Comb.
Honestly, some buyers say the blade feels dull or can wear down over time. Oil it regularly, and you’ll help it last longer.
| Best For | Men who want one waterproof, cordless trimmer to handle their beard, hair, ears, nose, and body without buying separate tools. |
|---|---|
| Product Type | Cordless trimmer |
| Weight | 8.96 ounces |
| Brand | N/A |
| Clipper Use | Beard, hair, and body trimming |
| Blade Care | Ultra Sharp Blade |
| Limitations | Mixed durability and sharpness feedback |
| Additional Features |
|
- PrecisionWheel offers 40 lockable length settings in 0.5 mm steps for precise styling
- Cordless and 100% waterproof, with up to 120 minutes of runtime per charge
- Includes a Sensitive Body Comb and an interchangeable SmoothShave head for comfortable body grooming
- Some users say the blade feels dull, even when new
- Customer feedback on long-term durability and product longevity is mixed
- Cutting performance may not stay consistent over time
Frequently Asked Questions (FAQs)
What happens if I over-oil my clippers?
Too much oil turns into a sticky, gunky mess. It grabs hair and dust, clogs the blades, and makes the motor work harder. Blades start to snag and pull instead of cutting cleanly.
Should I oil cordless and corded clippers differently?
No, the oiling itself is identical. Use the same clipper oil, put 2-3 drops on the blade teeth and corners, run them 10-15 seconds, then wipe off the excess. Your lubrication schedule doesn’t change either.
How long do clipper blades usually last?
Wondering when your blades will give out? That depends on how often you cut. Weekly hobbyists get 2–3 years, while daily pros check every 6–12 months.
Regular oiling can stretch blade life by 2–3 times.
How do I dispose of old clipper blades?
Before you dispose of hair clipper blades, brush off hair and wrap them in cardboard. Drop them point-first into a puncture-safe receptacle, like a sealed detergent bottle. Recycle them through TerraCycle. Never toss them loose.
Conclusion
Picture a weekend DIY haircut where the clippers snag halfway up the neck. The fix was one minute and three drops of oil.
Knowing how to oil hair clippers properly turns that chore into a habit. Clean the blades, add a few drops, run them briefly, then wipe away the excess.
Do it often, store them dry, and your blades stay sharp, cool, and quiet. Smooth cuts come from small habits. Oil today, glide tomorrow.