This site is supported by our readers. We may earn a commission, at no cost to you, if you purchase through links.
Start by washing and drying your beard, then roughly trim it to your desired shape.
Grab a trusty trimmer with adjustable guards.
Begin at your sideburns, setting the trimmer a notch below your beard length.
Trim inch by inch toward your jawline, slightly decreasing the guard as you move down.
Blend the lines for a seamless look, with a light stubble around 0.4mm.
Finally, don’t forget to check your neckline—precision matters!
Think of it as crafting your own work of art, one step closer to that sharp, polished look you’ve been eyeing.
Table Of Contents
- Key Takeaways
- Tools and Preparation for Fading
- Preparing Your Beard for Fading
- Creating The Fade
- Fading Your Neckline
- Fading The Sides of Your Beard
- Fading Your Cheeks
- Maintaining Your Fade
- Styling and Maintaining Your Faded Beard
- Common Mistakes to Avoid When Fading Your Beard
- Tips and Tricks for a Perfect Beard Fade
- Frequently Asked Questions (FAQs)
- How do you fade a beard?
- Should a beard be faded?
- How do you maintain a faded beard?
- Can a barber fade a beard?
- How can I fade my beard easily?
- How can I fade my beard color?
- How long does your beard need to be to fade it?
- How can I temporarily darken my beard?
- How do I prevent beard rash?
- What products are best for sensitive skin?
- Can beard fade work on curly beards?
- How to correct an uneven beard fade?
- Will a beard fade suit my face shape?
- Conclusion
Key Takeaways
- Start by trimming your beard to your desired length and wash it to ensure a clean canvas for a smooth fade.
- Use a beard trimmer with adjustable guard combs that come in various sizes depending on desired length and style preference, starting with a longer guard and decreasing it as you move towards your hairline for a gradual fade.
- Pay attention to blending the faded areas into your beard seamlessly, focusing on the sideburns and neckline for a polished look.
- Maintain your fade by regularly trimming, using beard oil to keep hair manageable, and ensuring proper hydration to avoid skin irritation.
Tools and Preparation for Fading
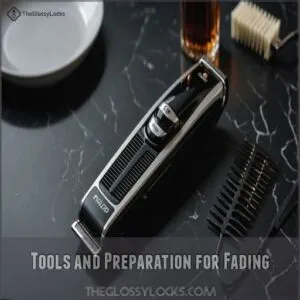
To fade your own beard like a pro, you need to gather the right tools, such as a beard trimmer with adjustable length combs, and a few items for preparation.
Think of it like prepping a canvas before painting; trimming and defining your beard makes for a smooth start for that perfect fade, and who doesn’t want their face looking like a masterpiece?
Essential Tools for Fading Your Beard
You’ll often need the right tools for a perfect beard fade.
First, grab a beard trimmer with adjustable guard sizes; this is your workhorse. Different guard sizes let you create that gradual fade.
An outliner is helpful for sharp lines, especially around your cheeks and neckline.
A comb helps you keep things neat and tidy, while a mirror—preferably a good, well-lit one—is essential for checking your progress.
Remember, these clippers and trimmers are your allies in achieving that sharp, well-defined beard fade.
With the right tools, you’re well on your way to mastering the art of beard trimming.
Preparation Steps for Fading Your Beard
Getting your beard fade-ready isn’t rocket science but does need a dash of attention to detail.
Before you get started with the fade, think about these steps.
First, Trim Your Beard to Your Desired Length to keep things tidy.
Second, Wash and Condition Your Beard for that smooth, soft canvas.
To prepare your beard for the fade, thoroughly cleanse and detangle to guarantee an even beard length and shape, as discussed in beard fading techniques.
Third, Apply Beard Oil or Balm to prevent skin irritation.
Imagine tackling each step like assembling a good coffee, ensuring every element blends perfectly.
With these tips, you’ll feel like a beard boss, mastering the art of that sharp, professional look!
Preparing Your Beard for Fading
Before you start fading your beard, it’s important to prepare it properly by trimming to the desired length and setting clear neck and cheek lines.
Don’t forget to shave everything below the neckline and above the cheek line for a clean foundation—like putting a fresh coat of primer before painting your masterpiece!
Trimming Your Beard to Desired Length
Imagine this: you’re gearing up to master your beard fade.
Start by trimming your beard to your desired length.
To achieve a sharp look, it’s essential to define your natural neckline, which can be identified by placing two fingers above your Adam’s apple, forming a "U" shape learn how to trim neckline short beard. This helps set the stage for an even trim and a defined beard shape.
Use these tools:
| Tool | Purpose |
|---|---|
| Beard trimmer | Achieve basic trim |
| Length guards | Control beard length |
| Comb | Smooth out the beard |
Defining The Neck and Cheek Lines
Every beard needs boundaries, and defining your neckline and cheek lines is essential.
Use a trimmer to shape clean edges, ensuring your neckline isn’t too high or low.
Symmetry is key for cheek lines—don’t rush it.
A razor can refine details, but beware of irritation.
Master these lines, and you’re set for a sharp, well-faded beard look.
Shaving Below The Neckline and Above The Cheek Line
To ace your beard fade, start by shaving under the neckline and above the cheek line.
This establishes a clean slate.
Choose a sharp razor and lather up with a good shaving cream for smooth results.
Embrace cheek line precision and a defined neckline to set the stage for your fade techniques.
Remember, a sharp look begins with these well-trimmed lines!
Creating The Fade
Creating the perfect beard fade at home might sound tricky, but it’s all about identifying where your longest beard hair begins and gradually adjusting your trimmer to smaller settings as you move up.
Picture it like climbing a ladder with each step getting a little shorter—you’ll be amazed at how easily you can achieve that professional look with just a steady hand and a bit of patience.
Identifying The Longest Section of Hair
Before you start trimming, find the longest part of your beard.
This important step, often overlooked, dictates your fade’s starting point.
Feel along your jawline; that’s where you’ll usually find it.
Consider your face shape and desired beard style – a longer jawline might mean a longer starting point.
To achieve a seamless look, you should clean and shape the neckline by trimming stray hairs below the jawline, as seen in guides on how to fade sideburns into beard.
This helps you achieve a natural-looking beard fade, whatever your beard growth or hair density.
Remember, patience is key!
Trimming The Longest Section Using a Lower Trimmer Setting
Spot the longest section of your beard along the jawline.
Now, choose the right guard for your beard trimmer, ensuring the trimmer setting impact creates a smooth blend without uneven trims.
Move the trimmer in harmony with your hair growth direction.
Using an adjustable clipper allows flexibility, making the beard fade process easier with the trimmer guide’s help.
Shortening The Trimmer Setting as You Move Up
Imagine your beard’s magic transformation as you master the trimming technique.
Each step leads to a gradual fade that seamlessly blends from jawline to hairline.
Use your beard trimmer, shortening the setting as you move up for that sharp, tapered beard look.
It’s like painting, but on your face, ensuring your DIY beard trim feels professional and polished every time.
Fading Your Neckline
Fading your neckline gives your beard a clean, polished look, and it’s easier than you might think.
Start with the highest guard number and use a scooping motion to blend it seamlessly into your beard using a lower guard.
Starting With The Highest Guard Number
Kicking off your beard fade can feel like taming a wild beast.
Grab your beard trimmer and start with the highest guard number.
This sets the stage for the perfect fade.
Follow these steps:
- Attach the highest guard for even blending.
- Trim the neckline evenly to maintain beard length.
- Make sure the changes are smooth with a beard comb.
Using a Scooping Motion to Cut The Length
When fading your neckline, use the scooping motion technique for precision.
This method lifts and cuts with ease, especially when you know how to shape your neck beard by creating a horizontal line across the neck and a vertical line from under the earlobe to the neckline, as seen in proper neckline techniques. This method lifts and cuts with ease, ensuring you avoid common beard fade mistakes.
Here’s a quick comparison guide:
| Scooping Motion | Flicking Motion |
|---|---|
| Gentle curve | Sharp flick |
| Controlled cut | Quick trim |
| Reduces errors | Risky for uneven cuts |
| Ideal for neckline | Best for sideburns |
Master your tools, and you’ll achieve a polished look every time.
Blending The Neckline With a Lower Guard
With the scooping motion perfected, it’s time to master blending the neckline using a lower guard.
Switch to a shorter guard length on your beard trimmer tool.
Anchoring your hand, employ a flicking motion to softly taper the neckline.
This gives your beard fade a natural look, as if channeling a barber’s advice.
Remember, sideburns deserve your attention too!
Fading The Sides of Your Beard
Now, let’s tackle those sideburns!
You’ll start by using a longer guard on your trimmer, gradually decreasing the length as you move upwards in the direction of your temples, ensuring a smooth blend into the rest of your beard for a professional finish.
Fading The Sideburns With a Longer Guard
Now that your neckline’s sharp, it’s time to tackle those sideburns. Choose a longer guard for a smooth, Sideburn Fade Style that seamlessly blends.
- Sideburn Fade Length: Start mid-ear.
- Guard Length Choice: Pick a longer guard.
- Avoid Uneven Fade: Stay consistent.
- Sideburn Fade Blending: Use gentle flicks.
- Beard trimmer tips: Keep it steady.
A flawless beard fade awaits!
Gradually Decreasing The Guard Length as You Move Up
Ever wondered how to achieve that perfect beard fade?
Start by gradually decreasing the guard length as you move up.
This fade technique creates a smooth shift and natural beard shape.
Use a beard trimmer with confidence.
It’ll take practice, but who says perfection comes easy?
| Fade Technique | Guard Length |
|---|---|
| Starting Point | Longer Guard |
| Mid Transition | Medium Guard |
| Near Top | Shorter Guard |
Blending The Faded Area Into Your Beard
Imagine looking in the mirror, and instead of harsh lines, you see a smooth gradual change.
To master the art of seamless blending, also known as a smooth change, use fade blending techniques like a pro by employing a beard trimmer or the trusty Braun MGK3060.
Blend the faded area gently into your beard.
Trim your beard to your desired length, and don’t be afraid to practice and experiment for that natural-looking blend.
Fading Your Cheeks
To achieve a crisp look while fading your cheeks, start with a shorter guard on your trimmer and work your way upward from the bottom of your cheeks.
Don’t rush the process—take your time to make sure an even blend that smoothly connects into your beard.
Using a Shorter Guard on Your Trimmer
You’ve tackled the sides with finesse; let’s shift focus to fading your cheeks using a shorter guard on your trimmer.
This tool is your magic wand for precision trimming.
Set your trimmer to a shorter guard length for fade consistency, ensuring a smooth blend that complements your beard style, and consider investing in a reliable pair of fade clippers for best results check out fade clippers.
The secret sauce? Guard change—move from a longer to a shorter setting without skipping a beat.
This technique helps achieve a balanced beard fade, making the shift in lengths seamless.
With the right approach, your DIY beard fade will look professionally done!
Trimming From The Bottom of Your Cheeks Upwards
Now, let’s tackle those cheeks! With a shorter guard on your trimmer, you’re ready to sculpt that cheek fade. Start at the bottom of your cheeks, trimming upwards. This gradual shortening creates a smooth, natural-looking fade.
Remember these tips:
- Start low, go slow.
- Use short, controlled strokes.
- Check your progress often.
- Blend the fade into your beard.
- Avoid skin irritation by using sharp blades.
A well-executed cheek fade enhances your beard shape, making facial hair maintenance a breeze. Experiment with different trimmer settings to find what best suits your beard texture and hair growth. You’ll be amazed at the difference!
Maintaining Your Fade
Keeping your beard fade sharp requires regular trimming and a trimmer with adjustable guards to tackle different lengths.
With a little practice, you’ll blend the fade seamlessly into your hairline, preventing awkward patches that make you look like you lost a battle with a weed whacker.
Trimming Your Beard Regularly to Maintain The Fade
Keeping that cheek fade sharp doesn’t end with the first cut.
Regular trimming is key to maintaining your fade, and you need to trim every two days, as a general rule, to keep your beard looking fresh and polished learn more about creating a seamless taper.
Every few days, grab your trimmer and spend a bit of time keeping edges clean—just like a pro would.
Mix in some beard oil or balm to keep things looking sleek and avoid those common mistakes we all know.
Using a Trimmer With Adjustable Guards
Got your trimmer ready? To keep that fade sharp, adjustable guards are your secret weapon. They’re like selecting the perfect tool from a superhero’s belt.
Choosing the right guards helps you achieve the exact length and style you want.
Whether it’s fine-tuning guard lengths or swapping settings, a handy beard guide can make at-home beard care a breeze.
Blending Your Beard With Your Hairline
Achieving a seamless shift between your beard and hairline takes finesse, but it’s worth the effort for a clean look.
You can find a variety of beard fade products online, like the Andis cordless Tblade outliner, to help you achieve a smooth blend.
Use a trimmer like the Andis cordless Tblade outliner to blend them smoothly.
Adjust the guard length to match your hairline’s grade gradually, ensuring your fades complement different face shapes.
This simple trick elevates your beard style and grooming game effortlessly.
Styling and Maintaining Your Faded Beard
Keeping your faded beard looking sharp involves more than just trimming; it’s about regular washing and conditioning, too.
Apply a good beard oil or balm to keep it soft and shiny.
Maintaining that perfect fade requires a steady hand and a bit of patience.
Washing and Conditioning Your Beard
In terms of washing and conditioning your beard, finding what suits you best can create a smooth, lush finish. Opt for specialized beard wash types and the best beard conditioner for your texture, considering factors like beard length, texture, and styling needs.
Follow a consistent beard care routine and remember, frequency matters.
- Use mild beard shampoos
- Condition daily
- Rinse thoroughly
- Trim regularly
- Avoid harsh chemicals
Applying Beard Oil or Balm
Now that your beard’s clean and conditioned, it’s time to add some style.
Applying beard oil or balm helps soften your beard, making it easier to manage.
Here’s a quick guide:
| Product | Application Tips | Frequency |
|---|---|---|
| Beard Oil | Rub a few drops into your beard, working it in from root to tip. | Daily or every other day |
| Beard Balm | Apply a small amount, working it into your beard and styling as desired. | Daily or as needed |
Choose the product that best suits your beard and style.
Remember, a little goes a long way!
Trimming Your Beard to Maintain The Fade
Feeling smooth after applying beard oil? Great!
Let’s get into trimming your beard to maintain the fade.
Keep that fresh look by trimming regularly.
Use your trusty trimmer to blend your beard and hairline seamlessly.
Grab shaving cream to keep things neat.
Remember, fade tools are your best friend.
To achieve a sharp, defined look, consider mastering neckbeard trimming techniques. With a steady hand, you’ll master the perfect beard fade.
Common Mistakes to Avoid When Fading Your Beard
When fading your beard, it’s easy to slip up and accidentally create a look that resembles a botched art project rather than a sleek style.
To keep your beard looking its best, avoid common mistakes like uneven fades, cutting too much hair at once, and failing to blend the faded area smoothly into the rest of your beard.
Uneven Fading
Uneven beard fading is a common fade mistake that can leave you looking like you’ve battled your trimmer.
To fix uneven fades, use fade tools like a shaver or a barber pen and make sure you apply even pressure.
Trim your sideburns carefully, practice and experiment until you achieve a balanced look.
This makes sure your beard looks sharp, not sloppy.
Cutting Too Much Hair at Once
You’ve got your sideburns even, but cutting too much hair at once can lead to beard disasters.
Avoid this common mistake by practicing patience and precision.
Remember these beard fade tips: A beard fade is a style that goes from shorter hair near the ears to fuller growth at the chin, and to achieve a professional look, check out the tools for fading a beard trimmer guide
- Trim Your Beard to Your Desired Length: Don’t rush, skim off small layers gradually.
- Fade Your Cheeks: Work strategically from bottom to top.
- Maintain Your Fade: Consistency is key for a polished look.
Not Blending The Faded Area Into Your Beard
A common mishap when fading your beard is overlooking the blend.
If you skip blending, that faded area can look like an abrupt cut rather than a smooth change.
To avoid harsh contrast and awkward changes, gradually decrease your guard length as you move up.
It’s key to blend your beard with your hairline, creating those sharp lines and maintaining your fade.
Tips and Tricks for a Perfect Beard Fade
Fading your own beard can feel like a challenging task, but with a mirror and a bit of patience, you’ll soon master the technique.
Don’t shy away from experimenting; each attempt gets you closer to that perfect look.
Using a Mirror to See What You’re Doing
Proper mirror placement lets you see all angles.
Experiment with mirror angles and multiple mirrors for best visibility.
Consider your hand position to avoid blocking your view.
Addressing visibility issues upfront prevents mistakes.
Prepare your beard beforehand; trim to your desired length, define your neckline, and then fade your sideburns and cheeks.
Taking Your Time and Being Patient
As you gaze in the mirror, wielding your trimmer, remember: patience is your greatest ally.
Don’t rush!
Keep your hand steady and focus on details.
Here’s a quick guide to mastering your beard fade:
- Trim your beard to your desired length.
- Fade your sideburns carefully.
- Gently fade your cheeks.
- Maintain your fade for a sharp look.
Practicing and Experimenting With Different Techniques
Embracing experimentation is key to nailing your beard fade.
Try different fade techniques and trimmer settings on your sideburns to discover what suits you best, such as starting with the longest guard and moving at the cheekbone for a seamless fade check out this guide on how to fade beard sideburns.
Practice blending methods to make sure your cheeks and neckline blend seamlessly.
Start small, perhaps on a lazy Sunday, and gradually refine your style.
With a bit of patience, you’ll master the perfect beard fade.
Frequently Asked Questions (FAQs)
How do you fade a beard?
To fade your beard, start with a high guard, trimming the neckline using a scooping motion.
Gradually reduce the guard size, working up in the direction of your hairline, blending as you go.
Keep it natural-looking with regular maintenance.
Should a beard be faded?
A beard fade is like a fine wine, enhancing your look over time.
It blends length for a sharp, neat appearance.
Consider fading your beard to achieve a polished, flattering style that suits different face shapes.
How do you maintain a faded beard?
Maintain that sharp fade by trimming every couple of days. Use a beard trimmer with different guards, paying attention to those tricky edges. A little upkeep goes a long way!
Can a barber fade a beard?
Absolutely, a barber can expertly fade your beard, crafting a seamless change for a polished look.
They use their skills and experience to create even fades, often better than DIY attempts.
Plus, you’ll enjoy professional grooming tips!
How can I fade my beard easily?
Grab a beard trimmer with adjustable settings and start high, gradually working down.
Use a scooping motion on the neckline and flick upwards on sideburns.
Practice makes perfect.
Keep it trimmed every two days for a crisp look.
How can I fade my beard color?
To fade your beard color, use a beard dye lighter than your current shade.
Apply it gradually with a brush, focusing on areas needing less intensity.
Maintain even coverage, and rinse thoroughly to achieve a natural look.
How long does your beard need to be to fade it?
Think of your beard as a painter’s canvas.
You need at least half an inch of growth to create a noticeable fade.
This length gives you enough hair to blend different lengths smoothly for a polished look.
How can I temporarily darken my beard?
You can darken your beard temporarily using beard dye, tinted beard oils, or mascara designed for facial hair.
Choose a color that matches your natural shade for the best results.
Always follow the product instructions carefully.
How do I prevent beard rash?
Imagine a prickly cactus brushing against your skin.
To prevent beard rash, keep your beard clean, moisturize daily, and use beard oil.
Regularly trim and exfoliate to avoid trapped dirt and sweat.
Your skin will thank you!
What products are best for sensitive skin?
For sensitive skin, try gentle, fragrance-free products.
Look for shaving gels, not foams.
After shaving, moisturize with a gel-based lotion.
Experiment to find what works best for you; it’s all about trial and error!
Can beard fade work on curly beards?
Curly beards? They naturally hold 20% more volume than straight ones.
A beard fade works wonders on them.
It tames the curls while keeping that natural texture, adding a refined edge without losing that unique curly charm.
How to correct an uneven beard fade?
Tackle uneven beard fades by starting with the longest guard and gradually working down to blend the lengths.
Use a clean mirror, trim evenly, and check your work frequently.
Patience and practice make perfect for an even finish!
Will a beard fade suit my face shape?
A beard fade can suit most face shapes, especially round or heart shapes, by adding length and slimming your look.
Experiment with different styles to find the perfect fit for your unique features and facial structure.
Conclusion
Imagine your beard as a carefully crafted sculpture.
Fading your own beard might seem intimidating at first, but with practice and the right tools, you’ll master it in no time.
The key is patience—don’t rush, and take it step by step.
By consistently applying these techniques, you’ll keep your beard looking sharp and stylish.
Remember, how to fade your own beard is an art that gets better with time and each attempt will refine your skill.

