This site is supported by our readers. We may earn a commission, at no cost to you, if you purchase through links.
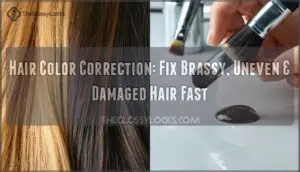
The truth is, 37% of salon clients walk in needing shade corrections because the color they chose didn’t turn out as expected, and nearly half are battling stubborn brassy tones. That expensive mistake on your head? It’s fixable.
Hair color correction isn’t just damage control—it’s a technical fix that requires figuring out what went wrong and knowing how to reverse it. Whether your color is too dark, too light, or resembles a traffic light, the right approach can turn your hair disaster into the shade you actually wanted. You don’t have to live with the regret or hide under hats until it grows out.
Table Of Contents
- Key Takeaways
- What is Hair Color Correction?
- Signs You Need Hair Color Correction
- Common Hair Color Mistakes and Solutions
- Professional Hair Color Correction Services
- Hair Color Correction Techniques Explained
- At-Home Hair Color Correction Options
- How Much Does Hair Color Correction Cost?
- How Long Does Color Correction Take?
- Maintaining Healthy Hair After Correction
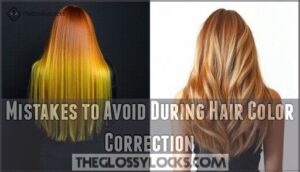
- Mistakes to Avoid During Hair Color Correction
- Frequently Asked Questions (FAQs)
- How long does a color correction take?
- What products should I use for a color correction?
- How often should I get a color correction?
- Are there any natural alternatives to color correction?
- What is the best way to maintain a color correction?
- How often should I schedule color correction touch-ups?
- Is color correction safe for pregnant or nursing women?
- Can I swim after getting hair color correction?
- Whats the difference between color correction and color removal?
- Conclusion
Key Takeaways
- Color correction fixes 37% of shade mismatches and 46% of brassy tone problems, requiring strategic techniques like toning, color removal, and rebalancing rather than just applying another layer of dye.
- Professional consultation involves complete hair analysis, damage evaluation, strand testing, and customized correction plans that often take 2-5 hours per session and may require multiple visits spaced weeks apart to protect hair integrity.
- At-home correction works for minor brassiness or fading using color removers and toners, but major issues like severe banding, patchy bleach damage, or dark-to-light transformations demand professional expertise to avoid worsening the damage.
- Post-correction maintenance requires sulfate-free products, washing only 2-3 times weekly with lukewarm water, protein treatments every other week, and waiting 72 hours before swimming to prevent color fading and preserve results.
What is Hair Color Correction?
Hair color correction isn’t just another dye job—it’s about fixing mistakes and rebuilding your color from scratch. Whether you’re dealing with a box dye disaster or years of buildup, this process demands a different mindset than simply applying a new shade.
Here’s what makes correction work different—and why you might need it in the first place.
Common Reasons for Color Correction
You’re seeking hair color correction for a few key reasons, and they’re honestly more common than you might expect. Shade mismatches are at the top of the list—37% of corrections happen because the chosen tone doesn’t suit your skin or vision, while 46% of DIY attempts end up too dark or too light.
Brassy hair troubles nearly half of all correction clients, especially after lightening. Color damage from overlapping applications makes up 34% of cases, and color regret drives another 32% when trendy shades need reversing.
Fading corrections tackle uneven results, and fixing hair color mistakes often requires multiple techniques to balance tonal issues and restore harmony. Understanding hair color theory is key to tackling these common problems.
How Color Correction Differs From Regular Dyeing
While regular dyeing adds color to a blank canvas, color correction is more like solving a puzzle. You’re working against existing pigment, unwanted tones, and sometimes years of buildup that won’t just disappear with another coat of dye.
Hair color correction techniques require a deeper analysis of the hair and a solid understanding of color theory. You’re basically reversing damage, not enhancing a fresh base.
The toning process neutralizes what’s already there, while correction methods strategically lift or deposit pigment to fix hair color mistakes through precise dyeing techniques.
Signs You Need Hair Color Correction
Not every color mishap screams for help right away, but your hair will tell you when something’s off. You might notice it in the mirror one morning or under different lighting throughout the day.
Here’s what to look for when it’s time to get expert help.
Hair Too Dark or Too Light
When your hair turns out three shades too dark or so light it’s nearly see-through, you’re facing a common color correction crisis that drives people to seek professional help. These shade disasters happen when color depth isn’t properly evaluated before processing, whether you skipped a strand test or your stylist misjudged your base tone.
Extreme color disasters typically fall into three categories:
- Too dark: Your hair soaks up pigment like a sponge, leaving you with black or muddy tones instead of a rich brown—this requires color remover or lightening techniques to strip away the excess depth.
- Too light: Over-bleaching leaves your strands damaged and see-through, needing careful tone adjustment and darkening methods to restore pigment without further harm.
- Wrong undertones: Even the "right" depth can look off if cool tones clash with your warm complexion, demanding hair color correction techniques to rebalance everything.
Unwanted Brassy, Yellow, or Green Tones
Brassy orange, shocking yellow, or swampy green—these unwanted tones are the hair color nightmares that send even the bravest DIYers running to a professional colorist. These disasters happen when pigment removal goes wrong or when you’re dealing with stubborn underlying tones that refuse to cooperate.
Brassy tones show up when lightening reveals warm orange undertones, while yellow creeps in from fading blonde shades. That swampy green? It’s chlorine mixing with blonde hair or ash toner clashing with brassy bases—classic signs you need hair color correction through tone correction and color balancing with the right toner or color remover for shade adjustment and color neutralization.
Uneven or Patchy Color
Splotchy, zebra-striped hair happens when color application goes wrong or previous dye jobs cling stubbornly to certain sections. You’ll notice color banding where dark and light patches clash, patchy roots from hair regrowth, or a messy color shift that screams amateur.
This uneven color and imbalance need tonal correction through professional hair color correction to fix these common mistakes.
Common Hair Color Mistakes and Solutions
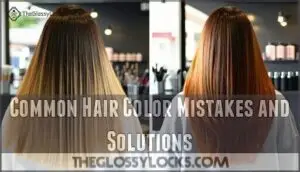
Let’s face it—color mishaps happen, even to the best of us. Whether you’ve been left with brassy orange tones, patchy fading, or highlights resembling zebra stripes, there’s a solution for every problem.
Here’s how to rescue each one.
Brassy Orange Tones
That fiery orange glow staring back at you in the mirror isn’t exactly the sun-kissed blonde or rich brunette you had in mind, right? Brassy orange tones happen when your hair’s underlying warm pigments break through—especially after lightening.
The fix? Blue-tinted shampoo works wonders for brass removal, while a professional toner handles those stubborn orange undertones through color neutralization. This color balancing act cools down the warmth and restores your intended shade without stripping your hair further.
Yellowish Hues
When blonde dreams turn into a chicken-yellow nightmare, you’re stuck with yellowish hues—those unwanted golden tones that scream "cheap dye job" instead of chic highlights.
The hero in this situation is purple shampoo—your go-to for ash toning and neutralizing yellow undertones through color correction magic. For stubborn brassiness, a professional toner with violet pigments works wonders, transforming that dull yellow into the cool, bright hair color you actually wanted.
Stripey or Chunky Highlights
Overdone highlights that look more like racing stripes than sun-kissed dimension are the telltale sign of a colorist who went too heavy-handed with the foils. Highlight correction requires strategic balayage and color balancing to restore natural movement:
- Weaving lowlights between chunky sections breaks up harsh lines and creates smooth highlight blending
- Strategic toner application through tone adjustment softens contrasts without sacrificing your brightness
- Root shadowing anchors the chunky fix, making regrowth less obvious while you shift back to gorgeous dimension
Fading or Patchy Color
If your color looks like a watercolor painting gone wrong—faded in some spots, stubbornly vibrant in others—you’re dealing with uneven porosity that’s sabotaging your shade. Color restoration starts with protein treatments to even out that patchy tone, followed by strategic toner application to rebuild consistency.
Color revival through weaving low-level pigment deposits rescues you from hair damage, while fading prevention products lock in your corrected results.
Professional Hair Color Correction Services
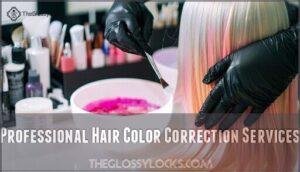
Walking into a salon for color correction is different from a regular dye job. It’s a partnership between you and a pro who needs to understand your hair’s full story.
The process starts with a consultation where your colorist checks the damage, figures out what went wrong, and plans a realistic approach. This is what happens when you trust a professional to fix your color disaster.
Consultation and Assessment Process
Your color correction consultation starts with a thorough investigation into your hair’s history—think of it as detective work for strands. During client interviews, your colorist documents every dye job, chemical treatment, and styling habit that’s shaped your current situation. This detailed consultation process happens in 100% of professional correction cases because skipping steps leads to correcting hair dye mistakes the wrong way.
Here’s what a proper consultation covers:
- Complete hair analysis examining your current color level, tone, and those patchy or uneven areas that drive you crazy
- Damage evaluation testing elasticity and porosity to determine if your hair can handle correction or needs multiple sessions
- Strand testing on several sections to predict how products will perform and prevent disasters
- Risk assessment with transparent cost estimates, realistic timelines, and signed agreements acknowledging potential outcomes
This assessment process separates pros from amateurs—88% of major corrections require strand tests, and 68% need multiple visits to protect your hair’s integrity while fixing common hair color mistakes. Understanding the hair color correction process is key for achieving the desired results.
Customizing The Correction Plan
Once your colorist assesses your hair’s issues, they’ll design a unique correction plan tailored to your specific color disaster—because there’s no one-size-fits-all solution here. Your individual treatment blends hair mapping with custom formulas to tackle specific color problems using strategic color blocking.
| Correction Priority | Technique Used | Sessions Needed |
|---|---|---|
| Tone correction (brassy/yellow) | Custom toners + color analysis | 1–2 visits |
| Uneven patches | Hair color correction balancing | 2–3 visits |
| Severe damage + color issues | Gentle lifting + custom color blocking | 3–5 visits |
This tailored approach ensures you won’t have to fix hair dye mistakes twice.
Hair Color Correction Techniques Explained
Transforming damaged hair into your dream look requires more than just hoping for the best—it takes the right techniques. Color correction isn’t one-size-fits-all, and knowing your options helps you take charge of the process.
Here’s what pros do when things go wrong.
Toning and Neutralizing Unwanted Tones
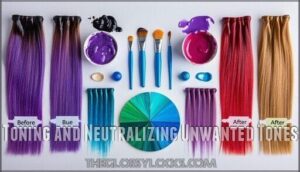
Toning is like a magic eraser for those unwanted shades that turn your dream color into a disaster—brassy oranges, yellows that are clearly a mistake, or even those strange green tints that appear unexpectedly.
This is how hair toner and color correction address each issue:
- Brassy tones get neutralized with blue or purple-based toners that cancel out orange and yellow
- Neutralizing green requires red-toned products to restore balance
- Correcting red calls for green or ashy tones to dial down unwanted warmth
- Gloss application seals everything in, adding shine while perfecting your shade
Toner selection isn’t guesswork—it’s pure color wheel science working for you.
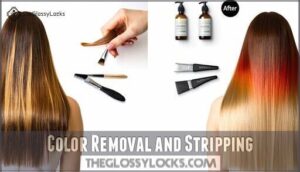
Color Removal and Stripping
Sometimes toning isn’t enough to fix a color disaster—that’s when you have to remove the existing color and start over.
Color removal involves using special products or bleach to lift out the unwanted pigment. Bleach alternatives are gentler on damaged hair, though you might need multiple applications.
The products you choose and how you apply them will determine if you get good results or cause more hair damage—professional advice is important here.
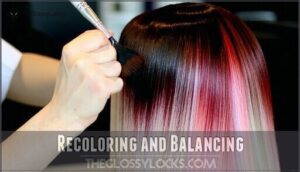
Recoloring and Balancing
After removing the unwanted pigment, you’re not done—you need to rebuild the color from scratch and make sure everything blends perfectly.
Once the unwanted pigment is gone, the real work begins—rebuilding the color and creating seamless blending.
- Shade Matching – Your colorist picks corrective formulas that match your target tone and natural base.
- Color Layering – Multiple tones are applied strategically to build depth and dimension.
- Balancing Highlights – Tone blending techniques correct uneven color and soften harsh lines.
- Final Toning – A gloss or toner seals everything, neutralizing any remaining brassiness.
At-Home Hair Color Correction Options
You don’t always need a professional colorist to fix a DIY hair color disaster or revive fading color. If you understand the issues and have the right products, you can often handle some corrections yourself at home.
Let’s break down when DIY fixes make sense and which products can actually get the job done.
When to Try DIY Correction
You don’t need a colorist on speed dial every time your hair acts up. Some color issues are totally fixable at home if you understand the problem. Is it minor brassiness, slight fading, or subtle unevenness? Then you’re good to go for DIY color correction.
But this is where you need to be honest about your skill level. If you’re dealing with serious banding, patchy bleach damage, or need to remove color completely, the risks of doing it yourself get much higher. Choosing the right product is essential—the wrong color remover can worsen the damage.
Know what you can handle, because fixing hair dye at home is great for small fixes but won’t do much for major problems.
Using Color Removers and Toners
When your DIY hair project needs a little help, color removers and toners are invaluable—if you know how to use them without damaging your hair. Color removers lift out pigment without bleach, but their strength differs. Mild formulas work on recent dye jobs, while stronger ones get rid of stubborn buildup.
After removing color, toner is essential to neutralize unwanted tones like brassiness or yellow. The right product is key: purple toners counteract yellow, and blue combats orange. Always test a small section first to avoid damage during color correction.
How Much Does Hair Color Correction Cost?
Let’s get real about the costs, because color correction isn’t cheap. You should know what you’re getting into before you sit in that salon chair.
Salon prices can really hurt your budget compared to doing it yourself, but several things affect whether it’ll cost $100 or $500.
A few key factors will determine whether you’re looking at $100 or $500.
Salon Pricing Vs. At-Home Costs
Let’s talk money—because deciding between a salon rescue mission and a DIY fix often comes down to what your wallet can handle.
Professional hair color services at a salon cost $100–$500, varying with complexity, while at-home hair color correction kits are $15–$40.
But the thing is: DIY correction carries risks. You might end up spending more to fix mistakes, making professional expertise worth every penny when hair color correction goes wrong.
Factors That Affect Correction Pricing
Salon location matters—expect to pay $68 in Wisconsin but closer to $405 in California for hair color correction in 2025.
Your stylist’s expertise drives pricing too, with master colorists adding $50–$200 over standard rates. Hair condition, length, and density increase product use and session duration, while top-tier ammonia-free formulas bump costs by 15–30%.
Most color correction consultations at a hair salon factor in all these variables before quoting your ultimate price for hair color services.
How Long Does Color Correction Take?
Color correction isn’t a quick fix—it requires time, patience, and sometimes multiple salon visits.
The amount of time you spend getting it done depends on your starting color, your desired shade, and how damaged your hair is.
Let’s break down what influences the process and walk through each step.
Single Session Vs. Multiple Visits
The truth is, not every color correction can be done in one appointment. Some situations need a well-planned strategy. How many sessions you’ll need depends on where you’re starting and what you want to achieve.
If you’re going from black to platinum, that’s a marathon, not a sprint. Plan on several visits to avoid damage and breakage. But if you’re dealing with minor brassiness or uneven color, you might see a complete change after a single session.
Having realistic expectations is important, and so is understanding the potential cost. Your colorist will figure out if your hair needs a quick fix or a longer-term plan.
What to Expect During Each Step
Here’s how hair color correction actually works. Your colorist kicks things off with an Initial Consultation—they’ll review your color history and map out the game plan.
From there, Strand Testing comes next to see exactly how your hair responds (pretty much every stylist does this step).
Then comes Color Removal if needed, which can take one to four hours depending on how bad it is. Toning Application follows to counteract Brassy Tones and fix Uneven Color, taking 10 to 25 minutes.
Maintaining Healthy Hair After Correction
Now that your color is exactly where you want it, the next thing is keeping your hair in good condition.
Taking extra care after a correction makes a real difference. Focus on these essentials to keep your hair strong and shiny while protecting that fresh color.
Best Color-Safe Shampoos and Conditioners
Your newly vibrant color deserves better than a generic drugstore shampoo. It needs protection to lock in that fresh color and prevent brassiness from returning.
Seek out sulfate-free options with hydrating ingredients like argan oil or shea butter, plus UV protection to fight sun-induced fading. Keratin-infused formulas can rebuild hair’s strength, while color-safe conditioners seal the hair shaft.
Read the ingredient labels closely—you want gentle cleansers that nourish, not leach moisture.
Post-Correction Hair Care Tips
Great products are useless if you wash your hair every day or use extremely hot water. These habits will fade your color faster than you can schedule another appointment.
Use lukewarm water instead, wash your hair only two or three times a week, and focus on moisturizing with deep conditioning masks.
Use protein treatments every other week to strengthen damaged hair, keep your scalp healthy with gentle massage, apply sunscreen sprays before going outside, and get regular trims to cut off split ends before they worsen.
How to Prevent Future Color Mistakes
Once you’ve nursed your hair back to health, the real power move is making sure you never end up in that chair again—at least not for damage control.
Always do patch tests before trying new products, schedule professional consultations instead of winging it, invest in quality hair color and hair care products, make gradual changes to avoid shocking your strands, and stick to a consistent home maintenance routine that protects against hair damage.
Mistakes to Avoid During Hair Color Correction
You’ve come this far—don’t let easily avoided errors ruin your color correction.
Often, the difference between healthy, vibrant hair and a damaged mess boils down to three big mistakes that even experienced DIYers make.
Let me show you what to skip if you want real results.
Choosing The Wrong Shade or Product
Picking a box color that “looks close enough” or grabbing the cheapest corrector at the drugstore is like trying to fix a blown tire with duct tape—it might hold for a minute, but you’re headed for a breakdown. So, before you attempt at-home hair color correction, get these things right:
- Study the color wheel – neutralizing brassy tones requires understanding complementary shades, not guesswork
- Match your skin tone – cool, warm, or neutral undertones dictate which hair dye shades will actually flatter you
- Check product ingredients – cheap correctors often lack the quality pigments needed for proper shade selection
- Assess your hair porosity – damaged strands absorb color differently, turning correcting hair dye mistakes into bigger disasters
Overprocessing and Hair Damage
Thinking another round of bleach or dye will correct your hair, when you’ve already made a mistake, is like pouring gasoline on a fire and hoping it extinguishes itself. Overprocessing removes protein, destroys elasticity, and turns your hair into brittle straw—no color fix is worth compromising your scalp and hair’s strength.
Overprocessing your hair to fix a color mistake is like pouring gasoline on a fire—it only destroys what’s left
Truly fixing your hair requires patience, not panic.
| Damage Type | What Happens | Prevention Strategy |
|---|---|---|
| Protein Loss | Hair becomes weak, limp | Space treatments 4–6 weeks apart |
| Elasticity Reduction | Strands snap when stretched | Use hydration therapy between sessions |
| Breakage | Hair breaks off at mid-shaft | Use bond-building treatments during color correction |
Skipping Professional Advice
Avoiding a consultation with a professional colorist to save time or money can end up costing you both—plus the health of your hair. DIY attempts carry risks, such as misdiagnoses that can lead to expensive mistakes. Examples include using the wrong toner on brassy tones or over-bleaching uneven color.
Without the necessary expertise to properly evaluate porosity, underlying pigments, and existing damage, you’re risking long-term harm. Fixing hair dye mishaps demands professional skill, not guesswork.
Frequently Asked Questions (FAQs)
How long does a color correction take?
Color correction isn’t a quick fix; many sessions take two to five hours, depending on how damaged the hair is and how complex the correction needs to be.
Significant transformations often require several appointments spaced weeks apart. This protects your hair while you work toward the color you want.
What products should I use for a color correction?
Walking into this without a plan? That’s like bringing checkers to a chess game—you’re just not equipped for what’s ahead.
You’ll need a color remover or lightener, the right toner selection matched to your developer strength, plus bond builders and protein treatments to keep your hair intact during the repair process.
How often should I get a color correction?
Hair corrections are usually one-time deals, unless you’re gradually changing your color or fixing significant damage.
How often you need a retouch depends on your lifestyle and how well your color lasts. You generally won’t need another full correction unless something goes wrong again.
Are there any natural alternatives to color correction?
Sometimes, Mother Nature herself holds the key—chamomile tea rinses can gently lighten blonde shades, while coffee or black tea rinses deepen darker tones without harsh chemicals that trigger Hair Damage or Brassy Tones common in traditional Hair Color Correction.
What is the best way to maintain a color correction?
Maintain your results with color-safe products and sun protection, and schedule regular touch-ups.
Hair upkeep includes hydrating, avoiding too much heat, and warding off brassy tones so your color stays vibrant.
How often should I schedule color correction touch-ups?
How often you need touch-ups depends on how fast your hair grows, the type of color treatment you get, and your lifestyle.
Many clients schedule maintenance every 6-8 weeks to handle roots and revive faded brassy tones, but damage assessment and budget are also factors.
Is color correction safe for pregnant or nursing women?
Many experts advise postponing color correction until after pregnancy and breastfeeding because ammonia and peroxide can absorb into the scalp.
Since chemical exposure during lactation worries many stylists, safer alternatives like henna are available if you prefer not to wait.
Can I swim after getting hair color correction?
Diving in seems tempting, but water is color correction’s sworn enemy. Wait at least 72 hours before swimming—pool chemical effects and saltwater exposure accelerate color fading risks.
Use protective measures like swim caps, then follow post-swim care rituals to prevent hair damage.
Whats the difference between color correction and color removal?
Color removal strips unwanted pigment out completely, while hair color correction uses targeted techniques—toning, balancing, recoloring—to transform your shade without necessarily erasing everything.
Removal is one tool; correction is the full strategy.
Conclusion
The truth is, hair color mishaps happen, but they don’t have to be permanent. Whether you’re dealing with brassiness or a color job gone wrong, color correction lets you fix the problem and undo the damage.
Don’t take shortcuts, trust the process, and either consult a professional or do your research before attempting DIY solutions. Your hair isn’t ruined—it simply needs the correct approach to restore it.
- https://www.grandviewresearch.com/industry-analysis/hair-color-market-report
- https://rodneygentry.com/hair-color-ideas/hair-color-correction/
- https://www.marketsandata.com/industry-reports/hair-color-market
- https://www.todyeforbeautystudio.com/what-really-happens-during-a-professional-color-correction
- https://www.rovesalon.com/how-does-rove-ensure-every-hair-color-correction-is-spot-on/

