This site is supported by our readers. We may earn a commission, at no cost to you, if you purchase through links. This content is for general informational and educational purposes only and is not a substitute for professional medical, dermatological, or nutritional advice.
You scrunch in your gel, watch it dry, then flip your hair upside down—and that crunchy cast cracks into frizz before you even hit the front door. Sound familiar? The gel isn’t the problem; your technique probably is.
Curl definition comes down to timing, product ratios, and how you handle your strands from soaking wet to bone dry. Skip a step, and you’ll fight frizz and flakes all week.
Get the process right, though, and gel becomes your curls’ best friend—not their enemy. Here’s exactly how to style curly hair with gel for bouncy, defined results that actually last.
Table Of Contents
- Key Takeaways
- Choose The Right Gel for Curly Hair
- How to Style Curly Hair With Gel Step by Step
- Best Gel Application Techniques for Defined Curls
- Dry, Set, and Break The Gel Cast
- Fix Frizz, Flakes, and Second-Day Curls
- Frequently Asked Questions (FAQs)
- Can I style my curly hair with just gel?
- How to use gel in a curly hair routine?
- Can progesterone make your hair curly?
- Do you put gel in curly hair wet or dry?
- How can I avoid white flaking after using gel?
- What is the best gel to use for a gel cast?
- How do I prevent frizz after breaking the gel cast?
- Does gel work better on damp or dry hair?
- How often should you wash curly hair when using gel?
- Can you use gel on dry curls for touch-ups?
- Conclusion
Key Takeaways
- Always apply gel to soaking wet hair, since dripping strands help the product absorb evenly and lock in curl definition instead of sitting on top and causing buildup or flakes.
- Match your gel’s hold level and weight to your curl type and density, using light formulas for loose waves and stronger, tackier gels for tight coils that need more humidity resistance.
- Apply gel using techniques like praying hands, raking, and glazing, then let it air dry or diffuse on low heat without touching it, since the resulting cast protects your curls from frizz until it’s fully dry.
- Once hair is completely dry, scrunch out the crunch with a bit of oil to break the cast, restore softness and shine, and prevent white flakes or buildup that come from residue or overuse of product.
Choose The Right Gel for Curly Hair
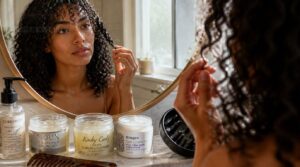
Before you scrunch a single curl, you’ve got to grab the right gel—because the wrong one can leave you stiff, crunchy, or just plain frizzy by noon.
If you’re unsure where to start, this roundup of the best hair gel for men breaks down which formulas hold curls without the crunch.
Not all gels are built the same, and your curl type, porosity, and hold needs all play a part in picking one that actually works for you.
Here’s what to look for before you toss a bottle in your cart.
Alcohol-Free Gel Formulas
If your curls feel like straw after styling, the culprit’s probably alcohol in your gel, drying you out fast. Alcohol-free formulas skip that, using water, glycerin, and plant-based thickening agents instead, so you get humectant moisture balance without the crunch.
Aloe and emollient slip ingredients smooth application and prevent scalp irritation, letting you apply gel on curly hair for genuinely defined curls.
Many premium options use a 100% biodegradable formulation to help keep environmental impact minimal.
Hold Level by Curl Type
Once you’ve got the moisture balance sorted, the next question is matching hold levels to your actual coil density. Loose waves do best with a soft 1-3 hold; medium curls want that 4-6 sweet spot for bounce with humidity resistance; tight coils need 7-9, or level 10 for max definition.
- Loose waves: light hold, natural movement
- Medium curls: balanced definition
- Tight coils: strong hold, less shrinkage
- Coily hair: firmest cast available
- Match hold to your curl’s density
Lightweight Vs Strong-Hold Gel
Now that hold level’s sorted, weight matters just as much.
Lightweight gels feel watery, absorb fast, and suit fine or low-density curls chasing bounce without stiffness.
Strong-hold formulas run thicker and tackier, packing higher polymer concentration for real humidity resistance—though that means more texture, more crunch, and thorough washing later to avoid buildup on delicate strands.
Moisturizing Ingredients to Look For
Weight and hold aside, what actually keeps your curls plump is the ingredient list. Look for glycerin, a humectant that pulls moisture straight into your strands. Aloe vera calms and hydrates without weighing curls down, while flaxseed extract adds slip and natural hold. Water-based gels let these humectants work better—always check that water tops the ingredient list.
Gel Vs Curl Cream
Gel or curl cream — which one wins? Gel delivers stronger hold and crisp definition, perfect for tight coils facing humidity.
Curl cream offers gentler moisture retention and softer texture, ideal for looser waves.
Many curlies layer curl cream first for slip, then gel for hold — boosting moisture without sacrificing definition, and keeping your scalp healthy while achieving beautifully defined curls.
How to Style Curly Hair With Gel Step by Step
Now that you’ve got the right gel in hand, it’s time to put it to work. Getting those defined, bouncy curls isn’t complicated, but it does depend on hitting each step in the right order. Here’s exactly how to go from soaking wet hair to gorgeous curls, one stage at a time.
If you’re working with locs instead of loose curls, your wash-day routine will look different, so check out this guide on how often to wash dreads before you get started.
Start With Soaking Wet Hair

Ever wonder why your gel clumps instead of coating evenly? It’s all about timing.
Applying gel to soaking wet, dripping hair opens the cuticle fully, letting product penetrate rather than sit on top. That moisture acts as a carrier, helping polymers form a uniform network along each strand—locking in curl definition without diluting hold.
Skip this wet styling technique, and you’re fighting frizz from the start.
Section Hair for Control
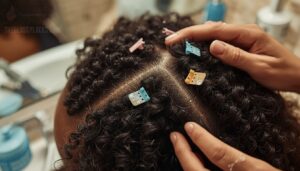
Four to six sections, clipped and separated with vertical partitioning from crown to nape, give you a clear map instead of one tangled mass.
Ideal section sizes should shrink for denser curls—smaller zones mean better targeted moisture distribution.
Watch clip placement near your hairline, and isolate any cowlicks separately so they get the attention (and product) they need.
Apply Gel Evenly

Rub a coin-sized amount between your palms first—this product emulsification step warms the gel so it glides instead of clumping.
Working section by section, layer gel from mid-lengths to ends using light praying-hands presses. Let each thin layer sit a beat before adding more; this layering thickness trick prevents pooling and buildup near your roots.
Scrunch to Boost Definition
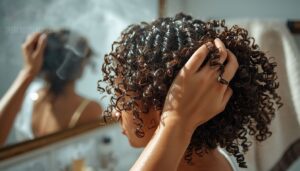
Now for the fun part: cupping each section and squeezing upward toward your scalp, coaxing those springy coils to life.
Effective scrunching pressure matters—too light skips definition, too hard causes over-crunching and flattens your pattern. Aim for steady, rhythmic squeezes.
- Cup hair gently
- Squeeze upward, don’t twist
- Repeat 3-5 times per section
- Move to next section
This builds uniform curl size while enhancing curl ridges beautifully.
Avoid Touching While Drying
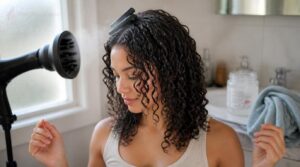
Here’s the hard part: hands off. That gel is forming a protective cast as it dries, and every touch risks frizz.
Let it air dry or diffuse on low heat, root-clipped for volume. Patience preserves your curl clumps and locks in frizz control—resist until hair’s bone-dry, then scrunch out the crunch for soft, defined curls.
Best Gel Application Techniques for Defined Curls

Getting your hands on some gel is only half the battle, you, technique is what actually turns product into definition. The way you apply it can mean the difference between bouncy, defined curls and a frizzy, flat mess. Here are the five methods worth mastering.
Praying Hands Method
Press your palms together like you’re about to make a wish, fingertips up, and glide them along small curl sections—this tactile technique coats strands evenly without flattening roots. Benefits include:
- Uniform product coating
- Stronger clump integrity
- Reduced frizz
- Root volume preserved
Go slow, section by section, and you’ll set up a solid gel cast before scrunching out the crunch later.
Raking for Even Coverage
Once you’ve smoothed on your gel, spread your fingers wide and comb through each section from root to tip—this finger raking technique separates clumps without pulling them apart. Work section by section for even sectional distribution, letting bristles-of-fingers reach the scalp.
Done right, it boosts curl definition while avoiding clump disruption, setting you up perfectly for glazing next.
Glazing Over Curl Clumps
Now that your clumps are raked and separated, it’s time to seal them in. Grab a tiny bit of gel—less than you think—and glaze lightly over each clump’s surface instead of saturating it.
This glaze vs saturation approach smooths flyaways, keeps clumps together, and lets film-forming polymers set a flexible shell without waxy buildup or heaviness.
Scrunching for Bounce
Once your clumps are glazed, add vertical lift with an upward pulsing motion—squeeze gently toward your scalp instead of downward tugging that causes clump collapse.
This moisture-driven scrunching boosts root lift and bouncy curls without frizz.
- Pulse, don’t rub
- Work mid-lengths to roots
- Keep pressure light and even
That rhythmic squeeze is what turns flat strands into springy, defined curls.
Layering With Leave-in Conditioner
Wondering why your curls still feel thirsty under all that gel? The Best Layering Order is water, leave-in, then gel—never skip the leave-in conditioner step.
That layer boosts enhancing detangling ease and provides slip before sealing moisture effectively underneath your gel. Skipping it means brittle, dry-feeling curls even with the best product layering technique. Layer light for managing product weight, and you’ll lock in truly defined curls.
Dry, Set, and Break The Gel Cast

You’ve applied your gel like a pro, so now comes the waiting game—and it’s more important than you think. How you dry your curls, and how you handle that stiff cast once they’re done, decides whether you get bouncy definition or a frizzy mess. Let’s walk through exactly what to do from soggy roots to that first satisfying scrunch.
Air Drying Vs Diffusing
Air dry or diffuse? It’s your drying time trade-off: air drying takes 2-10 hours but preserves natural texture, while diffusing sets curls in minutes with extra root lift and volume.
Humid day ahead? Diffusing fights frizz better.
Prefer softer, easygoing curls with zero heat exposure? Let gel-coated strands air dry undisturbed—patience pays off in texture.
Low Heat Diffuser Tips
Grab your diffuser and dial it to low heat—your curls will thank you. Keep placement at the ends, not roots, moving in gentle circular motions instead of holding still.
- Hover, don’t press
- Swirl sections gently
- Apply heat protectant first
Clean your diffuser weekly, then scrunch your curls upward as you go for real curl definition without the frizz.
What a Gel Cast Does
That hard, crunchy shell you feel isn’t a flaw—it’s your curls’ bodyguard. As gel dries, it forms a polymer network that smooths the cuticle, creating a humidity shield and locking in moisture before evaporation can frizz things up. This preserves your curl geometry, keeping each clump defined and separated.
That crunchy shell is your curls’ bodyguard, locking in moisture and shielding against frizz before it starts
Stay patient here—that crunch means it’s working, and defined curls are right behind it.
Scrunch Out The Crunch
Ready to break that shell? First, confirm you’re fully dry — squeeze a curl and check for zero dampness or crunch.
Rub a dime-size oil between your palms for smooth lubrication, then cup curls upward with gentle pressure. Don’t overdo it; a few scrunches per section restore bounce without flattening roots. You’ll feel crispy strands transform into soft, touchable, defined curls with real movement.
Add Shine With Oil
Here’s the secret step most people skip: oil. A tiny drop transforms flat, dull curls into glossy, defined curls with real light-reflecting shine.
- Argan oil: rich, smoothing
- Jojoba oil: lightweight, sebum-like
- Both seal moisture without weighing curls down
Warm oil between palms, then apply mid-lengths to ends—never roots—to avoid greasy roots. This scrunches out any crunchiness while boosting hair shine enhancement naturally, no silicone needed.
Fix Frizz, Flakes, and Second-Day Curls

Even with perfect technique, your curls can still hit a rough patch a day or two later, and that’s completely normal.
Frizz creeping in, flakes showing up, volume falling flat—these are just part of the curly hair journey, not signs you did something wrong.
Here’s exactly how to handle each one so your curls stay fresh, defined, and totally yours.
Prevent Product Buildup
Every gel leaves something behind, and over time that residue dulls your curls and flattens their bounce—this is product buildup.
Rinse with lukewarm water, not hot, since water temperature effects matter for dissolving residue.
Use clarifying shampoos every 2-4 weeks, alternating with sulfate-free lowpoo formulas.
Rotate products regularly, and massage your scalp while washing—it loosens buildup beautifully.
Stop White Gel Flakes
Those chalky white specks usually come from polymer-based residue that hasn’t fully dissolved into your strands.
- Test new products on one section first
- Check your moisture-to-gel ratio before applying
- Rinse with filtered water if you’ve got hard water minerals
Apply gel on soaking wet curls, let your gel cast set fully, then scrunch out any crunchiness—flakes vanish, curl definition stays intact.
Refresh With Water Mist
Once flakes are gone, curl definition can still sag by afternoon—that’s where a fine water mist earns its spot in your routine.
Look for hydrating mist ingredients like glycerin or panthenol; these humectants pull moisture back into thirsty strands.
Mist damp hair midday, scrunch gently, and watch second-day hair bounce back.
It’s a quick fluff and refresh, no full restyle needed.
Protect Curls Overnight
That midday boost only goes so far if your pillow undoes the work by dawn. Swap cotton for a satin pillowcase or bonnet—cotton soaks moisture and creates friction that frizzes curls.
Try these before bed:
- Loosely pineapple hair atop your head
- Apply a light leave-in for moisture sealing
- Smooth a satin scarf around edges
- Keep bedroom cool to control humidity
- Avoid heavy products that flake overnight
Keep Volume Without Frizz
Volume and frizz-free curls aren’t opposites—they just need balance.
Focus product at the roots for root lift, using fingers or a wide-tooth comb for even distribution.
Flip your head during diffusing for scalp buoyancy, keep heat low, and skip heavy butters on lengths.
Lightweight humectants hydrate without collapsing curls, so your gel cast sets bouncy, not flat.
Frequently Asked Questions (FAQs)
Can I style my curly hair with just gel?
Technically, yes—but gel alone won’t cut it long-term. Your curls need moisture retention first, so layering gel over a leave-in or mousse locks in hydration, reduces frizz, and gives you way better curl definition than gel by itself ever could.
How to use gel in a curly hair routine?
Think it’s just slapping product on wet strands? Not quite. Wash at the right moisture levels, section efficiently, apply gel using finger coils and scrunching, then diffuse on low heat, let the gel cast set, and sleep on satin.
Can progesterone make your hair curly?
Not directly — progesterone won’t rewrite your natural curl pattern. It can trigger hormonal sebum shifts and affect the hair follicle environment, making waves look temporarily curlier or looser, but genetics still decide whether you apply gel on curly hair or straight.
Do you put gel in curly hair wet or dry?
Always soaking wet, never dry. Wet hair helps gel glide through strands with better product absorption, sealing in moisture as it dries.
Dry application risks buildup, flaky residue, and uneven hold—so skip it if defined, frizz-free curls are your goal.
How can I avoid white flaking after using gel?
White flakes usually mean product buildup or too much gel.
Use alcohol-free, water-based gels, apply on damp hair, avoid mixing incompatible leave-ins, and clarify weekly—especially if hard water leaves mineral residue behind on your strands.
What is the best gel to use for a gel cast?
Picking the right gel is like choosing armor, not accessories—it needs to protect, not just decorate. Match water-based gels for lightweight hold, alcohol-based for stronger cast stiffness, and glycerin or aloe formulas for humidity resistance and curl definition.
How do I prevent frizz after breaking the gel cast?
Rub a lightweight oil or serum between your palms, then scrunch gently to seal the cuticle. This locks in humidity resistance, smooths flyaways, and keeps curls defined without weighing them down or inviting frizz back in.
Does gel work better on damp or dry hair?
Soaking wet hair wins here: higher moisture absorption rates help gel glide evenly, boosting curl clump formation and locking in moisture.
Damp hair offers more hold flexibility but risks residue.
Apply gel on curly hair while dripping for maximum texture definition and reduced frizz.
How often should you wash curly hair when using gel?
Wash your gelled curls a thousand times a week and you’ll strip every ounce of moisture; wash 3-5 days apart instead. Tighter, drier curls stretch further; oily scalps or heavy sweat sessions mean washing sooner to dodge buildup.
Can you use gel on dry curls for touch-ups?
Bone-dry gel touch-ups rarely work well. For a proper midweek refresh, mist a targeted section with water, then scrunch in a hydrating gel to reactivate curls, tame frizz, and restore bounce—no full rewash, no stiffness, no flaking required.
Conclusion
Wet hair, right gel, patient hands, still crunch—these are your building blocks, not obstacles. Mastering how to style curly hair with gel isn’t about luck; it’s about repeating smart moves until your curls trust you back.
Scrunch, dry, break the cast, breathe. That’s it. Once you nail your rhythm, frizz stops running your mornings.
Your curls were never the problem—your process was. Now you’ve got both: the technique and the confidence to use it.