This site is supported by our readers. We may earn a commission, at no cost to you, if you purchase through links.
 You can master coloring hair at home safely with a few key steps.
First, always do a patch test 48 hours before to avoid allergic reactions. Wear gloves and old clothes—that pristine white shirt is just asking for trouble!
Mix your dye in a well-ventilated area and follow package instructions precisely. For even application, section your hair with clips and work methodically from roots to ends.
Don’t leave color on longer than recommended, as over-processing can damage your strands. After rinsing, use color-safe products to maintain your new shade.
The difference between salon-worthy results and a hair disaster often comes down to proper preparation and following the instructions to achieve the desired new shade.
Table Of Contents
- Key Takeaways
- Pre Dyeing Preparation Tips
- Choosing Right Dye Shade
- Hair Color Application
- Top 7 Hair Coloring Essentials
- Safe Hair Coloring Practices
- Common Hair Coloring Mistakes
- Hair Coloring Aftercare
- Dealing With Color Issues
- Hair Texture Consideration
- Maintaining Color Longevity
- Frequently Asked Questions (FAQs)
- Why do hairdressers dislike box dye?
- How can I cover up grey hair without dye?
- What is the least damaging way to color your hair?
- What is the healthiest way to dye your hair?
- How often can I safely color my hair?
- Does hair dye damage color-treated extensions?
- Can medications affect hair dye results?
- How to fix stained skin after coloring?
- Are natural dyes safer than chemical ones?
- Conclusion
Key Takeaways
- Always perform a patch test 48 hours before coloring to prevent allergic reactions, as even familiar brands can change formulations and your body’s sensitivities may evolve over time.
- Don’t wash your hair 24-48 hours before dyeing, as your scalp’s natural oils create a protective barrier against chemical irritation while allowing the color to work effectively.
- Section your hair properly with clips and work methodically from roots to ends to prevent patchy application, using the right tools like nitrile gloves and a distortion-free mirror for full visibility.
- Wait at least 48-72 hours after coloring before shampooing, then use only cold water and sulfate-free products to maintain vibrant color and prevent premature fading.
Pre Dyeing Preparation Tips
You’ll need to prepare your hair properly before applying any dye to guarantee the color turns out even and vibrant.
Skip washing your hair for 24 hours prior to coloring so your scalp’s natural oils can protect against irritation.
Detangling your strands and removing product buildup with a clarifying shampoo the day before creates the perfect canvas for your new color, allowing for even distribution of the dye and ensuring the color is vibrant.
Natural Oils Protection

Those natural oils on your scalp aren’t just there for show—they’re your first line of defense during hair coloring.
Don’t shampoo your hair 24-48 hours before dyeing, as these oils create a protective barrier against irritation.
This natural protection shields your scalp from harsh chemicals while allowing the color to work effectively on your strands, think of it as your scalp’s built-in safety suit for safe hair coloring.
Detangling Hair

While those natural oils protect your scalp, tangled hair can ruin your color results.
Tangled hair leads to patchy dye application. Take the time to detangle thoroughly for even, vibrant color results.
Before reaching for the dye, verify your hair is completely tangle-free to prevent uneven application and patchy spots.
Three essential detangling techniques for pre-coloring prep:
- Use a wide-tooth comb to gently work through knots from ends to roots
- Apply a lightweight detangler spray to stubborn tangles
- Section hair with clips for methodical knot removal
Don’t rush this step—properly detangled hair accepts color more evenly and prevents patchy spots, ensuring a better color results.
Clarifying Shampoo

After detangling your locks, it’s time to purify your canvas.
Use a clarifying shampoo 24 hours before coloring to remove product buildup that can block dye absorption.
Unlike color-protecting shampoo, clarifying formulas strip away residue without eliminating natural oils that protect your scalp during the coloring process.
This hair purification step enhances color penetration, reduces hair dye safety risks, and helps achieve more even results when coloring hair at home safely.
Using a color safe shampoo is essential for maintaining the health and vibrancy of colored hair.
Choosing Right Dye Shade

You’ll need to match your hair dye to both your natural color and skin tone for results that won’t make your bathroom mirror your worst enemy.
Your hair’s texture also affects how the color develops, with coarse hair typically absorbing dye faster than fine strands, which is a key factor to consider for successful dyeing.
Hair Texture Impact
Your hair texture substantially impacts how dye behaves on your strands.
Fine hair absorbs color quickly and appears darker, while coarse hair needs more time for even deposit.
High porosity hair (rough, dries fast) grabs color intensely but fades quicker.
Low porosity hair resists absorption – try using heat during processing.
Curl patterns also affect how color distributes, so always perform a strand test before full application.
Understanding the right hair texture dye is vital for achieving the desired color outcome, and knowing your hair texture is crucial for the best results, as it helps in selecting the appropriate dye.
Skin Tone Consideration
Everyone’s skin tone plays a vital role in selecting the perfect hair color.
Your natural undertones determine which shades will complement you best. Warm undertones (peachy, golden) shine with honey blonde and caramel tones, while cool tones (pink, blue undertones) look stunning with ash blonde or mushroom brown.
Check a tone chart to identify your color palette before dyeing. This skin matching approach helps avoid common hair color mistakes that clash with your complexion.
Understanding skin tone basics is essential for choosing a hair color that complements your natural undertones. This approach is vital for selecting the perfect hair color.
Natural Hair Color
Your natural hair color serves as the canvas for your new look.
Your natural hair color is the blank canvas waiting for your creative vision—treat it with respect before transformation.
Understanding your hair’s natural pigmentation is essential for shade matching success.
- Dark bases require more lifting power to achieve lighter shades
- Going within 2-3 color depth levels of your natural tone yields most realistic results
- Natural tones contain underlying pigments (red, yellow, ash) that affect final color
- Hair that’s never been colored accepts dye more predictably than previously treated hair
Hair Color Application
You’ll need to time your application correctly and adjust your technique for your specific hair type to achieve salon-quality results at home.
Different hair textures absorb color at varying rates, so you’ll want to follow the package instructions while considering whether your hair needs more or less processing time than suggested to get the best results.
Timing Application

With your perfect shade selected, timing your hair dye application becomes your next critical step.
Always perform a strand test before full application to gauge how your hair reacts to the color. Processing time varies dramatically between products—follow package instructions precisely for best results.
Root application typically needs 30-45 minutes, while your refresh schedule might only require partial coloring every 4-6 weeks.
Consider using a hair dye timer product for precise timing.
Never leave hair color on longer than recommended, as this won’t make it darker—only more damaging. Set a timer on your phone when coloring at home; those extra five minutes can mean the difference between vibrant success and color disaster.
Different Hair Types

Now that you’ve mastered timing, let’s talk about how different hair types require specialized approaches.
Your hair’s texture and porosity substantially impact color deposit. Fine hair typically needs less processing time, while thick or coarse strands may require longer to achieve desired results.
Curly hair care involves sectioning more carefully to guarantee even application. For dry hair tips, apply a pre-color treatment 48 hours before dyeing.
Always perform a texture analysis before coloring hair safely – high porosity hair absorbs color quicker but fades faster too.
Remember: at-home hair dye success depends on understanding your unique hair type, not just following box instructions, and considering hair’s texture and porosity to ensure the best results.
Top 7 Hair Coloring Essentials
You’ll need the right tools to transform your hair color at home without ending up looking like you’ve been through a paint factory explosion.
These seven essential items will help you achieve salon-quality results while protecting your bathroom, skin, and clothing from permanent stains, which is crucial for a successful and stress-free hair color transformation at home.
1. Waterproof Hair Cutting Salon Capes
 View On Amazon
Before you get started with hair coloring, invest in a high-quality waterproof cape.
Made from durable nylon material, these lightweight and anti-static capes provide full coverage with dimensions of 59 x 47 inches.
The adjustable metal snap closure guarantees a comfortable fit for any neck size.
You’ll appreciate how easy they’re to clean after inevitable color splatters.
While some users note the material can be thin, most find these capes offer excellent protection for DIY coloring sessions.
For chemical services, you might want additional protection underneath.
Best For: Professionals or DIY enthusiasts looking for a lightweight, adjustable, and easy-to-clean cape suitable for general hairdressing and basic home coloring.
- Lightweight and breathable with a comfortable fit.
- Adjustable snap closure fits neck sizes from children to adults.
- Easy to clean and provides full clothing protection.
- Material may be too thin for heavy chemical services.
- Not entirely waterproof for prolonged use.
- Lack of color variety in product options.
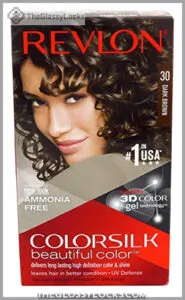
2. Revlon Dark Brown Hair Color
 View On Amazon
Revlon Dark Brown Hair Color stands out as a reliable option for your at-home coloring needs.
This ammonia-free formula offers 100% gray coverage while being gentle on your hair. You’ll appreciate how it delivers natural, fade-resistant color that maintains its true shade over time.
The liquid formulation makes application straightforward, while deep-conditioning technology guarantees even coverage from root to tip.
Many users report that it adds nice body to fine, wavy hair and colors grays exceptionally well, particularly for ash brown tones. The initial heaviness after rinsing typically disappears once you apply the included conditioner.
Best For: Individuals seeking a gentle, ammonia-free hair dye that provides 100% gray coverage and delivers natural, fade-resistant color.
- Ammonia-free formula ensures gentle treatment for hair.
- Deep-conditioning technology improves hair’s texture and softness.
- Long-lasting, fade-resistant color with 100% gray coverage.
- May cause allergic reactions; patch test is essential.
- Color can fade over time, especially without proper care.
- Initial heaviness after rinsing may be unpleasant for some users.
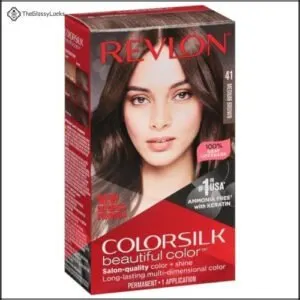
3. Revlon Medium Brown Hair Dye
 View On Amazon
This medium brown shade from Revlon’s ColorSilk line delivers natural-looking color with impressive gray coverage.
You’ll appreciate the keratin-enriched, ammonia-free formula that’s gentler on your hair while providing vibrant results.
The 3D Color Gel Technology creates multi-dimensional tones that prevent that flat, one-note color often seen with home dyes.
It works especially well for those shifting from darker shades or maintaining medium brown color.
For best results, apply methodically from roots to tips and consider extending the processing time slightly if you have resistant grays.
The post-coloring conditioner leaves your hair noticeably silky and shiny.
Best For: Individuals seeking an ammonia-free, keratin-enriched at-home hair dye for natural-looking medium brown color with excellent gray coverage.
- May cause scalp irritation or allergic reactions; patch test recommended.
- Results can vary, sometimes appearing lighter than expected.
- Red undertones might be visible in certain lighting.
- Ammonia-free formula enriched with keratin and silk amino acids for healthier hair.
- 3D Color Gel Technology delivers multi-dimensional, vibrant tones.
- Provides 100% gray coverage and leaves hair silky and shiny.
4. Clear Disposable Safety Gloves Set
 View On Amazon
Protecting your hands with nitrile gloves should be non-negotiable when coloring your hair at home.
These disposable shields create a vital barrier between your skin and potentially irritating dye chemicals.
While vinyl gloves are budget-friendly, they offer less chemical resistance than their nitrile counterparts, which provide superior protection against ammonia and hydrogen peroxide.
Look for powder-free options in 3-5 mil thickness for the ideal balance of dexterity and safety.
Always make certain they fit snugly without restricting movement, and replace them immediately if torn during application to prevent skin reactions.
Best For: Individuals needing reliable hand protection during tasks involving chemicals, including hair coloring at home or in professional settings.
- Latex-free, reducing allergy concerns.
- Provides excellent chemical resistance, especially against ammonia and hydrogen peroxide.
- Powder-free design prevents residue on skin or surfaces.
- Slightly more expensive than vinyl or latex gloves.
- Requires proper disposal after use to avoid environmental harm.
- May cause hand fatigue if worn for extended periods without correct sizing.
5. Professional Hair Coloring Dye Kit
 View On Amazon
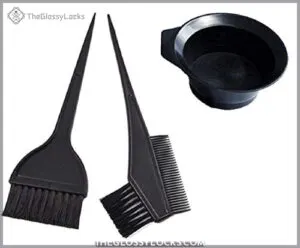
A professional hair coloring dye kit is your command center for DIY hair transformation.
These kits typically include a mixing bowl with measurement scales, an application brush, and a comb for precise distribution.
Look for bowls measuring around 5 inches in diameter with clear markings for accurate mixing. The brush should have bristles about 1 inch long for even application.
Whether you’re a salon professional or a home colorist, these tools guarantee professional-quality results. The graduated scales (50ml, 80ml, 100ml, and 200ml) help you mix the perfect amount of dye and developer for your hair length.
The kit’s components work together to ensure a successful DIY hair transformation.
Best For: Individuals looking for salon-quality hair coloring results at home or professionals seeking a reliable dye application kit.
- Includes all essential tools for precise dye application.
- Measurement scales on the mixing bowl ensure accurate mixing.
- Suitable for both beginners and salon professionals.
- Requires proper technique for best results.
- Not all users may find the included tools sufficient for complex styles.
- Chemicals in dyes may cause skin irritation if not handled carefully.
6. Fagaci Hair Sectioning Clips Set
 View On Amazon
When tackling home hair coloring, a set of Fagaci Hair Sectioning Clips becomes your best ally.
These clips feature a firm grip that works on both wet and dry hair, thanks to their upgraded silicone bands that resist breakage.
The premium ABS plastic construction guarantees durability while the soft, velvety texture provides all-day hold without pulling or damaging your hair.
You’ll appreciate how easily they open and close with one hand, securing large sections of hair without slipping, which is particularly useful for those with thick or fine hair.
Whether you have thick or fine hair, these clips keep everything organized during the application process.
Best For: Individuals who need reliable, durable hair clips for sectioning during styling or coloring, especially those with thick or fine hair.
- Edges may feel sharp and require sanding.
- Clips can snap if handled carelessly.
- No extra silicone bands included.
- Firm grip on wet or dry hair without slipping.
- Durable ABS plastic and upgraded silicone band for long-lasting use.
- Easy to open and close with one hand.
7. Large Distortion Free Hand Mirror
 View On Amazon
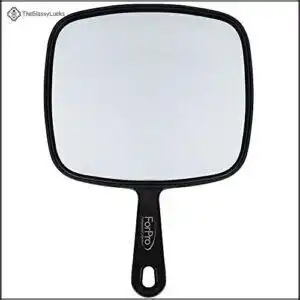
Seeing is believing regarding perfect color application. A large distortion-free hand mirror is essential for viewing the back of your head during self-application.
Look for one with an ergonomic handle to prevent fatigue during the 30-45 minute process. Positioning your mirror at a 45-degree angle helps you spot those easily missed crown and back sections.
For best results, coordinate with your bathroom mirror to create 360-degree visibility. Fog-resistant and shatterproof models are ideal when working with potentially slippery gloved hands.
Check periodically during processing to guarantee full, even coverage.
Best For: Individuals needing a lightweight, distortion-free hand mirror for personal grooming and hair coloring.
- Clear reflection without distortion.
- Lightweight and portable for easy handling.
- Comfortable ergonomic handle reduces fatigue.
- Construction may feel flimsy to some users.
- Lacks additional features like magnification or LED lighting.
- Handle durability may not withstand rough usage.
Safe Hair Coloring Practices

You’ll avoid a hair-coloring disaster by performing a patch test 48 hours before application.
This step is crucial as it protects your scalp from allergic reactions.
Using a deep conditioning treatment immediately after coloring is also essential, as it maintains your hair’s health and vibrancy.
Allergic Reaction Prevention
After selecting quality coloring products, preventing allergic reactions should be your top priority. A hair color patch test is your best defense against adverse reactions to toxic hair color ingredients like PPD.
PDD is rated a seven out of ten for toxicity and is found in most permanent hair dyes, according to these safe hair coloring tips.
- Apply a small amount of mixed dye behind your ear 48 hours before full application
- Watch for reaction symptoms like redness, itching, or swelling
- Consider dye alternatives if you have skin sensitivity or are coloring hair during pregnancy
This simple step reduces your risk of severe allergic reactions by 65%. Don’t skip this safety check—even if you’ve used the same brand before, as manufacturers occasionally change formulations and your body’s sensitivities can evolve over time, making it a critical precaution for hair coloring.
Conditioning After Coloring
The essential post-coloring conditioning step locks in your new hue while repairing chemical damage.
After coloring, wait 48-72 hours before shampooing to prevent premature fading and extend color longevity.
Avoid pre-coloring conditioners, as advised in this pre-coloring hair care guide, to guarantee the best color absorption.
| Treatment Type | Benefits | Best For |
|---|---|---|
| Keratin Mask | Deep Moisture Lock | Chemically treated hair |
| Color-Safe Leave-In | Color Preservation | Daily protection |
| Sulfate-Free Conditioner | Gentle Cleansing | Regular use |
| Natural Oil Treatment | Hair Repair | Severe Damage Control |
| Protein Treatment | Strength Restoration | Brittle strands |
Using sulfate-free and silicone-free products specifically formulated for colored hair maintains color integrity while restoring your hair’s moisture balance.
Common Hair Coloring Mistakes

You’ll save yourself from hair color mishaps by learning what not to do when dyeing at home.
From choosing the wrong shade to not letting the color process long enough, these common mistakes can turn your DIY color job into an unexpected surprise.
These mistakes can be avoided by understanding the process and taking necessary precautions, thus ensuring a successful hair dyeing experience at home with the right hair color.
Incorrect Shade Selection
The biggest haircare blunder happens at your fingertips: picking the wrong shade.
Many at-home colorists skip proper shade matching, resulting in colors that clash with their skin tone hair color. Remember that photos on box packaging often don’t reflect real results.
Before committing, do a hair color test on a small section. Color theory matters—cool undertones need cooler shades, while warm skin suits warmer tones.
If your chosen color turns out too light, you’ll need color correction later. Always consider your natural base and how it affects tone selection.
Prevent dye overlap when touching up roots to avoid uneven results.
Insufficient Color Processing
While choosing the wrong shade can leave you disappointed, not giving your color enough time to work its magic is just as problematic.
Processing time isn’t just a suggestion on the box—it’s a science. Cutting corners here often results in patchy, faded results or color that washes out after your first shampoo.
Remember that hair coloring tips vary by product, but dye concentration needs adequate time to penetrate your strands. Product buildup can also interfere with proper processing.
Always set a timer, and consider gentle heat application for deeper color. A quick strand test before rinsing can save you from coloring hair safely but ineffectively.
Hair Coloring Aftercare

You’ll need to treat your freshly colored hair with special care to maintain its vibrancy and protect your investment.
After coloring, you should wait at least 48 hours before shampooing and use color-safe products that won’t strip away your new shade.
Shampooing After Coloring
The first 48 hours after coloring your hair are vital for color preservation. Patience pays off in the process of shampooing after coloring, as waiting allows the dye to fully set within your hair shaft.
For ideal post-coloring hair care:
- Wait at least 24-48 hours before your first shampoo to lock in color molecules
- Use only cold water when washing to seal the hair cuticle
- Choose sulfate-free, color-protecting shampoo formulas specifically designed for colored hair
By following these shampoo timing guidelines, you’ll maintain your hair color’s vibrancy much longer. Think of it as giving your new color time to settle into its new home. Understanding hair care basics is essential for preserving color-treated hair.
Using Right Conditioner
Now that you’ve waited before shampooing, your colored hair needs the right conditioner for ideal results.
Color-depositing conditioners refresh your tone between major coloring sessions, while high-quality leave-in options provide ongoing protection. Your application method matters too—thoroughly coat each strand and let it sit for maximum benefit.
Deep conditioning treatments with a hair mask once weekly restore protein and moisture balance in colored hair. Look for ingredients like keratin, argan oil, and UV filters when selecting your post-coloring hair care products.
Color-protecting conditioners with these components will extend your color’s vibrancy and protect your investment. To maintain your hair’s color and health, understanding best conditioners is essential for making informed decisions about your hair care routine, ensuring the best results for your colored hair.
Dealing With Color Issues

You’ll need to fix color mishaps quickly when your at-home dye job doesn’t turn out as expected.
Whether your color is too light, too dark, or patchy, you can correct these common issues with the right techniques and products.
Color Too Light
Now that your hair coloring process is complete, you might notice your results appear too light.
This common hair dye mistake happens when processing time is insufficient or you’ve chosen a shade too blonde for your intentions.
To fix hair color that’s too light, wait at least 48 hours before applying a darker shade.
Alternatively, try a natural coffee rinse to gradually darken while conditioning.
Using color-protecting shampoo prevents further lightening and maintains proper color depth.
Color Too Dark
While lighter tones can be deepened gradually, ending up with color too dark requires different tactics.
Unlike trying to darken light results, fixing overly dark hair needs a specialized approach.
For successful color correction with dark roots:
- Wait 24-48 hours before using clarifying shampoo to safely remove excess pigments
- Avoid bleach—use professional color-removing products designed specifically for this purpose
- Schedule correction sessions at least 2 weeks apart to prevent structural damage while achieving desired tone
This process is crucial for maintaining the health and integrity of the hair, and following these steps can help in achieving the desired color correction.
Patchy Color
Spotting patchy color can dampen your hair transformation excitement. Improper sectioning during application commonly leads to uneven color distribution.
To prevent this disaster, use hair sectioning clips to maintain organization and avoid missed areas.
Product buildup causes inconsistent absorption, so thoroughly detangle before coloring. Sometimes you’ll need two boxes to guarantee complete coverage.
For stubborn patches, color balancing techniques can rescue your look without causing further damage, which is crucial to prevent a hair transformation disaster.
Hair Texture Consideration

Your hair’s texture dramatically affects how it absorbs color, with coarse strands typically soaking up dye faster than fine hair.
You’ll need to adjust your application technique and processing time based on whether your hair is silky-smooth or has more texture to guarantee even, predictable results, considering the impact of coarse strands.
Coarse Hair Coloring
When dealing with coarse hair, proper preparation becomes your secret weapon for successful at-home hair dye.
Because coarse strands resist color absorption, you’ll need to adjust your approach. Apply dye to smaller sections and leave it on for the maximum recommended time.
Coarse hair typically has higher porosity, which affects dye penetration and color depth. Consider pre-softening with a deep conditioning treatment 48 hours before coloring.
DIY hair color kits specifically formulated for resistant hair will yield better results. For natural hair dye options, add a touch of heat (using a shower cap) to enhance absorption without damaging your locks, which can be a deep conditioning treatment.
Fine Hair Coloring
While coarse hair drinks up color quickly, fine hair requires a gentler approach. Your delicate strands absorb dye differently and can become oversaturated if you’re not careful.
At-home hair color for fine hair demands precision and patience to prevent damage.
For DIY hair color success with fine strands:
- Perform a strand test 48 hours before coloring to check dye absorption
- Choose semi-permanent formulas for less damage than permanent options
- Apply toner selectively to avoid overwhelming your hair
- Focus on root coverage first, then pull through ends for the last 5-10 minutes
- Use heat protection products before any post-coloring styling
Maintaining Color Longevity

You’ll need proper maintenance strategies to keep your home-dyed hair vibrant long after coloring day.
The right products and washing habits can extend your color’s life, saving you from frequent touch-ups and protecting your investment.
Color Fading Prevention
Three critical factors contribute to color fading: frequent washing, heat styling, and UV exposure. To maximize dye longevity, wait 72 hours after coloring before your first wash—this gives color molecules time to fully bond.
When you do wash, use lukewarm water and color-safe shampoo specifically formulated for your shade. Between washes, dry shampoo becomes your best friend.
Create a color-shielding barrier by applying leave-in treatments with UV protection before heading outdoors. Minimize heat styling or always use a heat protectant spray.
For an instant refresh, color-boosting glosses can revive fading hues without damaging your hair structure. Using a color safe shampoo is essential for maintaining vibrant colors and preventing premature fading.
Touch Ups and Retouching
While preventing color fade extends your dye job’s life, regular touch-ups are still necessary for that fresh-from-the-salon look.
For perfect root touchups, match your exact shade to avoid banding or uneven color distribution. Apply only to new growth every 3-4 weeks rather than recoloring your entire head, which prevents damage from overlapping fixes.
Between appointments, temporary color sprays can disguise regrowth treatment needs. For professional-looking results without frequent salon visits, try color-depositing conditioners to refresh fading sections.
Remember, careful hair dye application tips like precise sectioning for root touch will guarantee your hair color maintenance routine keeps your look flawless.
Frequently Asked Questions (FAQs)
Why do hairdressers dislike box dye?
Like a chef cringing at instant meals, hairdressers dislike box dye because it’s one-size-fits-all, can damage your hair, often produces unpredictable results, and makes corrections professionally challenging.
How can I cover up grey hair without dye?
You can cover greys with henna, temporary color sprays, root touch-up powders, or tinted dry shampoo.
Coffee rinses and herbal remedies like sage tea offer natural alternatives.
Try colored hair waxes for fun, temporary coverage.
What is the least damaging way to color your hair?
Semi-permanent color, natural henna, or plant-based dyes offer the least damaging options for your hair. You’ll want to avoid permanent dyes with ammonia and minimize bleaching whenever possible.
What is the healthiest way to dye your hair?
Your hair drinks in color like a parched flower absorbs water. Choose vegetable-based dyes, henna, or semi-permanent options without ammonia or peroxide. Always deep condition afterward and limit dyeing frequency.
How often can I safely color my hair?
For colored hair, wait 4-6 weeks between sessions. If your hair’s damaged, extend to 8-10 weeks. You’ll need touch-ups every 2-3 weeks for roots, depending on your natural growth rate.
Does hair dye damage color-treated extensions?
Yes, hair dye can damage color-treated extensions. It strips the pre-existing color and weakens the hair fibers. You’ll want to consult a professional stylist before attempting to dye your extensions.
Can medications affect hair dye results?
Yes, certain medications can affect your hair dye results by causing unexpected color changes or reduced effectiveness.
Blood thinners, antibiotics, and hormone treatments may interfere with how the dye penetrates and develops on your hair.
How to fix stained skin after coloring?
Stained skin doesn’t have to ruin your color experience.
Remove dye marks with olive oil, milk, or specialized dye removers.
For stubborn stains, try baking soda paste or petroleum jelly applied before coloring next time.
Are natural dyes safer than chemical ones?
Natural dyes like henna typically contain fewer harsh chemicals than synthetic options.
They aren’t automatically safer, as allergic reactions can occur with both types of hair coloring products, so you’ll still need to patch test.
Conclusion
Just as a chef masters recipes through practice, coloring hair at home safely becomes second nature with experience.
By following these pro tips, you’ll transform your bathroom into a mini salon without the hefty price tag.
Remember, patience is your best tool—rushing leads to mishaps.
With proper preparation, the right products, and aftercare routines, you’ll achieve professional-looking results every time.
Your hair deserves this attention to detail, so take your time and enjoy the transformation!