This site is supported by our readers. We may earn a commission, at no cost to you, if you purchase through links.

Always do an allergy test 48 hours before coloring, and skip washing your hair for 24-48 hours beforehand—those natural oils protect your scalp like a built-in safety net. Virtual try-on tools help you visualize results before taking the plunge.
Essential supplies include a quality tint brush, nitrile gloves, and hair clips for sectioning. Smart color choices and proper preparation make the difference between salon-worthy results and color disasters that’ll have you reaching for a hat.
Table Of Contents
- Key Takeaways
- Choosing The Right Hair Color
- Picking Beginner-Friendly Hair Coloring Products
- Preparing Your Hair for Coloring
- Essential Tools and Supplies for At-Home Coloring
- Step-by-Step Hair Coloring Process for Beginners
- Easy Hair Coloring Techniques for Beginners
- Avoiding Common Hair Coloring Mistakes
- Caring for Colored Hair and Maintaining Results
- Frequently Asked Questions (FAQs)
- Conclusion
Key Takeaways
- You’ll get the best results by starting with beginner-friendly techniques like peek-a-boo highlights or dipped ends that don’t require full-head commitment and are more forgiving if you make mistakes.
- You must perform an allergy test 48 hours before coloring and avoid washing your hair for 24-48 hours beforehand since natural oils protect your scalp during the process.
- You’ll need proper sectioning and the right tools, including a quality tint brush, nitrile gloves, and hair clips, to achieve even coverage and prevent patchy results.
- You can extend your color’s life by using sulfate-free shampoos, washing only 2-3 times weekly with cool water, and applying weekly hydrating masks with UV protection.
Choosing The Right Hair Color
You can’t just grab any color and hope for the best – your skin tone, eye color, and natural hair undertones will make or break your new look!
Think of it like finding the perfect outfit that makes you glow, except this time it’s all about choosing a shade that complements your unique features and won’t leave you looking washed out.
Considering Skin Tone and Eye Color
Finding the right hair color isn’t just about picking what looks pretty in the bottle—it’s about working with what you’ve already got. Your skin’s undertones and eye color are like a roadmap that shows you which shades will make you look amazing versus ones that’ll leave you looking washed out.
- Warm undertones glow with honey blondes, coppers, and caramels that bring out your natural radiance
- Cool undertones sparkle with ashy blondes, platinum, and jewel tones for striking complexion contrast
- Blue eyes pop dramatically with deep browns and honey shades for eye enhancement
- Brown and hazel eyes shine with warm chestnuts, caramels, and seasonal palettes that emphasize depth
Before you take the plunge, test drive your color choice with virtual try-on tools. They’ll boost your satisfaction by 30% and save you from potential hair disasters. This is easier than ever with a hair color simulator that uses augmented reality.
Determining Natural Hair Color and Undertones
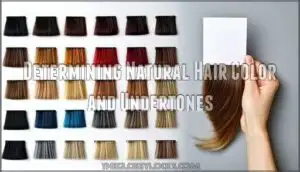
Now that you’ve considered your skin tone and eye color, let’s figure out your starting point. Your natural hair color has specific undertones – warm (golden, red) or cool (ashy, blue). Hold a strand against white paper in natural light for undertone identification.
Hair color levels range from 1 (black) to 10 (lightest blonde). Knowing these helps with skin tone matching and prevents clashing colors that fight your natural beauty.
How Drastic Should Your Color Change Be?
Now that you understand your undertones, consider your Color Change Impact carefully. Starting with beginner hair coloring styles prevents Damage Potential while building confidence.
Here’s your approach:
- One-shade lighter or darker – maintains your natural look
- Semi-permanent options – lower Maintenance Commitment
- Gradual changes – allows Personal Expression without shocking Lifestyle Changes
Remember, choosing a simple hair color keeps your first experience manageable and fun!
Picking Beginner-Friendly Hair Coloring Products
Walking into the hair color aisle can feel like entering a candy store—so many options, but which ones won’t turn your hair into a science experiment gone wrong?
You’ll want to start with gentler formulas like semi-permanent color depositing masks or beginner-friendly box dyes that forgive mistakes and protect your hair while you learn the ropes.
Box Dye Vs. Professional Products
Box dye offers budget-friendly at-home hair coloring but comes with trade-offs. Professional products deliver better ingredient quality and customization options, though they cost more upfront. One benefit of salon coloring is the stylist’s ability to create customized shades tailored to your hair.
| Factor | Box Dye | Professional Products |
|---|---|---|
| Cost Comparison | $5-15 per kit | $50-200+ salon visit |
| Ingredient Quality | Higher ammonia, metallic salts | Salon-grade with protective oils |
| Damage Potential | Higher risk of dryness, breakage | Lower risk, gentler formulas |
Here’s the thing about box dye: it’s made for everyone, which means it’s not really made for you. Your hair has its own personality—thickness, porosity, color history—but that $10 kit treats every head the same. Sure, you’ll pocket the savings upfront, but box dye tends to wash out quicker than professional color. Plus, if things go wrong, fixing a DIY disaster can cost way more than just going to a salon in the first place.
Box dye treats every head the same, but your hair has its own unique personality that a generic $10 kit can’t match
Semi-Permanent Color Depositing Masks
Color depositing treatment masks bring together the best of both worlds for at-home hair coloring. These semipermanent hair color products feature plant-derived ingredients like coconut oil and shea butter, offering ingredient benefits that nourish while you transform.
Application techniques are refreshingly simple—just apply like a regular mask. Their damage prevention approach makes them perfect for beginners exploring easy at-home hair color techniques and current hair color trends for beginners.
Choosing The Right Products for Your Hair Type
Your hair type determines which hair color products will work best for you. Fine hair needs gentler formulas to prevent damage, while thick hair can handle stronger processing.
Consider these key factors:
- Hair porosity: Low porosity needs heat activation, high porosity absorbs color quickly
- Scalp sensitivity: Choose ammonia-free options if you experience irritation easily
- Damage level: Already-processed hair requires protein treatments before coloring
Match your hair’s texture concerns with appropriate hair dye types for best results.
Preparing Your Hair for Coloring
Think of proper hair prep as laying the foundation for your dream color—skip it, and you’ll get patchy, uneven results that’ll make you want to hide under a hat for weeks!
You’ll need to clarify your hair, detangle every knot, and section it properly to make certain your new color grabs evenly and looks salon-quality.
Steps to Take Before Coloring
Getting your hair color right isn’t just luck – it’s all about the prep work. Before you even think about opening that box of dye, do yourself a favor and test for allergies 48 hours ahead (a dab behind your ear will do).
Then grab a hidden strand and do a color test so you’re not gambling with your whole head.
| Pre-Color Step | Why It Matters |
|---|---|
| Skip washing 24-48 hours | Natural oils provide scalp protection |
| Remove styling products | Prevents uneven color absorption |
| Check for damage | Damaged hair takes color differently |
| Gather all supplies | Avoid mid-process interruptions |
Your scalp’s natural oils act like a protective shield during the coloring process. Don’t wash your hair right before preparing for DIY hair coloring – those oils are your friend! This simple step prevents irritation and helps achieve even coverage.
Using Clarifying Shampoo and Detangling
Twenty-four hours before your DIY hair coloring adventure, grab a clarifying shampoo to tackle buildup removal. This pre-color prep creates the perfect canvas for even dye distribution.
Gently detangle wet hair with a wide-tooth comb, working from ends upward—think of it as untangling Christmas lights without the frustration! This hair preparation step ensures scalp health and prevents those pesky knots that sabotage smooth application.
Sectioning Hair for Even Application
Before diving into hair color application, you’ll need proper sectioning for even dye distribution. Think of your hair like a canvas – you can’t paint a masterpiece without organizing your workspace first!
When you section your hair properly, you get better root coverage and color that looks the same from front to back.
- No more patchy disasters – Even section size prevents those dreaded zebra-stripe moments
- Professional results at home – Clip types like alligator clips keep sections organized during DIY hair coloring
- Stress-free application – Hair coloring techniques become manageable when you work systematically through each section
Essential Tools and Supplies for At-Home Coloring
You’ll need the right tools to make your at-home coloring session smooth and successful. Having proper brushes, clips, gloves, and extra supplies on hand prevents messy mistakes and helps you achieve salon-quality results from your bathroom.
Dye Application Brushes and Bowls
A quality tint brush becomes your paintbrush for perfect hair dye application. Choose synthetic bristles over natural ones—they won’t absorb your hair dye mixture like a thirsty sponge.
Medium bowl size works best for most applications, giving you room to mix without waste.
Clean your hair dye application tools immediately after use to prevent staining and extend their life.
Hair Clips and Gloves
When sectioning hair for coloring at home, sturdy hair clips become your best friend. Choose metal or plastic clip material that won’t break mid-process.
Nitrile gloves protect your hands better than latex alternatives. Reuse clips between sections, but always dispose of gloves after each step-by-step hair coloring guide session.
Hair ties work as clip alternatives if needed.
Extra Dye and Protective Gear
Smart beginners always grab extra hair dye—running out mid-process isn’t fun! Purchase at least one additional box for longer or thicker hair.
Protect your skin with petroleum jelly around your hairline and ears. Wear old clothes or a salon cape for clothing protection.
Set up your workspace prep with towels and plastic sheets. Sterilize tools beforehand for safe at-home hair coloring success.
Step-by-Step Hair Coloring Process for Beginners
Now you’re ready to transform your hair with confidence! You’ll learn the exact steps to mix, apply, and rinse your color like a pro, ensuring gorgeous results without the salon price tag.
Mixing and Applying Dye Correctly
Now you’re ready to create your hair dye mixture! Mix your dye consistently according to package directions – lumpy mixtures create patchy results.
- Use a tint brush for precise root touch-ups and sectioning methods
- Apply from roots to ends in quarter-inch sections for timing accuracy
- Work quickly but thoroughly – hair coloring steps require focus
Remember, processing time starts when you finish applying, not when you begin!
Working in Sections for Full Coverage
Picture your head as a blank canvas waiting for color. Without dividing your hair into manageable sections first, you’ll end up with patchy, uneven results that look more like a DIY disaster than a salon finish.
Good clips keep each section in place while you work methodically from one area to the next.
| Section | Clip Placement | Application Order |
|---|---|---|
| Crown | Top center | Start here first |
| Temples | Side clips | Work outward |
| Nape | Bottom clips | Finish last |
| Left side | Secure tightly | Apply thoroughly |
| Right side | Match opposite | Complete coverage |
Timing and Rinsing Techniques
Once your sections are perfectly coated, timing becomes your best friend in hair coloring. Follow the processing time on your box—usually 20-45 minutes—and set a timer!
When time’s up, rinse with lukewarm water until it runs clear. This prevents color bleeding and protects your fresh shade. Cool water seals the cuticle, locking in your gorgeous new color for greatest vibrancy.
Easy Hair Coloring Techniques for Beginners
You don’t need to be a pro colorist to create stunning looks that’ll make your friends ask, "Where’d you get your hair done?"
These beginner-friendly techniques let you add pops of color without the commitment or complexity of full-head transformations.
Peek-a-Boo Highlights
Peek-a-boo highlights create hidden color placement under your top hair layers, revealing bold color choices when you move or style your hair. This easy at-home hair color technique offers cool peek-a-boo variations without commitment.
You’ll maintain contrast between your natural base and colorful sections. Hair highlights stay hidden until you want them seen—perfect for professional vs DIY experimentation with at-home hair coloring adventures!
Money Piece and Colored Bangs
Face framing money piece techniques involve applying hair dye to strands around your face for instant brightness. Start with thin sections near your temples, working outward.
Colored bangs offer bold bang styles—try subtle highlights or full coverage. Focus on precise color placement for professional results.
These easy at-home hair color techniques require minimal maintenance and offer endless trend variations.
Dipped Ends and Chunky Highlights
Dipped ends offer beginner-friendly at-home hair coloring with minimal commitment. Simply apply hair dye to your bottom inch or two for instant color vibrancy.
Modern chunky highlights make a bold Y2K comeback—section off thick strands and use proper blending techniques.
Both easy at-home hair color techniques require careful chunky highlight placement and consistent dipped ends upkeep for lasting results.
Avoiding Common Hair Coloring Mistakes
Even the most careful beginners can make mistakes that turn their dream hair color into a nightmare.
You’ll learn to spot timing errors, uneven coverage, and skipped safety tests that can damage your hair or leave you with patchy, disappointing results.
Overprocessing and Timing Issues
Getting your hair color timing right makes all the difference. Leave that dye on too long and you’ll end up with overprocessed, damaged hair that’s lost its bounce—and your hair’s natural porosity means it might soak up color faster than you think.
Heat damage from blow-drying freshly dyed hair makes things worse. Overlapping dye applications creates uneven results. When hair feels mushy, you’ve gone too far.
Protein treatments can help repair minor damage.
Uneven Application and Missed Spots
Uneven color happens when you miss spots or rush through sections. Patchy color screams "DIY disaster" louder than your neighbor’s karaoke nights!
Slow down when applying hair dye—work methodically through each section. Use a mirror to check application blindspots behind your ears and nape.
Proper sectioning prevents dye distribution problems and those dreaded root touch-ups later.
Performing Strand and Patch Tests
Before applying hair dye, perform a strand test and patch test. Mix a small amount of hair coloring formula and apply it to a hidden hair section for color preview and damage assessment. Test the mixture on your inner elbow for allergy identification.
Wait 48 hours to check for reactions. This timing accuracy prevents formulation changes and ensures safe hair dye application.
Caring for Colored Hair and Maintaining Results
You’ve worked hard to get that perfect color, so now it’s time to protect your investment! The right aftercare routine will keep your new shade vibrant for weeks longer than if you just wing it with your regular products.
Color-Safe Shampoos and Conditioners
Got the perfect shade? Now it’s time to keep it that way. A good sulfate-free shampoo will help your color stay vibrant way longer than those harsh drugstore bottles.
Look for pH balance formulas that seal hair cuticles—they’re your best friend for fade prevention. Ingredient analysis matters: skip harsh cleansers that strip color.
Instead, choose hydration boost formulas for post-color hair care and proper hair color maintenance.
Hydrating Masks and UV Protection
Beyond color-safe products, your hair needs deep hydration and protection. Use hydrating masks weekly with nourishing mask ingredients like coconut oil to restore moisture post-coloring.
Don’t forget UV filters in your hair care routine—sun damage causes major color fading. Hair treatment masks and UV protection work together, keeping your color depositing treatment masks’ results vibrant longer through proper post-color hair care and consistent hydration frequency.
Washing Frequency and Fading Prevention
Washing frequency makes or breaks your color’s lifespan. Limit washes to 2-3 times weekly using sulfate-free shampoos—sulfate concerns are real since they strip color faster than you’d think! Cool water temperature preserves vibrancy better than hot showers.
Between washes, dry shampoo becomes your best friend for sprucing up roots. Try color refreshers monthly and use overnight protection like silk pillowcases to prevent hair color fading naturally.
Frequently Asked Questions (FAQs)
Can I color wet or damp hair?
You shouldn’t color wet or damp hair with permanent dye. The water dilutes the formula, creating patchy, uneven results. Always start with dry hair for better color penetration and coverage.
How long should I wait between coloring sessions?
Wait 4-6 weeks between coloring sessions to let your hair recover and prevent damage. Your strands need time to rebuild their strength after chemical processing.
What happens if Im allergic to hair dye?
Stop using the dye immediately if you experience redness, itching, or swelling. Rinse thoroughly with cool water, apply a gentle moisturizer, and contact a dermatologist if symptoms persist or worsen.
Can I swim after coloring my hair?
Picture your vibrant new color washing down the pool drain like melted ice cream. Chlorine strips your hair color and leaves it dry and frizzy, so wait 5-7 days before swimming.
How do I fix patchy color results?
Fix patchy spots by applying more dye to light areas using a small brush. Section hair carefully and work in good lighting.
Let it process fully, then rinse and assess. You might need a second application for even coverage.
Conclusion
Most first-time colorists who follow proper techniques get great results at home – you don’t need salon prices for salon-quality color.
Now that you know the basics, from picking colors that work with your skin tone to applying them correctly, you’re ready to transform your look.
Remember to start small with highlights or dipped ends before attempting full-color transformations. With the right preparation, quality products, and patience, you’ll create stunning results while keeping your hair healthy and vibrant.
- https://www.glamot.com/blog/32678/10-common-mistakes-you-re-making-when-dyeing-hair
- https://naturtintusa.com/blogs/tips-tricks/hair-coloring-mistakes
- https://sevich.com/top-10-global-hair-dye-product-brands-in-2025/
- https://gooddyeyoung.com/pages/hair-color-starter-kit
- https://www.madison-reed.com/blog/5-tips-for-achieving-flawless-hair-color

