This site is supported by our readers. We may earn a commission, at no cost to you, if you purchase through links.

The answer depends on your hair length, thickness, and the specific toner formula you’re using. Short pixie cuts need around 2 ounces of mixed toner, while shoulder-length hair usually requires 4 ounces. Long, thick hair can demand 6 ounces or more.
But there’s more to it than just length—your mixing ratio and developer strength affect how far your toner goes and how well it neutralizes those unwanted yellow and orange tones lurking in your freshly bleached strands.
Table Of Contents
- Key Takeaways
- What is Hair Toner for Bleached Hair?
- Why Use Toner After Bleaching?
- How Many Ounces of Toner Do I Need?
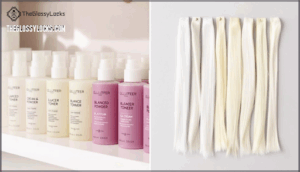
- Choosing The Right Type of Toner
- Understanding Toner to Developer Ratio
- Selecting Developer Strength for Toning
- Mixing and Preparing Toner Solutions
- Applying Toner to Bleached Hair
- How Long to Leave Toner on Hair
- Maintaining Toned Hair Color
- Frequently Asked Questions (FAQs)
- Will toner damage bleached hair?
- How often should toner be applied to bleached hair?
- Can I apply toner to hair that has not been bleached?
- Is toner safe to use on colored hair?
- What is the best way to apply toner to bleached hair?
- Can I mix different toner brands together?
- Does hair texture affect toner absorption rate?
- Should I shampoo immediately after toning treatment?
- Can I reuse leftover mixed toner solution?
- What happens if I use too much toner?
- Conclusion
Key Takeaways
- Hair length determines toner amount needed: short hair requires about 0.5 ounces, medium hair needs 1.5–2 ounces, and long hair demands 6–8 ounces mixed with developer at a 1:2 ratio.
- Use 10-volume developer for bleached hair to deposit color safely without additional damage, and always mix fresh toner solution immediately before application since effectiveness declines once developer and toner combine.
- High-porosity hair from bleaching absorbs toner 40% faster (5–10 minutes processing time) compared to low-porosity hair (25–30 minutes), so checking progress every five minutes prevents over-processing and dullness.
- Maintain toned results by washing only 2–3 times weekly with cool water, using purple shampoo every two weeks, applying heat protectants before styling, and waiting 24–48 hours after toning before shampooing to let color fully set.
What is Hair Toner for Bleached Hair?
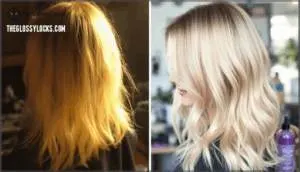
You’ve bleached your hair, but now it’s sporting shades of yellow or orange you didn’t sign up for. Hair toner is the product that fixes this problem by neutralizing those unwanted warm tones.
Let’s break down what toner is and how it works its magic on freshly bleached hair.
Purpose of Hair Toner
Hair toner deposits semi-permanent pigments into your bleached hair, neutralizing undertones like brassy yellows and oranges. It works by balancing pH levels from alkaline back to a natural acidic state, which helps seal cuticles and boost shine.
Think of it as the finishing touch that corrects discoloration and transforms your bleached hair into that perfect ashy blonde you’re after. Regular use helps maintain color vibrancy between salon visits.
How Toner Works on Bleached Hair
When bleach breaks down melanin inside your hair cortex, it leaves behind microscopic gaps and opens up the cuticle layer. That’s where the hair toning process comes in. Toner pigments slip into those porous spaces and lock onto the hair shaft through ionic bonding. Purple cancels yellow, blue neutralizes orange—basic color neutralization at work.
Toner pigments slip into microscopic gaps left by bleach and lock onto hair through ionic bonding, with purple canceling yellow and blue neutralizing orange
The mild alkaline formula (pH 8.5-10.5) keeps cuticles open just enough for pigment composition to penetrate without extra damage, then helps with pH rebalance and cuticle smoothing once processing finishes.
To maintain the color between salon visits, consider using at-home toning shampoos.
Why Use Toner After Bleaching?
Bleaching lifts your natural pigment, but it doesn’t stop there—it leaves behind warm yellow and orange tones that can throw off your desired look. Toner steps in to correct those unwanted shades and perfect your blonde to the exact tone you’re after.
Let’s break down why toner matters and what it does for freshly bleached hair.
Neutralizing Brassy Tones
Why does your freshly bleached hair look more sunset orange than icy blonde? Bleaching removes your natural pigment, but it leaves behind stubborn warm undertones that oxidize over time. That’s where hair toner steps in—it uses color wheel principles to neutralize brassiness and restore balance.
- Purple toners counteract yellow tones in very light bleached hair
- Blue-based formulas tackle orange hues using complementary color theory
- Application timing matters most right after bleaching, when cuticles accept pigment best
Toner selection depends on your specific brassy tones.
Toning shampoo types offer maintenance between treatments, while professional toners deliver stronger brassiness prevention for freshly bleached hair.
Enhancing Blonde Results
Beyond neutralizing brassiness, toner pigments perfect your blonde hair by adjusting undertones for precise shade control.
Formulas with keratin enrichment and hydrating oils restore moisture lost during bleaching, improving cuticle integrity while boosting shine by up to 40%.
UV protection in quality toners shields bleached hair from photo-oxidation, extending vibrancy for 2–6 weeks.
You’re not just toning hair—you’re creating dimension, brilliance, and professional-level results that last.
How Many Ounces of Toner Do I Need?
Figuring out how much toner you need isn’t guesswork—it depends on your hair length. Too little toner means patchy coverage, while too much just goes to waste.
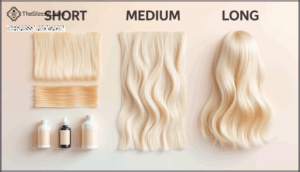
Here’s what you need based on whether your hair is short, medium, or long.
Toner Amount for Short Hair
Short cuts—think pixie or bob—usually need about 0.5 ounces of toner for full, uniform coverage. Professional colorists rely on precision scales to measure exactly, minimizing toner waste while saturating every hair strand.
You’ll mix that half-ounce with developer (usually 1 ounce) in a 1:2 ratio, though diluted formulas work well for gentler toning. Cream developers help prevent dripping on shorter hair, making application smoother. Even blonde hair this short requires careful measurement for even results.
Toner Amount for Medium Hair
You’ll need about 1.5 to 2 ounces of toner for medium hair—roughly shoulder-length strands. Hair thickness plays a role here: dense hair can demand up to 25% more product than fine hair for even blonde hair toner application.
Porosity levels also matter. If your hair’s porous from bleaching, it absorbs faster, so apply quickly to avoid patchy results.
Mix your toner with developer at a 1:2 ratio for proper viscosity impact and smooth strand processing, so your target shades come through evenly during toning hair sessions.
Toner Amount for Long Hair
When toning hair that’s waist-length or longer, you’ll need roughly 6 to 8 ounces of hair toner for complete coverage. Hair type matters—thick or curly hair strands may require 10 to 15% more product for coverage efficiency.
Mix at a 1:2 ratio with developer, creating about 18 ounces total.
Section your hair carefully to improve waste reduction and guarantee even saturation, especially through porous bleached layers.
Choosing The Right Type of Toner
Not all toners work the same way, and picking the right one depends on what you’re starting with and what you want to achieve. The main choices come down to where you’ll use it and what’s actually in the formula.
Let’s break down the two key decisions you’ll need to make.
Professional Vs. At-Home Toners
When you’re weighing professional hair toning versus at-home toners, think of it like choosing between a tailor-made suit and one off the rack. Professional toners contain higher-grade pigments and offer longer-lasting results—usually three to four weeks compared to one to two weeks for at-home products.
The cost comparison shows salon services averaging $63, while DIY kits run $20–$80, saving you roughly 35–60%.
Application complexity differs too: stylists customize ratios based on your hair’s condition, while at-home formulas follow standardized instructions with lower potency for product safety.
Maintenance frequency also varies—professionals need touch-ups every four to six weeks, but at-home toners require reapplication every seven to ten days to keep brassiness at bay after bleaching.
Ammonia-Based Vs. Ammonia-Free Toners
Ammonia-based toners work like heavy-duty color correctors, lifting deeper into your hair shaft with a pH between 10.0 and 11.0. This gives you stronger toning power and longer color longevity, averaging 28 washes versus 19 for ammonia-free options.
However, this strength comes at a cost: more odor intensity, potential scalp irritation, and roughly 15–25% greater hair damage through lipid loss.
Ammonia-free versions use gentler alternatives that reduce irritation by 40–50%, making them perfect if you’ve got sensitive skin or chemically stressed strands.
Understanding Toner to Developer Ratio
Getting the toner-to-developer ratio right makes all the difference between patchy results and a smooth, even tone. The standard mix is pretty straightforward, but you might need to tweak it depending on how much hair you’re working with.
Let’s break down the ratios that actually work.
Standard Mixing Ratios
Most professional hair toner brands follow a 1:2 ratio—one part toner to two parts developer. This toner-developer balance works well for evenly toned platinum and pale blonde results. However, brand variations exist: Wella Color Charm uses 1:2, while Schwarzkopf and Redken often recommend 1:1 or 1:1.5 for stronger pigment concentration.
Developer influence matters too—10-volume pairs best with most ratios for gentle deposit. Mixing precision guarantees consistent hair coloring results, so always check your specific product’s instructions before mixing developer and color.
Adjusting Ratios for Hair Length
Your hair length changes how much developer fluidity you’ll need for a smooth toning hair application. Long hair works best with the standard 1:2 ratio—more developer creates easier spreadability across those extra inches. Medium lengths do well at 1:1.5 for better pigment density, while short hair benefits from 1:1 to maintain strong color deposit without waste.
Here’s how to adjust your mix:
- Long hair (12+ inches): Use a 1:2 ratio for maximum developer fluidity and faster application.
- Medium hair (8–12 inches): Switch to 1:1.5 for a thicker toner consistency and stronger pigment coverage.
- Short hair (4–6 inches): Stick with 1:1 to boost pigment density and minimize product waste.
- Check ratio guidelines: Hair toner products vary by brand—some differ by 25% in formula thickness.
- Adjust for texture: Thick hair may need slightly more developer for even saturation throughout.
Selecting Developer Strength for Toning
Not all developers are created equal with regard to toning bleached hair. The strength you choose affects how the toner interacts with your hair and the final result you’ll see.
Let’s look at what works best for toned blonde hair and how different developer volumes change the outcome.
Best Developer for Bleached Hair
When toning hair after bleaching, 10 volume developer is your safest choice. This lower developer strength prevents damage to already compromised hair while effectively depositing color to neutralize brassiness.
Using bleach and developer has already opened your cuticles, so choosing developer strength for toning shouldn’t involve more lift. Higher developer volume damages porous hair and reduces toner longevity.
Stick with gentler mixing ratios—your porosity levels demand it for best damage prevention.
Developer Strengths and Their Effects
While 10 volume developer protects already bleached strands, understanding each developer strength helps you choose wisely for toning hair after bleaching:
- 10 volume (3%) — Deposits color with minimal lift; best for level 10 pale blonde and fragile, porous hair
- 20 volume (6%) — Lifts 1-2 levels while toning; ideal for level 9 bleached hair and gray coverage
- 30 volume (9%) — Lifts up to 3 levels but risks uneven results on porous hair
- 40 volume (12%) — Causes significant damage; never recommended for toning
Processing time speeds up and hair integrity drops as developer strength climbs, making lower volumes safer after using bleach and developer.
Mixing and Preparing Toner Solutions
Mixing toner correctly is the difference between a salon-quality finish and a patchy mess.
You’ll need a few basic tools and a clear understanding of the process before you start.
Let’s break down what you need and how to mix your toner solution properly.
Tools Needed for Mixing
Getting your mix right starts with the right gear. You’ll need a non-metallic mixing bowl—plastic works best to avoid chemical reactions that can mess with your hair color. Standard salon bowls accommodate 8 to 16 ounces, plenty for most toning jobs.
Grab a plastic or silicone whisk (6 to 8 inches) to blend your hair toner and developer into a smooth, lump-free mixture. Metal whisks are a no-go since they react with the developer. For accurate measurement, use graduated plastic cups or syringes to nail those 1:2 ratios.
Don’t forget nitrile gloves to protect your hands from the hair dye chemicals, and keep your workspace clean with towels and disinfectant wipes nearby.
| Tool | Material/Specs | Purpose |
|---|---|---|
| Mixing Bowl | Non-metallic plastic, 8–16 oz | Prevents color alteration from ion transfer |
| Whisk | Plastic/silicone, 6–8 inches | Creates smooth, consistent hair bleach mixture |
| Measuring Cup | Graduated plastic, 1–8 oz | Makes precise toner-to-developer ratios |
| Gloves | Nitrile or latex | Protects skin from chemical irritation |
Step-by-Step Mixing Instructions
Once you’ve gathered your mixing bowls and tools, measure your hair toner first—ratio accuracy matters. If you need 2 ounces of toner, weigh out 4 ounces of developer using developer weight measurements for precision. Pour both into your non-metallic bowl, then whisk for 30–45 seconds. That stirring time creates a smooth, liquid-cream consistency for the hair toning process.
Toner activation starts immediately after mixing developer and color, so apply within 30 minutes to maintain proper developer strength and best toning hair results.
Applying Toner to Bleached Hair
Once you’ve got your toner mixed and ready, the next step is making sure it gets on your hair the right way. Proper prep and even application make all the difference in getting the tone you’re after.
Here’s how to set yourself up for success.
Preparing Hair for Toner Application
Before your hair can take on that perfect tone, you need to check its health and integrity. Hair porosity matters—damaged strands from bleaching absorb toner unevenly, which means patchiness if you’re not careful.
Start with cleansing; washing removes styling products that block pigments. Pre-toning techniques using violet-based shampoos knock out yellow undertones first. Aim for slightly damp hair—that 15-20% moisture level lets the hair cuticle absorb evenly without diluting the formula.
Gather your non-metallic bowls, gloves, and clips before mixing anything.
Sectioning and Saturating Hair Evenly
With careful quadrant division, you’ll avoid application errors that trip up most first-timers. Split your hair from forehead to nape, then ear to ear—this creates four equal parts for even hair saturation. Within each quadrant, take subsections no thicker than 0.25 inches so the hair toner reaches every strand.
- Use fine-tooth combs and alligator clips to keep sections separate and prevent overlap
- Work strand-by-strand within each subsection to eliminate missed spots
- Keep subsections thin enough that light shows through—this guarantees saturation consistency
- Start at roots and glide outward systematically through each quadrant
- Check both visually and by touch for any gaps before processing
Professional endorsements consistently point to this method for reducing color corrections after hair bleaching.
How Long to Leave Toner on Hair
Timing isn’t one-size-fits-all regarding leaving toner on your bleached hair. Your hair’s porosity and the specific results you’re after will determine how long the toner needs to work its magic.
Here’s what you need to know about processing time and keeping an eye on your progress.
Timing Based on Hair Porosity
Your hair’s porosity determines how fast it soaks up toner—think of it like different sponges absorbing water. High-porosity hair processes toner about 40% faster, needing only 5–10 minutes, while low-porosity hair may require 25–30 minutes for proper pigment uptake. Medium-porosity hair usually hits the ideal time at 15–20 minutes.
Misjudging your cuticle state can lead to over-processing effects like dullness or unwanted gray tints, so checking every five minutes protects your hair integrity.
Monitoring Results During Processing
Watching your toner work isn’t guesswork—your hair shows clear visual cues that tell you exactly what’s happening. Check progress at 5-minute timing intervals to catch the ideal moment when brassy tones vanish and color looks even across all strands.
- Color shift progression: Toner darkens within 5–10 minutes as oxidation kicks in, signaling pigment deposit
- Application factors: Room temperature and plastic cap usage affect processing speed by 20–30%
- Monitoring tools: Use mirrors in natural light and set digital timers for accurate color correction tracking
- Common mistakes: Rinsing before 10 minutes leaves brassiness; waiting past 30 minutes risks over-toning
Stop when the color plateaus—that’s your signal that toning hair is complete.
Maintaining Toned Hair Color
Your freshly toned blonde won’t stay perfect on its own. The key is protecting your investment with the right care routine and smart product choices.
Let’s walk through how to keep those cool tones intact and brassiness at bay.
At-Home Maintenance Tips
Between salon visits, your toned hair needs consistent care to stay vibrant. Wash just 2–3 times weekly with lukewarm water—this extends pigment retention by roughly 35%. Use color-safe conditioner from mid-length down, and apply a deep treatment weekly to rebuild bonds.
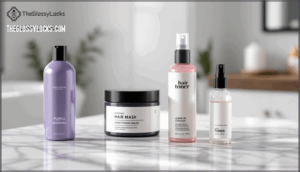
Purple shampoo every two weeks keeps brassiness in check, while heat protectant before styling prevents up to 40% of color fade. Schedule root touch-ups every 4–6 weeks to maintain even tone throughout.
Preventing Color Fading and Brassiness
Protecting your investment starts with smart daily choices. UV rays break down pigments faster than anything else—wear a hat or use leave-in sprays with UV protection. Sulfate-free shampoos preserve color without stripping, and cool water rinses seal cuticles tight. Heat protectants before styling block up to 25% of fading.
- Swap to sulfate-free formulas to cut pigment loss by half in the first month
- Rinse with cool water to lock in tone and prevent brassy undertones from surfacing
- Apply heat protectants before every blow-dry or flat-iron session
- Use color-depositing conditioners weekly to refresh pigment between toning sessions
Frequently Asked Questions (FAQs)
Will toner damage bleached hair?
Toner won’t ruin your bleached hair if you use it correctly, but over-processing can weaken hair integrity. Since bleach already increases hair porosity, adding toner requires careful timing and proper hydration.
Pair toning hair with protein treatments to maintain strength.
How often should toner be applied to bleached hair?
You should reapply toner every two to four weeks, depending on hair porosity and lifestyle factors. Frequent washing accelerates fading, so toning hair more often helps maintain color.
Damage prevention matters—space applications to avoid bleach impact on weakened strands.
Can I apply toner to hair that has not been bleached?
You can apply hair toner to unbleached hair, but the toner effectiveness depends on your pre-existing color. Dark hair toner won’t show much on naturally dark hair since toning hair requires lifted pigment for subtle tone change.
Is toner safe to use on colored hair?
You might think toner’s only for bleached hair, but it’s perfectly safe for color-treated hair too.
Toner adds dimension without harsh side effects, though you should always patch-test first to avoid potential toner allergies or reactions.
What is the best way to apply toner to bleached hair?
You want even application from root to tip, so work in thin sections and saturate each strand completely. Mix your hair toner products to the right consistency—too thick won’t spread, too thin drips everywhere.
Consider porosity matters: damaged areas grab color faster, so apply there last.
Can I mix different toner brands together?
Mixing different toner brands together is risky and not recommended. Each brand has its own chemical formulation, and combining them can create unpredictable chemical reactions that damage your hair or produce unexpected results.
Stick with one brand’s toner and developer system for consistent, professional outcomes. When in doubt, ask your colorist for guidance on brand compatibility before experimenting.
Does hair texture affect toner absorption rate?
Yes, hair texture greatly impacts toner absorption. Coarser, more porous hair absorbs toner faster and deeper, requiring shorter processing times. Finer, smoother hair with tighter cuticle conditions processes more slowly.
Understanding your hair’s porosity and texture differences helps you predict processing time and guarantee even toner penetration across all hair levels.
Should I shampoo immediately after toning treatment?
Refrain from shampooing right after toning—it’s like opening a door your color just walked through. Wait 24–48 hours so toner fully sets into your bleached hair. Immediate shampooing strips away color molecules, compromising toner effectiveness and color longevity.
This patience protects your scalp sensitivity and prevents product buildup while your at-home toners do their job.
Can I reuse leftover mixed toner solution?
Reusing mixed toner solution isn’t recommended. Once developer and toner combine, chemical reactivity begins immediately—the toner’s effectiveness declines over time.
Storage impact also matters: exposure to air destabilizes the mixture, compromising results and creating safety concerns.
Fresh solutions guarantee better coverage and color accuracy on your bleached hair.
What happens if I use too much toner?
Too much toner can lead to color oversaturation, creating muddy results or unwanted green tones that look unnatural. Excess toner deposits too much pigment, causing uneven tone across your hair.
You’ll need corrective treatments to fix the damage, making your bleached hair appear dull instead of luminous.
Conclusion
You could say getting your toner amount just right really tones down the guesswork. The amount you need for how many ounces of toner for bleached hair depends on your hair’s length, thickness, and porosity—not a one-size-fits-all formula.
Start with the guidelines we’ve covered, mix thoughtfully, and adjust based on your results. With practice, you’ll develop an instinct for what your hair needs.
Proper toning transforms bleached hair from brassy and damaged-looking into a gorgeous, intentional shade that lasts.

