This site is supported by our readers. We may earn a commission, at no cost to you, if you purchase through links.
 Want to rock silver hair without the salon price tag?
You’ll need patience and precision.
Start by bleaching your hair to a pale blonde – this might take multiple sessions, so don’t rush the process.
Invest in a high-quality purple-based toner to neutralize brassy tones and achieve that cool silver finish.
Protect your locks with bond repair treatments and use color-correcting shampoos to maintain the silvery shine.
Apply dye carefully in sections, wearing gloves to prevent stains.
Remember, silver hair is a commitment that requires regular touch-ups and deep conditioning.
Pro tip: your hair’s health is the secret weapon in achieving that stunning metallic look.
Table Of Contents
- Key Takeaways
- Pre-Dyeing Considerations
- Bleach, Bleach, Bleach!
- Toning for Silver Success
- Silver Dye Application
- Silver Hair Maintenance
- Bleaching Process Explained
- Toning Silver Shades
- Aftercare and Protection
- Silver Hair Care Tips
- Root Management
- Frequently Asked Questions (FAQs)
- Can I dye my hair silver?
- How do I get a silver hair colour?
- How do you get silver color out of hair?
- How long does it take to dye silver hair?
- What is the best hair dye for silver hair?
- Can You dye your hair with silver toner?
- What color does your hair have to be to dye it silver?
- How do I dye my hair silver at home?
- Can I dye my hair grey without bleaching?
- What can I use to make my hair silver?
- Conclusion
Key Takeaways
- You’ll need multiple bleaching sessions to transform dark hair into a pale blonde canvas, taking time between treatments to protect your hair’s health and prevent damage.
- Precision is crucial when applying silver dye—section your hair carefully, use high-quality purple-based toners to neutralize brassy tones, and apply color systematically to achieve an even, stunning silver finish.
- Ongoing maintenance is key: invest in deep conditioning treatments, use color-correcting purple shampoos, and limit washing to 1-2 times weekly to preserve your silver hair’s vibrancy and shine.
- Protect your hair’s integrity throughout the process by using bond repair treatments, avoiding heat styling, and being patient with your hair’s transformation from its original color to a cool, metallic silver shade.
Pre-Dyeing Considerations
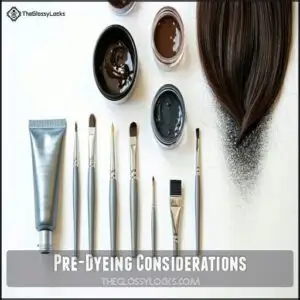
Before you transform your locks into a stunning silver masterpiece, you’ll need to assess your hair’s health and prepare for a potentially intensive process.
Your journey to silver hair requires patience, careful planning, and a willingness to invest time and care into achieving that cool, metallic shine.
Commitment and Patience
Buckle up for your silver hair transformation—it’s not for the faint-hearted!
Achieving that stunning metallic shade requires serious commitment and strategic patience.
Here’s what you’ll need to nail your DIY silver hair journey:
- Emotional resilience for color change
- Multiple dyeing session planning
- Realistic budget allocation
- Hair health expectations management
Permanent dyes typically require 25-45 minutes to process.
Get ready to rock a bold, statement-making look that screams confidence!
Skin Allergy Test
Before you paint your locks silver, you’ll want to play detective with your skin’s potential reactions. The patch test is your secret weapon against unexpected allergic drama.
- Test Procedure: Mix a small amount of dye with developer
- Application Zone: Apply behind your ear or on your inner arm
- Monitoring Window: Watch closely for 48 hours
Potential skin rebellion signs include redness, itching, or swelling—silent signals that your body mightn’t welcome the new color chemistry. Think of this test as your hair’s personal bodyguard, screening out troublemakers before they crash your silver transformation.
When uncertain, professional dermatologist backup can provide personalized guidance. Your skin’s comfort is the first step to nailing that perfect silver shine.
Hair Condition Level
Before transforming your locks into a silver masterpiece, assess your hair’s health like a pro.
Check your hair porosity, elasticity, and texture to prevent breakage during bleaching.
A quick elasticity test reveals your hair’s resilience: if it stretches and bounces back, you’re golden.
Dry, brittle strands scream caution – deep condition first to protect your hair’s hydration balance.
Bleach, Bleach, Bleach!
If you’re dreaming of silver hair, get ready to become best friends with bleach—it’s the magical potion that’ll transform your locks from dark to dazzling.
You’ll want to grab high-quality bleach, a trusty developer, and prepare yourself for a hair-lightening adventure that’ll require patience, precision, and a bit of courage.
Lightening Dark Hair
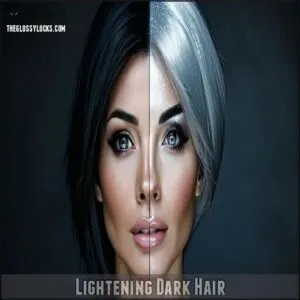
Because dark hair craves serious transformation, your silver dreams demand strategic lightening.
Mastering the art of hair bleaching requires precision and patience.
Here’s your roadmap to lighter locks:
- Select the right developer strength (30-40 vol) for maximum lift
- Protect strands with bond-repairing treatments during bleaching
- Monitor processing time to prevent unnecessary damage
- Understand your starting hair level before beginning
Professional stylists know that damage control is key.
Many options exist for hair bleach dark.
Your hair lightening journey starts now—embrace the silver revolution with confidence and careful technique.
Multiple Bleaching Sessions
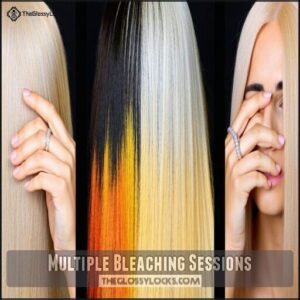
Your journey to silver stardom demands strategic bleach sessions.
Space out your bleaching to protect your hair’s health, targeting a week between treatments.
Perform strand tests religiously and monitor your hair’s response.
Each session brings you closer to that stunning platinum canvas, but patience is key.
Root touch-ups require extra care, so approach with precision and gentleness.
Avoiding Hair Damage
After multiple bleaching sessions, your silver dreams could become a brittle nightmare. Your hair craves rescue from the chemical warzone of repeated lightening.
Here’s your damage control battle plan:
- Use protein treatments to rebuild strand strength
- Lock in hydration with deep conditioning masks
- Protect against heat styling with leave-in serums
- Minimize chemical overlap between bleaching sessions
- Invest in silk pillowcases for overnight hair protection
Remember that misuse can melt your hair.
Strategic care transforms your fragile locks into resilient, stunning silver strands.
Toning for Silver Success
You’ll want to master the art of toning to transform your bleached locks into a stunning silver masterpiece.
Getting the right toner is your secret weapon for neutralizing those pesky yellow undertones and achieving that cool, metallic finish you’re craving.
Choosing The Right Toner
Like a magic wand for brassy hair, toners are your secret weapon in achieving that coveted silver sheen.
Wella Colour Charm T18 and similar purple-based toners neutralize yellow undertones, transforming bleached locks into a cool, metallic masterpiece.
Consider your hair’s porosity and choose a semi-permanent DIY toner with conditioning properties. To counteract these unwanted tones, consider hair undertones.
These gentle heroes help you tone hair silver without harsh chemicals, giving you salon-worthy results right at home.
Application and Timing
After selecting your perfect purple-based toner, it’s time to become a silver hair color maestro.
Your mission: execute a precise toning ritual that transforms brassy strands into a stunning metallic masterpiece.
- Grab a professional tint brush for surgical precision
- Section hair into manageable quadrants
- Apply toner systematically from roots to ends
- Set a timer and watch color development like a hawk
Many people use purple toning products to achieve their desired look.
Pro tip: Each minute matters in the hair dye application dance, so stay laser-focused and trust your technique.
Silver Dye Application
You’ve successfully bleached your hair to a pale, almost-white canvas, and now it’s time to transform those locks into a stunning silver masterpiece.
Grab your dye, section your hair like a pro, and get ready to rock a head-turning, cool-toned look that’ll make heads turn faster than a silver bullet.
Sectioning Hair for Dye
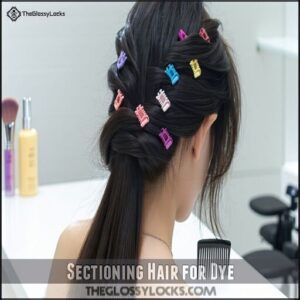
Your silver hair transformation begins with master-level sectioning techniques that’ll make professional stylists proud. Grab a rat-tail comb and prepare to divide and conquer your mane with precision.
| Tool | Purpose | Pro Tip |
|---|---|---|
| Rat-tail Comb | Precise Parting | Clean center line |
| Hair Clips | Section Control | Secure each quadrant |
| High-Quality Dye | Color Saturation | Even application |
| Gloves | Protection | Prevent skin staining |
| Mirror | Guidance | Check symmetry |
Create four equal quadrants by splitting hair vertically down the center, then horizontally from ear to ear.
Secure each section with clips, creating a strategic roadmap for color application.
Proper sectioning helps even color distribution.
Work methodically from roots to ends, making certain every strand receives that stunning silver hue.
Smaller sections mean maximum control and breathtaking, even coverage – your hair’s ultimate silver destiny awaits!
Preventing Drips and Stains
After perfecting your hair sections, gear up for the silver dye mission. Your secret weapons? Petroleum jelly and strategic planning.
- Shield skin with a thick jelly barrier around hairline and ears
- Drape an old dark towel as your stain-blocking cape
- Arm yourself with precision tint brushes for laser-focused application
- Transform your space into a pristine, dye-friendly zone
Glove up and conquer those potential color mishaps like a pro!
Silver Hair Maintenance
Maintaining your stunning silver hair requires more than just a one-time dye job—it’s a commitment to ongoing care and precision.
You’ll need to master a routine of regular touch-ups, specialized hair products, and protective treatments to keep your silver locks looking fresh, vibrant, and absolutely head-turning.
Regular Touch-Ups
In the wild journey of silver hair maintenance, touch-ups are your secret weapon against color chaos.
Mastering silver hair requires strategic interventions to combat color fading and root bleeding:
- Inspect roots every 4-6 weeks
- Target yellow tones with precision toners
- Protect hair’s silver longevity strategically
- Match your original silver shade perfectly
- Schedule consistent at-home maintenance sessions
Keep your silver locks looking fresh, vibrant, and professionally maintained with these expert techniques.
Deep Conditioning Treatments
Your silver strands’ lifeline? Deep conditioning treatments.
Post-bleaching, these moisture-packed heroes repair and protect your fragile locks.
Look for protein-rich masks with keratin and natural oils that restore hydration and prevent breakage.
Apply weekly, focusing on damaged ends.
Massage thoroughly, let sit for 15-20 minutes, and rinse with cool water to seal in the goodness.
Look for protein-rich masks with keratin and natural oils that restore hydration and prevent breakage.
Bleaching Process Explained
Get ready to transform your hair into a stunning silver masterpiece with the bleaching process, the critical first step in your hair color journey.
You’ll need patience, precision, and the right techniques to lighten your locks without causing severe damage, so buckle up and prepare for a hair-raising adventure.
Achieving Level 10 Blonde
The transformative journey to Level 10 blonde demands precision and patience.
Choose a premium bleach like Brilliant Blondexx, paired with 20 or 30 Vol developer for strategic lightening.
Target your darkest sections first, carefully applying to minimize damage during your dye hair silver adventure.
Your goal? That telltale pale yellow base resembling a ripe banana’s interior—the perfect canvas for silver hair dye.
Watch your hair’s progression carefully, treating each strand like a delicate masterpiece waiting to shine.
Hair Recovery Between Sessions
Healing takes time after your bleaching marathon.
Between sessions, treat your hair like a fragile masterpiece that needs careful restoration. Your locks have been through a chemical battlefield and deserve some serious recovery.
- Invest in protein treatments to rebuild strand strength
- Pamper your scalp with nourishing oils and hydration masks
- Shield vulnerable hair from heat and environmental stress
Give your hair a full month to recuperate, letting bond-repairing treatments like Olaplex work their magic and prevent irreversible damage. Your future silver locks will thank you.
Toning Silver Shades
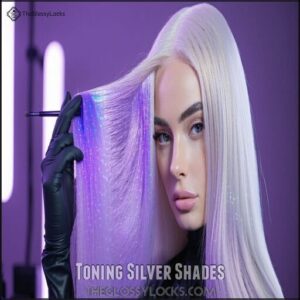
You’ve conquered the bleaching battle, but your silver hair journey isn’t over yet—now it’s time to tone those brassy yellow hues into a stunning, cool-toned masterpiece.
Silver hair transformation: where chemical precision meets personal style, turning brave hair adventurers into metallic mavens.
Toning is your secret weapon for transforming bleached locks into that perfect, head-turning silver shade that’ll make you look like you’ve just stepped out of a high-end salon.
Purple-Based Toners
After bleaching, your silver hair quest demands a purple-based toner—your secret weapon against brassy tones.
These pigment-packed allies neutralize unwanted yellow, transforming dull locks into a cool, metallic masterpiece.
Grab a tint brush and apply strategically, focusing on those stubborn warm patches.
Pro tip: Choose a high-quality silver hair toner with purple undertones that’ll make your DIY color correction look salon-professional.
With the right toner, you’ll kiss brass goodbye and welcome stunning, silvery perfection.
Developer Volume Selection
After neutralizing brassy tones with purple toners, you’ll need the right developer to reveal silver hair magic.
Your silver hair journey transforms bleached locks into a metallic masterpiece—one strategic developer drop at a time.
Your Lift Power depends on three key factors:
- Assess hair porosity
- Match developer volume
- Minimize damage risk
Twenty-volume developer strikes the perfect balance for most hair types, offering gentle color transformation without scorching strands.
Different brands provide unique application areas, so research carefully.
Understanding hair color levels helps you choose wisely, preventing breakage while achieving that stunning silvery sheen you’re craving.
Aftercare and Protection
Now that you’ve transformed your locks into a stunning silver masterpiece, it’s time to keep that color looking fresh and your hair feeling healthy.
You’ll want to invest in some specialized aftercare techniques that’ll protect your new hue and maintain those gorgeous silver strands.
Trimming and Conditioning
In the midst of your silver hair journey, stay one step ahead with strategic Split End Removal and deep conditioning techniques.
Regular trims every 6-8 weeks will zap those pesky frayed edges before they travel up your strand.
Invest in protein-rich hair mask choices that hydrate and strengthen color-treated locks.
A killer deep conditioning routine protects against hair damage, keeping your silvery mane vibrant, resilient, and seriously stunning.
Bond Repairing Treatments
After trimming your silver-styled locks, it’s time to rescue those fragile strands with bond repairing treatments.
These protein-packed heroes are your hair’s emergency response team, rebuilding and protecting against dye and bleach damage.
- Restore bond strength with targeted protein treatments
- Choose products with amino acids and peptides
- Apply treatments between color sessions for maximum hair health
OLAPLEX and Aveda offer at-home solutions that’ll bring your hair back from the brink, transforming brittle locks into a resilient, shimmering silver masterpiece.
Finding the right bond repair products can make a difference.
Your hair will thank you later!
Silver Hair Care Tips
Your silver hair journey doesn’t end after dyeing—it’s just beginning!
Maintaining that stunning, head-turning silver shade requires strategic care, color-correcting shampoos, and smart washing techniques that’ll keep your locks looking salon-fresh between touch-ups.
Color-Correcting Shampoos
You’ll want silver shampoo as your secret weapon against brassy tones.
Purple-pigmented formulas are magic for neutralizing unwanted yellow hues, keeping your silver locks looking ice-cool and pristine.
Opt for sulfate-free options packed with nourishing ingredients like biotin and jojoba.
Pro tip: Use these color-correcting shampoos once weekly to maintain that killer silver shine without overdoing it.
Your hair will thank you for the extra TLC that keeps your color looking salon-fresh and vibrant.
Washing Frequency
After neutralizing those brassy tones with purple shampoo, protect your silver stunners with a strategic washing routine.
Here’s your silver-strand survival guide:
- Limit washes to 1-2 times weekly
- Opt for lukewarm water to prevent color bleeding
- Choose sulfate-free, color-safe shampoos
- Massage your scalp gently to maintain hair health
Your silver mane demands TLC. Treat it like the crown jewel it is, and watch those metallic locks shine with rebellious brilliance.
Root Management
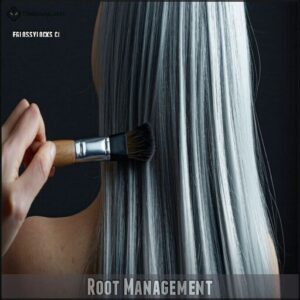
Managing your roots is the secret to maintaining that stunning silver hair color you’ve worked so hard to achieve.
You’ll want to tackle those new growth areas strategically, keeping your silver shade looking fresh and professional with careful bleaching and precise application techniques.
Bleaching New Growth
Bleaching new hair roots demands precision and strategic planning. Like a skilled painter touching up a masterpiece, you’ll need to approach root maintenance with laser-sharp focus.
- Master the art of precise root bleaching without overlapping previously treated hair
- Protect your delicate scalp from potential chemical sensitivity
- Navigate the developer strength maze with confidence and expertise
Your hair bleaching process isn’t just a task—it’s a transformation.
By understanding root bleach timing and developer strength, you’ll minimize damage and maximize your silver hair’s radiance.
Ensuring Even Color Application
After conquering bleached roots, you’ll need ninja-like precision for silver hair dye application.
Divide your mane into four strategic quadrants using hair clips—this visual map prevents patchy disasters.
Work swiftly, ensuring product saturation from roots to ends.
Quick, methodical banding techniques guarantee even coverage, while constant visual checks keep your silver hair transformation on point.
Frequently Asked Questions (FAQs)
Can I dye my hair silver?
Yes, you can dye your hair silver!
But it’ll require patience, multiple bleaching sessions, and careful toning to achieve that stunning metallic shade without damaging your locks.
Prep, protect, and proceed with caution.
How do I get a silver hair colour?
Like a metallic moonbeam cascading through strands, you’ll transform your locks by first bleaching to platinum.
Then applying a violet-based toner and semi-permanent silver dye for that stunning, cool-toned silver masterpiece.
How do you get silver color out of hair?
To remove silver hair color, use a color remover or clarifying shampoo.
If that doesn’t work, visit a professional stylist who can safely strip the dye without damaging your hair’s health and integrity.
How long does it take to dye silver hair?
Dyeing silver hair takes 2-4 hours, depending on your hair’s color and condition.
You’ll need time for bleaching, toning, and applying silver dye.
Patience and careful application are key to achieving that perfect metallic shade.
What is the best hair dye for silver hair?
Silver strands or steel-sharp style?
Pravana Chromasilk Vivids in Silver reigns supreme for home colorists.
Its semi-permanent formula delivers stunning, damage-minimizing results that’ll transform your locks from drab to fab without breaking the bank.
Can You dye your hair with silver toner?
You can use a toner to achieve a silver hair color, but it won’t permanently dye your hair.
It’ll neutralize brassy tones and add a cool silvery sheen, working best after bleaching your hair to a pale blonde base.
What color does your hair have to be to dye it silver?
You’ll need super light blonde hair—think pale yellow—to rock a stunning silver shade.
Bleach your locks multiple times, aiming for a level 10 or 11 platinum base before applying silver toner or dye.
How do I dye my hair silver at home?
You’ll rock silver locks by first lightening hair to platinum blonde with bleach.
Then neutralizing brassy tones using a purple toner before applying a semi-permanent silver dye for a stunning, head-turning transformation.
Can I dye my hair grey without bleaching?
While achieving grey hair without bleaching sounds like a shortcut, it’s tricky.
Semi-permanent, grey-toned dyes work on lighter hair, but darker locks require lightening first.
Your results depend on your natural color and hair health.
What can I use to make my hair silver?
Craving silver locks?
You’ll need bleach and a violet-based toner to neutralize yellow tones.
Choose semi-permanent dyes like Pravana Chromasilk for a stunning, damage-minimizing silver transformation that’ll turn heads wherever you go. Damage-minimizing silver transformation that’ll turn heads wherever you go.
Conclusion
Ultimately, achieving stunning silver hair at home takes dedication and skill.
You’ll transform your locks by mastering each step of how to dye hair silver at home.
Remember, patience is key—rushing can damage your hair.
Invest in quality products, follow professional techniques, and don’t be afraid to seek expert advice if you’re unsure.
With practice and proper care, you’ll rock that metallic silver look that turns heads and boosts your confidence.

