This site is supported by our readers. We may earn a commission, at no cost to you, if you purchase through links.
 When you’re figuring out how long to leave bleach in hair with 20 vol developer, aim for a sweet spot between 20 and 30 minutes.
It’s like baking cookies—keep an eye on them!
Different hair types react uniquely, so if you have fine or damaged hair, lean towards the shorter end to avoid turning your hair into a straw-like horror.
On the other hand, coarser or darker hair might need the full half-hour to achieve your desired lightness.
Always check every five to ten minutes.
Curious about mastering this process and avoiding a bleach mishap? When it comes to coloring, especially covering grey roots on dark hair, it’s essential to consider the processing time, such as allowing 10 minutes for normal gray coverage with root touch-up techniques. The expert tips ahead have got you covered!
Table Of Contents
- Key Takeaways
- How Long to Leave Bleach in Hair 20 Vol
- What is The Right Bleaching Time With 20 Vol Developer
- Choosing The Right Bleach for Your Desired Result
- Understanding 20 Volume Developer
- How to Mix Bleach With 20 Volume Developer
- How to Apply Bleach on The Hair
- How to Achieve an Even Result From Roots to Ends
- How to Tone The Hair After Bleaching
- Post-Bleaching Care and Maintenance
- Common Mistakes to Avoid When Bleaching With 20 Vol Developer
- Frequently Asked Questions (FAQs)
- How long should you bleach your hair?
- How long to leave bleach in hair with 20 vol developer?
- How long does bleach take to lighten hair?
- How long should you leave bleach on your head?
- How long should you leave bleach on?
- How long should you leave bleached hair after dyeing?
- Can I bleach my hair twice in one day?
- What if my hair turns orange after bleaching?
- How does porosity affect bleach processing time?
- Can previous hair treatments affect bleaching results?
- Is it safe to bleach pregnant women’s hair?
- Conclusion
Key Takeaways
- Leave bleach with a 20 volume developer in your hair for 10–30 minutes, adjusting time based on your hair type and desired lift.
- Check your hair every 5–10 minutes to prevent overprocessing and damage, especially if you have lighter or fine hair.
- Fine and light hair usually needs less time, while medium to dark or coarse hair can require the full 30 minutes.
- Always monitor closely, as time may vary with past hair treatments, porosity, or hair condition impacting bleach results.
How Long to Leave Bleach in Hair 20 Vol
When bleaching with 20 volume developer, the time you leave the bleach in your hair can vary greatly depending on your hair type.
From fine locks to coarse strands, understanding the best processing time is key to achieving your desired lift without damage.
Processing Times for Different Hair Types
Using a 20 Vol developer for bleaching involves understanding your hair’s texture, as well as being aware of the risks of over-bleaching hair.
Light hair types might only need 10–20 minutes, while medium to dark hair can require up to 30 minutes.
Keep an eye on the color lift—your ideal blonde is just around the corner.
Remember, patience is key to avoid any hair mishaps!
Factors to Consider When Timing Bleaching
When bleaching with 20 Volume developer, it’s important to think about your hair type and desired lift.
Fine, medium, or coarse hair may require different processing times.
Additionally, check your hair health and previous bleaching history – healthy hair can handle longer sessions.
Monitor closely to avoid overprocessing, which can lead to significant damage.
- Hair type and condition
- Desired lift level
- Previous bleaching experience
Risks of Overprocessing
Leaving bleach in too long can lead to hair breakage, scalp irritation, and uneven color results.
Brassiness, dryness, and severe damage are also common risks of overprocessing.
Monitor your hair closely, checking for signs of damage, and remove the bleach as soon as you reach the desired level of lift.
A little caution goes a long way in preserving the health of your hair.
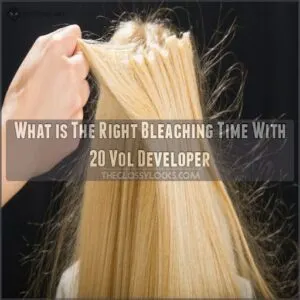
What is The Right Bleaching Time With 20 Vol Developer
Trying to nail the perfect bleaching time with a 20 vol developer can feel like walking a tightrope.
You want enough time for a good lift without tipping into the dreaded overprocessing zone.
So, how do you get it just right?
Keep in mind that a higher volume developer, such as 40 Volume Developer risks, can cause more damage if not used correctly.
Here’s a quick cheat sheet for your bleaching adventure:
- Hair type: Fine hair needs less time than coarse hair.
- Desired lift: More levels require more minutes.
- Color check: Start peeking after 10 minutes.
- Processing time: Ranges from 10 to 30 minutes.
- Overprocessing risk: Too long means breakage and damage.
Keep an eye on your strands, and you’ll steer clear of hair mishaps.
With these pointers, you’re ready to bleach with confidence!
Choosing The Right Bleach for Your Desired Result
Choosing the right bleach is key to getting your desired results – whether you’re after a bright, face-framing blonde or simply want to gently lift your color.
With the right product selection and application technique, you can achieve stunning, salon-quality color in the comfort of your own home.
Bleach Options for Different Hair Types
Choosing the right bleach for your hair type is key to achieving your desired blonde results.
Fine, medium, and coarse hair all have different processing needs.
Whether you have blonde, dark, or damaged hair, selecting the appropriate bleach formula can make a big difference in the final color outcome.
Considerations for On-Scalp Applications
When applying bleach with 20 Volume developer directly to your scalp, be extra cautious.
Opt for a feather brush to gently apply the mixture, steering clear of jabbing motions that may irritate your skin.
Start by testing a small section first to check for any sensitivities.
This helps prevent unpleasant scalp reactions during the full application.
Recommendations for Very Dark Hair
If you have very dark hair, 20 volume developer may not lift it enough on its own.
You can find a wide range of products specifically designed for this purpose, such as products for 20 vol bleach on dark hair.
Start with a 30 volume developer application for the first 15 minutes, then follow up with a 20 volume application to maintain gentler processing.
This two-step approach can help noticeably lighten stubborn, resistant hair while minimizing damage.
Understanding 20 Volume Developer
For at-home bleaching, 20 volume developer is the star player. It’s a milder option that lifts hair color 1-2 levels, making it the go-to choice for a safer, gentler bleaching experience.
Developer Basics
Developer is the key ingredient that powers the bleaching process.
It’s a liquid or cream containing hydrogen peroxide, responsible for lifting the hair cuticle and lightening the natural pigment.
Developers come in different volumes, each suited for specific needs – from subtle depositing to dramatic lifting.
Understanding how they work is important before you start bleaching.
Volume and Effects
Developers come in different strengths, each with unique effects on your hair.
20 volume, the most popular choice, provides a gentle 1-2 level lift.
It’s an ideal option for at-home bleaching, as it’s less damaging than higher volumes.
Just remember to monitor your hair closely during the process to avoid over-processing.
Developer and Color Compatibility
The versatility of developer is a game-changer for color enthusiasts.
Any developer can be paired with most color lines, as the primary active ingredient is hydrogen peroxide.
However, using the developer recommended by the color line guarantees the best results by maximizing lift, tonality, longevity, and consistency.
Matching developer to your color line is a surefire way to achieve stunning, long-lasting color.
How to Mix Bleach With 20 Volume Developer
Mixing bleach and 20 volume developer is an important step for at-home bleaching.
Consistency is key.
Get the perfect consistency by using a 1-to-2 ratio of bleach to developer, blending them together until you achieve a smooth, creamy texture.
Correct Bleach to Developer Ratio
When bleaching hair, it’s important to use the right ratio of bleach powder to 20 volume developer.
The recommended mix is 1 part bleach to 2 parts developer.
This creates a smooth, creamy consistency that applies evenly and helps achieve your desired level of lift.
Be sure to measure carefully for the best results.
- Use a 1:2 ratio of bleach to 20 vol developer
- Mix in a plastic bowl until a creamy, smooth consistency forms
- Measure the amounts precisely for the best lightening
- Apply the mixture evenly from roots to ends
- Saturate hair thoroughly for consistent, even results
Mixing Tips for a Smooth Consistency
You’ve got your bleach and 20 Vol developer all set, now mix it to a smooth consistency for the best results.
Think cookie dough, not clumps—you want the bleach powder and developer to blend seamlessly.
Stir well to avoid those pesky lumps that can leave spots on your hair.
This step helps you achieve a smooth application and a more even hair consistency.
Importance of Measuring Correct Amounts
Mixing the right amount of bleach and 20 volume developer is important.
Get the ratio wrong, and you risk causing hair damage like rough texture, split ends, and excessive shedding, which may require implementing effective hair color damage repair tips. Get the ratio wrong, and you risk uneven color or worse – damaged hair.
Use a 1:1 or 1:2 mix, depending on your desired consistency, and be sure to measure precisely.
This careful blending makes sure you get the best lift and even saturation throughout your locks.
How to Apply Bleach on The Hair
Proper application is key when bleaching your hair with 20 volume developer.
Section your hair into manageable pieces.
Gently apply the bleach mixture from roots to ends, ensuring even saturation for a flawless, consistent result.
Sectioning and Application Techniques
Now that your bleach and developer are perfectly mixed, let’s get to the application.
Proper sectioning is key for even coverage.
Here’s how to do it:
- Use a tail comb to create neat hair partings.
- To achieve the best results, make sure you have all the necessary tools and products for bleach application kits.
- Grab thin strands, aiming for consistent thickness.
- Employ a feather brush for gentle application.
- Work methodically, ensuring full head bleach coverage.
Minimizing Scalp Irritation
When applying bleach with 20 Vol developer, be gentle on your scalp.
Use a feather brush to lightly glide the mixture through your hair, avoiding direct contact with your scalp.
Always follow the proper mixing ratios.
This helps minimize irritation and discomfort.
Always do a patch test first to check for any sensitivities.
Your scalp will thank you for the TLC.
Saturating Hair Thoroughly
Saturate your hair thoroughly with the bleach mixture, ensuring even coverage from roots to ends.
Section your hair finely and apply the bleach segment by segment, starting with the thickest or darkest areas.
Use a feather brush to gently apply the bleach, avoiding jabbing the scalp. This will help minimize irritation and achieve a consistent, seamless result.
How to Achieve an Even Result From Roots to Ends
Achieving an even result from roots to ends when bleaching with 20 volume developer takes careful timing and monitoring.
Proper application techniques, like processing the root area last and checking progress regularly, will help you avoid over-processing and guarantee consistent, beautiful blonde results.
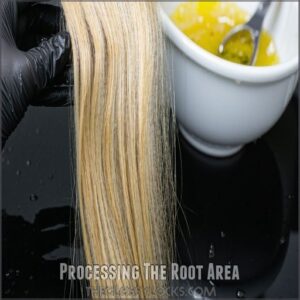
Processing The Root Area
Start with the root area; it’s like the grand finale at a fireworks show!
The scalp’s natural heat speeds up the process.
Use 20 Vol developer, staying mindful of root area color and avoiding damage.
Root area application is key—use less bleach there to balance the lift.
Keep an eye on regrowth application to make sure even bleach application and a flawless finish.
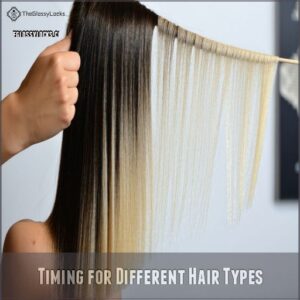
Timing for Different Hair Types
The amount of time you’ll leave bleach on your hair with 20 vol developer can vary based on your hair type:
- Blonde hair: 10-20 minutes
- Fine hair: 10-15 minutes
- Medium hair: 15-20 minutes
- Dark or coarse hair: 15-30 minutes
Monitor your hair closely as it processes, checking for the desired lift to avoid over-bleaching.
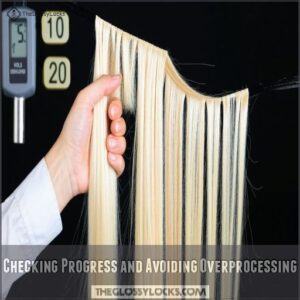
Checking Progress and Avoiding Overprocessing
When bleaching your hair, those color checks are your best friend.
Set a timer, but keep an eye out—hair can play tricks.
When using a 10 volume developer for subtle lightening effects, check processing time guidelines, but sometimes hair processing time seems endless, but regular checks prevent overprocessing.
Here’s a quick guide:
| Stage | Checking Time | Result Focus |
|---|---|---|
| Initial | 10 min | Avoid damage |
| Midway | 15 min | Even lift |
| Final | 20-25 min | Desired tone |
Ensure you’re getting those perfect hair lightening results.
How to Tone The Hair After Bleaching
Once you’ve achieved that perfect lift with your bleach, it’s time to tackle the brassiness with a good toner to get those dreamy blonde tones.
Toner will help you achieve those dreamy blonde tones.
Don’t forget to finish off your hair care routine with a rich conditioner to keep your locks soft and healthy after all that chemical action.
Removing Yellowness and Achieving Desired Blonde Tones
Although achieving that perfect platinum or ash blonde can feel like taming a wild beast, it all boils down to mastering toning techniques.
Purple shampoo acts as your trusty sidekick, erasing unwanted brassiness after bleaching.
By embracing these toning products, you’ll glide from orange hues to that dreamy silver blonde with startling ease.
Let your hair color radiate freedom and fabulousness!
Using Toner for Maintaining Blonde Hair
Battling that brassiness after bleaching? From our last chat on achieving blonde tones, let’s spotlight toners. They’re your secret weapon against unwanted hues:
- Types of Toners: Choose wisely based on your shade—purple for yellow, blue for orange.
- Toning frequency: Keep it regular to maintain vibrancy.
- Purple shampoo: Your low-key color correction buddy between toning sessions.
Importance of Conditioning After Bleaching
After bleaching, your hair craves a little TLC.
Think of conditioning as your hair’s trusty sidekick, swooping in to restore moisture and boost color vibrancy.
It fights damage, ensuring your strands bounce back stronger.
| Aspect | Benefit |
|---|---|
| Moisture retention | Keeps hair hydrated |
| Protein replenishment | Strengthens hair fibers |
| Damage control | Reduces breakage |
| Color vibrancy | Maintains your shade |
Remember, a good conditioner is key for healthy, dazzling hair!
Post-Bleaching Care and Maintenance
Now that you’ve achieved your perfect blonde, let’s talk about keeping it healthy and vibrant.
You’ll want to focus on strengthening your bleached hair, minimizing damage and breakage, and following some simple tips for long-lasting, gorgeous locks.
Strengthening Bleached Hair
Toning sets the stage for dazzling blonde hues. But never skip strengthening your bleached hair!
Consider using deep conditioners rich in argan oil, keratin, and vitamins to provide essential nutrients for your color-treated hair, try a best deep conditioner for dyed hair. Go for hair masks and deep conditioning treatments to keep strands luscious.
Consider Protein treatments or the magic of Olaplex and Keratin treatments for resilience. These keep your tresses fortified after 20 Vol developer’s job, ensuring your hair lightening process doesn’t lead to dullness.
Minimizing Damage and Breakage
Taking care of your hair post-bleach isn’t just about appearance; it’s about keeping those strands strong and resilient.
Here are four tips to keep your hair in top shape:
- Condition Deeply: Give your hair a rich, hydrating mask weekly.
- Avoid Heat: Skip the hot tools to minimize breakage.
- Trim Regularly: To repair burnt hair from a curling iron, incorporate nourishing oils and masks into your routine, like coconut argan oil heat protectant spray for fixing damaged locks. Snip off split ends to prevent further damage.
- Use Protection: Apply a UV protectant to shield from sun damage.
General Tips for Healthy Bleached Hair
Keep your hair’s sparkle by embracing a consistent hair care routine.
Start with deep conditioning rituals to combat hair damage from bleaching with 20 vol developer.
Prioritize color maintenance to preserve your desired shade, and be open to a salon consultation for expert tips.
Trust the process and remember—healthy hair is your crown, so treat it with care.
Common Mistakes to Avoid When Bleaching With 20 Vol Developer
When you’re bleaching your hair with a 20 volume developer, it’s important to steer clear of common pitfalls that can lead to overprocessing or uneven results.
Always follow the instructions closely and consider consulting a pro—sometimes you’re just a good hair day away from a crisis.
Overprocessing and Damage
Bleaching mistakes can really mess up your mane. Overprocessing leads to hair breakage and scalp irritation. Imagine a desert-like dryness or pesky split ends.
To avoid damage, it’s important to understand the proper bleach to developer ratio.
Watch the clock, trust your gut, and:
- Limit bleaching sessions to avoid frying your hair.
- Check hair progress often.
- Avoid overlapping bleach on colored parts.
- Use conditioner to thwart damage.
Underprocessing and Uneven Results
Getting patchy bleach jobs when using 20 Vol can lead to uneven lightening and frustrating color variation.
If processing times are too short, you might end up with underprocessed hair, creating a root shadow or distinct hair lifting levels.
Pay close attention to how your hair responds, ensuring bleach reaches all areas evenly for consistent results.
Importance of Following Instructions and Consulting a Professional
Uneven color? That’s a sign you didn’t follow directions!
Always read the instructions on your bleach and developer; they’re your roadmap to awesome hair.
Still unsure? Don’t be a hero; a pro stylist can prevent hair damage and guarantee perfect color results.
They’ll guide you through the whole hair bleaching process, from choosing the right bleach and developer to achieving your dream shade.
Their expert advice will save you time, money, and frustration.
Think of it as insurance against a bad hair day!
Frequently Asked Questions (FAQs)
How long should you bleach your hair?
When you’re ready to bleach your hair with 20 volume developer, let it work its magic for about 10-30 minutes, depending on your hair type.
Check frequently starting at 10 minutes to avoid overprocessing and damage.
How long to leave bleach in hair with 20 vol developer?
Leave bleach in your hair with 20 volume developer for 10-30 minutes.
For blonde or fine hair, around 10-20 minutes should suffice, while medium to dark or coarse hair may need closer to 15-30 minutes.
How long does bleach take to lighten hair?
Bleaching hair with 20 volume developer typically takes between 10 to 30 minutes.
Start checking at 10 minutes, especially for lighter hair, to avoid overprocessing.
Hair type and desired lift determine the exact timing needed.
How long should you leave bleach on your head?
So, you’re ready to become a blonde bombshell?
Don’t get carried away!
Check your hair’s color every 10 minutes; this is crucial, especially if you’re considering balayage or foil highlights, as processing time can vary greatly depending on the technique; leaving bleach on too long is a recipe for disaster.
Aim for 10-30 minutes, depending on your hair type and desired lightness.
How long should you leave bleach on?
You should keep bleach on your hair for 10-30 minutes, depending on your hair type and desired lightness.
Always check progress every 5-10 minutes.
Stop if your hair reaches your target shade early.
How long should you leave bleached hair after dyeing?
After dyeing, leave your freshly tinted locks to settle for at least 48 hours before washing.
This gives the color time to set, like letting paint dry before touching it.
Happy coloring!
Can I bleach my hair twice in one day?
It’s not advisable to bleach your hair twice in one day.
Doing so can cause severe hair damage and breakage.
Instead, give your hair a break of at least two weeks between bleaching sessions to recover properly.
What if my hair turns orange after bleaching?
When that orange hue pops up, it’s like catching a pumpkin surprise in the mirror.
Toning with a purple shampoo or toner, which combats yellow tones, helps neutralize those brassy shades, bringing your hair color back to a cooler balance.
How does porosity affect bleach processing time?
High porosity hair absorbs bleach quickly, reducing processing time but increasing the risk of damage.
Low porosity hair creates slower processing as bleach struggles to penetrate, so monitor closely and adjust time based on your hair’s needs.
Can previous hair treatments affect bleaching results?
Ironically, past hair treatments are your hair’s hidden history.
Previous color, perms, or even excessive heat styling can impact how your hair bleaches.
Damage makes bleaching trickier; healthy hair bleaches best.
Is it safe to bleach pregnant women’s hair?
Bleaching hair during pregnancy is generally advised against due to potential chemical exposure.
Bleaching hair during pregnancy is generally advised against due to potential chemical exposure.
If you decide to proceed, use a well-ventilated area, non-ammonia products, and avoid scalp contact to minimize any risks.
Conclusion
Imagine your best friend left bleach in their hair a bit too long, ending up with brittle strands.
Don’t worry, you can avoid this fate by knowing how long to leave bleach in hair with 20 vol.
Stick to the safe window of 20 to 30 minutes, adjust for hair type, and keep checking.
Armed with these insights, you’ll nail that perfect shade without the damage.
Remember, patience and observation are your best tools.

