This site is supported by our readers. We may earn a commission, at no cost to you, if you purchase through links.

Hair dye stains appear on your skin within seconds of application, creating dark streaks along your hairline, ears, and neck that resist ordinary soap and water. The oxidative pigments in permanent and semi-permanent formulas bond with the outermost layer of your skin cells through chemical reactions that intensify over time.
Most people discover these stubborn marks only after rinsing out the color, when removal becomes markedly harder. Acting within the first few minutes makes the difference between a quick wipe-down and an hours-long battle with household remedies.
The methods you choose depend on how long the dye has been sitting, the type of formula you used, and your skin’s sensitivity level.
Table Of Contents
Key Takeaways
- Hair dye bonds to skin cells within minutes, so immediate cleanup with lukewarm water and mild soap prevents stubborn stains that can otherwise last 30 to 50 days.
- Gentle removal methods like oil-based cleansers, micellar water, and petroleum jelly work by dissolving pigment molecules without damaging your skin barrier, while household remedies like baking soda toothpaste or diluted white vinegar offer stronger exfoliation for set-in stains.
- Applying barrier creams like petroleum jelly to your hairline, ears, and neck before dyeing prevents most stains from forming, making this the single most effective strategy for avoiding skin contact with dye.
- Post-removal care with fragrance-free moisturizers containing ceramides or hyaluronic acid restores your skin barrier, while persistent redness, swelling, or burning beyond 24 hours requires professional dermatological evaluation.
How to Get Hair Dye Off Skin
Hair dye stains on your skin aren’t permanent, but they won’t disappear on their own for 30 to 50 days.
If you’re wondering how long the actual dyeing process takes, most permanent dyes need 30 to 45 minutes to fully develop.
The good news is that you can take control and remove them much faster with the right approach.
Here’s what you need to know about tackling fresh dye stains, why timing matters, and which areas require the most attention.
If you’re dealing with a stubborn stain that’s already set, this guide on removing hair dye from your sink covers proven techniques for porcelain, ceramic, and other surfaces.
Immediate Steps After Dyeing
The moment you finish dyeing, rinse techniques become your first defense. Use lukewarm water to flush excess color from skin surfaces immediately. Follow with gentle cleansing using mild soap, avoiding harsh scrubbing that compromises your skin barrier.
If your skin feels tight or flaky afterward, applying a healing treatment for cracked, dry skin can restore moisture and speed up recovery.
Skin patting—not rubbing—prevents micro-tears and further dye transfer. Finish with moisturizer application to restore protective layers.
Quick stain assessment determines if you need additional hair dye removal methods for stubborn skin staining.
Importance of Acting Quickly
Hair dye sets into skin cells within minutes, so delays in treatment drastically reduce your removal success rate. Swift cleanup within the first five minutes prevents pigment oxidation and cellular bonding. Timely intervention using appropriate dye removal techniques protects your skin from prolonged staining that becomes increasingly resistant to standard removal methods.
Hair dye bonds to skin cells within minutes, so immediate cleanup prevents stubborn stains that resist standard removal methods
To minimize staining, it’s critical to understand proper hair dye removal techniques.
Common Areas Prone to Stains
Your hairline, temples, ears, and neck act as pigment magnets during any dye application. To minimize staining, it’s vital to apply a hair dye barrier before coloring.
Hands absorb dye fastest without gloves, while facial skin retains pigment longer due to higher cell turnover rates. Behind the ears and along the nape often suffer the worst staining because these zones receive direct drips during processing.
To minimize mess around your face and neck, use a barrier cream like petroleum jelly before you start—this guide to covering roots at home walks through that step and other prep tricks.
Gentle Hair Dye Removal Methods
You don’t need harsh chemicals to remove hair dye from your skin. The most effective methods work with your skin’s natural barrier rather than against it.
Here are four gentle techniques that lift pigment without causing irritation or dryness.
Soap and Water Technique

When dye marks your skin, warm water and a gentle cleanser work best within minutes of application. This simple technique relies on surfactants to lift pigment before it fully oxidizes and penetrates deeper layers.
Apply your chosen soap directly to the stain while it’s still fresh, then massage in small circles for thirty to sixty seconds. Rinse thoroughly and pat dry.
Using Facial Cleansers

Facial cleansers designed for sensitive skin can break down pigment without compromising your skin barrier. Choose fragrance-free options with balanced pH to avoid irritation during cosmetic removal.
- Oil-based cleansers dissolve stubborn dye through lipophilic action
- Cream-to-foam formulas provide gentle exfoliation and skin protection
- Double cleansing removes layered pigment more completely
- Hydrating cleansers preserve moisture while lifting stains
Follow with moisturizer for skin care and barrier repair.
If irritation persists or worsens, check whether your hair dye damaged the follicles, as this can prolong healing and require professional treatment.
Makeup Remover Pads and Micellar Water

Makeup remover and micellar water lift stains through surfactant micelles that surround pigment particles. These solutions work for hair dye removal on sensitive facial skin without harsh scrubbing.
Soak a cotton pad and gently wipe stained areas using circular motions. Multiple short applications yield better results than prolonged rubbing.
The gentle removal preserves your skin barrier while dissolving oxidative color residues around the hairline.
Olive Oil and Coconut Oil Solutions

Vegetable-based oils break down pigment molecules through lipid solubility. Apply a thin layer of olive oil or coconut oil to stained skin and massage gently for one to two minutes. The oil loosens dye particles without abrasive friction.
Wipe away residue with a clean cloth, then wash with lukewarm water and mild cleanser. These natural remedies offer skin soothing benefits while achieving gentle removal of hair dye stains.
Effective Home Remedies for Stubborn Stains

When gentle methods don’t cut it, you’ll need stronger solutions that work on a molecular level to break down dye pigments.
These home remedies use common household products with exfoliating or dissolving properties to tackle stubborn stains.
Each method targets the dye differently, giving you multiple options to find what works best for your skin type.
Toothpaste With Baking Soda
Sodium bicarbonate-based toothpaste offers mild abrasive action that lifts surface pigment particles from skin stain removal zones. This gentle exfoliation technique breaks down hair dye stains without excessive friction.
Apply a small amount to the affected area and work in gentle circular motions for one to two minutes. Rinse with cool water and assess results.
Avoid whitening formulas or prolonged scrubbing to prevent skin irritation and abrasive risks.
Petroleum Jelly Application
Petroleum jelly creates a protective shield that prevents hair dye from bonding with skin during application. Apply a thin layer around your hairline, ears, and neck before you start coloring. This Jelly Barrier Method stops stains before they form.
For existing marks, gently massage a small amount onto affected areas to dissolve pigment particles without harsh scrubbing.
White Vinegar Method
White vinegar’s acetic acid breaks down hair dye pigments when diluted properly. Mix one part white vinegar with two parts water to protect your skin pH balance.
Soak a cotton pad in this solution and gently dab stained areas for up to 60 seconds. Rinse thoroughly with lukewarm water. Vinegar dilution ensures removal efficacy while maintaining vinegar safety for sensitive facial skin.
Dandruff Shampoo Exfoliation
Medicated shampoos with salicylic acid remove stained skin cells through gentle exfoliation. This method works because keratolytic agents break down surface buildup without harsh scrubbing. Apply dandruff shampoo to damp skin along your hairline and massage for one to three minutes before rinsing.
- Choose formulas with 2-3% salicylic acid concentration
- Patch test on a small area first
- Limit use to 1-3 times weekly
- Rinse thoroughly with lukewarm water
- Follow with moisturizer to restore skin barrier
Products and Tools for Hair Dye Removal
You don’t need to rely solely on household items to remove hair dye stains. Several specialized products and tools can make the removal process more efficient and protect your skin during application.
Here are the most effective options for tackling dye stains and preventing them in the first place.
Hande Touch Nitrile Gloves
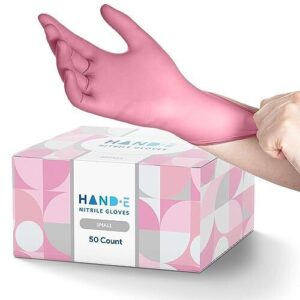
You need hand protection that won’t fail when chemicals make contact with your skin. Hande Touch Nitrile Gloves provide chemical resistance and tear-resistant durability during hair dye application.
The nitrile material creates a barrier against dye stains and prevents skin exposure to harsh ingredients. These powder-free rubber gloves offer textured fingertips for improved grip and control during the dyeing process.
Available in sizes small through extra-large, proper glove sizing ensures a snug fit that facilitates precision work while minimizing dye contact with your hands.
- Nitrile material provides strong chemical resistance and durability, protecting hands from dye stains and harsh ingredients
- Textured fingertips offer enhanced grip for precise application and control during detailed work
- Powder-free and latex-free design reduces allergic reactions and keeps hands clean without residue
- Single-use disposable design may not be cost-effective for frequent users who need multiple pairs daily
- Not suitable for people with nitrile allergies, limiting options for sensitive users
- Some users report inconsistent sizing across batches, which can affect fit and protection
CeraVe Healing Skin Ointment
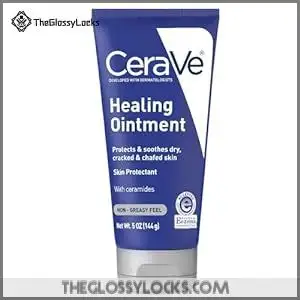
Protection goes beyond gloves—barrier creams shield exposed skin from hair dye stains. CeraVe Healing Ointment creates a petrolatum-based film along your hairline and ears before dye application. The ceramide-rich formula aids skin barrier repair while preventing pigment adhesion to facial skin. This fragrance-free ointment benefits sensitive skin care without comedogenic effects.
Apply a thin layer to clean, dry areas prone to staining for gentle removal later. After washing out dye, reapply the ointment to restore moisture and aid skin stain removal recovery on treated regions.
- Creates a protective petrolatum barrier that prevents dye from staining facial skin and helps with easier cleanup afterward.
- Fragrance-free and non-comedogenic formula with ceramides that repairs and hydrates skin, making it safe for sensitive or eczema-prone skin.
- Multi-purpose product that works as both a preventative barrier before dyeing and a moisturizing treatment to restore skin after dye removal.
- Thick, greasy texture can be difficult to squeeze from the tube and may feel heavy on skin during application.
- Doesn’t chemically remove dye stains on its own—you’ll still need soap or other cleansing agents to fully eliminate staining.
- The occlusive barrier may feel uncomfortable for some users, especially in warm conditions or on oily skin types.
Professional Hair Dye Stain Removers
Professional stain removers combine solvents with emollients to target hair dye stains without harsh irritation. These gentle formulas include conditioning agents that support cosmetic stain removal while minimizing dryness.
Run a skin patch test on intact skin before broader application—most products specify facial suitability and exclude mucous membranes.
Find them at salons, cosmetology suppliers, or beauty distributors for effective hair dye stain removal.
Makeup Remover Wipes
Makeup remover wipes dissolve hair dye stains using surfactants at 0.1 to 1 percent concentration—these formulations encapsulate pigment molecules for gentle removal. Soak the stained area for several minutes before wiping to improve stain lifting effectiveness.
Choose fragrance-free options to maintain skin tolerance on sensitive facial zones. Baby wipes work for light marks, while micellar wipes handle stubborn cosmetic removal tasks better.
Preventing Hair Dye Stains on Skin

Prevention beats removal every time. You can avoid most skin stains by setting up barriers before you apply dye. Here’s how to protect your skin from the start.
Applying Barrier Creams
You control stains before they happen with barrier creams applied along your hairline, ears, and neck. Think of petroleum jelly or professional barrier products as your first line of defense against dye resistance.
- Apply a thin, even layer to all exposed skin areas before mixing your color
- Choose products labeled for cosmetic use to minimize irritation on sensitive skin
- Test a small patch 24 hours prior to verify compatibility
Reapply after washing hands to maintain skin protection throughout your session.
Wearing Gloves and Protective Gear
Nitrile gloves create an impermeable barrier against hair dye chemicals, reducing skin exposure by up to 99%. Choose powder-free options with a snug fit to prevent slippage during application.
Pair hand protection with a professional-grade vinyl cape to shield your arms and shoulders from dripping color.
Remove gloves carefully by peeling from the cuff and turning inside out to avoid transferring residual dye onto clean skin.
Sectioning Hair for Targeted Application
Dividing your hair into quarter-inch sections confines dye to your strands and keeps it off your scalp and face. Use metal clips to secure each partitioned segment away from skin contact zones.
This targeted dyeing approach reduces messiness and improves color saturation. Work methodically through each section from root to tip, repositioning clips as needed to maintain clean separation throughout the hair coloring process.
Using Brushes for Precision
A quality brush transforms chaotic dye application into controlled artistry. Precision tips guide pigment exactly where you want it while shielding skin from unwanted stains.
- Select synthetic bristles stiff enough to hold their shape during hair dye application
- Angle your brush at a shallow incline to protect skin beneath the hairline
- Guide dye along contours with minimal splatter for targeted removal prevention
- Clean brushes immediately after use to prevent dried pigment transfer and future skin stains
Post-Removal Skin Care and Safety Tips

Removing hair dye from your skin is just the first step. Your skin needs proper care afterward to recover from the products and scrubbing you used.
Here’s what you need to know to keep your skin healthy and avoid complications after stain removal.
Moisturizing Treated Areas
After scrubbing away those stubborn dye marks, your skin needs immediate hydration to recover from the removal process. Apply a gentle, fragrance-free moisturizer within minutes to restore moisture balance and support skin regeneration.
Look for aftercare products with ceramides or hyaluronic acid to strengthen your skin barrier. For sensitive skin, choose oil-based formulas that provide deep skin hydration without irritation. This step protects against dryness and maintains ideal skin health.
Avoiding Harsh Chemicals
While hydration heals, skin protection tips demand equal attention to what you don’t use. Skip acetone, bleach, and ammonia-based products that compromise pH balance and trigger inflammation.
Choose fragrance-free, gentle cleansers formulated for sensitive skin instead. Before applying any new remover, perform a skin patch test on your inner forearm.
Stick with proven options like olive oil, petroleum jelly, baby oil, or coconut oil to safely lift residual pigment without chemical damage.
When to Seek Professional Help
Most dye stains resolve with home care, but persistent redness, swelling, or burning after 24 hours signals the need for dermatological evaluation.
Severe reactions like blistering, chemical burns, or signs of skin infections require emergency care. If you experience allergic responses—hives, facial swelling, or breathing difficulty—seek immediate medical attention.
A dermatology consultation can identify hair dye allergy and prevent future skin sensitivity episodes.
Restoring Skin Health After Removal
Once irritation subsides, focus on skin barrier repair with ceramide-rich moisturizers applied twice daily. This prevents dermatitis and aids skin regeneration and health.
Broad-spectrum SPF 30 protects against hyperpigmentation, especially on darker skin tones.
Inflammation care includes cold compresses and gentle, fragrance-free products for 24–72 hours. Avoid harsh exfoliants that increase skin sensitivity.
Consistent moisturizing techniques restore your skin’s protective function and minimize long-term irritation.
Frequently Asked Questions (FAQs)
Can hair dye stain nails or cuticles permanently?
Like stubborn coffee rings that eventually lift, hair dye stains on nails and cuticles aren’t permanent. Pigments bind to surface keratin temporarily, fading as nails grow and skin naturally exfoliates over several weeks.
Are certain skin types more prone to staining?
Yes. Sensitive skin, dry skin, and atopic dermatitis increase staining risk because a weakened skin barrier allows dye pigments to penetrate more deeply.
Thin facial areas and impaired barriers retain hair dye stains longer than healthy skin.
How long before a stain becomes harder to remove?
Within ten to fifteen minutes, oxidative dyes bind to keratin in your stratum corneum, making stain removal progressively harder. After an hour, penetration deepens markedly. Beyond twenty-four hours, you’ll need stronger solvents and repeated treatments.
Conclusion
Your skin doesn’t have to advertise your hair transformation. Getting hair dye off skin becomes simple when you act fast, use the right removal method for your situation, and protect vulnerable areas before you start.
Whether you reach for oil-based solutions, gentle exfoliants, or commercial removers depends on stain severity and skin sensitivity. Master prevention techniques and keep removal products within arm’s reach during every color session.
Clean skin starts with preparation, not damage control.
- https://www.researchgate.net/profile/Kirti_Rani2/publication/299975785_Novel_washing_analysis_of_stained_woolen_fabric_having_stains_of_shoe_polish_and_hair_color_dye_with_olive_oil_driven_amylase_loaded_BSANPs_as_bio-active_nano-wool_shampoo_additives/links/570ca3bd08aea660813b2de0.pdf
- https://ulta.ztk5.net/Gm1472
- https://www.lancome-usa.com/skincare/bi-facil-double-action-eye-makeup-remover/602581.html
- https://www.skincare.com/skin-concerns/wrinkles/how-to-remove-hair-dye-from-skin
- https://www.madison-reed.com/blog/how-to-remove-hair-dye-stain-from-skin