This site is supported by our readers. We may earn a commission, at no cost to you, if you purchase through links.

Most guys switching to a safety razor make the same mistake: they treat it like their old cartridge razor and wonder why their face looks like a crime scene. The truth is, safety razors demand a different approach—one that respects physics and geometry over brute force.
Once you understand the mechanics, though, you’ll get closer shaves with less irritation and save a fortune on blades. The technique isn’t complicated, but it does require unlearning some habits. Your angle matters more than pressure, your prep work determines half the outcome, and those short, controlled strokes you’ll master transform shaving from a chore into something close to a ritual.
Table Of Contents
Key Takeaways
- Safety razors demand a 25-30 degree blade angle and short strokes with zero pressure—let the razor’s weight do the work, not your hand, and you’ll cut irritation by up to 40%.
- Your pre-shave prep matters more than you think: 3-5 minutes of warm water softens beard hair by 20%, while loading a proper lather with a badger or synthetic brush creates the cushion that protects your skin.
- Replace blades every 5-7 shaves and always shave with the grain first—mapping your face’s hair growth patterns and keeping skin taut eliminates most nicks and razor burn before they start.
- The right aftercare seals the deal: skip alcohol-based splashes if you’ve got sensitive skin and reach for fragrance-free balms with glycerin or hyaluronic acid to lock in 20-40% more moisture.
Essential Tools for Shaving With a Safety Razor
Switching to a safety razor isn’t just about buying a different handle—you’ll need a few key tools to get the job done right. The good news is that once you’ve got the basics down, you’re set for years of great shaves.
Let’s walk through what you actually need to make this work.
Choosing The Right Safety Razor
Your first safety razor should feel like an extension of your hand. Look for a handle length between 4-6 inches—this sweet spot cuts wrist fatigue by about 20%.
Consider these essentials:
- Weight balance: 70-150 gram razors need less pressure, reducing irritation by roughly 15%
- Razor material: Stainless steel or chrome-plated brass offers durability
- Blade exposure: Adjustable models let you fine-tune aggression as you learn.
When troubleshooting issues with your website, checking for web server errors can help resolve connectivity problems.
Selecting Double Edge Razor Blades
Once you’ve picked your razor, blade selection makes or breaks your experience. Stainless-steel double-edged razor blades with platinum or PTFE coating types cut drag by 10-16%, protecting sensitive skin. Sharpness levels matter—beginners report 20-35% less razor burn with “gentle” options.
Edge geometry and blade materials affect your shaving technique, so try sample packs. Most blades stay sharp for 5-7 shaves before blade durability drops.
Understanding the literature review process is essential for evaluating the effectiveness of different blade types.
Shaving Brush Types and Benefits
Your blade’s set—now let’s talk about the tool that makes lather magic happen. Choosing between badger hair and synthetic fibers affects everything from cushion to dry time. Here’s what you need to know about shaving brush types and accessories:
- Badger hair brushes retain 30% more water, creating richer lather in 6-8 passes
- Synthetic fibers dry 10-15% faster and last 5-7 years with proper brush maintenance
- Boar bristles offer natural exfoliation for sensitive skin
- Handle materials like restaurant-grade resin improve grip stability by 24-40% when wet
- Natural brushes deliver 20% more cushion but require careful care
Lather quality hinges on picking the right match for your routine.
Shaving Soap Vs. Shaving Cream
Once your shaving brush is dialed in, you’ll need something to turn into lather. Shaving soap usually requires 15–60 seconds of loading with your brush, building a dense, cushiony foam that improves razor glide by 12–25%. Shaving cream dissolves faster—around 30–45 seconds—creating a lighter lather with 8–18% more slickness.
Here’s how they stack up for your wet shave:
| Factor | Shaving Soap | Shaving Cream |
|---|---|---|
| Lather Formation | Dense, requires more loading | Quick, lighter consistency |
| Skin Hydration | Good, but rinses with slight film | Excellent, 8–15% higher moisture retention |
| Razor Glide | Strong cushion, 12–25% improvement | Smoother feel, 9–14% friction reduction |
| Cost Per Use | Lasts 35–50% longer | More frequent replacement needed |
Soap benefits include longer-lasting containers and thicker cushion, while shave cream offers faster prep and better skin hydration—especially helpful if you’re prone to razor burn. Both work great with your safety razor and shaving brush, so pick what fits your routine.
Step-by-Step Safety Razor Shaving Technique
Shaving with a safety razor isn’t complicated, but getting it right requires knowing the proper sequence and technique. The difference between a smooth, comfortable shave and one that leaves you irritated comes down to a handful of key steps done correctly.
Here’s exactly how to work through each stage of the process, from prep to the final stroke.
Pre-Shave Preparation and Beard Softening

Your preshave routine makes or breaks the shave. Start with a warm shower or splash hot water on your face for 3–5 minutes—beard softening is real, increasing skin pliability up to 20%.
Your preshave routine makes or breaks the shave—warm water for 3–5 minutes softens beards and boosts skin pliability by up to 20%
Follow with gentle skin exfoliation once or twice weekly to reduce ingrowns by 15–25%.
Pre-shave oils with glycerin lock in moisture, cutting required blade passes and priming facial hair for your shaving brush.
Creating and Applying a Rich Lather

A thick cushion starts with loading your shaving brush: circular swirls for 20–40 turns on wet soap pull foam into the bristles.
Add water gradually—aim for a 2:1 to 4:1 ratio—then whip gently until you see glossy peaks.
Proper lather formation boosts slip by 12–20%, letting your wet shave glide smoother while shielding skin from irritation.
Holding The Razor at The Correct Angle

Mastering razor angle control is your ticket to clean, nick-free passes. Rest the safety razor’s head flat against your cheek, then lift the handle until only the blade edge touches skin—that sweet spot sits around 25–30 degrees.
Studies show this range cuts irritation risk by up to 40%. Keep your wrist steady, let the blade exposure do the work, and you’ll feel the difference instantly.
Shaving With The Grain and Problem Areas

Your first pass follows the grain—that’s the direction hair naturally grows. Run your fingertips across your face to map those grain patterns; cheeks might angle down while your neck curves sideways.
Keep skin tension firm with your free hand, especially along facial contours like the jawline where 58% of users report fewer weepers. Adjust razor angles slightly for each zone, and you’ll master shaving technique fast.
Using Short, Gentle Strokes

Short strokes—think one to one-and-a-half inches—transform your shaving technique and slash skin trauma by 30%. Here’s your stroke control playbook:
- Let gravity work: Your safety razor’s weight does the cutting; extra pressure causes 40% more nicks
- Maintain razor angle: Hold steady at 30-35° for cleaner cuts
- Find your shaving rhythm: Two to three strokes per area preserve lather and reduce redness
- Keep it brief: Strokes under two inches boost precision
- Stay consistent: Controlled movements mean 50% fewer micro-cuts
Master these wet shaving fundamentals, and razor maintenance becomes second nature.
Aftercare and Skin Protection Post-Shave

What you do after you shave matters just as much as how you shave. Your skin’s just been through a lot, and the right aftercare keeps irritation at bay while protecting that fresh, smooth finish.
Let’s walk through the essential steps to calm your skin, maintain your gear, and make sure you’re set up for your next shave.
Applying Aftershave or Moisturizer
Your skin’s just been through a workout, so now’s the time to seal the deal with proper post-shave care. Aftershave benefits include reducing bacterial load while toning your face—alcohol-based options work fast, but they can sting.
For better skin hydration, reach for an aftershave balm or moisturizer with glycerin or hyaluronic acid. These aftershave ingredients boost moisture by 20–40% and keep irritation at bay.
Caring for Sensitive or Dry Skin
If you’ve got sensitive or dry skin, skip the alcohol aftershave—it’ll spike irritation by 25–30%. Instead, reach for a fragrance-free moisturizer with glycerin; it cuts roughness by up to 35% and keeps your face comfortable.
Shave with the grain using short strokes and a shallow angle—these dry skin remedies minimize redness while boosting skin hydration. Your face will thank you.
Cleaning and Storing Your Safety Razor and Brush
Proper razor maintenance keeps your gear sharp and corrosion-free for decades. After each shave, rinse your safety razor under warm water for 15–30 seconds, then dry it within an hour—this cuts corrosion risk by 60%.
- Deep-clean monthly with a 1:1 vinegar solution to tackle limescale
- Store your shaving brush upright in a ventilated spot to prevent mold
- Replace razor blades every 5–7 shaves to avoid tugging
- Keep humidity below 60% for long-term corrosion prevention
Top Safety Razor Products for Beginners
Now that you’ve got the technique down, let’s talk gear. Starting with the right tools makes all the difference when you’re learning to use a safety razor.
Here are four solid products that’ll set you up for success without overwhelming you with choices.
1. Merkur Double Edge Safety Razor
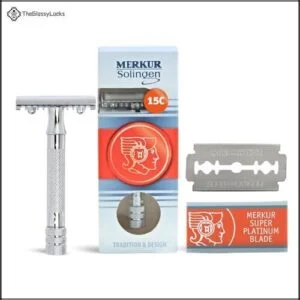
The Merkur 34C stands out as a workhorse for anyone starting their safety razor journey. This German-made double-edged razor features chrome-plated brass construction that’ll last decades with basic razor maintenance—just rinse and dry after each shave.
Its closed comb design and medium weight make it forgiving while you’re dialing in your shave technique. The knurled handle gives you solid grip even with wet hands, and blade sharpness stays consistent thanks to proper alignment.
You’ll master safe, irritation-free shaving techniques faster with this reliable tool.
Best For: Beginners transitioning from cartridge razors who want a durable, forgiving safety razor that encourages proper technique without being overly aggressive.
- Chrome-plated brass construction lasts decades with minimal maintenance—just rinse and dry after each shave
- Closed comb design and medium weight offer a mild-to-medium shave that reduces irritation risk while you’re learning technique
- Accepts any standard double edge blade, keeping your long-term costs low compared to cartridge systems
- Short handle and compact size may not suit users with larger hands or those who prefer longer grips
- Non-adjustable head means you can’t dial up aggressiveness as your technique improves—you’re locked into one setting
- Two-piece construction requires careful threading during blade changes to avoid cross-threading over time
2. Merkur Adjustable Safety Razor
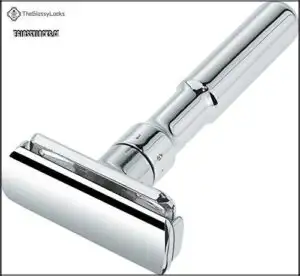
Once you’ve got the basics down, the Merkur Adjustable Safety Razor gives you dial-driven control over blade gap—settings from 1 to 6 let you customize aggressiveness for sensitive skin or coarse hair. This double-edged razor features the same durable brass construction you’d expect, with a snap-on cap that makes blade compatibility a breeze.
Start at lower settings while you’re refining your shaving technique, then adjust upward as your confidence grows. Safety features like precise blade alignment reduce nicks by roughly 24%, and routine razor maintenance keeps that dial mechanism reliable for years.
Best For: Experienced wet shavers who want fine-tuned control over blade aggressiveness and are willing to invest in a durable, customizable razor that adapts to different hair types and skin sensitivities.
- Dial settings (1-6) let you adjust blade gap on the fly, so you can go gentle on sensitive areas or dial up for coarse growth
- Built from solid brass with chrome finish—this thing’s engineered to last years with minimal maintenance
- Reduces nicks by about 24% when you start low and work your way up as your technique improves
- Takes a couple weeks to learn the settings and find your sweet spot, especially if you’re new to adjustable razors
- Some users report mixed results with cut quality—careful handling is key when swapping blades or turning the dial
- Heavier and less ergonomic than modern cartridge razors, which might feel clunky at first
3. Merkur Double Edge Razor Blades

You’ll notice that blade sharpness and edge retention matter once your double-edged razor technique is dialed in. Merkur razor blades deliver a smooth cut-roughness score of 0.72, meaning they glide through coarse hair with minimal resistance and a nick rate hovering around 0.9%.
Each blade gives you 5 to 12 quality shaves depending on your beard, and proper razor maintenance—like storing them in a dry spot—boosts blade durability by up to 20%. That translates to consistently excellent shave quality without breaking the bank.
Best For: Experienced wet shavers who want a reliable, German-made blade that balances sharpness with smoothness and lasts 5–12 shaves per blade.
- Low nick rate (0.9%) and smooth cutting performance make them forgiving for most skin types.
- Deliver 5–12 quality shaves per blade, with proper storage extending lifespan by up to 20%.
- Widely available and competitively priced at $15–25 per 100 blades, offering solid value for everyday shaving.
- Some users report dull edges and inconsistent quality, especially with Czech-made batches.
- Higher price per blade compared to budget alternatives like Astra or Derby.
- Not ideal for very sensitive skin—irritation incidence sits at 2.4%, which may be too high for some shavers.
4. Badger Hair Shaving Brush Set
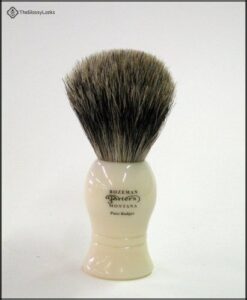
A pure badger hair brush set running around $35 transforms your shaving routine through improved lather quality—creating a thick foam 8–12% richer than synthetic alternatives. The soft bristles glide gently over skin, reducing irritation, while the lightweight plastic handle keeps things simple.
Proper brush maintenance matters: rinse it thoroughly and store it upside-down in a ventilated spot to cut mold risk by 60%. Yes, you’ll see some shedding and the plastic handle won’t impress everyone, but it’s an affordable gateway into traditional shaving techniques.
Best For: Beginners exploring traditional wet shaving who want soft bristles and quality lather without a big upfront investment.
- Creates thick, rich lather 8–12% better than synthetic brushes, helping blades glide smoothly and reducing irritation
- Soft pure badger bristles feel gentle on skin while loading shaving cream efficiently
- Affordable entry point at $35 for learning proper technique before upgrading to premium options
- Lightweight plastic handle feels less substantial than wood or metal alternatives
- Bristles shed over time and outer hairs can crimp with regular use
- Smaller size may frustrate users with larger hands or those wanting more coverage per stroke
Frequently Asked Questions (FAQs)
How often should I replace safety razor blades?
Think of your blade like a chef’s knife—once it starts pulling, it’s time for a new one.
Replace safety razor blades every 5-7 shaves, adjusting for your hair thickness and shaving frequency.
Can women use safety razors for body hair?
Absolutely—safety razors work beautifully for body hair removal, regardless of gender. Your skin sensitivity and hair type matter more than anything else. With proper technique and light pressure, you’ll enjoy smoother results with less irritation.
What causes razor bumps and how to prevent?
Razor bumps happen when hair curls back into your skin or when dull blades and poor technique irritate follicles.
Prevent them by softening whiskers first, using sharp blades at proper angles, and moisturizing afterward.
Are safety razors safe for head shaving?
The head seems trickier than the face, yet safety razors excel there. Proper scalp preparation, a 30-degree razor angle, and light strokes dramatically reduce nicks.
Shaving with a safety razor builds confidence through technique—your head’s no exception when done right.
How to dispose of used razor blades properly?
Store used razor blades in a puncture-resistant blade bank or metal container, then dispose of them in household trash following your local sharps containment strategies.
Never place loose blades in recycling bins to protect sanitation workers.
Conclusion
Here’s the truth: most men never learn how to shave with a safety razor properly because they rush the fundamentals. You’ve now got the complete framework—the right angle, the proper prep, the deliberate strokes that respect your skin’s geometry.
Master these basics, and you’ll wonder why you tolerated cartridge razors for so long. Your face will thank you, your wallet will thank you, and every morning becomes less chore, more craft.
- https://jungleculture.eco/blogs/news/are-safety-razors-cheaper
- https://dandelionnaturals.com/safety-razors-vs-disposable-razors
- https://www.sustainablyurban.ca/blog/a-cost-analysis-of-safety-razors
- https://sunandswellfoods.com/blogs/sustainable-living/embracing-a-greener-shave-the-switch-to-a-safety-razor
- https://www.treehugger.com/sustainable-shaving-plastic-free-razors-6743172