This site is supported by our readers. We may earn a commission, at no cost to you, if you purchase through links.
 Pamper your precious locks with the perfect blow-drying technique for sleek, straight hair. Whether you’ve got wavy curls or bouncy waves, it’s easier than ever to learn how to straighten hair with a blow dryer.
With these step-by-step instructions and our favorite products and tools in hand, you can master the art of heat styling without compromising on health or shine.
First things first: choose quality products that are specifically designed for taming frizz and protecting against heat damage.
To ensure an even smoother finish before drying, use a wide tooth comb to brush out any knots after blotting away excess moisture from towel drying post showering session.
Finally, grab an ionic hairdryer equipped with multiple temperature settings plus adjustable airflow levels.
Table Of Contents
- Key Takeaways
- Step-by-Step Guide to Straighten Hair With a Blow-Dryer
- How to Properly Wash and Condition Hair Before Blow-Drying
- The Importance of Detangling Hair Before Blow-Drying
- Sectioning Hair for Effective Blow-Drying
- Choosing the Right Brush and Blow Dryer for Straightening
- Benefits of Using the Cold Air Setting on a Blow Dryer
- Top 3 Blow Dryers for Hair Straightening
- Blow Dryer Vs. Hair Straightener: Which One is Better for Straightening?
- Debunking the Myth: Does Blow-Drying Straighten Hair Damage It?
- Why You Can Trust Our Expertise in Hair Care and Styling
- Conclusion
Key Takeaways
- Start with Suave Professionals Keratin Infusion Smoothing Shampoo and Conditioner.
- Use quality frizz-taming and heat-protecting products.
- Divide hair into manageable sections using clips.
- Use a round brush to brush and blow-dry hair, starting at the roots and working towards the tips.
Step-by-Step Guide to Straighten Hair With a Blow-Dryer
Are you looking for a step-by-step guide to straighten your hair with a blow dryer? Look no further! This guide will walk you through the process, from washing and conditioning your hair to applying finishing products.
First, wash and condition your hair with products designed for smooth styling.
Next, apply heat protectant before dividing it into sections. You can use clips if needed.
Thirdly, brush each section while blow drying from roots to ends using the medium heat setting on the dryer angled downwards.
Finally, add any desired finishing product like gel or hairspray for hold. Now, enjoy the results of beautiful sleek locks!
Step 1: Wash and Condition Hair
Start off by giving your locks a luxurious wash and condition with keratin-infused products for maximum protection against heat damage. Consider your hair type when choosing the right shampoo and conditioner to ensure you get the best results.
Be sure to rinse thoroughly so that no product residue is left behind, which can lead to frizz or dryness.
Once out of the shower, apply leave-in conditioner on damp hair before blow-drying for added moisture and shine while protecting it from hot temperatures.
Step 2: Apply a Heat Protectant
Next, apply a heat protectant product from roots to tips before blow-drying your hair for up to 75% less frizz. Heat protectants are essential in keeping your hair healthy while styling with hot tools.
- Use the best products: Choose a high-quality brand that is specifically designed for heat protection and won’t damage the integrity of your hair.
- Apply correctly: Start at the roots and brush it down towards ends where most of the damage occurs.
- Know its benefits: Protectants form an invisible barrier between wet strands and heated tools, reducing breakage due to friction or moisture loss due to over-heating.
- Avoid mistakes: Don’t skip this step! Too much product will weigh down locks, but not enough won’t provide adequate protection either, so find balance when applying heat protectant onto damp tresses.
- Get creative: Experiment by mixing different types together like oil plus cream or serum plus mousse; these combinations can help enhance shine further too!
With these simple steps, you’ll be able to ensure shiny straight locks without sacrificing any healthiness along the way!
Step 3: Divide Hair Into Sections
Divide your hair into manageable sections with a rat-tail comb for easier straightening. Use clips to secure each section and create even, consistent parts. Start at the front of the head and work towards the back when blow drying or styling with a straightener.
Consider starting from one side of your part line and working down in rows or using diagonal parting techniques to give volume while you’re sectioning out segments for efficient styling segmentation.
When it comes to blowing out curly hair, adjust settings on your dryer according to thickness so that the heat isn’t too high or low – setting it too hot can cause damage! Keep fingers close together as if holding an ice cream cone while using a downward motion over each section until the desired smoothness is achieved.
Step 4: Brush and Blow Dry
Using a round brush and your blow dryer with the concentrator nozzle, angle it downwards as you move from roots to ends. Brush each section of hair while simultaneously drying – this will ensure an even distribution of heat.
Start at the root and slowly work down towards the tips for maximum efficiency. Avoid using high-heat settings on damp or wet hair, as this can lead to damaging frizzing; instead, use medium settings for the best results in straightening natural hair without damage.
Ensure that all sections are completely dry before moving onto styling products such as anti-frizz serum or argan oil for added shine and protection against humidity!
Step 5: Use Cold Air Setting
Finally, use the cold air setting to lock in moisture and help set your style for a long-lasting result. Cold air helps prevent frizz and keeps hair looking smooth and straight. Make sure to section off your hair before blow-drying for optimal styling techniques.
This will also reduce heat damage from using too much hot air on one area at once. Blasting with cold air after each section is complete can seal cuticles down for an extra layer of frizz control.
Step 6: Apply Finishing Products
Finish off your style with finishing products like hairspray or gel to keep it looking sleek and smooth. For enhancing shine, frizz prevention, and that extra styling touch, consider product selection such as a shine serum or oil-based straightening cream.
Apply the product evenly from roots to ends for the best results. When selecting products, always look for those labeled for heat protection if blow-drying is part of your hair straightening routine.
How to Properly Wash and Condition Hair Before Blow-Drying
Before blow-drying, it’s important to start with properly washed and conditioned hair.
- Shampoo your hair first, using products designed for straightening natural hair. Avoid excess product buildup on the scalp or strands.
- Keep the water temperature warm but not hot to prevent damage from extreme temperatures. Use a leave-in conditioner after shampooing if desired for added moisture protection during styling.
- Use a microfiber cloth or towel to lightly blot the dampness out of your locks before detangling them with a wide-tooth comb.
- Apply any additional heat protectant oils/serums as needed before starting blow drying.
The Importance of Detangling Hair Before Blow-Drying
Gently detangle your locks with a wide-toothed comb before blow-drying for a smooth and silky finish. Taking the time to properly detangle hair is essential in preventing breakage, as this will make sure that each strand of hair is separated from other strands.
This can be done either when wet or dry, but it’s best to do it on damp hair prior to applying heat protectant products like serums or oils. Investing in quality detangling tools, such as bristle brushes and combs made specifically for natural hair types, will also help ensure that no damage occurs while styling.
Detangling techniques include using the praying hands method, which reduces tension on the scalp; finger-combing, which helps reduce friction between fingers and strands; and twisting sections of curls into loose coils, then unraveling them with care afterwards.
Following these steps routinely ensures healthy straightening results without damaging fragile tresses!
Sectioning Hair for Effective Blow-Drying
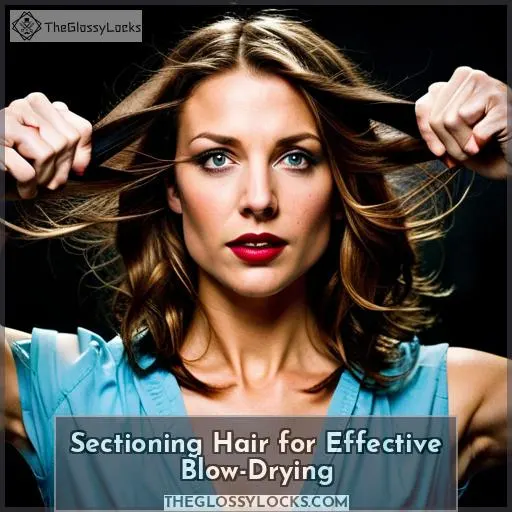
Divide your hair into sections for efficient styling with a blow dryer. Properly partitioning your hair will help ensure even heat distribution, resulting in quick and perfect drying. Use a rat-tail comb to create thin hair sections and secure thick ones with clips so you can easily manage them while blow-drying.
When using the technique of sectioning, start from the back of the head first. This is where most people have thicker or more unruly strands of hair. Work on one section at a time. Use an appropriate size brush along with your chosen heat setting from root to tip until it’s completely dry.
The key takeaway here is that proper sectioning helps make sure that all parts of your tresses get equal attention when utilizing any type of blow-drying technique.
Choosing the Right Brush and Blow Dryer for Straightening
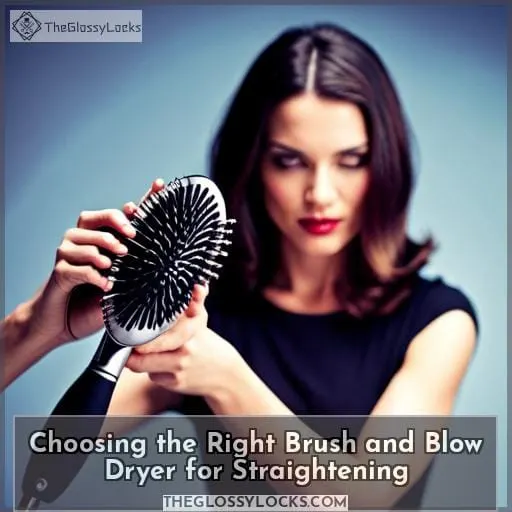
To achieve the best results, choose a hair dryer and brush that are tailored to your hair type. For type 2 textures, look for professional dryers with ionic technology and ceramic round shafts.
Best brushes come equipped with heat protectants like boar bristles or nylon bristles – both of which help reduce damage from extreme temperatures while styling. Heat settings should be adjusted according to your needs. Using too high of a temperature can lead to frizzing and breakage in delicate strands.
A wide-toothed comb attachment is also helpful when sectioning off sections before blow drying.
Lastly, use finishing products such as gel or hairspray for hold after straightening if desired. Just be careful not to overuse them as they could potentially weigh down the style or add unnecessary product buildup on the scalp over time.
With these tips in mind, choosing the right brush and blow dryer will get you well on your way towards achieving perfectly sleek locks every time!
Benefits of Using the Cold Air Setting on a Blow Dryer
Setting the cold air on your blow dryer is a great way to lock in your style and prevent frizz. Using the cold air setting helps seal cuticles, which prevents damage from heat styling. Additionally, it will help give you smoother results with fewer flyaways or unruly strands.
The colder temperature also works better for certain hair textures that are prone to frizz and can make them easier to manage without too much heat exposure.
It’s a great way of getting creative with hairstyles while still protecting hair from any potential damage caused by excess heating elements found in other tools like flat irons or curlers.
Top 3 Blow Dryers for Hair Straightening
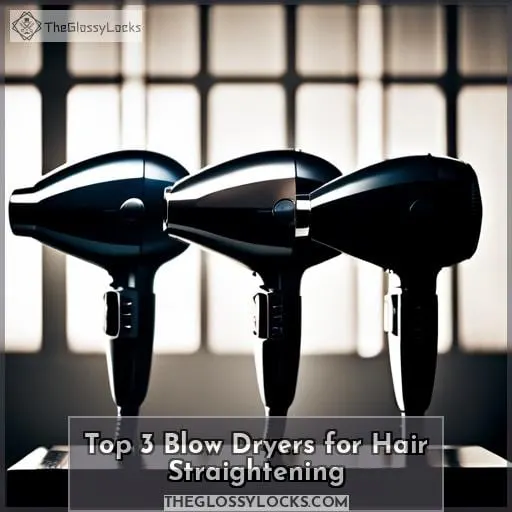
Straightening your hair can be an intimidating task, but it doesn’t have to be! With the right blow dryer, you can achieve amazing results. The Revlon Hair Dryer Shiny Smooth, Hair Dryer 1875W Negative Ionic, and INFINITIPRO CONAIR are some of the top-rated blow dryers for straightening natural hair that offer powerful drying performance with features like Tourmaline Ion Technology and Ceramic Coating.
1. Revlon Hair Dryer Shiny Smooth
Try the Revlon Hair Dryer Shiny Smooth for salon-quality styling that will leave your hair looking shiny and smooth – just like a professional stylist! It features Tourmaline Ionic Technology to reduce frizz, Ceramic coating, 1875W of drying power, 2 heat/speed settings, and a Cold Shot Button.
With precision attachments such as a Concentrator and a volumizing finger diffuser, it’s perfect for all hair types. The AC motor lasts up to 3X longer than DC motors, offering faster drying with infrared heat generated by ceramic technology.
2. Hair Dryer 1875W Negative Ionic
Experience a professional-grade styling experience with the Kaleep Hair Dryer 1875W Negative Ionic. This dryer features Ceramic Tourmaline ionic technology, which reduces frizz and enhances shine. It includes 3 heat/2 speed settings, a Cool Shot button, and attachments such as a concentrator and diffuser.
The dryer also comes with a comb attachment and safety features like overheat protection and an ALCI plug.
- Reduce Frizz & Enhance Shine
- Faster Drying Time
- Styling Attachments
- Safety Features
- User Experience
Users love the lightweight design of this blow dryer, which makes it easy to maneuver when straightening their hair.
3. INFINITIPRO CONAIR Hair Dryer
For professional performance and smooth, shiny hair, the INFINITIPRO CONAIR Hair Dryer is a great choice. It boasts up to 75% less frizz with its ionic technology. This dryer has 3 heat and 2 speed settings, as well as a Cool Shot button for locking styles.
It also features Ceramic Tourmaline ionic technology, which reduces moisture loss while styling at home.
Users have praised its powerful motor, lightweight design, and heavy-duty feel. They also appreciate the variable power/heat settings and long cord.
Blow Dryer Vs. Hair Straightener: Which One is Better for Straightening?
Discover the difference between a blow dryer and hair straightener, and find out which one is better for achieving your desired hairstyle.
Blow dryers add volume to styles while also providing gentle heat compared to flat irons. On the other hand, hair straighteners offer precise styling results with higher temperatures that can cause damage if not used correctly.
Consider both pros and cons when determining which tool is best for you. Understanding their respective techniques will help ensure healthier-looking locks and save time during styling sessions.
While blow drying provides faster results with less stress on strands than using a flat iron or curling wand, it’s important to use appropriate products like heat protectants before brushing through dampened tresses.
Additionally, setting the temperature at medium levels helps reduce potential harm from too much exposure of direct high-heat sources onto delicate strands. This is especially important for African American women who tend to have thicker textures than other ethnicities.
Lastly, consider adding an anti-frizz serum or argan oil post styling session once all sections are completely dried off.
Debunking the Myth: Does Blow-Drying Straighten Hair Damage It?
You may have heard that blow-drying straightens hair, but does it really damage it? There are many misconceptions surrounding the safety of heat styling. While there is some potential for damage to occur with prolonged exposure to high temperatures, blow-drying can be a great way to achieve smooth and sleek locks without causing too much harm.
Here’s what you need to know about using a blow dryer:
- Start by washing your hair with quality shampoo and conditioner specifically designed for your hair texture.
- Apply a leave-in conditioner or styling gel before drying.
- Use the lowest setting possible on the dryer while keeping an attachment (like a comb or diffuser) at least 6 inches away from the scalp. This will prevent any weakened cuticles, which could lead to further issues down the line.
With these few steps in mind, you can safely use your blow dryer regularly without worrying about damaging your tresses!
Why You Can Trust Our Expertise in Hair Care and Styling
With a Cosmetology degree and years of experience in hair care, you can trust us to deliver expert advice on styling your locks with the blow dryer! Our articles are reviewed by medical professionals for accuracy and expertise.
We use luxury cushion brushes with tourmaline-enhanced bristles that help protect strands from damage while curling or straightening. Additionally, our professional knowledge helps guide users through selecting the right styling tools and products for their individual needs without compromising the health or quality of their hair.
To ensure optimal results, we also suggest avoiding split ends due to overstyling or incorrect techniques, which may lead to permanent damage.
Conclusion
Blow drying your hair is a great way to achieve a sleek and straight look without using a flat iron. You can transform your natural hair into a smoother, more polished version with the right tools and products.
Start by washing and conditioning your hair using the correct techniques. Use a shampoo and conditioner that are suitable for your hair type.
Apply a heat protectant spray or serum to your damp hair. This will help protect your hair from heat damage caused by the blow dryer.
Next, divide your hair into sections. This will make it easier to dry and straighten each section individually.
Choose a blow dryer with a concentrator nozzle. This attachment helps to direct the airflow and focus it on specific sections of your hair.
Starting with the bottom sections, use a round brush to guide the airflow from the blow dryer down the length of your hair. Hold the brush and blow dryer underneath the section of hair, and slowly move them down towards the ends.
Repeat this process for each section of hair, working your way up towards the top.
As you dry each section, use the brush to pull the hair taut and create tension. This will help to straighten your hair and reduce frizz. Continue drying and straightening each section until your hair is completely dry.
Once your hair is dry, you can use a flat iron or straightening brush to further enhance the straightness and smoothness of your hair.
Remember to always use a heat protectant and avoid excessive heat to prevent damage to your hair.
With the right blow dryer, techniques, and products, you can achieve salon-quality results and straighten your hair without causing damage.

