This site is supported by our readers. We may earn a commission, at no cost to you, if you purchase through links. This content is for general informational and educational purposes only and is not a substitute for professional medical, dermatological, or nutritional advice.
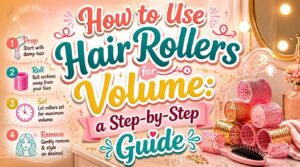
Remember hot rollers your grandma swore by? Turns out she was onto something big—literally. That bouncy, root-lifted volume you’ve been chasing with mousse and dry shampoo alone? Rollers do it better, and they don’t fry your hair in the process.
Here’s the secret: it’s not just about tossing your hair up in curlers and hoping for the best. Roller size, placement, and timing all decide whether you walk out with flat, sad strands or salon-worthy lift that lasts all day.
Grab your rollers, and let’s get your hair standing at attention.
Table Of Contents
- Key Takeaways
- Choose The Best Hair Rollers for Volume
- How to Use Hair Rollers for Volume
- Prep and Section Hair Before Rolling
- Set, Cool, and Remove Rollers Correctly
- Make Roller Volume Last Longer
- Frequently Asked Questions (FAQs)
- Do you put rollers in wet or dry hair for volume?
- Which way to roll curlers for volume?
- How do you use hair rollers for beginners?
- Should I roll my rollers inwards or outwards?
- How do hair rollers work?
- How to place hot rollers for volume in medium hair?
- How do you use a Velcro hair roller?
- What size hair roller should I use?
- Do hair rollers cause damage?
- What’s the difference between a hot roller and a velcro roller?
- Conclusion
Key Takeaways
- Choosing the right roller size (small for roots, medium for body, large for bounce) and matching it to your hair length and texture determines whether you get flat results or salon-worthy volume.
- Proper technique—rolling away from your face, sectioning slightly damp hair, and applying even tension—creates lasting lift without heat damage.
- Letting rollers fully cool before removal is essential, since warm hair produces loose curls while cooled hair locks in shape and reduces frizz.
- You can extend your volume for days by backcombing flat roots, refreshing with dry shampoo, avoiding heavy root products, and protecting your style overnight with a silk pillowcase or bonnet.
Choose The Best Hair Rollers for Volume

Not all rollers are created equal, and picking the wrong one can leave you flat (literally). The right choice comes down to your hair type, length, and how much lift you’re after. Let’s break down your options so you can find the perfect match.
If you’re aiming for that smooth, voluminous look, larger velcro rollers mimic the bouncy finish of a Dominican blowout without the extra heat damage.
Velcro Rollers for Lift
Ever wonder how celebs get that gravity-defying root lift? Velcro rollers are the secret. Those tiny hooks grip hair (no clips needed!) for gentle, even tension.
Section slightly damp hair, place rollers at your crown for maximum lift, and let cooling completely lock in the shape. Trust me—your roots will thank you. For best results, try the root volume strategy to boost lift at the crown.
Large Rollers for Bounce
Now that your roots are lifted, let’s talk bounce. Large rollers (1.5-2.5 inches) create that swingy, voluminous movement at the ends.
Section hair to match roller diameter, roll away from your face, and cool completely before removing. Finger-style afterward for soft, natural waves—no brush needed! Mid to long hair gets the biggest lift here, trust me.
Medium Rollers for Body
Big waves are great, but what about that in-between fullness—body without going full-on beachy? That’s where medium rollers (around 1 inch) come in.
They boost mid-shaft volume, not just roots or ends, smoothing flat spots along the sides. Section hair to match roller width, place horizontally, and roll end-to-root. Air-dry or blow-dry on low heat—both work great for lasting, natural body!
Small Rollers for Roots
Flat crown, sad volume—we’ve all been there. Small rollers (think 1/8 to 1/4 inch) tackle root lift head-on, pushing hair up right where it grows.
Section thin, place parallel to your scalp, and roll away from your face. Foam or velvet-covered ones grip best without snagging. Leave them in fully, then unroll gently—you’ll get that bouncy crown volume boost without any bulk!
Roller Size by Hair Length
Not all hair is created equal, so your roller size should match your length and texture, not just what’s in the pack.
Short hair roller sizing calls for smaller barrels for control. Long hair roller size needs bigger ones (50-65mm) for waves without losing length. Medium hair rollers (35-45mm) build fullness fast. Fine hair volume rollers stay small for lift. Thick hair roller choice? Go large, section generously, and don’t skimp!
How to Use Hair Rollers for Volume
Alright, you picked your rollers, now let’s get them working for you. This part is really just five simple moves, and once you know them, you’ll never blow-dry the same way again. Here’s exactly how to roll like you know what you’re doing.
Start With Damp Hair
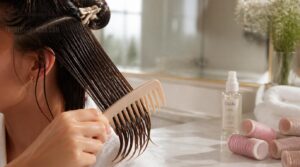
Ever tried rolling bone-dry hair? It slips right off, no grip, no shape. That’s why slightly damp hair is your starting line—damp strands hold curl and take products better than wet or dry ones.
Once you’ve got that damp texture down, timing becomes the next variable to nail—check out this breakdown of perm processing times by hair type and length before you start.
Gently detangle first, working ends to roots, then section damp hair into clean parts. A light leave-in helps rollers glide without snagging or stretching fragile strands.
Apply Root-Boosting Spray
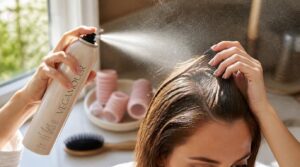
Grab your root-boosting spray and shake it well—those active ingredients settle fast! Hold the can six to eight inches from your scalp and mist the crown zone, where lift matters most.
This lightweight formula won’t weigh you down, and it fights humidity too. Give it a few seconds to set before rolling—trust me, that little pause makes your root lift technique actually stick.
Roll Away From Face

Here’s the golden rule: rolling away from your face is what gives you that lifted, bouncy look instead of a flat, pancaked mess.
Start at your hairline and roll upward and back, following your head’s natural curve. This creates gorgeous crown lift and shapes soft side volume, too—no flat spots, no weird dents near your cheeks!
Keep Tension Even
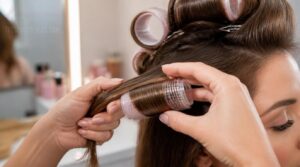
Tension is everything here—too tight and you’ll dent your hair, too loose and your curl falls flat before you even get started.
Wrap each section with even, steady pressure, matching hair width to roller size as you go. Don’t yank, don’t rush—keep a consistent wrap speed. Pause and check: does one side look tighter than the other? Even tension means even, balanced scalp lift all around.
Let Hair Fully Set

Patience pays off—rolling is only half the job, and rushing the finish undoes all that hard work.
Give hair 20 to 60 minutes to set (thickness and humidity decide where you land), then let it cool completely before touching a single roller. That cooling process locks in shape, blocks heat escape, and seriously cuts down frizz. Skip ahead, and you’ll lose your volume before it even had a chance.
Prep and Section Hair Before Rolling

Before you touch a single roller, your hair needs a little groundwork first. Think of it like setting up dominoes – skip a step and the whole style can fall flat. Here’s exactly how to get your hair prepped and sectioned right.
Detangle to Prevent Breakage
Before any roller touches your hair, you’ve got to smooth out those knots — trust me, rolling over a tangle is a recipe for breakage.
Work section by section with a wide tooth comb, starting at the ends and easing upward with gentle tension. Add a slip spray if hair feels stubborn.
Smooth, detangled strands mean better grip and way less damage once you start rolling!
Divide Crown and Sides
Grab your tail comb and part hair from ear to ear, separating the crown from the sides. This clean line matters — it’s how you control lift up top while keeping the sides smooth.
Clip each zone separately so nothing slips mid-roll.
Divide the hair this way and you’ll section faster, tangle less, and get maximum lift exactly where you want it!
Match Sections to Rollers
Now that your zones are split, it’s time to play matchmaker between hair and rollers.
Your crown section wants mid-size rollers for even lift, while temple areas and side panels do better with smaller diameters — trust me, bulk near your face is nobody’s friend. Nape sections pair well with larger rollers for that soft, swoopy finish.
Keep section width consistent with your roller size — it’s the secret to salon-smooth results!
Clip Hair Cleanly Apart
Once your sections are sized right, keeping them apart is the next battle. Loose hair sneaking back into a finished section ruins your lift before you even pick up a roller.
Here’s your clip cheat sheet:
- Detangle first to stop snagging
- Place clips close to the scalp at a slight angle for secure grip
- Keep parting lines clean and straight
Add Heat Protectant
Skipping this step is like skipping sunscreen before a beach day — you might get away with it, but why risk it? If you’re using any heat during your set, spritz on a heat protectant first. It forms a protective film that shields your strands, handling temps up to 450°F while boosting shine and cutting breakage.
Set, Cool, and Remove Rollers Correctly
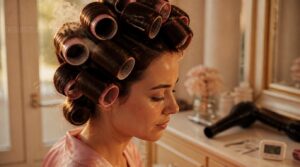
You’ve rolled your hair up perfectly, so don’t blow it now by rushing the finish! This part is all about patience – and trust me, it makes or breaks your volume. Here’s exactly how to set, cool, and unroll like you know what you’re doing.
Heat Versus Air-Drying
Heat or air—which wins? Truthfully, both work, but they serve different moods.
Heat drying speeds things up big time using a blow-dryer, perfect when you’re in a rush. Air drying takes longer, sure, but it’s gentler on damp hair, giving you that dreamy heatless curls vibe.
Want max root lift with minimal energy use? Air dry when you can—your hair (and your electric bill) will thank you!
Ideal Roller Setting Time
So how long should those rollers actually stay in? It depends on your hair type and roller size.
Fine hair sets in 30-60 minutes, coarse hair wants 90 minutes to 2 hours, and small rollers work faster than jumbo ones.
Using heat? You’re looking at just 10-20 minutes. Air-drying? Give it 2-4 hours, or overnight for maximum hold!
Cool Before Removing
Patience pays off here — rushing this step is how a great roller set turns into a flat, frizzy mess.
Let hair cool completely before touching those rollers. Warm hair means loose curls, plain and simple.
Try the touch test: hair should feel cool, not warm, all the way through. No cool air handy? A low fan speeds things up without messing with your shape.
Unroll Without Pulling
Ready to unroll? Go slow — this isn’t a race.
- Unwind 1-2 turns at a time
- Guide with your other hand, no twisting
- Follow your hair’s natural growth direction
- Ease tension gradually near the scalp
Never yank a roller straight out. Gentle unwind techniques protect those root-friendly curls you just built, keeping your set smooth, bouncy, and totally frizz-free.
Finger-Style for Volume
Fingers are your final volume tool, not just for unrolling. Once rollers are out, don’t grab a brush — that flattens everything you just built.
Use fingertips to gently lift and separate curls at the roots, working section by section the same way you sectioned before rolling. This finger-styling technique preserves lift, shapes waves naturally, and keeps that bounce exactly where you want it.
Make Roller Volume Last Longer

So you’ve got gorgeous volume now, but here’s the thing nobody tells you: it won’t stick around forever on its own. Life happens, hats happen, pillows happen, and that lift starts to fade by afternoon. Here are the tricks that’ll keep your roots standing tall for days, not hours.
Backcomb Flat Roots
Some mornings, your crown just gives up. That’s when backcombing saves the day — grab a fine comb, tease small sections at the scalp in short strokes toward the roots (never all the way to the ends), and you’ll create instant lift.
Smooth the top layer over your hidden backcombing for a natural finish, then mist with light hold spray. Volume, restored!
Refresh With Dry Shampoo
Backcombing gets you through the morning, but dry shampoo is your secret weapon for the whole week. Spray it 6 inches from your scalp in short bursts — oil absorption happens fast, roots lift instantly, and that matte texture holds your curl pattern longer.
- Spritz roots, wait 2-3 minutes
- Work in with fingers for powders
- Rotate formulas to avoid buildup
- Skip if scalp’s irritated
Re-Roll Crown Sections
Dry shampoo runs out of steam by dinner, but a quick crown lift refresh brings it right back.
Grab two small rollers, section a mini triangle at the crown, and roll away from the face with even tension. Cool completely before removing, finger-comb, and finish with a light hold mist for max lift.
Avoid Heavy Root Products
Here’s the truth: heavy root products cancel out all your roller work. Rich creams, oils, and silicone-based serums press down at the scalp, flattening the very lift you just created.
Heavy root products cancel out your roller work, flattening the very lift you just created
Instead, reach for mousse, lightweight root sprays, or clear gels—they add texture without residue. Apply to mid-lengths only, let everything dry before rolling, and your roots stay buoyant all day.
Protect Hair Overnight
Rarely do people realize your pillowcase matters as much as your rollers. Swap cotton for silk pillow protection—it cuts friction, locks in moisture, and keeps volume intact.
- Loose braid or pineapple style
- Silk bonnet or scarf
- Light leave-in serum on ends
These protective night styles paired with overnight treatments mean you wake up with bouncy, heatfree styling still holding strong.
Frequently Asked Questions (FAQs)
Do you put rollers in wet or dry hair for volume?
Go with slightly damp hair for velcro rollers—about 75% dry gives grip without slipping. Fully wet hair slips and stretches drying time, while damp strands mold nicely, setting shape and lasting volume as they cool completely.
Which way to roll curlers for volume?
Always roll away from the face, starting scalp-to-ends for even tension.
This opens up your features and boosts crown lift, while an outward diagonal roll direction keeps volume balanced instead of bunching it awkwardly along your hairline!
How do you use hair rollers for beginners?
Start with damp, detangled hair, not dry. Section with clips, then roll hair gently from ends to roots, starting at nape, rolling away from face. Avoid tight tension, secure snugly, and cool before removal — patience locks in real volume!
Should I roll my rollers inwards or outwards?
Think of your roller like a compass needle, pointing the direction your volume flows.
Roll inward toward your scalp for crown lift and root tension balance; roll outward for ends volume boost and mid-shaft fullness—mixing both, always rolling away from your face, gives the fullest results.
How do hair rollers work?
It’s all about tension and curl formation — rollers grip strands, hold sections in a curved shape while heat or moisture sets, and once cooled, hair "remembers" that bend. Bigger diameters mean bigger volume, smaller ones mean tighter lift!
How to place hot rollers for volume in medium hair?
Big-bounce magic starts at the crown—place crown roller placement horizontally, roll away from your face, and work down in rows. Section hair evenly, matching width to roller size, then hold heat briefly for lasting hair volume boost.
How do you use a Velcro hair roller?
Grab damp, sectioned hair matching roller width, spritz roots first, then roll toward your scalp with even grip. Clip if it slips, let it set 20 minutes, cool completely, then unroll gently—no yanking, no flat volume!
What size hair roller should I use?
Size isn’t just detail — it’s basically your whole style, decided in one choice! Match roller size to hair texture and length: large for thick, long hair; small for fine strands or crown volume; medium keeps things balanced everywhere else.
Do hair rollers cause damage?
Rollers themselves won’t hurt you—it’s tight tension, high heat, or skipping heat protectant that causes trouble. Roll gently, choose satin or velcro over metal, and always cool hair fully before removing for healthy, damage-free volume!
What’s the difference between a hot roller and a velcro roller?
The fastest way to slow down is with heat. Hot rollers deliver quick curl definition and shorter styling time but carry more damage risk; velcro rollers skip clips and heat, gently boosting volume with longer, safer setting time.
Conclusion
Think rollers take too much time? Imagine this: ten minutes rolling while you brush your teeth, and you’ll unroll gorgeous, bouncy lift that lasts all day. That’s the real magic behind how to use hair rollers for volume—no heat damage, no guesswork, just smart placement and patience.
Your grandma wasn’t old-fashioned; she was ahead of her time. Master the size, the tension, the timing, and rollers become your secret weapon. Trust me, once you feel that bounce, you’ll never go back.