This site is supported by our readers. We may earn a commission, at no cost to you, if you purchase through links.

Salon appointments stack up fast—booking fees, tips, and the occasional last-minute cancellation that leaves you scrambling. Most people don’t realize that waxing your legs at home produces results just as clean as a professional session, provided you follow the right steps.
The gap between a smooth finish and a red, irritated mess usually comes down to three things: prep, technique, and timing. Skip one, and your skin pays for it. Get all three right, and you’ll have silky legs that last three to four weeks without ever leaving your bathroom.
Table Of Contents
- Key Takeaways
- Prep Your Legs for Waxing
- Choose The Right Leg Wax
- Top 7 At-Home Waxing Products
- Non-woven Hair Removal Waxing Strips, 100 Pack (3×9)
- 1. Salon Sundry Portable Electric Wax Warmer
- 2. Revlon High Precision Slant Tweezers
- 3. Cirepil Purifying Blue Wax Cleanser
- 4. MOOM Organic Sugar Wax Hair Removal
- 5. SUGARING PASTE – HARD 1.3kg 45Oz FOR TOUGHEST HAIR (BIKINI, BRAZILIAN, UNDERARMS)
- 6. Flamingo Body Hair Removal Wax Strips
- Wax Your Legs Step-by-Step
- Soothe Skin After Waxing
- Frequently Asked Questions (FAQs)
- Can you wax your legs by yourself?
- Should I wax my legs up or down?
- What kind of wax is best for legs?
- How do you prepare your legs for waxing at home?
- How to wax under legs at home for beginners?
- Is it worth it to wax your legs at home?
- Do you wax your legs before or after a shower?
- How often should I wax my legs?
- Can I wax my legs if pregnant?
- Will waxing my legs cause skin damage?
- Conclusion
Key Takeaways
- Prep makes or breaks your wax — exfoliate 24–48 hours before, trim hair to ¼ inch, cleanse skin of oil, and dust on baby powder so the wax actually grips.
- Match your wax to the job: soft wax covers large leg areas fast, hard wax is gentler on sensitive spots, and sugar wax is the kindest option for reactive skin.
- Technique comes down to two moves — apply in the direction of hair growth, then pull the strip fast, low, and against it while keeping your skin pulled taut.
- After waxing, cool skin with aloe, skip heat and sun for 24 hours, wear loose cotton, and start gentle exfoliation 48 hours later to keep results smooth and ingrown hairs away.
Prep Your Legs for Waxing

Good prep is what separates a smooth wax from a patchy, painful one. Before you heat anything up, your skin needs a little groundwork first. Here’s what to do in the days and hours leading up to your at-home wax.
If wax ends up where it shouldn’t, knowing how to safely remove beeswax from hair can save you a lot of frustration before you even get started.
Good prep is the line between a smooth wax and a painful, patchy one
Exfoliate 24–48 Hours Before
Exfoliating your skin 24 to 48 hours before your wax session is one of the smartest moves you can make. It clears away dead skin cells, giving the wax a clean surface to grip. That gap also lets your skin recover, so you’re not walking into your session already irritated.
Skip the same-day exfoliation — freshly scrubbed skin is reactive, and wax will only intensify that. Keep it gentle, too. A light scrub is all you need to prevent ingrown hairs and get smooth skin that’s actually ready. Be sure to avoid harsh chemical exfoliants to prevent skin damage.
Trim Hair to Proper Length
Once your skin is prepped, it’s time to check your hair. Trim leg hair to ¼ inch — about 6 millimeters — before waxing. That’s the sweet spot where wax grips cleanly without slipping.
Use a body trimmer with a guard or grooming scissors, and comb hair flat first so you cut evenly. Uneven length means patchy results.
Cleanse Oils and Sweat
Once your hair is the right length, clean skin is next. Oil and sweat block wax adhesion, so don’t skip this step.
Use a prewax cleanser or gentle oil cleanser on dry skin, massage for 30–60 seconds, then rinse with lukewarm water. Pat completely dry. If you worked out earlier, shower first to remove sweat, then oil cleanse.
Check for Skin Irritation
Clean skin is ready — but don’t reach for the wax just yet. Run a quick skin irritation check before anything touches your legs.
- Red, flushed patches signal your skin is already reactive
- Itching or burning means the skin barrier is compromised
- Swelling or tenderness near follicles calls for a full skip
Press gently along your leg. Redness assessment comes first — look for blotchy or inflamed areas that look angrier than your normal tone. Then do an itching check: does rubbing the area trigger stinging? That’s a no-wax zone. Finish with dryness inspection — peeling or cracked skin won’t hold up. Spot a blister or open skin? Blisters detection is non-negotiable; waxing over broken skin worsens damage fast.
Apply Powder Before Waxing
Dust a light layer of baby powder over your legs right before waxing. It soaks up excess oil and sweat so the wax grips hair instead of sliding around on slick skin. Sprinkle it on — don’t cake it. If you’re sensitive to talc, cornstarch or arrowroot works just as well.
Choose The Right Leg Wax

Not all waxes work the same way, and picking the wrong one can make the whole process harder than it needs to be. Your skin type, pain tolerance, and the area you’re waxing all play a role in which formula will actually work for you. Here are the five main types to know before you buy anything.
Hard Wax for Sensitive Spots
Hard wax is your best friend for tricky spots like the bikini line, underarms, or behind the knees. Unlike soft wax, it adheres only to hair — not skin — which makes it a smarter pick for sensitive areas.
Many formulas are hypoallergenic and fragrance-free, so reactive skin gets a gentler experience without the redness.
Soft Wax for Larger Areas
Soft wax is the workhorse for large area speed when you wax your legs at home. It spreads in a thin, even layer, grips fine hairs at the root, and pairs with strips for clean removal. Here’s why it’s a staple in any DIY waxing kit:
- Strip compatibility makes coverage fast across wide sections.
- Fine hair removal stays thorough, not patchy.
- Temperature control keeps burn risk low when warmed correctly.
Sugar Wax for Gentle Removal
Sugar wax is basically the gentle giant of your DIY waxing kit. Made from just sugar, water, and lemon juice, it’s as clean as ingredients get.
Pair your sugar wax routine with a sensitive bikini area shaving cream for days when you want a closer finish without sacrificing that same skin-kind approach.
The paste grips hair, not skin, which makes it noticeably kinder on sensitive legs. Cleanup is simple — warm water rinses it right off. No oils, no fuss.
Roll-on Wax Kit Basics
Roll-on wax is the closest thing to a salon setup you can run from your bathroom. The cartridge wax sits inside a warmer, and most systems need about 20 minutes to heat before the consistency is smooth enough to roll cleanly. Once it’s ready, roller application lets you spread a thin, even layer directly onto your leg — no spatula juggling required.
Press your wax strips firmly over the applied wax, then pull fast in the opposite direction of hair growth. Keep the motion low and parallel to the skin. After you’re done, post wax oil lifts any leftover residue without scrubbing.
Pre-made Strip Options
Sometimes the simplest option wins. Pre-made wax strips skip the mess entirely — no warming, no melting, just peel and press. Products like Veet Ready-to-Use Wax Strips and the Sally Hansen Wax Strip Kit come infused with resin or paraffin wax for quick, clean adhesion.
- Ready to use straight from the pack
- Resin formula grips hair fast
- Fragrance-free options reduce irritation
- Packaging lists strip count and target area
- Gentle enough for sensitive skin types
Top 7 At-Home Waxing Products
Having the right products on hand makes the whole process faster, cleaner, and a lot less frustrating. From wax warmers to pre-made strips, a few solid tools can genuinely change your at-home results. Here are seven worth keeping in your kit.
Non-woven Hair Removal Waxing Strips, 100 Pack (3×9)
Good wax strips make or break the whole session. These non-woven, 3×9-inch strips resist tearing under tension and cover large leg areas fast. They’re disposable — one use, tossed. That keeps things hygienic and clean.
| Feature | Detail | Benefit |
|---|---|---|
| Strip durability | Tear-resistant fabric | Smooth, clean removal |
| Size | 3×9 inches | Covers large leg areas |
| Hygiene factor | Single-use disposable | Prevents skin irritation |
1. Salon Sundry Portable Electric Wax Warmer
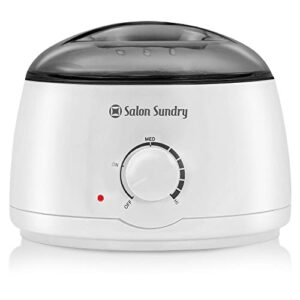
Great strips need a great heat source. The Salon Sundry Wax Warmer runs on 75 watts with an adjustable thermostat, so your wax stays at the right consistency — not too thick, not runny. It holds up to 18 ounces and fits standard 14-ounce cans perfectly.
The see-through lid lets you watch the melt without lifting it. Removable liner makes cleanup painless. It’s compact enough for a bathroom counter and portable enough to travel with.
| Best For | Anyone who does wax treatments at home, travels for work, or runs a small salon and needs something compact that actually holds a consistent temp. |
|---|---|
| Primary Use | Wax strip application |
| Body Areas | Full body including face |
| Skin Type | All skin types |
| Hair Removal Role | Application material |
| Product Form | Fabric strips |
| Key Material | Non-woven fabric |
| Additional Features |
|
- Fits standard 14-oz wax cans and handles paraffin, loose wax, and bricks — pretty versatile for the size
- The see-through lid is genuinely useful; you can check the melt without letting heat (or debris) in
- Removable liner makes cleanup way easier than scrubbing a fixed pot
- The 12-inch cord is really short — you’ll almost definitely need an extension cord
- Heat settings can run inconsistent, so you might have to dial higher than you’d expect to keep wax warm
- The inner container can sit loose without a cardboard collar, which feels a little flimsy for the price
2. Revlon High Precision Slant Tweezers
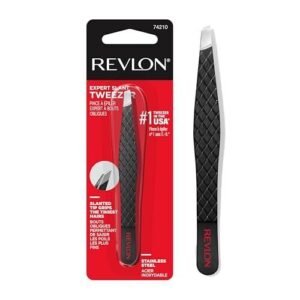
Wax leaves behind a few stray hairs no strip can catch — that’s where the Revlon Slant Tweezers earn their place in your kit. The hand-finished slant tips grip even the finest hairs cleanly without breakage. At just 0.8 ounces, they fit easily in any makeup bag.
The stainless steel construction resists rust and stays sharp over repeated use. Wipe them down with alcohol after each session and they’ll stay clean and ready.
| Best For | Anyone who waxes regularly and needs a reliable tool to clean up the strays that strips always seem to miss. |
|---|---|
| Primary Use | Wax melting and heating |
| Body Areas | All body areas |
| Skin Type | All skin types |
| Hair Removal Role | Heat source tool |
| Product Form | Electric warmer unit |
| Key Material | Metal and plastic |
| Additional Features |
|
- Hand-finished slant tips grip fine and stubborn hairs cleanly, right from the root
- Lightweight stainless steel build resists rust and holds up well over time
- Compact enough to toss in a makeup bag or carry-on without a second thought
- The sharp tips can feel a little harsh if your skin runs sensitive
- No case or cover included, so the tips can snag on other items in your bag
- At this price point, some users may expect a bit more tension control out of the box
3. Cirepil Purifying Blue Wax Cleanser
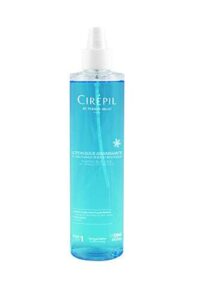
Once your tweezers are squared away, it’s time to think about skin prep — and the Cirépil Purifying Blue Lotion Cleanser takes care of that job well. It removes oil, sweat, and makeup before waxing so the wax actually sticks. After your session, it calms redness and clears leftover residue.
The formula includes soothing cornflower water and glycerin, keeping skin hydrated without over-drying. Low alcohol means it’s safe for sensitive areas like the bikini line or face.
| Best For | Estheticians and waxing professionals who want a reliable pre- and post-wax cleanser for sensitive skin areas. |
|---|---|
| Primary Use | Precision hair tweezing |
| Body Areas | Face and body |
| Skin Type | All skin types |
| Hair Removal Role | Finishing and cleanup tool |
| Product Form | Metal hand tool |
| Key Material | Stainless steel |
| Additional Features |
|
- Dual-action formula works before and after waxing — preps skin and soothes irritation in one product
- Low alcohol content keeps sensitive areas like the face and bikini line from drying out
- Dragon’s Blood and cornflower water help calm redness and reduce the chance of ingrown hairs
- The pump spray can be inconsistent, which gets frustrating mid-session
- Caps may arrive loose or missing due to shipping issues
- Geared toward professional use, so it might be more than a casual home waxer needs
4. MOOM Organic Sugar Wax Hair Removal
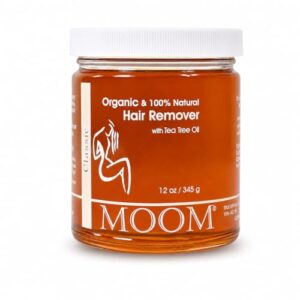
If you want salon-quality results at home, MOOM Organic Sugar Wax is worth keeping on your shelf. This USDA certified organic formula blends cane sugar, lemon juice, chamomile, and tea tree oil — gentle enough for sensitive skin, effective enough to pull hair from the root.
The water-soluble formula cleans up with warm water, no harsh solvents needed. Just note: strips and sticks aren’t included, so grab those separately before your session.
| Best For | Anyone with sensitive skin who wants a clean, organic alternative to traditional waxing — great for both men and women doing at-home hair removal on the face, legs, or bikini area. |
|---|---|
| Primary Use | Pre-wax skin cleansing |
| Body Areas | All body areas |
| Skin Type | All skin types including sensitive |
| Hair Removal Role | Pre-wax preparation |
| Product Form | Liquid cleanser |
| Key Material | Water-based formula |
| Additional Features |
|
- USDA certified organic with simple, natural ingredients like cane sugar, chamomile, and tea tree oil
- Water-soluble formula means cleanup is quick and easy — just warm water, no residue hassle
- Removes hair from the root for smooth results that last longer than shaving
- Strips and application sticks aren’t included, so you’ll need to buy those separately
- Hair needs to be a certain length to grip properly, which takes some planning
- May need frequent reheating during longer sessions to keep the consistency right
5. SUGARING PASTE – HARD 1.3kg 45Oz FOR TOUGHEST HAIR (BIKINI, BRAZILIAN, UNDERARMS)
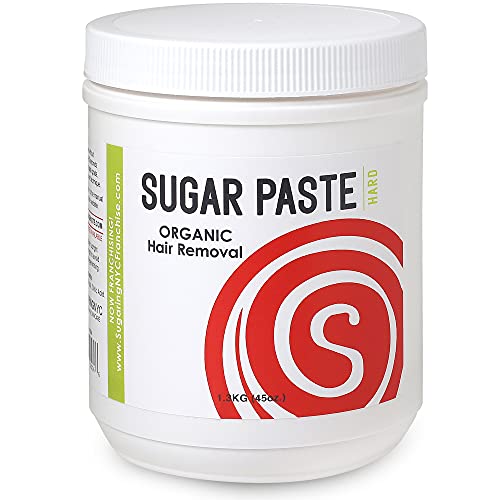
Meet the heavy lifter of the sugaring world. This hard paste formula — 1.3kg of pure, organic sugar and water — was built for coarse, stubborn hair in tough zones like the bikini line and underarms. No synthetic resins, no fragrances, no artificial coloring.
It takes practice to get the flicking technique right, and it’s sensitive to warm environments, so work in a cool room. Once you nail it, the results last noticeably longer than softer formulas.
| Best For | Anyone tackling coarse hair in stubborn zones like the bikini line, Brazilian, or underarms who wants a clean, chemical-free formula and is willing to learn the technique. |
|---|---|
| Primary Use | Pre and post-wax care |
| Body Areas | Face, bikini, and body |
| Skin Type | All skin types |
| Hair Removal Role | Pre and post-wax treatment |
| Product Form | Pump spray toner |
| Key Material | Organic plant extracts |
| Additional Features |
|
- Just two ingredients — water and sugar — so it’s as clean and natural as it gets
- Hypoallergenic and free from fragrances, making it a solid pick for sensitive skin
- Doubles as an exfoliant, so your skin feels smoother after each session
- There’s a real learning curve — the flicking technique takes practice to get right
- It’s very sensitive to heat, so a warm room can turn it into a sticky mess fast
- Not the best starting point for beginners who haven’t used sugaring paste before
6. Flamingo Body Hair Removal Wax Strips
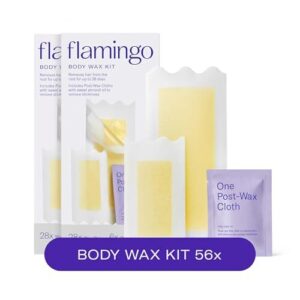
If you want zero setup, Flamingo strips are hard to beat. These pre-made gel wax strips require no heating — just warm them between your palms, peel, and apply. Each strip grips hairs as short as 2 mm and pulls from the root for smoothness that lasts up to four weeks.
The kit includes 56 strips plus post-wax cloths infused with sweet almond oil to calm skin right after. Paraben-free and dermatologist-tested, they’re a solid grab-and-go option for legs and arms.
| Best For | Anyone who wants a quick, fuss-free at-home wax without any prep or special equipment. |
|---|---|
| Primary Use | Soft wax hair removal |
| Body Areas | Face, legs, and bikini |
| Skin Type | Sensitive skin focus |
| Hair Removal Role | Wax formula |
| Product Form | Wax refill jar |
| Key Material | Organic sugar blend |
| Additional Features |
|
- No heat needed — just rub the strip between your palms and go
- Grabs hair as short as 2 mm and pulls from the root for weeks of smoothness
- Comes with sweet almond oil cloths to soothe skin right after
- Skip these if you’re doing eyebrows — not designed for that
- Very thick or stubbly hair might need a little extra cleanup afterward
- Results can vary depending on your hair texture and how well you apply the strip
Wax Your Legs Step-by-Step
Now comes the part where prep pays off. Getting the technique right makes the difference between clean results and a lot of unnecessary ouch. Walk through each step below and you’ll be pulling like a pro in no time.
Test Wax Temperature First

Think of your wax warmer like a stove — just because the dial says "medium" doesn’t mean the heat is right for your skin. Always run the Wrist Temperature Test first: dab a small amount on your inner wrist. It should feel comfortably warm, never hot.
- Check that hard wax flows like thick honey off the stick
- Confirm soft wax spreads smoothly without dragging or clumping
- Do a quick skin patch test on a small leg area before committing
Burn risk starts around 44°C, so don’t skip this step.
Apply With Hair Growth

Direction is everything. When you wax your legs at home, always apply the wax in the direction of hair growth using smooth, even strokes. This helps the wax wrap around each hair for a cleaner grip.
Keep each section small, work at a steady pace, and press the wax firmly so it makes full contact with the skin.
Hold Skin Firmly Taut

Loose skin is the enemy here. Hold skin firmly taut with your free hand by pinching two fingers near the strip and pulling slightly away from the waxing zone.
This flattens the surface, improves wax-to-hair contact, and reduces bruising. Keep that tension consistent the entire time — don’t release until the strip is fully off.
Pull Against Hair Growth

Once the skin is taut, the pull itself does all the heavy lifting. Pull the strip parallel to your skin — not upward — and snap it back in one fast, confident motion against the direction of hair growth. That low pull angle keeps the wax locked onto the hair shafts instead of peeling off the skin.
Keep these in mind as you pull:
- Fast, firm motion pulls cleanser than a slow drag
- Low angle preserves traction control and prevents strip failure
- Opposite direction improves hair extraction from the follicle
- Consistent skin tension reduces irritation during removal
Going against growth isn’t just technique — it’s how the wax wins.
Remove Missed Hairs Carefully

Even a perfect pull leaves a stray hair or two — that’s just waxing.
Grab your fine-tipped tweezers, cleaned with rubbing alcohol, and only target hairs you can clearly see. Apply a warm compress for 10–15 minutes first to soften the skin.
Grip each hair near the surface and lift gently. Never dig or scrape — that causes skin irritation fast.
Soothe Skin After Waxing

Your skin just went through a lot — a little TLC goes a long way right now. The next few steps will help calm redness, lock in moisture, and keep things smooth for days after. Here’s what to do once the waxing is done.
Apply Aloe or Moisturizer
Once the wax is off, your skin deserves some quick TLC. Reach for an aloe vera gel first — apply a thin, even layer over the treated area using clean hands. It cools irritation fast and gives skin that first moment of calm.
Here’s how to do it right:
- Remove all wax residue before applying anything
- Start with a thin aloe layer and let it absorb for a few minutes
- Follow with a fragrance-free moisturizer if skin still feels tight or dry
- Use gentle upward motions — no pressing or tugging
- Skip products with exfoliating acids or strong actives right after waxing
If your skin runs dry, layer a richer cream on top of the aloe. That combination manages both post-wax care and lasting softness in one simple routine.
Avoid Heat and Sun
Your skin is more vulnerable right after waxing, so heat and sun exposure can quickly turn into irritation or even hyperpigmentation. Skip hot showers, saunas, and direct sunlight for at least 24 hours.
If you must head outside, apply broad-spectrum SPF 30+ at least 20 minutes before stepping out, stick to shaded spots, and stay hydrated — your skin will thank you.
Wear Loose Clothing Afterward
Right after waxing, what you throw on matters more than you’d think. Breathable fabric choice is your first line of defense for post wax comfort — go with loose cotton shorts or lightweight pants that won’t cling or rub.
- Choose loose cotton clothing to allow airflow and reduce trapped heat
- Skip tight waistbands that press against freshly treated skin
- Opt for smooth, seam-light garments to avoid friction hotspots on your legs
- Change into fresh, dry clothing if you sweat to keep irritation down
- Stay in loose layers for the first 12–24 hours while follicles settle
Synthetic, compressive fabrics trap moisture and worsen skin irritation — exactly what your healing skin doesn’t need right now.
Prevent Ingrown Hairs Gently
Ingrown hairs don’t have to be part of the deal. Start exfoliating 48 hours after waxing — two or three times a week — using a soft washcloth or gentle scrub. Don’t go aggressive; light, consistent passes are all you need.
If a bump appears, press a warm damp compress on it briefly, then leave it alone. Never pick or squeeze.
Maintain Smooth Results Longer
Keeping results smooth comes down to what you do between sessions.
- Hydrate between sessions daily with a water-based, fragrance-free moisturizer
- Use a barrier repair balm to protect reopening follicles from friction
- Follow a sun protection routine to prevent dark marks and uneven tone
- Gentle weekly exfoliation keeps ingrown hairs and dead skin in check
- A consistent wax schedule trains regrowth to come in thinner over time
Frequently Asked Questions (FAQs)
Can you wax your legs by yourself?
Yes, absolutely. Think of it like learning to parallel park — a little awkward at first, but once you know the steps, waxing your legs at home is totally doable on your own.
Should I wax my legs up or down?
Apply wax in the direction your leg hair grows, then pull the strip against hair growth, parallel to the skin. For most legs, that means apply downward, pull upward.
What kind of wax is best for legs?
Think of wax types like tools in a kit — each one has a job. Soft wax covers large areas fast, hard wax suits sensitive spots, and sugar wax offers the gentlest pull.
How do you prepare your legs for waxing at home?
Good prep is half the battle. Exfoliate 24–48 hours before, trim hair to ¼ inch, cleanse skin thoroughly, check for irritation, and dust on baby powder for a clean, grippy surface.
How to wax under legs at home for beginners?
Waxing under the legs trips up a lot of beginners — it’s awkward to reach and easy to miss patches. Lay a towel down, prop your leg up, and work in small sections.
Is it worth it to wax your legs at home?
Yes, it’s worth it. A waxing kit costs less than repeat salon visits, and results last 4 to 6 weeks. Legs are beginner-friendly, though expect some pain and minor skin irritation.
Do you wax your legs before or after a shower?
Shower before, not after. A warm shower softens hair and loosens follicles, making wax grip more reliably. Just dry your skin completely first — any moisture left behind weakens the wax’s hold.
How often should I wax my legs?
Most people wax their legs every 3 to 6 weeks. Your ideal interval depends on your hair growth rate — faster growers do better closer to 3 weeks.
Can I wax my legs if pregnant?
Generally, leg waxing during pregnancy is considered safe if your skin is healthy. That said, pregnancy heightens skin sensitivity, so expect more discomfort. Always check with your doctor first, especially if you have varicose veins or complications.
Will waxing my legs cause skin damage?
Done right, waxing won’t damage your skin. Proper prep and aftercare keep irritation minimal. Skip the heat, moisturize after, and exfoliate weekly — your skin stays smooth and healthy long-term.
Conclusion
Smooth, touchable legs—no appointment, no crowded waiting room, no tip jar. Once you genuinely know how to wax your legs at home, the salon loses its grip on your schedule and your wallet.
Prep your skin, choose the right wax, and work with clean technique. Your results will last weeks, not days. The redness fades quickly.
What stays is the quiet confidence of knowing you did it yourself, and can always do it again.
- https://www.youtube.com/watch?v=xurl_ruebnE
- https://cna.st/affiliate-link/8c1CyqM3gV3cUk7YgrNK1zoTmuidETLjivmKjA3CDRiReBFNEpQg8827PPrz1op1Wg9t35frMd3ACsuCRda33kWxfZyXjjF5vVAukTTDWREhpWxpZbohrLmFp1BpXsw8gF32cr4VLoZH1ToeqLc5L6faxdKpUedffw1WHm2h1rrVbGNmGgVyFeCF1soe8pNcZ3srcfVnmVb55kUaAhtuHg5ytJLM5yk1F7TMAS8pPKkkwTknxrJXfugqQLJmMb8sidF8b4UgApoTduWazKQTeQwAwhoBg7v1KdF1qQVGgqAAwT4mYg6jFmN3Ax2WVcsQcMjGPAKTQbTeG4j1TPt6ayqUhwsbPpY9Zk2vnuUixkYh7D5LPJQpy8wF5Mt2AtEQK3UMA6nsTtaMCWMyNUWGhxVpkMyWU4uNqAfJTkG1GJATX8Ts18huDfDPHN8RqNW6GgHFPNAAgTW8YSPJpQqFimdK4WStmdyHGA3n5XvgC
- https://affderm.com/team/karan-lal/
- https://www.healthline.com/health/oil-cleansing-method
- https://www.paulaschoice.com/expert-advice/skincare-advice/cleansers/what-is-cleansing-oil-who-is-it-for.html