This site is supported by our readers. We may earn a commission, at no cost to you, if you purchase through links.

Most men who pick up a straight razor the first time get the same result: razor burn, patchy spots, and a face that looks like it lost an argument. The blade isn’t the problem. The angle is. Hold it too flat and it skates across stubble without cutting. Too steep and you’re scraping skin.
That narrow 30-degree sweet spot is where everything clicks—closer cuts, zero drag, no irritation. Once your straight razor angle technique locks in, the whole shave changes. Fewer passes, better results, and the kind of finish a cartridge razor can’t touch.
Table Of Contents
- Key Takeaways
- Benefits of Proper Straight Razor Angle
- Essential Tools for Angle Precision
- Preparing Your Beard for The Perfect Angle
- Mastering The 30-Degree Blade Angle
- Step-by-Step Straight Razor Shaving Technique
- Straight Razor Safety and Maintenance Tips
- Top 9 Straight Razor Tools and Products
- 1. Dovo 6/8 Black Straight Razor
- 2. DOVO Inox Straight Razor Olive Wood
- 3. Norton Japanese Waterstone 4000 8000 Grit
- 4. Fromm Razor Strop Blade Sharpener
- 5. Porter Badger Shaving Brush
- 6. Taylor Old Bond Street Sandalwood Shaving Cream
- 7. Manscaped Plow 2.0 Safety Razor
- 8. Parker SRX Stainless Steel Straight Razor
- 9. CeraVe Hydrating Facial Cleanser
- Frequently Asked Questions (FAQs)
- Conclusion
Key Takeaways
- Holding your blade at 30 degrees is the single thing that separates a clean, close shave from razor burn and patchy spots — everything else builds on getting that angle right.
- Prep work isn’t optional: clean skin, a hot towel, and quality lather give your blade the cushion it needs to glide instead of scrape.
- Your face isn’t flat, so your angle can’t be either — drop to 20–25 degrees on the neck, bump up to 35–40 on the jawline, and let the contours guide you.
- A sharp blade only stays sharp if you strop before every shave and hit the honing stone every 60–70 shaves — skip that, and no amount of technique will save your skin.
Benefits of Proper Straight Razor Angle
Getting the angle right changes everything about your shave. It’s the difference between baby-smooth skin and a face that looks like it lost a fight.
Even a slight tilt too steep or too shallow can trigger irritation, so brushing up on natural ways to reduce shaving irritation can save your skin while you’re still dialing in your technique.
Here’s what nailing that 30-degree angle actually does for you.
Achieving a Closer, Smoother Shave
Getting that baby-smooth, BBS finish starts with one thing: the right blade angle. Lock in at 30 degrees and let pressure and glide do the heavy lifting — no forcing, no scraping. Factors like hair thickness, skin sensitivity, and razor type all influence your ideal blade angle selection.
Here’s what proper straight razor grip and angle actually delivers:
- Closer cuts through tough stubble management with zero drag
- Smoother last-pass refinement on every stroke
- Consistent shaving precision across all facial contours
- Seamless grain mapping tactics for each shaving pass
Reducing Skin Irritation and Cuts
Nail the blade angle and you’ll cut your skin issues nearly in half. Ideal blade pressure — just the razor’s own weight — stops razor burn before it starts. Pair that with skin stretching techniques to flatten folds, and straight razor nicks and cuts drop dramatically.
Managing sensitive skin gets easier too: shave with the grain, and you’re preventing ingrown hairs without even thinking about it. Studies show that shaving with the grain benefits include markedly less irritation, fewer ingrown hairs, and smoother overall skin.
Enhancing Shaving Efficiency
Right angle, right grip — and suddenly the whole shave takes half the time. Holding the blade at 30 degrees with a relaxed grip lets your strokes flow instead of fight. That’s shaving efficiency in action.
Here’s what locks it in:
- Rapid Beard Mapping guides your blade angle with the grain, cutting 90% of stubble in one pass
- Stroke Optimization means longer, heel-leading strokes with light pressure — fewer passes, less re-lathering
- Lathering Workflow and Grip Efficiency keep your straight razor shaving technique smooth and your Time-Saving Routines consistent
Essential Tools for Angle Precision

Getting the angle right starts long before the blade touches your face. The tools you pick will either work with you or against you — and there’s no faking your way through a bad setup.
Here’s what you actually need to shave with precision.
Choosing The Right Straight Razor
Your straight razor is the foundation of everything — get it wrong and no technique will save you. For beginners, a 5/8-inch, full-hollow, round-point stainless blade hits the sweet spot for Blade Width Selection, Grind Type Comparison, and Point Shape Options.
A well-balanced wooden handle keeps that 30 degrees angle steady.
Blade material choice and blade weight matter more than you’d think when choosing the right shaving tools.
Importance of Strop and Hone
Think of your strop and hone as your razor’s pit crew — one keeps you race-ready every session, the other rebuilds the engine when needed.
- Stropping realigns your edge before each shave, preventing chatter and nicks
- Honing methods refresh the bevel every 60–70 shaves, restoring true sharpness
- Consistent blade maintenance and sharpening extends your razor’s life by years
Together, they lock in your 30-degree angle every single time.
Selecting Quality Shaving Cream and Brush
Your shaving cream and brush aren’t accessories — they’re angle insurance. Dense, glycerin-rich lather from quality cream ingredient formulas cushions the blade and makes that 30-degree sweet spot forgiving. Match it to your skin type for best results.
| Factor | What to Look For | Why It Matters |
|---|---|---|
| Cream ingredient quality | High glycerin, fatty acids | Stable lather, better glide |
| Skin-type matching | Soothing extracts for sensitive skin | Prevents post-shave irritation |
| Brush hair materials & knot size backbone | Badger or quality synthetic | Builds rich, clingy lather fast |
Preparing Your Beard for The Perfect Angle

Before the blade even touches your face, the prep work decides how that shave goes. A well-softened beard and clean, hydrated skin make holding the right angle so much easier.
Mapping your beard’s grain zone by zone—as covered in this guide on shaving techniques for sensitive male skin—gives you a real edge before the razor ever moves.
Here’s what you need to do before the razor comes out.
Skin Cleansing and Hydration
Clean skin is the foundation of a great straight razor shave. Gentle Pre-Shave Cleansing with a pH-Balanced Cleanser — ideally around 4.5 to 5.5 — removes oil and grime without wrecking your skin’s Moisture Barrier Support.
Straight razor skin preparation starts here. Hydrating Beard Prep with lukewarm water for one to two minutes swells the hair shaft, making every stroke cleaner and safer.
Hot Towel and Pre-Shave Oil Methods
A hot towel is your secret weapon for beard softening science — it hydrates each hair shaft so the blade glides instead of tugs. Towel temperature safety matters: aim for comfortably warm, not scalding.
Here’s your straight razor skin preparation sequence:
- Hot towel — hold 3–5 minutes to open pores
- Preshave oil — massage 3–5 drops using oil application techniques in circular motions
- Skin-type matching — oily skin benefits from a slightly cooler towel
Routine integration tips: apply oil over the towel warmth, then layer your lather right on top.
Creating and Applying Optimal Lather
Your lather is the foundation everything else depends on. Nail the Water Soap Ratio first — aim for roughly one part soap to two parts water, then fine-tune from there.
Brush Loading Methods matter too: swirl your shaving brush on the soap for 30–60 seconds until you’ve got a thick, yogurt-like consistency.
For Face Lather Application, work in circles to lift the hairs, then smooth it out. That’s straight razor lathering done right.
Mastering The 30-Degree Blade Angle
The 30-degree angle is the sweet spot every straight razor shave depends on — get it right, and everything else falls into place. It sounds precise, but once you feel it, your hand just knows.
Master the 30-degree angle, and every straight razor shave falls into place
Here’s what you need to nail it every time.
How to Hold a Straight Razor Correctly

The grip is everything — get it wrong and even a perfect blade will punish you. Start with Basic Grip Fundamentals: open the scales to 270 degrees, edge down, two fingers in front of the tang, two behind, thumb underneath for support. Keep it relaxed — firm handshake, not a death grip.
- Pinch Grip Control flips the edge upward for against-the-grain cheek strokes
- Push Grip Applications position your thumb on the spine for forward, with-the-grain passes
- Hand Position Transitions include backhand and reverse freehand for chin and neck coverage
- Grip Safety Habits mean always gripping the tang or spine — never just the scales
Positioning The Blade for Best Results

Now that your grip is locked in, here’s where it pays off. Lay the blade flat on your skin first — that’s flat-start positioning — then tilt to 30 degrees.
Let spine-led strokes do the heavy lifting, spine leading, edge trailing. Keep short stroke control tight, one to two inches max.
Grain-aligned passes with minimal pressure contact. Let the blade angle work, not your hand.
Adjusting Angle for Facial Contours

Your face isn’t flat — so your angle can’t be either. Master these straight razor facial areas, and your blade angle does the rest.
Jawline Angle Adaptation means bumping to 35–40 degrees as bone protrudes. Cheekbone Angle Control drops to 25–28 degrees over the arch. Neck Curvature Technique calls for 20–25 degrees to protect the throat. Sideburn Temple Shift steepens fast.
Step-by-Step Straight Razor Shaving Technique

You’ve got the angle down — now it’s time to put it all together and actually shave.
The technique breaks into a few key stages, each one building on the last. Here’s exactly what to do, step by step.
Shaving With The Grain
Before you make a single stroke, nail your Grain Mapping Basics. Let stubble grow for 24 hours, then run a finger across each zone to feel the smoothest direction. Cheeks usually run downward; the neck’s a different story.
Neck Grain Challenges are real, with swirl patterns that demand short, deliberate With-Grain Stroke Control. Use light pressure, follow the hair, and let the blade do the work.
Multiple Passes and Angle Adjustments
Once you’ve finished your with-grain pass, it’s time to layer up. A solid pass sequencing strategy means going with grain first, then across-grain transitions sideways toward your nose, then against-grain last — only where your skin tolerates it.
Re-lather between every straight razor pass. Active angle tuning matters here: contour pass mapping on your jawline needs a slightly steeper blade angle than flat cheeks.
Techniques for Sensitive Areas
Sensitive areas will humble you fast — the neck, upper lip, and chin all need their own game plan. Neck Angle Control means dropping your blade angle to around 20 degrees and letting the razor’s weight do the work. For Upper Lip Strokes, tilt your nose up, flatten the skin, and use slow center-out passes. Chin Skin Stretching keeps everything taut so the edge glides — not grabs.
- Jawline Section Shaving: Reset your angle every few centimeters as the bone curves
- Tackle the chin and upper lip with the middle of the blade for precision
- Sensitive Area Aftercare: Alum block first, then fragrance-free moisturizer — skip the alcohol splash
Straight Razor Safety and Maintenance Tips

A sharp razor is only half the battle — keeping it that way is where most beginners drop the ball. The good news is that maintenance doesn’t take much time once you know the routine.
Here’s what you need to do to keep your blade safe, sharp, and ready for the next shave.
Stropping and Honing for Sharpness
Think of your strop as daily upkeep and your hone as a deep reset. Before every shave, run 40–60 passes on leather — spine first — for proper strop maintenance and edge refining.
When the blade starts tugging despite stropping, that’s your cue for straight razor honing and stropping on a honing stone. Start at 4,000 grit, finish at 8,000 for blade polishing. Sharp razor, smooth face.
Safe Handling and Storage
A dropped razor stays dropped — never try to catch it. Razor Grip Safety starts with holding the scales firmly, thumb on the spine side, fingers along the opposite handle.
Safe Blade Handling means closing it fully after every shave. For Childproof Razor Storage, use a locked cabinet or dedicated box.
Dry Storage Practices and Travel Razor Protection keep moisture and accidents at bay.
Cleaning The Blade After Use
Cleaning your blade right after every shave is non-negotiable razor maintenance. Rinse under warm running water for 10–20 seconds, then wash with a mild cleaning solution and a soft brush. That’s your straight razor cleaning sorted.
Pat dry spine-to-edge for safe drying techniques, leave it open 15 minutes, then apply a drop of oil for rust prevention and long-term blade maintenance.
Top 9 Straight Razor Tools and Products
Having the right tools in your kit makes every shave easier, safer, and cleaner. These nine products cover everything from beginner-friendly razors to professional-grade maintenance gear. Here’s what’s worth your attention.
1. Dovo 6/8 Black Straight Razor
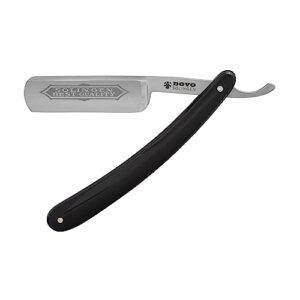
The Dovo 6/8 Black is one of those razors that earns its reputation quietly. Made by hand in Solingen, Germany, it features a full hollow-ground carbon steel blade heat-treated to 61 HRC — which means it holds an edge longer than most entry-level options.
The 6/8 width gives you stability across broad cheeks without losing control under the nose. The round point forgives rookie angle mistakes.
Ribbed tang, water-resistant acrylic handle, neutral balance. It’s a proper learner’s razor that won’t embarrass you later.
| Best For | Men who want to get into straight razor shaving — whether they’re total beginners or seasoned shavers looking for a reliable, well-crafted everyday blade. |
|---|---|
| Material | Steel/Plastic |
| Weight | 1.76 oz |
| Skill Level | Beginner/Advanced |
| Maintenance Required | High |
| Skin Compatibility | All Skin Types |
| Country/Standard | German Made |
| Additional Features |
|
- Handmade in Solingen, Germany — serious craftsmanship baked into every blade
- The 6/8 width and round point make it forgiving and easy to control, great for learning
- Holds an edge well thanks to high-quality carbon steel heat-treated to 61 HRC
- May not arrive shave-ready, so you might need to strop or hone it before first use
- The handle has been known to feel a bit flimsy and could crack over time
- It’s pricier than most beginner razors, and occasional quality control inconsistencies have been reported
2. DOVO Inox Straight Razor Olive Wood

If the Dovo 6/8 Black is the workhorse, the DOVO Inox Olive Wood is the one you’re proud to leave on the counter.
Hand-ground in Solingen from stainless 1.4034 steel, it holds up against steam and soap without fussing. The full hollow grind keeps the blade responsive — you’ll actually feel when your angle drifts.
At 5/8 inch with a round point, it’s forgiving enough to learn on. The olive wood handle looks sharp and grips well wet.
| Best For | Shavers who want a dependable daily razor that also looks good sitting on the bathroom shelf. |
|---|---|
| Material | Stainless Steel/Olive Wood |
| Weight | 10g |
| Skill Level | Intermediate/Advanced |
| Maintenance Required | High |
| Skin Compatibility | All Skin Types |
| Country/Standard | International |
| Additional Features |
|
- Stainless steel holds up well to moisture — less worry about rust compared to carbon steel
- Full hollow grind gives you real feedback on your angle, which helps you improve your technique
- Olive wood handle looks beautiful and gives a solid, natural grip even when wet
- Not the best starting point for total beginners — proper technique and maintenance take some practice
- You’ll likely need to pick up a strop or sharpening stone separately to keep the edge in shape
- A few users have noted concerns about the handle construction holding up over time
3. Norton Japanese Waterstone 4000 8000 Grit
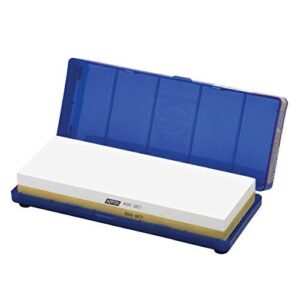
Your razor’s only as good as its edge — and that edge comes from the stone. The Norton 4000/8000 waterstone gives you two grit levels in one block.
Work the 4000 side first to knock out micro-nicks, then flip to the 8000 to polish the bevel to a near-mirror finish.
Soak it 10 minutes before use, keep it wet, and wipe the blade between sides. It’s simple, effective, and built to last.
| Best For | Home cooks and sharpening enthusiasts who want a reliable, two-stage stone for keeping kitchen knives, tools, and straight razors at a polished, razor-sharp edge. |
|---|---|
| Material | Corundum |
| Weight | 2.05 lbs |
| Skill Level | All Levels |
| Maintenance Required | Medium |
| Skin Compatibility | N/A |
| Country/Standard | JIS Standard |
| Additional Features |
|
- Two grits in one block — the 4000 side refines the edge, the 8000 polishes it to near-mirror sharpness
- Easy to maintain, just water — no oils or special cleaners needed
- Solid, stable setup with a rubber-footed holder so it doesn’t slide around while you work
- Needs a 15–20 minute soak before each session, so it’s not a grab-and-go option
- Corundum stones wear down over time and may need occasional flattening to stay effective
- Only two grits means you’ll need a coarser stone if your blade has serious damage or a very dull edge
4. Fromm Razor Strop Blade Sharpener
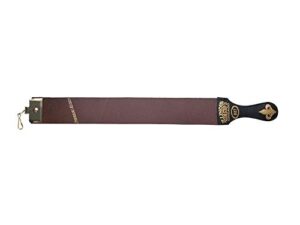
Once your edge is polished on the stone, you need something to keep it that way between hones. That’s where the Fromm Razor Strop comes in. Flip it to the zinc-oxide canvas side first to knock back any rolled edge, then finish on the 23-inch top-grain cowhide to align and polish. The swivel mount keeps it flat and steady every pass.
Strop before every shave — no exceptions. Think of it as tuning your instrument before the performance.
| Best For | Wet shavers and woodworkers who already know their way around a straight edge and want to keep their blades in peak condition between hones. |
|---|---|
| Material | Leather/Canvas |
| Weight | 6.4 oz |
| Skill Level | Intermediate/Advanced |
| Maintenance Required | Medium |
| Skin Compatibility | N/A |
| Country/Standard | USA Handcrafted |
| Additional Features |
|
- Top-grain cowhide on one side, zinc-oxide canvas on the other — two stages of sharpening in one tool
- Handcrafted in the USA with a full 23 inches of stropping surface
- Works on straight razors, knives, and fine woodworking tools alike
- The leather can be stiff out of the box and may need conditioning before first use
- Hardware feels a bit cheap for the price point
- Not the best pick for beginners — good technique matters here, and bad habits can dull a blade faster than sharpen it
5. Porter Badger Shaving Brush
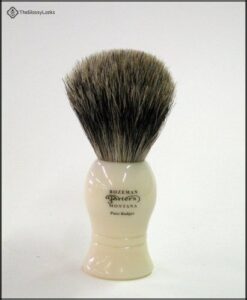
Your strop keeps the edge sharp — but a good brush is what gets the lather where it needs to be. The Porter Badger Shaving Brush uses pure badger hair, which soaks up hot water fast and builds a rich, creamy lather without much effort.
At just two ounces, it won’t tire your hand out. The plastic handle is basic, sure, but it does the job. Soft enough on skin, stiff enough to lift stubble and prep your face for a clean pass.
| Best For | Guys who want a solid entry-level shaving brush that gets the job done without spending a ton. |
|---|---|
| Material | Badger Hair/Plastic |
| Weight | 2 oz |
| Skill Level | All Levels |
| Maintenance Required | Low |
| Skin Compatibility | All Skin Types |
| Country/Standard | International |
| Additional Features |
|
- Pure badger hair soaks up hot water fast and builds a great lather
- Light enough to use daily without any hand fatigue
- Works well with all kinds of shaving creams and soaps
- The plastic handle feels a bit cheap and may have visible casting marks
- Bristles can shed over time with regular use
- Runs smaller than some people expect — worth checking the dimensions first
6. Taylor Old Bond Street Sandalwood Shaving Cream
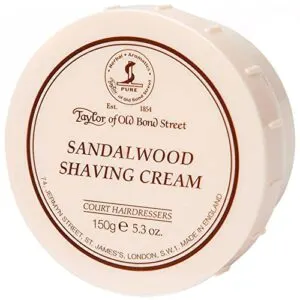
Once your brush is loaded, reach for Taylor Old Bond Street Sandalwood Shaving Cream. This stuff isn’t just about scent—though the classic sandalwood, with hints of lavender and patchouli, makes your bathroom smell like a proper barbershop.
It’s thick, slick, and cushions your skin so the blade glides smooth. Even with sensitive skin, you’ll notice less irritation and a softer finish.
For $19.99, you get a bowl that lasts, but watch the scent—it’s bold and sticks around.
| Best For | Men with sensitive skin who want a premium, aromatic shaving experience with a close, smooth shave. |
|---|---|
| Material | Glycerin-based Cream |
| Weight | 150g |
| Skill Level | All Levels |
| Maintenance Required | Low |
| Skin Compatibility | All Skin Types |
| Country/Standard | International |
| Additional Features |
|
- Rich, creamy lather that cushions the blade for a seriously close shave
- Paraben-free and gentle enough for sensitive or easily irritated skin
- That classic sandalwood scent—lavender, geranium, patchouli—smells like an old-school barbershop
- The scent is strong, so if you’re fragrance-sensitive, it might be a bit much
- At $19.99, it’s pricier than your average drugstore shaving cream
- The bowl packaging isn’t the most durable, and some buyers have reported damage on arrival
7. Manscaped Plow 2.0 Safety Razor
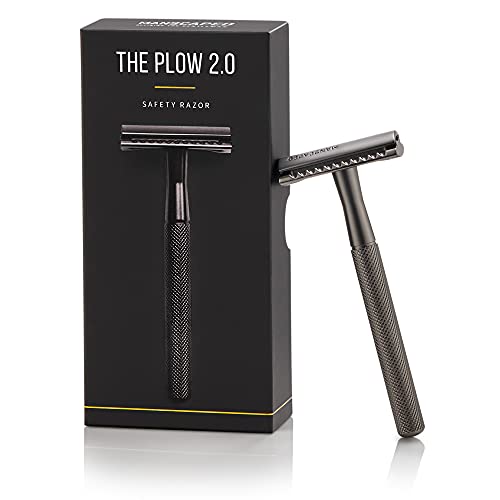
Not every guy is ready to jump straight into a full straight razor. That’s where the Manscaped Plow 2.0 earns its place.
It’s a double-edged safety razor with a precision brass handle and zinc alloy head — weighted just right so you let the razor do the work, not your wrist. The gunmetal finish looks sharp, and at around $35, it won’t hurt your wallet.
Great for building proper angle habits before graduating to the real thing.
| Best For | Guys who want to ditch disposables and learn proper shaving technique without the steep learning curve of a straight razor. |
|---|---|
| Material | Brass/Zinc Alloy |
| Weight | 5 oz |
| Skill Level | All Levels |
| Maintenance Required | Medium |
| Skin Compatibility | Sensitive Skin |
| Country/Standard | International |
| Additional Features |
|
- The brass handle and zinc alloy head give it a satisfying weight — you guide it, not force it
- Gunmetal coating looks clean and feels premium for a $35 razor
- Works for face, body, and sensitive areas, so it pulls double duty
- Swapping blades takes a little patience — rushing it is how you nick yourself
- Not ideal if you have moles or tricky skin contours due to the blade gap
- Blades need regular replacing, so factor that into the long-term cost
8. Parker SRX Stainless Steel Straight Razor
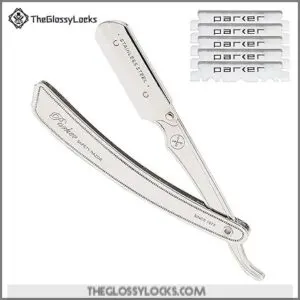
The Parker SRX is where serious technique meets convenience. This all-stainless shavette weighs in around 2.3 ounces — heavy enough to let gravity do the work, light enough to maneuver tight spots.
It takes half a DE blade, so you’re always shaving with a fresh edge. No honing, no stropping. That means you can focus entirely on nailing that 30-degree angle instead of worrying about blade maintenance.
Perfect for barbers and dedicated home shavers who want pro results without the upkeep.
| Best For | Barbers and dedicated home shavers who want a clean, traditional straight-razor shave without the hassle of blade maintenance. |
|---|---|
| Material | Stainless Steel |
| Weight | 2.29 oz |
| Skill Level | Beginner/Advanced |
| Maintenance Required | Low |
| Skin Compatibility | Most Skin Types |
| Country/Standard | International |
| Additional Features |
|
- All stainless steel build feels solid and lasts — no rust, no flimsy parts
- Takes half a DE blade, so you always have a fresh, sharp edge ready to go
- Balanced weight lets the razor do the work, making precision lines and neckline cleanup much easier
- Beginners need to take it slow — the blade is unforgiving if your angle or pressure is off
- The weight takes some getting used to if you’re coming from a lighter cartridge razor
- The blade lock needs careful handling to avoid wear or damage over time
9. CeraVe Hydrating Facial Cleanser
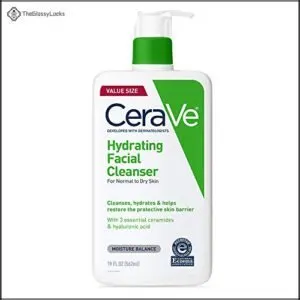
Clean skin is the foundation of a great shave — and CeraVe Hydrating Facial Cleanser earns its spot in your kit. At around $17, it gently removes oil and buildup without stripping your skin’s natural barrier.
The ceramide and hyaluronic acid formula keeps your face moisturized and prepped, so your blade glides smoother and irritation stays minimal.
Non-comedogenic, fragrance-free, and gentle enough for daily use. Use it before your hot towel step and you’ll notice the difference immediately.
| Best For | Guys with normal to dry or sensitive skin who want a gentle, no-fuss cleanser that preps their face before a shave. |
|---|---|
| Material | Hyaluronic Acid Formula |
| Weight | 1.26 lbs |
| Skill Level | All Levels |
| Maintenance Required | Low |
| Skin Compatibility | Normal to Dry |
| Country/Standard | International |
| Additional Features |
|
- Keeps your skin hydrated for a full 24 hours thanks to hyaluronic acid and ceramides
- Fragrance-free and non-comedogenic — great if your skin throws a fit easily
- Versatile enough to use as a face wash, hand wash, or body wash
- Not a great fit for oily skin types
- The non-foaming texture might feel like it’s not cleaning enough if you’re used to a sudsy lather
- You might need to use more product than expected to feel fully clean
Frequently Asked Questions (FAQs)
Can beginners learn the correct angle quickly?
Yes — and no. Most beginners nail a workable angle within three to five shaves. The trick isn’t thinking harder. It’s feeling when the blade glides cleanly instead of scraping.
Does blade width affect the shaving angle?
Blade width does affect angle, but not drastically. Wider blades like 8/8 demand stricter control around 28–30 degrees, while a 5/8 forgives small errors more easily.
How does beard density influence angle adjustments?
Dense beard? Go steeper, around 30 degrees. Fine or sparse growth? Ease back to Your chin needs more angle than your cheeks. Let the hair density guide your tilt.
Should angle technique differ for head shaving?
Absolutely. The scalp curves more than your face, so drop that angle down to 15–20 degrees. You’ll avoid nasty nicks and get a clean, smooth result without wrecking your skin.
Conclusion
Patience, practice, and precision—that’s what straight razor angle technique really comes down to. The 30-degree angle isn’t some mystery reserved for seasoned barbers. It’s a learnable skill that rewards anyone willing to slow down and pay attention.
Your face will tell you when you’ve got it right: no drag, no burn, just clean. Keep your blade sharp, your strokes deliberate, and your confidence steady. The best shave of your life is already in your hands.
- https://www.bassbrushes.com/post/straight-razors-mastering-the-art-of-shaving
- https://cutthroatclub.co.uk/blogs/instructions/complete-beginners-guide-to-straight-razors
- https://www.portlandrazorco.com/blog/2019/7/3/how-to-grip-your-straight-razor
- https://www.classicshaving.com/
- https://shavelibrary.com/w/Different_ways_to_hold_a_straight_razor