This site is supported by our readers. We may earn a commission, at no cost to you, if you purchase through links.

You’ll need a sterile dermaplaning tool and clean, dry skin.
Skip exfoliants for three days beforehand—your skin needs to be calm, not irritated.
Hold the blade at a 45-degree angle and use light, feathery strokes in the direction of hair growth.
Never press hard or go against the grain.
Avoid active breakouts and sensitive areas like your upper lip.
After dermaplaning, apply a gentle moisturizer and sunscreen religiously.
The key is patience and precision—rushing leads to nicks and irritation.
The devil’s in the details when mastering this technique.
Table Of Contents
- Key Takeaways
- Dermaplaning Basics
- Dermaplaning at Home Safely
- Choosing Right Tools
- Preparing Skin Correctly
- Dermaplaning Techniques
- Post-Dermaplaning Care
- Minimizing Side Effects
- Frequently Asked Questions (FAQs)
- What should I put on my face before dermaplaning?
- Is it safe to do dermaplaning yourself?
- Is it better to Dermaplane wet or dry?
- How to safely dermaplane at home?
- What products should I avoid before dermaplaning?
- How often should I change my dermaplaning blade?
- How long should I wait to apply makeup after dermaplaning?
- Is it true that hair grows back thicker after dermaplaning?
- Can I use a regular razor for dermaplaning?
- How often should I replace dermaplaning blades?
- Conclusion
Key Takeaways
- You’ll need sterile dermaplaning tools and completely clean, dry skin—never reuse blades and avoid dermaplaning over active breakouts or irritated areas to prevent infection and cuts.
- Hold your blade at a 45-degree angle and use light, feathery strokes in the direction of hair growth while pulling your skin taut—never press hard or go against the grain to avoid nicks and irritation.
- Skip exfoliants like retinoids and acids for at least three days before dermaplaning, and limit treatments to once every 2-4 weeks to prevent over-exfoliation and skin barrier damage.
- Apply gentle moisturizer immediately after dermaplaning and use broad-spectrum SPF 30+ sunscreen religiously for at least 72 hours since your freshly exfoliated skin becomes extremely vulnerable to UV damage.
Dermaplaning Basics
Dermaplaning uses a small blade to remove dead skin cells and peach fuzz from your face, creating smoother and brighter skin.
Transform your complexion with dermaplaning’s gentle blade technique that reveals radiant, baby-smooth skin underneath the dullness.
You’ll get better results from your skincare products after this gentle exfoliation process opens up your pores and creates an even surface, allowing for more effective absorption of the products, which can lead to brighter skin.
Removing Dead Skin Cells
When you dermaplane at home, you’re basically giving your skin a fresh start by removing the top layer of dead cells that make your complexion look dull.
This safe dermaplaning technique reveals brighter, smoother skin underneath while improving how your skincare products absorb.
Here are 5 key benefits of dead skin removal through dermaplaning:
- Improved skin texture – Your face feels noticeably smoother after removing built-up dead cells
- Enhanced facial renewal – Fresh skin cells emerge, creating a natural glow
- Better product absorption – Serums and moisturizers penetrate deeper without dead skin barriers
- Reduced dullness – Exfoliation methods like dermaplaning instantly brighten your complexion
- Preparation for makeup – Foundation applies more evenly on exfoliated skin surfaces
The key to effective cell removal is using proper dermaplaning tools with gentle, controlled strokes.
This exfoliation method works by physically scraping away the outermost layer of dead skin cells that naturally accumulate over time.
Unlike harsh scrubs, dermaplaning provides precise control over how much dead skin you remove, making it a safer option for at-home facial renewal.
Exfoliating Peach Fuzz
Removing vellus hair through peach fuzz removal creates that coveted baby-smooth canvas you’re after.
Safe dermaplaning at home effectively targets these fine facial hairs that trap dirt and makeup residue. Your dermaplaning tools glide easier across hair-free skin, maximizing facial exfoliation benefits.
Don’t worry about hair regrowth – it won’t return thicker or darker, despite common myths. Following a consistent daily skin care routine is also essential for maintaining healthy and smooth skin.
Enhancing Skin Brightness
Beyond removing dead skin cells, dermaplaning at home reveals your skin’s natural radiance by creating a smooth canvas that reflects light beautifully.
This exfoliation process reveals the fresh, healthy skin underneath, giving you an instant facial glow.
Here are three key brightening tips for maximum results:
- Enhanced product absorption – Your serums and moisturizers penetrate deeper for better skin smoothing
- Improved light reflection – A smoother surface creates an even tone and glowing complexion
- Instant luminosity – Dermaplaning benefits include immediate skin brightness without harsh chemicals
Dermaplaning at Home Safely
Your skin deserves the royal treatment, but dermaplaning at home requires careful planning.
Your complexion craves that luxury spa glow, but mastering at-home dermaplaning demands serious preparation and the right technique.
Understanding dermaplaning risks helps you avoid complications like cuts or infections. Different skin types respond differently to safe exfoliation, so assess your skin’s sensitivity first.
Tool sanitization prevents bacterial contamination, while proper dermaplaning frequency prevents over-exfoliation. Follow these at home dermaplaning safety guidelines, and you’ll master dermaplaning tips that deliver professional results without the hefty price tag.
| Safety Factor | Recommended Action | Warning Signs |
|---|---|---|
| Frequency | Once every 4 weeks maximum | Redness lasting >24 hours |
| Skin Assessment | Check for active breakouts | Inflamed acne, rosacea flares |
| Tool Hygiene | Sanitize before/after use | Rust, dullness, or debris |
| Timing | Avoid during menstruation | Increased skin sensitivity |
| Preparation | Stop retinoids 1 week prior | Peeling or irritated skin |
Choosing Right Tools
You’ll need the right dermaplaning tool to safely remove dead skin and peach fuzz without causing cuts or irritation.
Choose a single-blade razor with safety guards from reputable skincare brands, and never reuse blades since dull tools increase your risk of nicks and infection, which can be prevented with the right tool.
Single-Blade Dermaplaning Tools
Single-blade dermaplaning tools offer precise control for safe at-home exfoliation.
These specialized razors feature protective guards and ergonomic handle design that minimize cuts while maintaining proper blade angles.
Here’s what makes quality single-blade dermaplaning tools stand out:
- Built-in safety guards prevent accidental nicks during facial hair removal
- Replaceable blade systems guarantee hygiene and peak sharpness for effective dermaplaning technique
- Premium tool materials like stainless steel provide durability and razor precision
To achieve superior results, understanding the skin treatment process and following proper techniques for effective dermaplaning is vital.
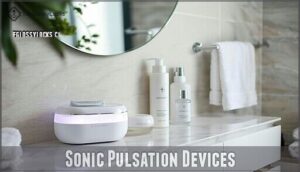
Sonic Pulsation Devices
Electric dermaplaning tools with sonic technology take the guesswork out of at-home skin exfoliation.
These devices use controlled vibrations and adjustable pulsation modes to gently remove dead skin cells while brightening your complexion.
Device safety features like automatic shut-off and protective guards minimize risks.
The controlled exfoliation depth guarantees consistent results without the manual errors common with traditional dermaplaning technique.
For superior results, understanding the Sonic Dermaplaning process is essential to achieve smooth skin with at-home exfoliation using dermaplaning tools.
Stacked Skincare Dermaplaning Tools
Complete dermaplaning kits offer excellent value for beginners wanting thorough at-home dermaplaning tools.
These skincare devices typically include multiple replacement blades, protective guards, and detailed instructions for safe exfoliation. You’ll appreciate the ergonomic handles that enhance blade safety during your dermaplaning procedure.
Look for kits with clear storage cases to maintain hygiene between uses and prevent accidents.
When selecting a dermaplaning tool, consider the importance of proper skin type considerations to achieve the best results, focusing on complete dermaplaning kits, proper skin type, ergonomic handles, and safe exfoliation.
Preparing Skin Correctly
Proper skin preparation prevents bacterial contamination and guarantees your dermaplaning tool glides smoothly across your face.
Start with clean, completely dry skin and pull it taut during the process to avoid nicks and achieve the best results.
Cleansing Face Thoroughly
Once you’ve selected your dermaplaning tool, proper face washing sets the foundation for safe treatment. Clean skin prevents bacteria from entering microscopic cuts during dermaplaning.
Follow this gentle cleansing routine:
- Use a mild cleanser to remove makeup, oil, and daily grime
- Apply with gentle strokes using lukewarm water
- Rinse thoroughly to guarantee complete skin purification before dermaplaning
This routine is essential for safe treatment, as it ensures the skin is clean and prepared for dermaplaning, reducing the risk of infection or other complications.
Drying Skin Completely
After cleansing, let your skin air-dry completely before dermaplaning. Moisture levels on damp skin create slippery conditions that increase cut risk. Dry skin allows for better blade control and gentle strokes.
Wait until your face feels completely dry to the touch—this vital skin preparation step guarantees maximum pore minimization and safe exfoliation. Understanding the importance of a proper skin care routine is essential for maintaining healthy skin.
| Skin Condition | Dermaplaning Safety | Result Quality |
|---|---|---|
| Completely Dry | Optimal control | Clean removal |
| Slightly Damp | Increased slip risk | Uneven results |
| Wet/Moist | High injury risk | Poor exfoliation |
Pulling Skin Taut
Before dermaplaning, you’ll need to master the taut technique for safe exfoliation.
Use your free hand to create gentle stretch across your facial structure, pulling skin taut without overdoing it.
This skin tension creates an even pressure surface, allowing your dermaplaning tools to glide smoothly.
Think of it like stretching canvas—firm but not painful—to exfoliate skin effectively.
Dermaplaning Techniques
Now that your skin’s prepped, you’ll need to master the proper technique to dermaplane safely at home.
Hold your tool at a 45-degree angle and use short, gentle strokes while keeping your skin taut to avoid nicks and cuts.
Holding Tool Correctly
Your dermaplaning technique starts with proper hand placement and blade position.
Hold your singleblade dermaplaning tool at a 45-degree angle against your skin—this tool angle guarantees effective exfoliation without cuts.
Grip the handle firmly but gently, like holding a pencil.
Keep your wrist relaxed while maintaining consistent blade position.
This dermablading technique creates the foundation for safe, effective results.
To minimize risks and achieve superior outcomes, this is vital to understand dermaplaning face risks and benefits.
Using Light Strokes
Light pressure is your best friend when dermaplaning. Think feather-light touch – you’re not scraping paint off a fence.
Use gentle strokes with your dermaplaning tool, letting the blade do the work. The feathering technique involves soft, downward movements that create a smooth skin glide.
Heavy-handed strokes damage your skin barrier and cause irritation.
Avoiding Sensitive Areas
Navigate around your eye area like you’re tiptoeing through a minefield—these delicate areas deserve extra respect.
Skip the sensitive skin near your eyes, lips, and any active breakouts during the dermaplaning process.
Your facial contours have varying thickness, so gentle strokes protect fragile skin barriers.
Avoid skin irritation by steering clear of inflamed or compromised areas where your gentle technique might backfire, and always prioritize gentle care to prevent damage to delicate skin.
Post-Dermaplaning Care
After dermaplaning, your skin needs extra protection since you’ve removed its natural barrier and exposed fresh skin cells.
You’ll want to apply a gentle moisturizer immediately and use sunscreen daily for at least three days to prevent irritation and sun damage.
Applying Hydrating Moisturizer
Your freshly dermaplaned skin needs immediate hydration to lock in that gorgeous glow.
Apply a gentle, fragrance-free moisturizer containing hyaluronic acid or ceramides within minutes of finishing. These moisturizing serums provide essential skin nourishment and barrier repair.
The enhanced facial hydration helps maintain your results while preventing dryness. Think of moisturizer benefits as your skin’s protective shield after exfoliation.
For ideal results, consider using products with key ingredients like dry skin moisturizers that help to lock in moisture and support the skin’s natural barrier function.
Avoiding Sun Exposure
After dermaplaning, your skin becomes a sitting duck for UV damage.
Think of your freshly exfoliated face as having its protective armor stripped away.
Sun sensitivity peaks dramatically during the first 72 hours, making even brief outdoor exposure risky.
Stay indoors when possible, seek shade religiously, and remember that UV protection isn’t optional—it’s your skin’s lifeline during this vulnerable healing period.
Using Broad-Spectrum SPF
After dermaplaning, your freshly exfoliated skin becomes a magnet for UV damage.
Apply broad-spectrum SPF 30+ sunscreen daily—think of it as your skin’s bodyguard against sun sensitivity and potential skin cancer.
Zinc oxide or titanium dioxide formulas offer gentle UV protection without irritation.
Don’t skip weekends or cloudy days; consistent daily application maximizes SPF benefits and maintains your glowing results.
Using a broad spectrum sunscreen product is essential for maximum protection and is your skin’s defense against harmful UV rays, making daily application crucial.
Minimizing Side Effects
While dermaplaning can give you smooth, glowing skin, you’ll want to watch for common side effects like temporary redness, irritation, or small breakouts.
Following proper technique and timing prevents most problems, but knowing what to expect helps you handle any issues that come up, especially in terms of irritation.
Temporary Skin Irritation
Your skin might feel like it got a little too much attention after dermaplaning – that’s completely normal.
Temporary skin irritation and skin redness happen because you’ve disrupted your skin’s protective barrier.
This dermaplaning risk affects those with sensitive skin more intensely.
Combat skin inflammation by applying cool compresses and gentle, fragrance-free moisturizers as soothing remedies to reduce skin inflammation.
Risk of Acne and Infection
Bacterial contamination poses real dermaplaning risks when proper infection control isn’t followed.
You’re basically creating tiny openings that invite unwanted guests to your skin party.
Three critical acne prevention steps:
- Sterilize tools before and after each use
- Avoid active breakouts completely during treatment
- Keep hands clean throughout the entire process
Poor technique increases skin sensitivity and bacterial spread, turning your glow-up into a breakout nightmare.
Preventing Over-Exfoliation
Beyond infection concerns, overdoing dermaplaning damages your skin barrier through excessive exfoliation.
Limit treatments to every 2-4 weeks, allowing proper skin recovery between sessions. Watch for increased skin sensitivity—redness lasting over 24 hours signals overexfoliation.
Gentle strokes prevent trauma while maintaining exfoliation limits protects your skin care routine‘s effectiveness.
| Frequency Guidelines | Recovery Signs |
|---|---|
| Every 2-4 weeks maximum | No redness after 24 hours |
| Skip if skin feels tender | Smooth texture returns |
| Wait for complete healing | Normal oil production |
| Monitor sensitivity levels | Even skin tone restored |
| Adjust based on skin type | Comfortable to touch |
Frequently Asked Questions (FAQs)
What should I put on my face before dermaplaning?
Studies show 90% of dermaplaning injuries occur on unprepared skin.
You’ll want absolutely nothing on your face before dermaplaning. Start with completely clean, dry skin using a gentle face wash, then let it air dry completely.
Is it safe to do dermaplaning yourself?
Yes, you can safely dermaplane at home with proper tools and technique.
Use clean, single-blade razors at 45-degree angles with gentle strokes.
Avoid active breakouts and don’t over-exfoliate to prevent irritation.
Is it better to Dermaplane wet or dry?
Dry skin tells no lies" – always dermaplane on completely dry skin.
Wet or damp skin creates drag, making precise blade control impossible and increasing your risk of cuts, nicks, and uneven results.
How to safely dermaplane at home?
Start with clean, dry skin and a sterile single-blade tool. Hold at 45 degrees, pull skin taut, use gentle downward strokes. Don’t repeat areas. Follow with moisturizer and sunscreen protection.
What products should I avoid before dermaplaning?
Stop using retinol, AHA acids, BHA exfoliants, and vitamin C serums one week before dermaplaning.
These active ingredients thin your skin and increase sensitivity, making cuts and irritation more likely during the procedure, which is why it is crucial to avoid them, particularly retinol, to minimize risks.
How often should I change my dermaplaning blade?
Think of your dermaplaning blade like a razor – it’s a one-and-done deal.
Never reuse blades to avoid infection and irritation.
Replace after each session to maintain sharpness and prevent bacterial buildup.
How long should I wait to apply makeup after dermaplaning?
Wait at least 24 hours before applying makeup after dermaplaning.
Your freshly exfoliated skin needs time to recover and rebuild its protective barrier.
Rushing into makeup too soon can clog pores and cause irritation.
Is it true that hair grows back thicker after dermaplaning?
That old wives’ tale about hair growing back thicker is just smoke and mirrors.
Your hair follicles don’t change structure after dermaplaning.
The vellus hair returns with the same fine texture it had before.
Can I use a regular razor for dermaplaning?
Regular razors aren’t ideal for dermaplaning since they’re designed for thicker body hair, not delicate facial skin.
You’ll get better results with single-blade dermaplaning tools that offer more control and precision.
How often should I replace dermaplaning blades?
Replace your dermaplaning blade after every single use.
Never reuse blades to avoid infection and irritation.
Single-use tools are designed for one session only, ensuring maximum safety and effectiveness for your skin.
Conclusion
Your skin deserves the silk-smooth finish that dermaplaning delivers.
Learning how to dermaplane at home safely transforms your skincare routine when you follow proper techniques.
Remember the golden rules: sterile tools, gentle pressure, and consistent aftercare.
Skip the shortcuts—your face isn’t a testing ground for rushed decisions.
With practice and patience, you’ll master this professional technique from your bathroom, always prioritizing safety over speed, and your skin will reward you with that coveted glass-like glow.
- https://www.shorelineshaving.com/en-us/blogs/articles/a-step-by-step-guide-to-dermaplaning-at-home
- https://curology.com/blog/dermaplaning-at-home-fact-vs-fiction
- https://www.whitepebbledermatology.com/blog/what-are-the-best-practices-for-preparing-my-skin-before-dermaplaning
- https://aboutfacesdayspa.com/2025/03/20/dermaplaning-the-ultimate-guide-to-radiant-smooth-skin
- https://www.gillettevenus.com/en-us/womens-shaving-guide/how-to-shave/dermaplaning-how-to


