This site is supported by our readers. We may earn a commission, at no cost to you, if you purchase through links.

The difference between a razor that lasts three shaves and one that gives you clean cuts for weeks comes down to three things: proper sharpening technique, consistent maintenance, and smart storage.
You don’t need expensive equipment or complicated procedures. What you need is the right knowledge applied consistently, treating your blade like the precision tool it is rather than a disposable afterthought.
Table Of Contents
Key Takeaways
- Extending blade life comes down to three core practices: stropping with denim or leather to realign the edge (15-20 passes after each shave), thorough drying to prevent the 78% corrosion spike from moisture exposure, and applying 2-3 drops of mineral oil to completely dry blades for 90% corrosion reduction.
- Proper sharpening requires progressive grit stages starting at 1000 grit for bevel work, moving through 4000-6000 for polishing, and finishing at 10,000-12,000 for mirror edges, with angle precision between 16-19 degrees for straight razors and around 30 degrees for safety razors being critical to performance.
- Storage location matters more than most realize—bathroom humidity averaging 75% triggers rust in 48 hours, while bedroom storage below 50% humidity combined with airtight containers blocks oxygen exposure and extends blade life threefold compared to open storage.
- Maintenance timing signals include physical tugging during shaves, visible irritation requiring multiple passes, or hitting the 20-30 shave mark for quality blades, with proper stropping and cleaning routines capable of stretching sharpness to 40-80 shaves before replacement becomes necessary.
Essential Razor Blade Sharpening Methods
A sharp blade makes all the difference between a smooth shave and a frustrating one. You don’t need expensive equipment to keep your razors performing like new.
Here are the most effective methods you’ll use to restore and maintain that cutting edge.
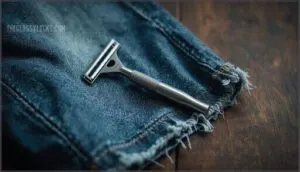
Using Denim for Sharpening Disposable and Safety Razors
With old jeans, you can extend disposable razor and safety razor blade life considerably. The denim stropping technique realigns blade edges without removing metal, restoring sharpness through microscopic edge effects.
Here’s your routine for sharpening razor blades:
- Hold the razor at a 30-degree angle against clean denim
- Drag the blade backward 15-20 passes per session
- Rotate the denim every 5-6 strokes for even results
- Strop immediately after drying to prevent oxidation
- Replace denim every 30-40 shaves to maintain performance
This stropping surface delivers performance impact comparable to leather for disposable razors, extending blade life up to 6-8 weeks. Regular sharpening helps prevent dull razor problems.
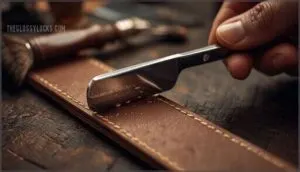
Stropping Straight Razors With Leather Strops
Straight razor stropping works differently than denim methods. You’re realigning microscopic bends in the edge through burnishing, not abrasion. This stropping technique restores shaving readiness between honing sessions.
Your leather strop choice matters. Cowhide offers versatility, while cordovan delivers medium abrasiveness with superb durability. Latigo provides heavy draw for increased feedback during each pass. A good idea is to think about a strop’s draw on the blade.
Execute 40-50 laps before each shave, keeping spine and edge flat against the leather. Pull toward the spine, flip over the spine, and apply minimal pressure. This edge alignment process creates micro-convexity that strengthens your straight razor blades without dulling the tip.
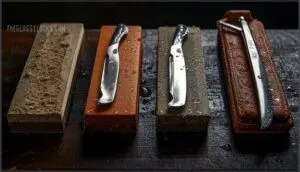
Sharpening With Whetstones and Sharpening Stones
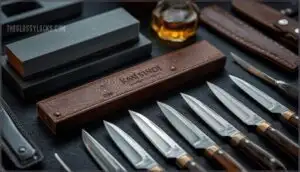
Whetstones take honing further than stropping alone. These sharpening stones remove metal to restore cutting geometry, unlike leather’s burnishing action. You’ll rely on grit levels and stone types to control blade sharpening precision.
Start with this sharpening stages progression:
- 1000 grit establishes a new bevel on dull razor blades
- 4000-6000 grit polishes the edge and raises a burr
- 10,000-12,000 grit creates mirror finishes for best edge retention
- Regular stropping extends maintenance frequency to 6-12 months between full whetstone sessions
Water stones need 10-15 minutes soaking time before use. Keep consistent 15-25 degree angles throughout each stage, rinsing frequently to prevent metal slurry buildup that hampers cutting performance.
Mastering The Correct Sharpening Angle
Honing precision demands mastering the right angle. Straight razors perform best between 16–19 degrees, while safety razors hold near 30 degrees for control. A 15-degree angle delivers scalpel-like sharpness but dulls faster—bump it to 20 degrees for better edge retention.
Blade geometry changes everything. Angles below 12 degrees risk microchipping; above 25 degrees, you sacrifice cutting-edge sharpness. Use the spine-to-blade ratio to calculate your bevel—a 1:3.6 ratio gives you that sweet 17-degree honing precision. Angle calibration within 0.5 degrees keeps shaving performance consistent stroke after stroke.
| Razor Type | Appropriate Angle |
|---|---|
| Straight razors | 16°–19° |
| Safety razors | ~30° |
| Disposable blades | ~30° |
Razor Blade Maintenance for Lasting Sharpness
Sharpening alone won’t keep your blade in peak condition—daily upkeep is what separates a razor that lasts from one that dulls in days.
The way you clean, dry, and store your blade between shaves determines how long it holds its edge. Here’s what you need to do after every use to maintain that sharp, smooth cut.
Proper Cleaning After Each Use
You can’t see dirt, but it’s there after every shave—and it dulls your blade fast. Rinsing under warm running water removes about 85% of debris, but you need to go further. Rinse the blade after every pass during your shave to cut clogging by 70%.
Here’s your cleaning routine for blade maintenance:
- Rinse thoroughly under warm water after each use
- Tap the razor gently to shake out trapped hair and cream
- Inspect for visible residue—18% of razors still have buildup
- Use a soft brush if needed for stubborn debris
Proper blade cleaning doubles the lifespan of your razor and reduces skin irritation by 22%. Rinsing techniques and residue removal matter more than most barbers realize. Clean blades mean sharper shaves, and blade drying comes next.
Disinfecting Blades to Prevent Contaminants
Beyond cleaning, disinfecting blades regularly protects you from microbial risks that lurk on every razor. Tests show wet razors harbor up to 4.9 million colony-forming units—Streptococci and Staphylococci thrive in that environment.
Soak your blade in 70% isopropyl alcohol for one to two minutes weekly to eliminate bacteria without damaging steel. Hydrogen peroxide works too—dilute it 1:1 with water and soak for 10 minutes biweekly.
Chemical disinfectants cut pathogen transmission risks that cause folliculitis and worse infections. Proper disinfection frequency keeps contaminants off your blade and your skin safe.
Thorough Drying Techniques to Prevent Rust
After every shave, drying the blade thoroughly stops rust before it starts—moisture exposure spikes corrosion rates by 78% within 48 hours if you skip this step. Manual drying extends sharpness over twice as long compared to air drying alone, making it essential razor blade care.
Proper drying also prevents mineral buildup from hard water, which causes up to 25% of perceived dullness. Blade storage in dry conditions preserves sharpness five times longer than damp environments.
Follow these proven blade maintenance steps for rust prevention:
- Shake off excess water – Remove 60% of surface moisture immediately after rinsing
- Pat with lint-free cloths – Cuts residual moisture by another 35% without edge damage
- Use a blow dryer on cool – Dries completely in under one minute without warping steel
- Improve airflow – Stand razors upright so air circulates 2.5 times faster
- Control humidity – Store below 50% relative humidity to slash rust risk by 84%
Applying Oil for Blade Protection
Blade lubrication with mineral oil is like putting a protective shield on your razor—it cuts corrosion by over 90% and can stretch blade life from 2 weeks to 6–8 weeks.
Mineral oil shields your razor from corrosion by over 90% and extends blade life from 2 weeks to nearly 2 months
Apply 2–3 drops along the blade edge after each shave, but only on completely dry blades to avoid trapping moisture. Light mineral oil works best for safety and compatibility with most razors, while baby oil can actually soften plastics and increase dullness by 50%.
Best Storage Practices for Razor Blades
Where you store your blades matters as much as how you clean them. The right storage keeps moisture and contaminants away from the edge.
Here’s what you need to know about protecting your investment.
Choosing a Dry and Safe Storage Location
Where you store your razors matters more than most barbers realize. Humidity impact on blades is serious—above 65%, moisture triggers corrosion that dulls edges fast. Temperature effects compound this problem, especially near heat sources or exterior walls. Proper razor storage protects your investment and keeps edges sharp longer.
- Store razors in bedrooms or linen closets where humidity generally stays below 50%, never in bathrooms averaging 75% moisture
- Keep blades away from windows and exterior walls where temperature gradients cause condensation
- Assure moderate airflow importance without direct exposure to prevent moisture buildup
- Maintain ambient temperatures around 18–20°C to minimize stress on blade steel
- Use dehumidification methods like small dehumidifiers or silica gel packets for contaminant control in enclosed storage areas
Using Protective Cases and Airtight Containers
Think of protective cases as armor for your blades—airtight benefits are real. Sealed containers block oxygen exposure, the main culprit behind corrosion, preventing rust for months. Polymer-based case materials using corrosion inhibitors extend blade life threefold compared to open storage.
Humidity control through airtight storage practices cuts edge degradation by over 40%, essential for proper razor storage and blade care.
Avoiding Humidity and Salty Air Exposure
Humidity above 70% triggers water film formation on blades, starting corrosion within days—bathroom moisture alone can rust steel in 48 hours. Salty air accelerates this threefold, with coastal conditions demanding airtight storage.
Controlled environments using silica gel cut humidity by 40%, while protective coatings like mineral oil reduce corrosion over 80%, extending razor lifespan considerably through proper blade care and mitigation practices.
Straight Razor Care and Sharpening Tips
Straight razors demand more attention than cartridge systems, but the payoff is a cleaner shave and a blade that lasts for years. Your routine should cover daily upkeep, material choices, prep work, and knowing when it’s time to refresh the edge.
Here’s what you need to handle each part of straight razor care.
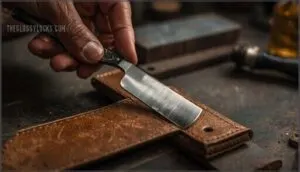
Daily Maintenance and Stropping Routines
Your straight razor needs attention before and after every shave. Stropping frequency matters—run the blade spine-first along your leather strop for 20–30 passes per side daily. This realigns the edge and can stretch sharpness up to 40 shaves before rehoning.
Here’s your shaving routine checklist:
- Clean and dry the razor thoroughly before stropping
- Use controlled, light pressure on a tensioned strop
- Flip the blade on its spine between passes for even edge refreshment
- Apply chromium oxide paste weekly for technique refinement
- Touch up on fine-grit stones every 2–3 months
Professional recommendations emphasize daily razor stropping technique as non-negotiable for lasting sharpness.
Selecting Quality Blade and Handle Materials
Your material choices dictate performance—blade steel types and handle material ergonomics define how your razor feels and cuts. Stainless steel dominates blades because 12% chromium content creates corrosion resistance without sacrificing edge. Carbon content matters: higher carbon (0.5–1.5%) means sharper edges but faster rust. Handle weight distribution affects control—stainless steel at 7.9 g/cm³ stabilizes coarse hair cuts, while titanium’s 40% lighter frame suits precision work.
Blade grind and blade materials work together—harder alloys resist deformation but need proper tempering to avoid brittleness.
| Material Aspect | Performance Impact |
|---|---|
| Blade materials (3Cr13 stainless) | 12.5–14.5% chromium balances sharpness and rust resistance |
| Coating performance (platinum/Teflon) | Extends sharpness 20–30% longer than uncoated blades |
| Handle ergonomics (resin vs. metal) | Resin absorbs 40% less vibration; knurled steel improves wet grip 60% |
Preparing Skin and Hair for Optimal Shaving
Before your blade touches skin, you need proper shaving preparation. Pre-shave cleansing removes bacteria—dermatologists report 47% fewer irritation incidents in sensitive skin.
Soften hair with a warm shower or damp towel for 2–3 minutes; hydration cuts removal force by 40%. Exfoliation benefits include 32% fewer ingrown hairs when done 2–3 times weekly.
Apply shaving lubricants with hydrating agents to reduce friction by 37%, and your timing approach matters—immediate hair removal lowers infection rates to 3.1%.
Recognizing When to Sharpen or Replace
When your blade starts tugging or pulling at hair during a pass, that’s the clearest physical sign of dullness you’ll notice. Shaving performance indicators like redness, razor burn, or needing multiple passes for a close shave tell you it’s time to sharpen.
For usage-based guidelines, most quality blades need attention after 20–30 shaves, though coarser hair accelerates wear. Blade hygiene factors matter too—visible rust or difficult-to-clean residue means replacement, not sharpening.
Maintenance considerations include regular stropping and proper storage to extend blade sharpness between sessions.
Advanced Tips for Sharper, Longer-Lasting Blades
You’ve covered the basics, but a few higher-level techniques can make a real difference in how long your blades stay sharp.
These strategies involve choosing better materials, refining your sharpening process, and fixing common errors.
Let’s break down what works when you’re ready to take your blade care to the next level.
Benefits of Blade Coatings and Harder Alloys
Modern blade coatings and harder alloys can transform your blade performance. Coatings like titanium nitride or platinum boost edge retention, reduce cutting force by up to 80%, and fight corrosion that shortens blade life.
Ceramic-coated blades stay sharp 10 times longer than standard steel, while sophisticated alloys improve material innovations and blade sharpness.
These upgrades mean fewer sharpenings, better blade longevity, and a smoother shave every time.
Rotating Sharpening Surfaces for Even Results
When sharpening stone meets spinning wheel, abrasive uniformity becomes your secret weapon for professional-grade results. Rotational speed between 1,200–1,800 rpm delivers ideal contact without overheating your blade, while rotating the surface every few strokes balances edge symmetry and cuts material removal variance by 30%.
Here’s how rotary sharpening outperforms manual methods:
- Faster processing: Rotary-assisted blade sharpening finishes 35% quicker than hand stropping while maintaining finish quality.
- Greater accuracy: Bevel angles improve by 0.3° compared to manual techniques, reducing edge deviation.
- Consistent wheel maintenance: Recoat abrasive wheels every 20–25 cycles to restore grit performance and extend wheel life by 200%.
- Extended durability: Blades retain cutting efficiency through 25% more operational cycles when sharpened with controlled rotation.
Balanced rotation prevents heat buildup that dulls edges prematurely, maintaining your razor sharpening precision stroke after stroke.
Using Multiple Grits for Edge Refinement
Progressive grit progression transforms rough edges into razor-sharp accuracy through deliberate material removal. Start with coarse grits (200–400) to reshape damaged blades, then advance through medium (1000–3000) and fine grits (6000–8000) for edge refinement.
Each finer grit removes 80–90% of previous scratches while reducing material removal from 5–10 µm down to 0.1–0.5 µm per stroke. Dual-grit stones accelerate blade sharpening by combining deburring and polishing in one pass.
Stop at 8000 grit—polishing effects beyond 10,000 yield minimal cutting improvement despite cosmetic appeal.
Troubleshooting Common Sharpening Mistakes
Most sharpening failures stem from five controllable errors. Angle inconsistency—fluctuations beyond 5° from your target sharpening angle—cuts edge retention by 40%. Uneven pressure control causes blade warping in 70% of workshop cases.
Stone prep matters: skipping 10–15 minute soaking drops cutting efficiency by half. Grit progression can’t be rushed—jumping steps leaves scratches that dull your razor 35% faster.
Frequently Asked Questions (FAQs)
How often should I replace my razor blades?
Your shaving habits dictate replacement frequency—plan on swapping blades every 5–7 shaves for most users. Hair coarseness accelerates dulling, while blade material and coatings affect longevity.
Visual indicators like tugging or irritation signal it’s time for blade replacement.
Can electric razors be sharpened at home?
You can try DIY blade sharpening for electric razors using toothpaste or household abrasives, but experts don’t recommend it.
Most manufacturers suggest replacing blades every 12-18 months instead, since home methods risk uneven edges and skin irritation.
What causes razor blades to dull so quickly?
Your blade edge suffers from microscopic cracks and structural damage caused by repeated contact with hair, which deforms the steel despite its hardness.
Moisture, skin oils, and impurities from shaving creams accelerate corrosion processes, while environmental factors like humidity strip protective layers and promote rust formation.
Are expensive razor blades worth the extra cost?
High-end blades generally last seven to ten shaves compared to one or two for cheaper options, making them cost-effective despite higher upfront prices.
You’ll get greater sharpness, better blade longevity, and improved shaving comfort with reduced irritation, so the investment pays off.
Can I sharpen cartridge razor blades effectively?
You can sharpen cartridge razors using denim or stropping methods, realigning microscopic edges to extend blade life by 50-80 shaves.
However, DIY sharpening offers temporary improvement rather than true restoration, with results varying by technique and blade condition.
Conclusion
Picture your razor edge catching the light—sharp, clean, ready. That’s what these tips for sharper razor blades deliver when you apply them with discipline.
Strop your blade, clean it properly, store it dry, and treat maintenance like the ritual it deserves to be.
The payoff isn’t just in the shave itself but in the confidence that comes from mastering your tools. Sharp blades don’t happen by accident—they’re earned through consistent care and attention to detail.
- https://starmaxxgroup.com/blog/how-many-times-can-you-use-a-stainless-steel-razor-blade/
- https://www.nakedarmor.com/blogs/grown-man-shave-society-articles/how-often-should-you-change-your-safety-razor-blade
- https://barbersets.com/blogs/blogs/what-is-the-shelf-life-of-unopened-derby-razor-blades
- https://news.mit.edu/2020/why-shaving-dulls-razors-0806
- https://www.theenglishshavingcompany.com/blog/how-long-do-safety-razor-blades-last/

