This site is supported by our readers. We may earn a commission, at no cost to you, if you purchase through links. This content is for general informational and educational purposes only and is not a substitute for professional medical, dermatological, or nutritional advice.
A razor doesn’t need to look rusty to shave badly. A blade can drag across your jaw like sandpaper long before corrosion appears, because dried soap, skin oil, and a slightly rolled edge have had time to build.
You’ll get a smoother shave by treating the blade like a cutting tool, not something to bang against the sink and forget. Cartridge heads, safety blades, and straight razors need different care. Use the wrong fix, and you’ll damage the edge instead of reviving it.
These tips for sharper razor blades point you toward the right method and better care after shaving.
Table Of Contents
Key Takeaways
- Match your sharpening method to your razor type — stropping works for straight razors, but safety blades can’t handle the same treatment without bending or wearing out faster.
- How you clean and store your blade matters just as much as sharpening it — rinse after every shave, dry thoroughly, and keep it out of humid bathrooms to stop rust before it starts.
- Light pressure is everything when honing on a whetstone — let the stone do the cutting, and work through grits in order so you’re not dragging scratches into stages that can’t fix them.
- Know when to quit — if your blade still drags after honing, shows visible chipping, or has rust covering more than a fifth of the surface, it’s time to replace it, not rescue it.
Best Razor Blade Sharpening Methods by Type
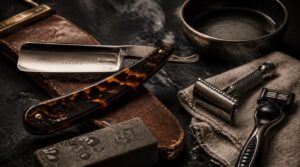
Not every razor can—or should—be sharpened the same way. You’ll get better results and avoid damaging the edge when you match the method to your razor type. Here’s how to handle each one safely.
For practical guidance, explore these natural ways to sharpen a razor without compromising its edge.
Disposable and Cartridge Razor Stropping
Although disposable blade stropping offers only a small boost, it can smooth tiny burrs and reduce tugging. Use any built-in stropping features as directed, with two or three gentle passes only.
A razor strop or stropping with denim can help blade edge realignment, but don’t press or flex the cartridge. Coatings wear quickly. Inspect for nicks, discoloration, or roughness, then replace it. This is blade longevity extension, not magic. For less waste, consider a durable handle with replaceable stainless steel blades.
Safety Razor Blade Limitations
Safety blades aren’t built for true sharpening. Their thin steel flexes easily, and stropping offers minor blade edge realignment at best. Coatings wear, while repeated honing speeds blade edge degradation.
Don’t force extra life with pressure. Excessive pressure bends the edge, hurts blade edge performance, and can irritate skin. Open-comb heads add torque, and over-tightening can cause blade warp. Dry blades promptly, humidity cuts blade edge durability.
Straight Razor Leather Stropping
Unlike safety blades, a straight razor responds well to a leather strop. Keep gentle, even strop tension and start on clean, flat linen or canvas before leather.
During stropping, lead with the spine, then use a slight edge lifting technique. Turn on the spine only. Light passes deliver blade edge refinement without damage.
Save compound application for later, not after fresh honing. Wipe, hang, and store your strop dry for smart blade maintenance.
Straight Razor Stone Honing
A strop maintains an edge, but a honing stone rebuilds it. Flatten and soak your water stone, then make a light slurry before you begin.
- Start around 1000 grit to reset blade edge geometry.
- Keep angle consistency near 15–20 degrees with gentle strokes.
- Move through progressive grits to 12000, thinning slurry as scratches fade.
Test on arm hair, rinse thoroughly, and finish with careful blade drying.
When Professional Honing Helps
Call a professional when a straight razor pulls, chips, or keeps losing its bite. Blade edge restoration with a honing stone and progressive grits repairs damage, improves edge alignment, and gives you a cleaner shave.
You’ll also get hygiene assurance through inspection and sanitizing. Precision sharpening reduces pressure, nicks, and irritation while helping the edge stay sharp longer.
How to Hone Razor Blades With Whetstones
Honing on a whetstone brings a straight razor’s edge back with real precision. You’ll need a steady hand, patience, and the right setup—no rushing it. Follow these steps to keep the edge keen, smooth, and ready to shave.
Soak and Flatten Whetstones
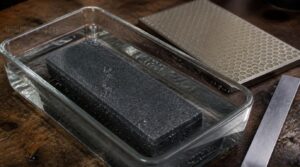
Soak synthetic whetstones for 5 to 15 minutes, fully submerged until bubbles stop. Use clean, cool water, then wipe surface puddles. Never add oil.
After sharpening, follow these razor blade longevity tips to dry and store blades properly, preventing rust and edge damage.
- Flatten with a diamond plate
- Use even, full-surface passes
- Rinse swarf from grooves
- Check with a straightedge
- Air-dry before storage
A flat stone keeps blade maintenance predictable. Keep it away from heat and sun.
Maintain The Correct Honing Angle
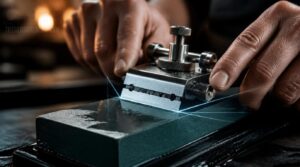
Set a 15-degree angle and keep it locked from heel to tip. A honing guide, calibrated square to the blade, takes guesswork out of setup.
Keep your wrists steady, elbows close, and use short, controlled passes on the honing stone. Check your sharpening angle every few strokes. That protects blade edge symmetry and helps clean edge realignment.
Use Light, Consistent Pressure
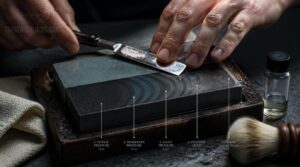
Light pressure wins. Let the whetstones cut, not your hands. Heavy sharpening pressure can chip a razor blade’s fine edge or make it skip.
Use pressure scale training to build feel:
- Start near 3–4 pounds.
- Keep each stroke consistent.
- Drop pressure through progressive grit stages.
- Finish feather-light.
That progressive pressure drop builds pressure sensitivity development and makes blade maintenance safer.
Progress Through Multiple Grits
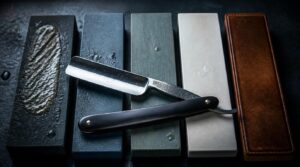
Think of grit progression like roughing then polishing leather. Coarse grits cut fast, pulling material off quickly. Finer grits slow that down and start refining.
| Grit Stage | Purpose |
|---|---|
| 1,000 (Coarse) | Build the bevel |
| 4,000–8,000 (Mid) | Eliminate scratches |
| 12,000+ (Fine) | Sharpen the edge |
| Finishing pass | Prevent burr buildup |
You’ll move through each stage on synthetic whetstones in order. Jump ahead, and you’ll carry scratches into stages that can’t clear them. Blade honing only clicks when the full progression runs start to finish.
Polish and Remove Edge Burrs
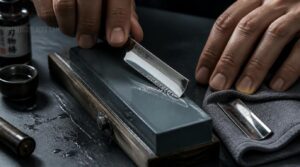
After your finest grit pass, microscopic burrs still cling to the edge. You’ll flip your stone to the finishing side and do a few light edge burnishing strokes, spine-first. That knocks burrs loose without reforming them.
Wipe the blade clean to prevent slurry buildup from redepositing grit.
Run your thumb across the flat, not the edge, to check the finish.
Clean and Dry Razor Blades Properly
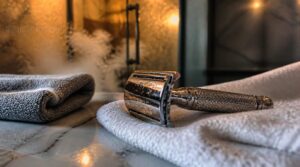
Sharpening your blade is only half the job — how you clean and dry it afterward makes all the difference in how long it lasts. Skipping this step is where most people unknowingly let rust and dullness creep in. Here’s what you need to do right after every shave.
Clean and dry your razor after every shave to prevent rust, dullness, and a shorter blade life
Rinse Away Hair and Residue
After each swipe, rinse right away under running water. Don’t just splash and hope for the best.
Hold the razor so water flows off the edge, not across it, and tilt it gently to hit both sides. Warm water loosens soap and gel residue faster.
Rinse between passes too. Dried residue bonds tight and makes your next shave feel rough.
Disassemble Safety Razor Components
You’ll pull it apart next. Twist the handle counterclockwise to free the head, then separate the top cap, blade, and base plate.
- Unscrew the handle counterclockwise until the head releases.
- Lift the top cap off, keeping fingers clear of blade edges.
- Slide the blade out using a paper towel, not bare fingers.
- Set each part aside separately before drying.
Disinfect With Isopropyl Alcohol
With the parts separated, disinfect the blade using 60% to 90% alcohol. First remove any leftover soap, hair, or skin oil, since grime blocks the alcohol from doing its job.
Wet the blade fully with isopropyl alcohol and keep it visibly wet for at least 60 seconds. Keep it away from flames, then seal the bottle tight to prevent evaporation and weaker disinfecting power.
Dry Without Touching The Edge
After alcohol contact time, dry the handle and guard first. Then hold the razor with the blade pointing down, away from your fingers.
Use a lint-free cloth to pat around the blade, never rub the edge. Let air move from spine to tip. Check the bevel for droplets before returning it to its dry storage location.
Cool-Air Dry Hard-to-Reach Areas
A cool-air blast reaches the sneaky spots under the guard and around the handle. Keep the nozzle back, and wear eye protection.
- Use compressed air drying briefly.
- Pat with microfiber.
- Set on a ventilated stand.
- Use a low heater mat.
- Add a desiccant sachet.
Finish drying the blade, then use airtight storage for humidity control and moisture protection.
Prevent Razor Blade Rust and Corrosion
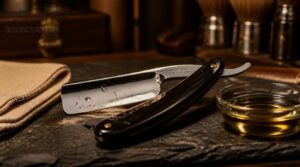
Rust can ruin a good edge long before the blade feels dull. You’ll get the best protection by building a few simple habits into your routine. Start with these practical ways to keep moisture and corrosion in check.
Apply a Light Mineral Oil
After drying, apply 2–3 drops of light mineral oil to the blade with clean fingertips or a soft cloth. Spread it across the edge, surface, and pivot areas, then wipe away excess. You want a faint sheen, not a greasy coat.
This simple barrier helps prevent blade corrosion and works with steel, plastic, wood, and horn. For airtight storage, oil first.
Store Outside Humid Bathrooms
The bathroom is rough on steel. Avoid steam exposure by keeping your razor in a dry cabinet or bedroom drawer, not beside the shower.
For solid Bathroom Humidity Prevention, use ventilated storage solutions and store blades outside the shower. Moisture-free razor storage, plus silica packs for airtight storage, helps with corrosion prevention and better blade drying techniques.
Keep Razors Upright
Keep your razor upright in a stand. Blade Edge Protection starts by keeping the edge off wet counters, sink rims, and stray soap residue. That simple blade storage location also improves Air Circulation, so water leaves faster.
For smart razor storage tips, store blades outside the shower and away from splash zones. Upright blade storage helps with Moisture Prevention, Contaminant Avoidance, and Travel Ready Storage when packing later.
Use Cases and Silica Gel
Silica gel works like a tiny moisture guard inside a protective case. Add one packet to blade storage, especially in a humid room, to support blade corrosion prevention and stop rust or pitting.
You’ve seen it in Food preservation, Electronics shipping, Shoe storage, and Medicine packaging. Use fresh packets in Travel kits too. Don’t let silica gel touch a wet blade.
Protect Blades During Travel
Travel can turn a sharp edge into loose change. You’ll pack blades with a blade guard and protective case, checking case sealing integrity before leaving.
- Choose durable blade guard materials.
- Position edges away from metal.
- Add silica for moisture absorption methods.
- Disinfect, dry, and seal.
These blade storage tips support travel case durability, blade disinfection, and blade corrosion prevention.
Keep Razor Blades Sharper for Longer
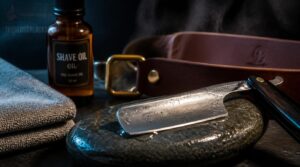
A sharp razor lasts longer when you treat its edge with a little care between shaves. Small habits matter, and they also help you avoid nicks, irritation, and wasted blades. Use these steps to protect the edge and know when it’s time to let a blade go.
Strop Before Straight Razor Shaves
Before each shave, you’ll strop on fabric, then leather, using light pressure to settle microscopic burrs.
| Side | Passes |
|---|---|
| Fabric | 15–20 |
| Leather strop | 30–40 |
Lay spine and edge flat. Draw spine-first, then make the blade edge reversal by turning on the spine, never rolling the edge. This protects edge and helps razor blade maintenance. Strop before every shave; passes build control.
Avoid Tapping Blades on Sinks
After stropping, never tap a razor on the sink. Sink tapping damage chips edges, creates tiny fractures, and can transfer rust residue from metal fixtures.
Set the razor on a rubber mat or microfiber cloth instead. Wipe it dry, clean with alcohol, then use a guard or dry case. That simple razor maintenance step helps blade corrosion resistance and safer transport.
Test Sharpness Before Shaving
Before your next shave, use edge testing to check blade sharpness and blade edge consistency. Hold the edge upward and try a clean hanging hair cutting test along the blade. It should catch and cut, not slide.
You’ll also use the arm hair method for cutting precision, without touching skin. For a quick blade edge inspection, lightly feel a moistened thumb pad across it. Check your sharpness chart if needed.
Prevent Over-Honing and Edge Damage
A clean test tells you when to stop. Prevent Over-Honing and Edge Damage with edge protection techniques:
- Use light honing pressure control to limit oversharpening and blade edge deformation.
- Follow stroke limit guidelines: 5–7 passes, watching blade edge wear patterns.
- Alternate sides for symmetrical edge maintenance and burr prevention methods.
- Stop if blade edge microchipping or blade edge fatigue appears.
Know When Replacement is Safer
Replace the blade when visible deformation appears or blade play throws off alignment. Don’t gamble with razor blade reuse when rust coverage passes 20 percent, edge chipping exceeds 0.5 mm, or a blade corrosion spike spreads across the edge.
Recurring dullness after honing signals failing blade edge effectiveness. Watch blade edge wear patterns. Smart blade replacement timing prevents nicks and irritation.
Frequently Asked Questions (FAQs)
How to make a razor blade sharper?
Your blade isn’t dull — it’s misaligned. Edge alignment through leather stropping realigns microscopic teeth, while a honing stone removes burrs. Nail your sharpening angle and you’ll feel the difference immediately.
How do you keep razor blades sharp?
Keeping a sharp edge is really about consistency. Strop before every shave, store your razor dry and upright, and never tap the blade on the sink. Small habits done right beat any single sharpening session.
Can you sharpen dull razor blades?
Yes, you can. Think of a dull blade like a bent knife tip. With the right blade restoration techniques — a honing stone, strop, or synthetic whetstone — you’ll revive that edge and shave sharp again.
What is the most sharpest razor blade?
Two names dominate the sharpness debate: Feather Hi Stainless and Kai. Both use platinum chromium coatings and precision blade edge geometry that lets them slice cleanly through coarse hair with almost zero drag.
How often should I replace my razor blades?
A smooth glide means keep going. Tugging or irritation? Swap it out. Plan on replacing every five to seven shaves, but coarse hair dulls blades faster, so watch for wear signs, not just the count.
Conclusion
Sharp blades, smart habits, smooth shaves every single time. These tips for sharper razor blades aren’t just about the edge. They’re about the whole routine you build around it.
Strop before you shave, clean right after, and store it somewhere dry and away from humidity. A well-kept blade doesn’t pull or irritate. It just works.
Treat your razor like the precision tool it’s, and every morning shave becomes something you actually look forward to.
- https://www.nakedarmor.com/blogs/grown-man-shave-society-articles/how-do-you-keep-a-safety-razor-blade-sharp
- https://www.therazorcompany.com/blogs/the-benefits-of-wet-shaving/razor-blade-care-101-how-to-extend-the-life-of-your-blades
- https://gillette.com/en-us/shaving-tips/how-to-shave/how-often-should-you-change-your-razor