This site is supported by our readers. We may earn a commission, at no cost to you, if you purchase through links.

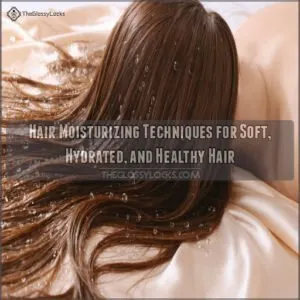
Most people apply moisturizer to dry hair and wonder why it never quite works. The timing isn’t accidental—hair absorbs products dramatically better during a specific window right after washing, when the cuticle sits slightly open and the fiber is primed to pull moisture inward. Miss that window, and you’re basically spreading product on a sealed surface.
Towel-dried hair hits a kind of sweet spot: not soaking wet, not fully dry. That brief state changes how ingredients penetrate, how evenly products distribute, and how long moisture actually stays locked in. The damp hair moisturizing technique turns that biology into a reliable routine.
Table Of Contents
- Key Takeaways
- What is Damp Hair Moisturizing?
- Causes of Dry Hair
- Prepare Hair Before Moisturizing
- Step-by-Step Damp Hair Method
- Choose Moisturizers by Hair Type
- Ingredients That Lock Moisture
- Top 10 Damp Hair Products
- 1. Vegamour Weightless Repair Oil
- 2. Shu Uemura Gentle Radiance Clarifying Shampoo
- 3. Color Wow Money Hydrating Hair Mask
- 4. Fable Mane Strengthening Hair Oil
- 5. SheaMoisture Coconut Hibiscus Curl Shampoo Conditioner
- 6. Kerastase Chronologiste Hydrating Shampoo
- 7. Kingsteam Ozone 2in1 Hair Facial Steamer
- 8. Heated Thermal Hair Steamer Cap
- 9. K18 Molecular Repair Hair Mask
- 10. Living Proof Triple Bond Hair Treatment
- Keep Hair Moisturized Longer
- Frequently Asked Questions (FAQs)
- Can wet hair cause folliculitis?
- What is the 3 minute rule for moisturizer?
- What helps dry menopausal hair?
- Can hard water affect how well moisturizers absorb?
- Does diet or water intake impact hair hydration?
- How often should you repeat the damp hair method?
- Can you layer multiple leave-in products without buildup?
- Does scalp health affect how moisturized hair feels?
- Conclusion
Key Takeaways
- Applying moisturizer to towel-dried hair — cool, damp, not dripping — gives your cuticle a brief open window that pulls products deeper than dry hair ever could.
- Most dryness isn’t random; it stacks up from habits like daily washing, hot water, heat styling without protection, and hard water mineral buildup blocking absorption.
- Your hair type and porosity should drive every product choice — fine hair needs lightweight sprays, high-porosity hair needs the LOC method, and damaged hair needs protein balanced with moisture.
- Keeping hair hydrated long-term comes down to a few consistent habits: silk pillowcases, weekly deep conditioning, spaced-out wash days, and sealing ends with a lightweight oil between washes.
What is Damp Hair Moisturizing?

Damp hair moisturizing is exactly what it sounds like — applying products to hair that’s towel-dried but not soaking wet. It’s a small shift in timing that makes a real difference in how well your hair holds onto moisture.
Pairing this technique with the right leave-in products for hair hydration takes it even further, giving your strands plant-powered nourishment they can actually absorb.
Here’s what you need to know before adding it to your routine.
Why Damp Hair Absorbs Moisturizer Better
When your hair is damp, something genuinely useful happens: the cuticle swelling slightly opens the outer layer, reducing surface tension and activating hydrophilic ingredients in leave‑in conditioners.
That moisture gradient pulls humectants deeper during penetration timing — basically a short window right after blotting.
Damp styling works with your hair’s natural hair porosity, giving moisture absorption a real head start.
Difference Between Wet, Damp, and Dry Hair
Not all "wet" is created equal — and that distinction actually matters for your routine.
- Wet hair drips when lifted and has high surface tension, which dilutes product quickly
- Damp hair feels cool and shiny but doesn’t drip — ideal cuticle flexibility and friction levels for even product distribution
- Dry hair shows higher evaporation rate resistance, so moisture balance is harder to restore
- Weight perception shifts noticeably as water leaves, affecting curl shape and damp styling versus wet styling for curls
How This Technique Helps Reduce Dryness
Knowing the difference between wet, damp, and dry hair sets you up for this next part — because damp is where the real work happens.
That slightly cool, non-dripping state gives you a moisture retention boost right away: products spread evenly for even product distribution, the cuticle flattening effect reduces friction, and a sealant oil locks everything in before evaporation takes over.
Best Hair Types for Damp Moisturizing
This technique works for nearly every texture — but a few hair types see the biggest wins.
- Fine Straight Benefits: Lightweight sprays absorb fast without flattening thin strands.
- Thick Wavy Needs: Cream leave-ins reach uneven waves more effectively when hair is damp.
- Curly Coil Retention and Coily Kink Sealing: Both textures hold moisture longer when products are applied before the cuticle closes.
High porosity hair and low porosity hair respond differently — high porosity management means sealing immediately, while medium porosity hair stays balanced with lighter layering. Curly hair moisture and coily hair thrive most with this method.
When to Use This Method in Your Routine
Timing matters more than most people realize. Use damp moisturizing right after washing — especially after a post-clarifying wash, when your hair is freshly stripped and thirsty.
It’s also your best move before heat styling, during seasonal dryness spikes, or as a midweek frizz boost between wash days.
After color treatment, apply leave-in conditioners within minutes while cuticles are open for maximum moisture lock.
Causes of Dry Hair

Dry hair rarely happens for just one reason — it’s usually a few habits and outside factors piling up over time. Understanding what’s behind it makes fixing it a whole lot easier.
most common culprits.
Over-washing and Moisture Loss
Washing your hair every day might feel like a clean habit — but it could be the reason your ends feel like straw. Each wash strips scalp oil before sebum migration can coat your lengths, creating a cycle of Scalp Oil Depletion.
Sulfate Impact hits hard here — strong surfactants swell the hair cuticle and pull moisture out fast.
Watch for these Frequency vs. Hydration warning signs:
- Hair squeaks after rinsing — natural oils are gone
- Ends feel dry while roots feel oily — overwashing at work
- Scalp feels tight after washing — barrier disruption
- Fine hair looks dull within a day — sebum migration delay
Heat Styling and Cuticle Damage
Hot tools sit between 180–230°C — well past the Cuticle Lift Threshold where heat styling begins raising those protective micro-scales. Once lifted, cuticle damage accelerates moisture loss quickly.
Your hair’s Porosity Heat Sensitivity determines how quickly this happens.
A heat protectant spray creates a Protectant Film Efficacy barrier that buys real protection. Pair it with Thermal Diffusion Techniques like low-heat diffusing to keep heat damage mitigation front and center.
Bleaching, Coloring, and Chemical Treatments
Chemical treatments don’t just change your hair’s color or texture — they reshape it at a structural level. Bleach, in particular, erodes the cuticle layer and raises cuticle porosity, meaning moisture escapes just as fast as it enters.
Chemical treatments don’t just alter your hair’s appearance — they restructure it, leaving the cuticle so porous that moisture escapes as fast as it enters
Here’s what each treatment does:
- Bleaching — Higher developer strength (up to 40 volume) strips pigment and weakens fiber integrity.
- Permanent color — Ammonia swells the shaft open, depleting natural lipids and reducing hair moisture retention strategies.
- Toners — Toner pH imbalances can leave cuticles rough and prone to faster color fade, prevention failures.
- Relaxers — Skipping relaxer neutralization leaves hair brittle and prone to breakage during detangling.
- Perms — Chemical treatments impact on hair stacks: overlapping perms on colored hair multiplies porosity damage, fast.
Deep conditioning masks and leave-in conditioners vs lotions become non-negotiable after any chemical service.
Low Humidity, UV Exposure, and Wind
weather outside is doing more damage than you might think. Low humidity hydration becomes a real challenge when dry air pulls moisture straight from your strands — that’s atmospheric dryness effects in action.
UV-induced color fade accelerates cuticle breakdown, making UV protection essential outdoors. Wind-driven frizz lifts the cuticle and tangles strands, worsening moisture loss.
Sun protection strategies like hats genuinely help.
Aging Hair and Reduced Scalp Oil Production
As you get older, your scalp simply makes less oil — and that shift is more significant than most people realize. Sebum decline and hormone changes, especially around menopause or androgen shifts, directly trigger scalp barrier weakening and fiber thinning. The result? Uneven oil distribution that leaves ends feeling parched.
signs in aging hair:
- Roots feel oily while ends stay dry
- Less natural shine between wash days
- More scalp tightness or flaking
- Strands tangle and break more easily
- Hair feels rough faster after washing
Hydrating aging hair means leaning on moisture retention strategies like leave-in conditioners and hair oiling benefits — both help compensate for reduced scalp oil production and age-related changes.
Hard Water, Chlorine, and Product Buildup
Age-related dryness isn’t always the culprit, though. Sometimes your environment is quietly working against you.
Hard water deposits calcium and magnesium — mineral scale removal requires chelating shampoos that bind those ions before they dull your strands. Chlorine exposure strips your moisture barrier faster on bleached hair. Silicone buildup effects compound the problem, trapping residue.
pre-swim rinse, clarifying frequency every one-to-four weeks, sulfate-free shampoo, and deep conditioning support moisture barrier repair.
Prepare Hair Before Moisturizing

What you do before applying any moisturizer matters more than most people realize. Getting your hair into the right state sets everything else up to actually work.
Here’s how to prep it properly.
Wash With a Gentle, Moisturizing Shampoo
Before anything else, the shampoo you choose sets the entire stage. A sulfate-free formula with low-foam cleansing protects your scalp’s natural oils — exactly what dry hair needs.
Apply a gentle lather amount mainly to your roots, then use a scalp massage technique for 30–60 seconds to lift buildup. Finish with a residue-free rinse, letting moisture retention begin from the very first step.
Use Lukewarm Water Instead of Hot Water
Once your shampoo is rinsed out, water temperature matters more than most people expect. Hot water’s temperature impact on dry strands is real — it roughens cuticles, speeds up evaporation, reduction failure, and strips scalp moisture retention. Stick to lukewarm water throughout your wash for consistent rinse temperature results.
Three things lukewarm water does for your hair:
- Promotes cuticle flatness so strands reflect light and feel smoother
- Lowers evaporation from the shaft, protecting moisture retention during damp styling
- Keeps your scalp barrier calmer than a cold water rinse ever could
Apply Conditioner to Mid-lengths and Ends
With your cuticles calmed from the lukewarm rinse, now’s the time to condition — but placement matters. Skip the scalp entirely (that’s your Scalp Avoidance Strategy in action) and start about 5–8 cm down, working a creamy leave‑in conditioner through the mid‑lengths.
Your End-focused Saturation gets the most product, since that’s where moisture retention breaks down fastest.
Gently Remove Excess Water After Washing
Once your conditioner’s rinsed out, how you handle your hair next can make or break your moisture results. Skip the rub — the Blotting Technique is your move here.
- Press the towel flat using the Pressing Method
- Use 5–10 firm Towel Patting passes per section
- Embrace Squeeze-Free Drying and Low Friction Drying
- Try microplopping for curls
- Stop when hair feels cool and damp, not dry
Use a Cotton T-shirt or Microfiber Towel
Your choice of towel matters more than you’d think.
Cotton Texture Benefits come from its open weave — it pulls water off gently without grinding against your cuticle, making Hair Friction Reduction smooth.
Microfiber Drying Speed is equally impressive, leaving hair evenly damp for product application.
For Towel Placement Strategy, press flat sections from mid-length to the ends using light Blotting Pressure Tips — never rub.
Avoid Rough Towel Drying Before Application
Here’s the thing about towel drying — rough rubbing undoes everything your conditioner just did. Wet hair stretches and snaps under friction, and vigorous scrubbing lifts the cuticle, creating wet frizz before you’ve even started styling.
Stick to these Friction-Free Drying habits instead:
- Use Light Pressure Blotting with a soft fabric
- Practice the No Twisting Technique — twisting strains mid-lengths
- Try the scrunching method for curly textures
- Follow Patting Not Rubbing from roots to ends
Step-by-Step Damp Hair Method
Now that your hair is prepped and ready, it’s time to put the method into action. Each step builds on the last, so the order actually matters here.
Here’s exactly how to do it.
Start With Clean, Evenly Damp Hair

Think of clean, evenly damp hair as your blank canvas. Start with a solid scalp cleansing routine using lukewarm rinse benefits — hot water leaves strands squeaky and resistant.
After washing, blot with a microfiber towel using the patting pressure technique until hair looks shiny but isn’t dripping. Do a quick dampness uniformity check: you should feel cool moisture throughout, with no dry patches fighting your leave-in conditioners.
Section Hair for Better Product Coverage

Skipping this step is like painting a wall without taping the edges — you’ll miss spots. Divide your hair into four to six sections depending on thickness; fine hair sectioning works well with four, while curly hair sectioning benefits from six or more.
Clip Selection matters too — use claw clips to keep sections controlled. Work back-to-front for consistent section order and better product absorption throughout.
Apply Leave-in Conditioner First

Now that your sections are clipped and ready, grab your leave-in conditioner — this is where damp styling really starts working for you. Apply it section by section, starting from the mid-lengths down.
Damp hair gives you natural product slip enhancement, so the formula spreads easily without tugging. Warm a small amount between your palms first — that absorption warm-up technique helps hair moisturizers penetrate faster and more evenly.
Focus Product on Mid-lengths and Ends

Once your leave-in conditioner is warmed through, focus product placement only on mid-lengths and ends — starting about 2 to 3 inches below the roots. This damp styling window is your best shot for even coverage.
Use a pea-sized amount per section, smooth it through with your fingers, then pat the ends. Texture layering and oil lightness matter here: a few drops of sealant are plenty.
Detangle Gently With Fingers or Wide-tooth Comb

Now that product is spread through each section, it’s time to detangle — gently. Use the Finger Detangling Grip first: work small sections end-to-root with slow, patient separation. For a wider pass, switch to Wide Comb Spacing with a wide-tooth comb.
Follow this Low Tension Technique for damp styling success:
- Divide hair using Layered Section Detangling — one chunk at a time
- Start at ends, never roots
- Apply extra leave-in if a knot resists
- Use the Curly Coil Rake motion for curl definition
- Keep strokes smooth to protect hair moisture retention
Seal Moisture With a Lightweight Oil

Once your strands are detangled, seal that moisture right away — Oil Timing matters here. While hair still feels damp, warm 3–6 drops of argan or jojoba sealant oil between your palms, then focus on Mid-length Sealing and ends only.
Scalp Avoidance keeps roots fresh.
This lightweight leavein-and-oil combo locks hydration in without risking Buildup Prevention issues from over-applying.
Let Hair Air-dry or Diffuse on Low Heat

Now that moisture is sealed in, how you dry makes all the difference. Air-drying is the gentlest option — it protects your cuticle and helps your natural moisture barrier repair without added stress.
If you’re short on time, try the Diffuser Technique using a tool like the Curlsmith Defrizzion Hair Dryer XXL Diffuser on low heat styling settings. Stop at 80–90% dry for best moisture retention.
Choose Moisturizers by Hair Type

Not every moisturizer works for every head of hair, and using the wrong one can leave you with buildup, limpness, or strands that still feel parched.
The right pick comes down to your hair’s texture, density, and porosity. Here’s a breakdown of what works best for each hair type.
Lightweight Sprays for Fine Hair
Fine hair is basically a sponge that’s already full — add too much, and it collapses. That’s why lightweight sprays win here.
micro-mist atomization delivers humectant balance through glycerin and panthenol without flooding each strand. Focus application control on mid-lengths and ends, not roots.
Fast drying time keeps volume intact, and heat compatibility makes these sprays ideal before low-heat diffusing.
Creamy Leave-ins for Thick Hair
Thick hair drinks product fast — so you need a formula that actually keeps up. Creamy leave-in conditioners nail this through smart emollient balance and pump dispensing that gives you consistent control every wash day.
Match your dampness level before applying, then target mid-lengths first:
- Start with a quarter-size amount per section
- Work cream through mid-length targeting, ends last
- Choose climate formulas for humidity or dryness
- Seal with a lightweight oil for moisture barrier repair
Curl Creams for Curly and Coily Hair
Curly and coily hair has its own set of rules — and curl creams are built around them. Applied to damp hair, a good curl cream uses humectant balance to attract water while film formers reduce frizz and lock in shape.
Work it through sections using clumping techniques to encourage curl definition. The result? Soft, frizz-managed curls without the crunch.
Protein-moisture Balance for Damaged Hair
Damaged hair is basically a tug-of-war between strength and softness — and getting that protein-moisture balance right makes all the difference. Your damage assessment starts simple: if strands stretch too much when wet, reach for hydrolyzed protein benefits first, then layer moisture on top.
- Use protein timing wisely — once weekly max for severely damaged hair
- Follow every protein hair mask with deep conditioning to prevent stiffness
- Apply leave-in conditioners before sealing with lightweight oil
- Moisture layering strategy: water-based product first, then emollient last
Hydrating Formulas for Aging Hair
As hair matures, its sebaceous glands quietly dial back oil production — which is why your routine needs to work harder.
Look for Ceramide Enrichment and Panthenol Hydration in hydrating shampoos and leave‑in conditioners to restore the cuticle’s smoothness.
A Hyaluronic Boost pulls moisture in, while Shea Butter Emollient softens coarse ends. Finish with a Lightweight Oil Seal for lasting softness.
| Antiaging Hair Care Need | Best Ingredient Match |
|---|---|
| Moisture retention | Hyaluronic acid, panthenol |
| Cuticle smoothing | Ceramides, rich moisturizing oils |
| Deep conditioning ends | Shea butter emollient, argan oil |
Low-porosity Hair and Lighter Layering
Low-porosity strands are basically tiny gatekeepers — water and product sit on the surface instead of sinking in. That’s why Product Penetration Speed matters so much here.
Try a Layering Timing Strategy: apply leave-in conditioners in 2–3 thin passes, waiting 30–60 seconds between each.
Heat Assisted Diffusion on low helps open the cuticle temporarily.
Clarify monthly to prevent buildup from blocking lightweight conditioning products.
High-porosity Hair and Stronger Sealing
Unlike high-porosity hair, high-porosity hair drinks moisture fast — then loses it just as quickly. That open cuticle structure means Cuticle Repair and Sealant Layering aren’t optional; they’re your whole strategy.
- Use the LOC method: leave-in conditioners, then oil, then cream
- Practice Humectant Balancing — glycerin helps, but seal it with sealant oils after
- Try Porosity Testing by dropping a strand in water; it sinks fast if porosity is high
- Finish with Low Heat Diffusing to lock the seal without lifting the cuticle further
A protein-moisture balance keeps strands from feeling mushy after deep conditioning.
Ingredients That Lock Moisture

Not all moisturizing products are created equal — what’s actually inside the bottle makes all the difference.
Some ingredients pull water into your hair, others lock it in, and a few you’re better off avoiding altogether.
Here’s what to look for on the label.
Water-based Formulas for True Hydration
If you’ve ever wondered why some products actually work and others just sit on top of your hair, it comes down to what’s in the formula.
Water-based formulas — those listing aqua first — create an aqua phase distribution that drives molecular water binding deep into each strand.
Their hydrophilic polymer network and film former layer work together with humectants, leave-in conditioners, and hair hydration masks during damp styling for real moisture seal technology.
Glycerin, Aloe Vera, and Panthenol
Once your formula has a water base, three humectants do the real heavy lifting — glycerin, aloe vera, and panthenol.
- Glycerin Humectant Power pulls moisture from the air into your strand.
- Aloe Slip Film gives lightweight glide for easier detangling.
- Panthenol Conditioning Effect softens without grease.
- Humectant‑Emollient Balance improves your Moisture Locking Strategy when you layer a leave‑in conditioner over these hair moisturizers.
Hyaluronic Acid for Moisture Retention
Glycerin works hard, but hyaluronic acid takes moisture retention a step further.
| What It Does | Why It Matters |
|---|---|
| Molecular Weight Impact | Smaller molecules reach deeper into the hair surface |
| Application Timing | Works best on damp hair, not dry |
| Humectant Synergy | Pairs well with glycerin for layered hydration |
| Porosity Compatibility | Especially helpful for high-porosity or damaged strands |
| Sealant Pairing | Follow with lightweight oil to lock moisture in |
Apply your hyaluronic acid leave-in conditioner right after towel blotting — that’s when it binds water most effectively.
Shea Butter for Dry, Coarse Hair
Shea butter is a natural emollient that works like a coat of armor for dry, coarse hair.
Because it melts near body temperature, warming a pea-sized amount in your palms makes application easy.
Apply it over a water-based leave-in for real emollient sealing, focusing on mid-lengths and ends.
Used as a weekly deep-conditioning treatment — or in hair masks — shea butter’s fatty acids visibly soften thick hair and reduce frizz.
Pair it with a light oil afterward for balanced shine.
Jojoba Oil for Lightweight Sealing
Unlike heavier oils, jojoba oil mimics your scalp’s natural sebum — making it ideal for lightweight sealing on damp styling days. Nail your Seal Timing by applying it within 1–3 minutes after your leave-in conditioner. For Fine Hair Use, keep Oil Quantity to just 1–3 drops for a Weightless Finish.
It’s also safe for Extension Care.
- Apply 1–3 drops for fine hair
- Smooth over mid-lengths and ends only
- Follow your leave-in conditioner, never precede it
Argan Oil for Shine and Softness
Pressed from Argania spinosa kernels, argan oil delivers a real Slip Boost and Light Reflection upgrade to damp strands. Its natural fatty acids form a Hydrophobic Barrier that slows moisture loss — especially after your leave‑in conditioner.
For Application Timing, smooth 1–3 drops through mid‑lengths and ends while hair is still damp. It’s a Color‑safe Finish that won’t weigh fine hair down.
Avoid Heavy Waxes and Drying Alcohols
Some ingredients look harmless on the label but quietly sabotage your moisture routine.
Heavy waxes cause wax build-up detection headaches — think stiffness, dullness, and patches that never fully rinse clean.
Drying alcohols like isopropyl or SD alcohol 40 pull water right back out. Check alcohol ingredient labels carefully.
Reach for alcohol-free formulas, silicone-free products, and lightweight seal alternatives like jojoba-based leave-in conditioners or hair oils instead.
Top 10 Damp Hair Products
Finding the right products makes the damp hair method so much easier to stick with. These ten options cover everything from lightweight oils and clarifying shampoos to repair masks and hair steamers.
Pick what fits your hair type and budget, and you’re already halfway there.
1. Vegamour Weightless Repair Oil
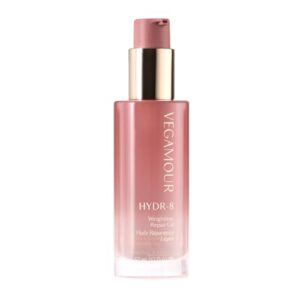
If your hair is fine but still crying out for moisture, Vegamour Weightless Repair Oil was practically made for you. Its silicone-free blend of Marula oil, Vitamin C oil, and Chia seed oil absorbs fast — no greasy residue, no weighed-down feeling.
Applied to damp mid-lengths and ends, it helps seal the cuticle and lock in hydration for up to 72 hours. Pump or two is genuinely enough.
Users report around 96% more shine and roughly 92% less breakage over time.
| Best For | Anyone with fine or thin hair that needs moisture and frizz control without the heavy, greasy feeling most oils leave behind. |
|---|---|
| Price | $48.00 |
| Product Type | Hair Oil |
| Hair Benefit | Shine & Hydration |
| Hair Type Suitability | All types, especially fine |
| Key Ingredient | Marula & Sacha Inchi Oil |
| Frizz Control | Yes |
| Additional Features |
|
- Absorbs fast and skips the silicone — so you get real hydration without buildup or that weighed-down effect
- A little goes a long way; one or two pumps can keep hair shiny and hydrated for up to 72 hours
- Backed by solid results — users have seen around 96% more shine and 92% less breakage over time
- At $48 for 1.7 oz, it’s a splurge — and you’ll feel that if you accidentally over-apply
- The chai-tea scent is lovely to some, but if you’re sensitive to fragrance, it might be a dealbreaker
- A few users with very dry ends didn’t notice much improvement there, so it’s not a miracle worker for everyone
2. Shu Uemura Gentle Radiance Clarifying Shampoo
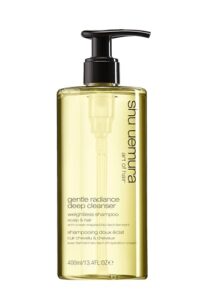
Think of your clarifying step as hitting the reset button — and the Shu Uemura Gentle Radiance Clarifying Shampoo does exactly that without going nuclear on your moisture levels. At $62 for 13.4 fl oz, it’s a splurge, but a little goes a long way — about three pumps covers a full cleanse.
The lightweight, gel-like formula lifts buildup, oil, and grime while Japanese onsen-inspired ferments deliver minerals and antioxidants. Your scalp feels balanced, not squeaky, not stripped, which makes it a smart weekly reset before damp moisturizing.
| Best For | Anyone with oily or product-heavy hair who wants a weekly deep cleanse that won’t leave their scalp feeling like a desert. |
|---|---|
| Price | $62.00 |
| Product Type | Clarifying Shampoo |
| Hair Benefit | Moisture Balance |
| Hair Type Suitability | All types, especially oily |
| Key Ingredient | Japanese Onsen Ferments |
| Frizz Control | Yes |
| Additional Features |
|
- Removes buildup, oil, and grime without stripping moisture — scalp feels clean, not raw
- A little goes a long way (three pumps does the job), so the bottle lasts longer than you’d expect
- Gentle enough for sensitive scalps, with Japanese onsen ferments that add minerals and antioxidants
- The pump breaks easily, which gets frustrating fast at this price point
- Low lather can feel off if you’re used to a foamy shampoo — takes some getting used to
- $62 is a tough sell for a shampoo, and the scent is pretty subtle if you like something more noticeable
3. Color Wow Money Hydrating Hair Mask
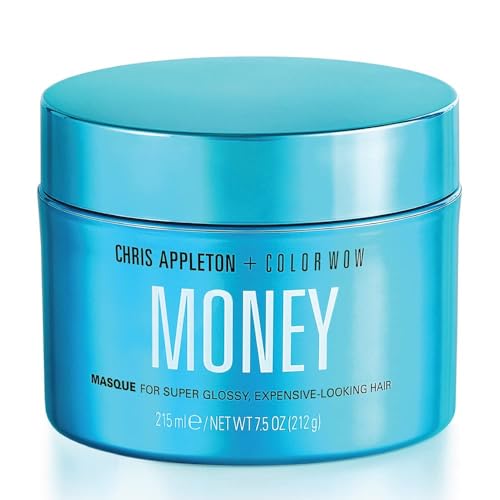
Once you’ve cleared the slate with a good clarifying shampoo, your hair is ready to actually absorb something. That’s where the Color Wow Money Hydrating Hair Mask earns its $45 price tag.
Mediterranean sea kelp, blue sea kale, and panthenol work together to restore elasticity and lock in moisture — especially useful for bleached or color-treated strands. Apply it to damp hair for 10–20 minutes, and you’ll notice softer, more manageable results after just one use.
| Best For | Anyone with thick, wavy, bleached, or color-treated hair who wants a deep conditioning boost that actually delivers soft, manageable results without weighing hair down. |
|---|---|
| Price | $45.00 |
| Product Type | Deep Conditioning Mask |
| Hair Benefit | Softness & Repair |
| Hair Type Suitability | All types, especially thick/damaged |
| Key Ingredient | Deep Conditioning Agents |
| Frizz Control | Yes |
| Additional Features |
|
- Works fast — one 10–20 minute session leaves hair noticeably softer, shinier, and easier to style
- Lightweight formula absorbs quickly with no waxy or heavy residue left behind
- Versatile enough to use a few times a week without causing buildup
- At $45, it’s pricier than a lot of comparable masks on the market
- May not do much for gray hair or those already happy with a budget conditioner
- The travel size only gets you about 4 uses, which goes fast if you’re using it regularly
4. Fable Mane Strengthening Hair Oil
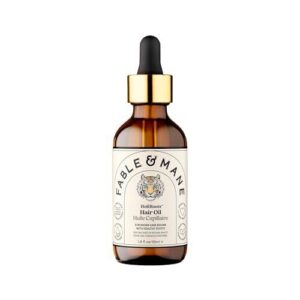
Once your strands are deeply conditioned, sealing that moisture in is the next smart move. Fable & Mane Strengthening Hair Oil does exactly that — and then some.
Rooted in Ayurvedic tradition, it blends ashwagandha, dashmool, and castor oil into a silicone-free formula that feels surprisingly light.
Apply a small amount to damp mid-lengths and ends, massage gently, and let it seal the moisture layer that your conditioner just built.
In two weeks, 96% of users reported noticeably less breakage during brushing.
| Best For | Anyone with dry, breakage-prone hair who wants a lightweight oil rooted in Ayurvedic ingredients without the greasy aftermath. |
|---|---|
| Price | $38.00 |
| Product Type | Hair Oil |
| Hair Benefit | Thickness & Nourishment |
| Hair Type Suitability | All types, especially low-porosity |
| Key Ingredient | Ashwagandha & Castor Oil |
| Frizz Control | Yes |
| Additional Features |
|
- Visibly reduces breakage fast — 96% of users noticed less snapping while brushing in just two weeks
- Lightweight and non-greasy, so it works even for low-porosity hair that usually rejects oils
- Clean formula: silicone-free, vegan, cruelty-free, and color-safe
- At $38 for under 2 oz, it’s pricier than most drugstore alternatives
- The jasmine scent is lovely at first, but can feel a bit much if you’re using it daily
- Results vary — the survey data is user-reported, not clinically tested
5. SheaMoisture Coconut Hibiscus Curl Shampoo Conditioner
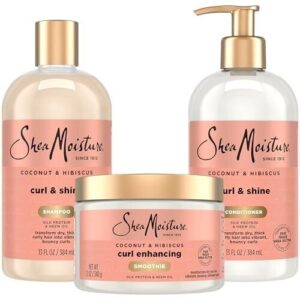
If sealing oil is step one of your moisture routine, a solid shampoo-conditioner duo is the foundation everything else builds on. SheaMoisture’s Coconut Hibiscus Curl Shampoo, Conditioner, and Leave-In Smoothie set covers all three steps in one go.
The sulfate-free shampoo cleanses without stripping, while the conditioner — packed with certified organic shea butter, silk protein, and neem oil — deeply replenishes curls.
The silicone-free smoothie then reduces frizz and defines without crunch.
At $35.98 for all three, it’s genuinely good value.
| Best For | Curly, wavy, or permed hair that needs deep moisture and frizz control without harsh chemicals. |
|---|---|
| Price | $35.98 |
| Product Type | Shampoo, Conditioner & Smoothie Set |
| Hair Benefit | Moisture & Curl Definition |
| Hair Type Suitability | Curly, wavy, permed |
| Key Ingredient | Shea Butter & Coconut Oil |
| Frizz Control | Yes |
| Additional Features |
|
- Clean formula — no sulfates, silicones, parabens, or phthalates, so your curls get moisture without the buildup
- The conditioner is loaded with good stuff: organic shea butter, silk protein, and neem oil actually do the heavy lifting
- Great value at $35.98 for a full three-step system that covers wash day start to finish
- The smoothie can feel heavy on fine or low-porosity hair, sometimes causing curls to clump or bunch
- The coconut-vanilla scent is strong — if you’re sensitive to fragrance, it might be a lot
- Lather is on the lighter side, which throws some people off even though it still cleans just fine
6. Kerastase Chronologiste Hydrating Shampoo
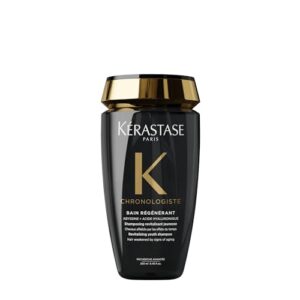
If your hair is aging or feels perpetually thirsty, the Kérastase Chronologiste Hydrating Shampoo ($48 for 8.5 oz) is worth a serious look. It pairs hyaluronic acid — yes, the same ingredient your skincare routine leans on — with Vitamin E to hydrate from scalp to ends while shielding strands from environmental damage.
The rich gel-to-foam lather feels luxurious without leaving residue. It works best alongside the Chronologiste mask for a full regimen.
| Best For | Anyone with dry, aging, or chemically-treated hair that needs serious hydration without weighing strands down. |
|---|---|
| Price | $48.00 |
| Product Type | Revitalizing Shampoo |
| Hair Benefit | Hydration & Strength |
| Hair Type Suitability | Dry, brittle, chemically treated |
| Key Ingredient | Hyaluronic Acid & Vitamin E |
| Frizz Control | Yes |
| Additional Features |
|
- Hyaluronic acid pulls moisture deep into the scalp and all the way to the ends — same hydrating power as your favorite serum
- Vitamin E creates a protective shield against everyday environmental damage and oxidative stress
- Leaves hair softer, shinier, and easier to manage without any heavy residue
- At $48 for 8.5 oz, it’s a splurge — not everyone’s budget can swing it regularly
- Struggles a bit with thick, curly, or wavy hair that needs serious detangling
- The scent can fade fast, and you’ll want to shake the bottle before each use to keep the formula consistent
7. Kingsteam Ozone 2in1 Hair Facial Steamer
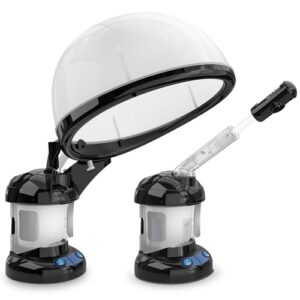
Steam is one of those tools that genuinely changes how well your hair absorbs moisture — and the Kingsteam Ozone 2-in-1 Steamer ($79.99) makes it easy to add that step at home.
Its PTC ceramic element produces micro-fine ozone-enriched steam that’s claimed to penetrate up to 10× deeper than regular steam.
The auto-shutoff kicks in if water runs low, which is a nice safety detail.
Bonus: swap the hood attachment for the facial nozzle and it doubles as a skin-care tool.
| Best For | Anyone who deep-conditions regularly — especially those with natural, low-porosity, or damaged hair — and wants a dual-purpose tool that pulls double duty for skincare too. |
|---|---|
| Price | $79.99 |
| Product Type | Hair & Facial Steamer |
| Hair Benefit | Deep Conditioning |
| Hair Type Suitability | Natural, low-porosity, damaged |
| Key Ingredient | PTC Ceramic Steam |
| Frizz Control | Yes |
| Additional Features |
|
- Ozone-enriched micro-fine steam helps moisture actually sink in, not just sit on top of your hair
- Swapping between the hair hood and facial nozzle takes seconds, so you’re getting two tools for the price of one
- Built-in auto-shutoff gives you peace of mind if you zone out mid-treatment
- Some users catch a hot-plastic smell during facial steaming, especially out of the box
- The hood doesn’t adjust for height, so if you’ve got a big, voluminous mane, coverage can feel a little limited
- No cleaning tools included — you’ll need to rinse and dry the parts yourself to keep mold from building up
8. Heated Thermal Hair Steamer Cap
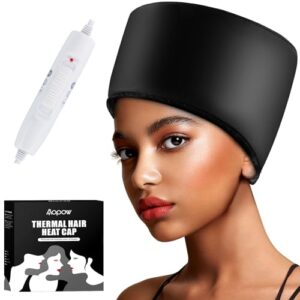
If deep conditioning is part of your routine, but you feel like the products never quite sink in, this cap changes that.
At just $17.99, the Heated Thermal Hair Steamer Cap (Model A01) wraps your hair in consistent warmth — cycling between 45°C and 65°C — so masks and leave‑ins actually penetrate instead of just sitting on the surface.
The built‑in timer goes up to 45 minutes, and the drawstring fits thick, curly, or voluminous hair comfortably.
It’s a low‑cost way to get real, salon‑style results at home.
| Best For | Anyone with thick, curly, or natural hair who wants their deep conditioning treatments to actually work — not just sit on top. |
|---|---|
| Price | $17.99 |
| Product Type | Heated Conditioning Cap |
| Hair Benefit | Heat-Enhanced Conditioning |
| Hair Type Suitability | Natural, Afro-textured, curly |
| Key Ingredient | Electric Heating Element |
| Frizz Control | Yes |
| Additional Features |
|
- Heats evenly and cycles automatically between 45°C and 65°C, so you’re not babysitting it
- Built-in timer (up to 45 min) and drawstring fit make it easy and hands-free
- At $17.99, it’s a genuine salon upgrade without the salon price tag
- You’re tethered to an outlet the whole time — not exactly a walk-around situation
- The plastic control unit feels fragile and doesn’t love being tossed around
- Runs warm even on lower settings, which can be a lot if you have a sensitive scalp or a smaller head
9. K18 Molecular Repair Hair Mask
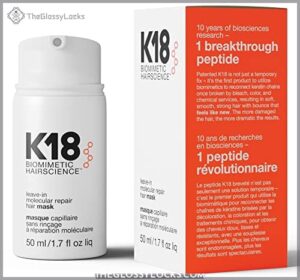
When damaged hair needs more than surface-level help, K18 Molecular Repair Hair Mask delivers.
Its patented K18Peptide targets broken keratin chains at the cortex level — not just coating strands, but actually reconnecting them.
Apply it to clean, damp mid-lengths and ends, skip the conditioner, and leave it in for four minutes. That’s it.
At $75 for 50ml, it’s an investment, but for color-treated or chemically processed hair that’s lost its elasticity, the results hold up wash after wash.
| Best For | Anyone with seriously damaged hair — think bleached, color-treated, or chemically processed — who wants real repair, not just a temporary fix. |
|---|---|
| Price | $75.00 |
| Product Type | Leave-In Treatment |
| Hair Benefit | Bond Repair |
| Hair Type Suitability | All types, especially damaged |
| Key Ingredient | K18Peptide |
| Frizz Control | Yes |
| Additional Features |
|
- Actually rebuilds broken keratin chains instead of just masking damage with a coating
- Super easy to use — four minutes, leave it in, done
- Works for all hair types and holds up through multiple washes
- $75 for 50ml is a tough pill to swallow, especially if you’re on a budget
- You have to ditch your regular conditioner while using it, which takes some adjustment
- Full results don’t show up overnight — you need to stick with it consistently
10. Living Proof Triple Bond Hair Treatment
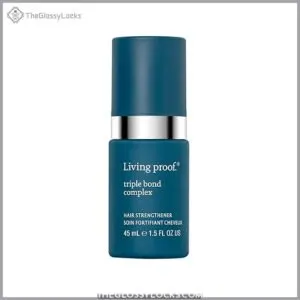
Think of this as a full-system reboot for your hair.
Living Proof Triple Bond Complex doesn’t just coat strands — it rebuilds hydrogen, ionic, and covalent bonds from the inside out, making hair up to eight times stronger.
Apply it to clean, damp hair for ten minutes before styling. At $45 for 1.7 oz, it’s a premium pick, but if breakage and brittleness are your main complaints, the clinical results make a solid case for it.
| Best For | Anyone dealing with damaged, color-treated, or heat-styled hair who wants real structural repair — not just a surface fix. |
|---|---|
| Price | $45.00 |
| Product Type | Leave-In Treatment & Mask |
| Hair Benefit | Bond Rebuilding |
| Hair Type Suitability | All types, especially damaged |
| Key Ingredient | Triple Bond Complex |
| Frizz Control | Yes |
| Additional Features |
|
- Rebuilds all three hair bonds (hydrogen, ionic, and covalent), so you’re getting genuine repair, not just a coating
- Heat protection up to 450°F means you can style right after without undoing the work
- Works across hair types — fine, curly, thick, chemically processed — so it’s pretty versatile
- $45 for 1.7 oz is steep, and results can take two or three uses before you notice a difference
- Fine hair users might find it too heavy if they’re not careful with how much they apply
- The 10-minute wait time adds an extra step, and the full ingredient list isn’t disclosed, which may bother some people
Keep Hair Moisturized Longer

Getting moisture into your hair is only half the job — keeping it there where most routines fall short. few consistent habits make a real difference between hair that stays soft for days and hair that feels dry by tomorrow.
what actually helps.
Refresh Dry Ends With Water and Leave-in
Dry ends between wash days don’t need a full reset. A quick refresh keeps your moisture game strong without disrupting your scalp hydration balance:
- Mist ends lightly with water using a fine spray bottle
- Wait 10–30 seconds, then press in a small amount of leave-in conditioner
- Seal with a pea-sized drop of lightweight oil
- Air-dry — heatless styling benefits your strands every time
Repeat every one to three days as needed.
Sleep on Silk or Satin Pillowcases
Your pillowcase matters more than you’d think. Cotton grabs at your strands all night, creating friction that disrupts curl clumps and strips moisture.
Switching to a silk pillowcase or satin pillowcase improves overnight hair moisture retention substantially — both materials support friction reduction and frizz control while you sleep.
For curly hair protection especially, this simple swap pairs beautifully with an overnight hair mask.
Remember pillowcase care: wash gently, air-dry.
Protect Hair From Heat Styling Damage
Heat styling doesn’t have to mean dry, damaged strands. The real key is Pre-Heat Conditioning — applying a leave-in conditioner to damp styling hair before you even reach for the dryer.
Thermal Protectant Sprays and Heat-Resistant Tools take that further, with Temperature Monitoring keeping things in check. Allow Cooling Periods between passes, and your moisture stays where it belongs.
Apply Heat Protectant Before Hot Tools
Once your leave-in is locked in, the next step is timing your protectant right. Apply your heat protectant spray — or cream if your hair’s thicker — before any hot tool touches your strands, not after.
Protectant Timing matters because the coating needs a minute to set.
Match Temperature Settings to your hair’s strength, and skip Reapplication Guidelines unless your label says otherwise.
Limit Shampooing to Prevent Stripping
Just like timing your protectant protects strands from heat, spacing out wash days protects your natural oils. Low-Frequency Cleansing is one of the simplest wins for preventing overwashing and oil stripping.
Extended Wash Intervals — every two to three days instead of daily. Use a Water-Only Refresh on Scalp Rest Days, and apply dry shampoo at roots sparingly.
Your sulfate-free shampoo works harder when you use it less often.
Deep Condition Weekly or as Needed
Deep conditioning builds on everything you’ve done so far — think of it as a weekly reset button. Most hair types benefit from a deep conditioning treatment once a week, while coarse or color-treated strands often need twice weekly.
- Frequency Guidelines: Weekly works for most; adjust based on porosity impact and season
- Seasonal Adjustments: Dry winters call for more frequent hydrating mask sessions
- Product Buildup Management: Clarify first so your deep treatment hair mask actually penetrates
- Scalp Sensitivity: Skip roots; focus leave-in treatment on mid-lengths and ends
Trim Split Ends to Reduce Moisture Loss
split ends aren’t just a cosmetic issue — they actively drain moisture from your hair, wicking hydration out through frayed tips.
For split end detection, stretch a few strands toward light and look for that telltale Y-shape.
trim frequency matters too: every 8–12 weeks keeps breakage in check.
scissor over razor wins for precision cutting, preserving your moisture barrier and overall hair health.
Frequently Asked Questions (FAQs)
Can wet hair cause folliculitis?
Wet hair won’t automatically cause folliculitis, but leaving your scalp damp for hours creates the perfect storm — scalp occlusion, yeast overgrowth, and sweat-induced irritation can quietly compromise your follicle barrier over time.
What is the 3 minute rule for moisturizer?
The 3-minute rule is simple: apply your leave-in conditioner within three minutes of washing, while hair is still damp.
That small timing window maximizes surface water capture and humectant efficiency before evaporation control becomes impossible.
What helps dry menopausal hair?
Estrogen deficiency quietly turns down your scalp’s oil production — sometimes overnight.
A weekly deep conditioning treatment, leave-in conditioners, omega-3 intake, biotin supplementation, scalp massage, and herbal hair oils help restore what menopause takes.
Can hard water affect how well moisturizers absorb?
Yes — hard water leaves mineral film buildup on your strands, blocking moisturizers from absorbing properly.
That pH shift affects how conditioners spread, making everything feel tacky or ineffective, no matter how good your products are.
Does diet or water intake impact hair hydration?
Your diet and hydration habits genuinely matter. Protein consumption strengthens keratin structure, while vitamin deficiencies and poor mineral balance can leave strands brittle.
Water-rich foods and steady fluid intake keep your scalp healthier from the inside out. A balanced diet and hydration helps prevent hair loss.
How often should you repeat the damp hair method?
Most people do fine repeating this 2–4 times per week, but your scalp oil rate, hair porosity influence, and seasonal frequency adjustments all shift that number.
Listen to your hair — it’ll tell you.
Can you layer multiple leave-in products without buildup?
You can layer leave-in products without buildup — if you’re smart about it.
Stick to one hydrating base and one lightweight sealer. Keep amounts small, mind your layering order, and clarify every few weeks.
Does scalp health affect how moisturized hair feels?
Scalp health absolutely shapes how moisturized your hair feels. When scalp barrier integrity, sebum regulation, and microbiome balance are off, even the best leave-in conditioners won’t deliver lasting hair hydration.
Conclusion
Da Vinci once said the details aren’t the details—they make the design. That’s exactly what the damp hair moisturizing technique proves.
Timing, texture, and the right ingredients aren’t minor adjustments; they’re the whole game.
Catch that window after washing, layer your products with intention, and seal everything in. Do it consistently, and dryness stops being a problem you manage—it becomes one you’ve genuinely solved.
- https://www.aad.org/public/everyday-care/hair-scalp-care/hair/habits-that-damage-hair
- https://pubmed.ncbi.nlm.nih.gov/24332313/
- https://cna.st/affiliate-link/4wXieV9Z5T21RAVvSofZrWbDtknk4nwUNZvzSiZ1hLVppbpfPMi4wPqiRdtPYSNiZqiUV2GhkQbfp1kLCUzFJtyV6858gPU4mXmwMoaro1nMXVnGTfDxA3zX1bAvwJC5FFGwBr31Nc54xZrwmZvTRxRSGgtLmLnJgJJNbrV8hmhetPtmapHULDryn29hc1nCFWzhJEQRWX3QJae6aPrYkgaowSqyTADYrt8XZbZpjVM8KmutLkM1kxGjLARwYMuSU
- https://glnk.io/x26q/genamarieco5zs
- https://bit.ly/3BReP1F