This site is supported by our readers. We may earn a commission, at no cost to you, if you purchase through links.

Most people use leave-in conditioner the same way they use everything else in the shower—a quick application, no real thought, and a vague hope it works. The problem isn’t the product. It’s the technique.
Applied to soaking wet hair, used in the wrong amount, or spread root to tip instead of mid-length to ends, even a $40 bottle delivers disappointing results.
Your hair type also changes the game entirely—a cream formula that transforms thick coils can flatten fine waves overnight.
Once you know how to apply leave-in conditioner correctly for your specific hair, the difference shows up the same day.
Table Of Contents
- Key Takeaways
- What Does Leave-in Conditioner Actually Do
- How to Choose Leave-in Conditioner for Your Hair Type
- How to Apply Leave-in Conditioner Step by Step
- How to Use Leave-in Conditioner on Curly Hair
- How to Use Leave-in Conditioner on Wavy or Fine Hair
- How Often Should You Use Leave-in Conditioner
- Common Mistakes When Applying Leave-in Conditioner
- How to Prevent Product Buildup From Leave-in Conditioner
- Top 7 Leave-in Conditioners for Every Hair Concern
- How to Build a Leave-in Conditioner Hair Routine
- Frequently Asked Questions (FAQs)
- Conclusion
Key Takeaways
- Apply leave-in conditioner to damp — not soaking wet — hair, working only from mid-lengths to ends to avoid scalp buildup and get the most out of every application.
- Your hair type determines your formula: fine and wavy hair needs a lightweight spray, while thick, curly, or coily hair calls for a rich cream that seals in moisture without stiffness.
- Amount matters more than most people realize — a dime-sized drop for short hair, up to a quarter-sized amount for long or thick strands, and always less than you think you need.
- Always comb through with a wide-tooth comb after applying so every strand gets coated evenly — skipping this step is one of the most common reasons results fall flat.
What Does Leave-in Conditioner Actually Do

Leave-in conditioner does more than just soften your hair — it works quietly in the background every single day. Think of it as a protective layer your strands wear from the moment you style until you wash again.
Whether you have fine waves or thick coils, the right formula makes all the difference — check out these best leave-in conditioners for men to find one that fits your hair type and daily routine.
Here’s exactly what it’s doing for your hair.
How It Differs From Rinse-Out Conditioner
Think of rinse-out conditioner as a quick shower guest — it does its job, then leaves. Leave-in conditioner moves in and stays.
The biggest differences come down to texture weight, application timing, and build-up risk. Rinse-out formulas are thicker and made to wash away. Leave-ins are lighter, designed to protect strands all day without scalp contact or residue overload.
For frizzy hair, the moisture retention benefits of leave-in conditioners are especially noticeable.
Key Benefits for Hair Health and Shine
So why does leave-in conditioner actually make hair look and feel better? It works on several levels at once.
- Cuticle Smoothing — Flattens the hair surface so strands reflect light evenly for real glossy shine
- Moisture Retention — Humectants keep hair hydrated between washes, reducing brittleness
- Frizz Reduction — Coats strands so humidity can’t puff them up
- Strengthening Support — Reduces breakage by lowering friction during brushing
- Hair Shine Enhancement — Even product distribution creates consistent, non-greasy luster
How It Protects Against Heat and UV Damage
Beyond shine, a good leave-in works as your hair’s first line of defense.
UV filter technology blocks ultraviolet rays before they break down your strands, while a heat-protective film creates a barrier during blow-drying or flat-ironing.
Add in an antioxidant shield plus a hydrolyzed protein barrier, and you’ve got real protection — not just moisture.
Why It Helps Color-Treated Hair Last Longer
Color fades fastest when the cuticle stays rough and open. Leave-in conditioner changes that. Cuticle smoothing flattens the outer layer so pigments don’t slip out with every wash.
film buffer between your strands and shampoo surfactants slows color fading prevention considerably. Add porosity balancing and detangling protection, and your leave-in conditioner for color-treated hair maintenance genuinely earns its place in your routine.
How to Choose Leave-in Conditioner for Your Hair Type

Not all leave-in conditioners are created equal, and the wrong one can leave your hair flat, greasy, or thirstier than before. The good news is that matching a formula to your hair type is simpler than it sounds.
Here’s what works best for each one.
Lightweight Sprays for Fine or Oily Hair
Fine or oily hair is basically the Goldilocks of hair types — too much product, and it falls flat. That’s why lightweight sprays work best here.
Look for formulas built on polymer film formers, glycerin balancing agents, and aloe for scalp comfort.
A UV filter mist adds daily protection without heaviness.
Starch oil control ingredients help prevent product buildup from weighing your strands down.
Rich Creams for Thick, Curly, or Coily Hair
Thick, curly, and coily hair drinks moisture faster than most — that’s why richer creams are your go-to.
Look for Oil and Butter blends like shea and argan, plus Humectant Power ingredients like glycerin or honey for moisture retention.
Film Former Hold keeps curly hair definition intact without stiffness, while Protein Enrichment strengthens strands. Weight Management matters too — rich shouldn’t mean heavy.
Moisturizing Formulas for Dry or Damaged Hair
Dry or damaged hair needs serious reinforcement — not just surface moisture.
Look for ceramide-enriched conditioners that rebuild the cuticle layer, paired with humectant-rich formulas containing glycerin or panthenol to pull water into each strand.
Oil-based emollients like argan smooth roughness, while protein-moisture synergy prevents brittleness.
Film-forming technology seals everything in. Kérastase Nutritive Nectar Thermique does this beautifully.
Low-Porosity Hair and What to Look For
Low porosity hair is basically a closed door — moisture knocks, but the cuticle doesn’t always answer. Understanding hair porosity and conditioner suitability starts here.
For low porosity hair management, focus on:
- Humectant Focus — Choose glycerin or aloe-based formulas to draw water in
- Cuticle Prep — Apply to damp hair so water acts as a pathway
- Absorption Timing — Use light heat to coax the cuticle open
- Product Weight Balance — Stick to serums or water-based leave-ins; heavy creams sit on the surface
Moisture locking works best when choosing the right leave-in conditioner for your hair type; this means going lightweight first.
High-Porosity Hair and Conditioner Suitability
High-porosity hair is the open door low-porosity hair isn’t — moisture rushes in fast, then slips right back out. That’s why moisture retention strategies for dry hair focus on cuticle sealing first.
Look for humectant strategy ingredients like glycerin or honey, plus oils for locking in hydration. A protein balance keeps strands strong without stiffness.
Rich creams beat lightweight sprays here.
How to Apply Leave-in Conditioner Step by Step

Getting the application right makes all the difference — even a great product won’t do much if you’re using it wrong. The good news is the process is simple once you know the order.
Here are the five steps to follow every time.
Step 1 — Shampoo and Towel-Dry to Damp
Start with clean, damp hair — not soaking wet, not fully dry.
Your Towel Dry Method matters more than you’d think.
After you apply, after shower, gently squeeze out excess water with your hands, then pat (don’t rub) with a microfiber towel.
Damp Hair Timing is key: aim for that glossy-but-not-dripping sweet spot.
Water Removal Tips like towel-wrapping for 5–10 minutes help you land there perfectly.
Step 2 — Measure The Right Amount for Your Length
Now that your hair is damp, portion size guidelines matter more than most people realize.
- Short hair: a dime-sized amount
- Shoulder-length: one pea-sized measurement
- Long or thick hair: a quarter-sized amount
For sprays, Spray Pump Calibration is simple — 2–4 pumps, distributed evenly. Length-based dosing keeps things efficient. When in doubt, use a small amount first, then build.
Step 3 — Apply From Mid-Lengths to Ends
With your quarter-sized amount warmed between both palms, mid-length targeting is where proper application techniques for leave-in conditioner begin. Skip the scalp entirely — that’s your first line of scalp buildup prevention.
Work downward using deliberate finger direction, coating strands from the mid-lengths to the ends. Sectioned application helps with thick hair. End saturation matters most; those tips are driest.
| Zone | Priority | Why |
|---|---|---|
| Scalp | Skip | Causes buildup |
| Mid-lengths | Start here | Balances moisture |
| Ends | Saturate fully | Driest, most damaged |
Spray evenly for even distribution across every section.
Step 4 — Distribute Evenly With a Wide-Tooth Comb
Now that the product is on your strands, grab your wide-tooth comb. Start ends first — this is non-negotiable for avoiding breakage.
Work upward in small sections using short, controlled strokes, keeping your comb angle gentle so you’re gliding, not dragging. This sectioning technique locks in even distribution across every layer.
Proper application techniques for leave-in conditioner only work when every strand gets coated.
Step 5 — Air-Dry or Style as Usual
Once your comb does its job, you’re free to air-dry or blow-dry — your call. For air-dry timing, let hair set without constant touching; touch-free drying is one of the best frizz control tips you’ll use.
If you’re reaching for heat styling tools, the leave-in already gives you heat styling protection. Finish with cool air to lock the style.
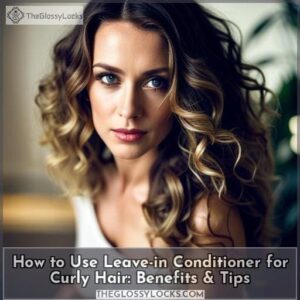
How to Use Leave-in Conditioner on Curly Hair

Curly hair is thirsty by nature — the coils and bends make it harder for natural oils to travel down the strand, so moisture slips away faster. That’s why leave-in conditioner isn’t just a nice-to-have for curly hair; it’s practically a non-negotiable.
Curly hair’s natural coils block oil from reaching the ends, making leave-in conditioner a daily essential, not a luxury
Here’s how to make it work for your curls.
Why Curly Hair Needs Extra Moisture
Curly hair can’t move scalp oil down the shaft the way straight hair can — which means moisture retention becomes a constant battle. Frizz, breakage, and stiffness are all signs your curls are thirsty. Leave-in conditioner for curly hair care directly targets that gap.
Here’s why curls need extra moisture:
- Cuticle hydration seals the hair surface, reducing environmental dryness impact from wind and sun.
- Scalp oil transfer is blocked by curl bends, leaving ends dry and rough.
- Elasticity enhancement keeps curls flexible, making detangling technique easier and gentler.
- Moisture retention prevents frizz by stopping strands from pulling humidity from the air.
Applying Cream Formula to Define Curls
Start with a dime-sized amount and emulsify in hands before touching your hair — this alone improves curl definition noticeably. Work through sections using the rake-and-smooth method, then try the praying-hands technique to smooth each strand. Finger-twirling definition works great for stubborn pieces.
Briogeo Curl Charisma Leave-In Defining Crème is a solid pick for moisture retention and easy detangling and styling results.
Using The LOC or LCO Method for Curl Hydration
Think of LOC and LCO as your personal moisture retention strategies for curly and coily hair — two step-by-step hair conditioning routines that keep curl pattern consistency intact all day.
- Liquid – Apply your leave-in conditioner for curly hair care first on damp strands
- Oil – Layer a DIY oil mix or single oil to seal hydration
- Cream – Lock everything in with a styling cream
- LCO order – Works better for low-porosity hair; cream before oil improves product absorption timing
- Seasonal hydration adjustments – Switch methods based on humidity and nighttime curl care needs
Scrunching Technique for Frizz-Free Results
Once your leave-in is applied, scrunch damp hair — not soaking wet hair — using the Gentle Pressure Squeeze method: cup small sections upward with moderate pressure. This Sectioned Curl Control approach keeps each curl clumped and defined.
Use a microfiber towel beforehand to reduce frizz from rough fabric.
Finish with the Cast Release Method — scrunch softly once curls set fully.
How to Use Leave-in Conditioner on Wavy or Fine Hair

Wavy and fine hair needs a lighter touch — too much product, and you’re left with limp, greasy strands that lose all their bounce. The trick is knowing what to use, how much to apply, and where to put it.
Here’s what works.
Choosing a Non-Weighing Formula
For wavy or fine hair, the formula you pick makes or breaks your style. A lightweight formula keeps waves bouncy instead of weighed down.
Look for sprays or light lotions — water-based options absorb quickly without leaving residue.
Bonus points if it offers heat resistance and UV protection.
Ingredient transparency matters too, so scan for fragrance-free formulas if you’re sensitive.
How Much Product to Use on Fine Strands
Fine hair gets overwhelmed fast — less is genuinely more here.
Start with pea-sized measurements and build only if needed:
- Creams: 1–2 pea-sized drops, never a dime-sized amount upfront
- Sprays: 5–7 light bursts for droplet distribution tips that coat without flattening
- Length-based adjustments: longer hair adds tiny increments, not big scoops
Always use your scalp avoidance strategy — roots stay volume-friendly that way.
Applying Leave-in Conditioner Spray for Waves
Spray technique makes all the difference for waves. Hold the bottle 6–8 inches away and use light, even bursts — that’s your spray angle control working for you.
Sectioned spraying ensures every layer gets covered.
Focus on mid-lengths to ends, combing through gently after each pass for a wave definition boost.
This leave-in conditioner spray technique sets your post-spray styling up beautifully.
Avoiding Flat Roots While Moisturizing Ends
Once your waves are set, keep roots lifted by applying only from the midshaft to the ends — never the scalp. Use a Finger Lift technique while working product through damp hair with Lengthwise Distribution.
Sectioned Application keeps things controlled.
This Lightweight Distribution approach gives you Avoid Scalp Contact naturally, preventing product buildup while lightweight leave-in formulas for fine hair do their job without dragging roots flat.
How Often Should You Use Leave-in Conditioner

How often you use leave-in conditioner matters just as much as how you apply it. Use it too rarely and your hair misses out; use it too often and you’re dealing with buildup and greasy roots.
Your hair type is the key — here’s how to find the right rhythm.
Frequency Guidelines for Fine or Oily Hair
For fine or oily hair, less is almost always more. Stick to a Wash-Day Sync approach — apply your lightweight leave-in only on days you shampoo, not between washes.
- Use it 1–3 times per week for fine hair maintenance
- Watch for Root Greasiness Signals within 24 hours
- Monitor Scalp Buildup Timing every 1–2 weeks
- Adjust Lightweight Spray Intervals by season — humidity changes everything
- Cut frequency if roots collapse by midday
Daily Use for Dry, Curly, or Damaged Hair
Dry, curly, or damaged hair is thirsty — daily leave-in conditioner isn’t overindulgence, it’s maintenance. Work a cream formula through damp ends every morning for steady moisture retention techniques for curly and coily hair.
A nighttime moisture boost before protective styling integration seals hydration overnight. Humectant benefits keep strands softer between washes, making your daily routine for dry and oily hair feel effortlessly manageable.
When to Use It Before Heat Styling
Before reaching for your flat iron or blow dryer, damp hair timing matters more than most people realize. Apply your leave-in to towel-dried strands, focusing on end-focused protection — that’s where heat damage hits hardest.
Follow the scalp avoidance rule, keep your spray distance technique at arm’s length, and let the heat protectant settle briefly.
Your hair is heat-ready when it’s evenly coated, not dripping.
How to Tell if You Are Using It Too Much
Your hair will tell you when enough is enough. Weighty ends that stay limp after drying, a sticky scalp, or noticeable volume loss at the crown — these are classic overapplication risks showing up in real time.
Hair texture change, like curls drooping or strands clumping, signals product residue building up. Stick to a dime-sized amount and your hair stays balanced.
Common Mistakes When Applying Leave-in Conditioner

Even with the right product in hand, a few small missteps can quietly undo all your effort. Most of them are easy to fix once you know what to watch for.
Here are the most common mistakes people make when applying leave-in conditioner.
Applying to Soaking Wet Instead of Damp Hair
Most people step out of the shower and go straight for the leave-in — but soaking wet hair is actually the wrong starting point.
Too much surface water dilutes the formula, hurting product dilution and reducing how well it clings. You’ll also get uneven curl clumping and longer dry time impact.
Towel-dry first, then apply after shower for better slip and detangling control.
Using Too Much Product and Causing Buildup
More isn’t always better — excessive product is one of the fastest ways to invite residue buildup and hair weightiness. A dime-sized amount for short hair, nickel for medium, quarter for long.
Go heavier and you’re coating strands instead of conditioning them. That heavy coating clogs follicles, causes scalp congestion, and leaves hair looking limp.
Stick to a low buildup routine with proper application techniques for leave-in conditioner.
Applying Directly to The Scalp
Most leave-in conditioners aren’t made for scalp contact — and putting them there can throw off your oil balance management fast.
It clogs follicles, triggers scalp irritation, and makes roots look greasy by noon.
If your scalp is sensitive, it can sting too.
Proper application techniques for leave-in conditioner mean mid-lengths to ends only, unless the label says otherwise.
Skipping The Comb-Through Step
Skipping the comb-through step is one of the most common mistakes when using leave-in conditioner — and it quietly wrecks your results. Without a wide-tooth comb, you risk uneven product coverage, patchy detangling results, and frizz control loss.
Tangles trap the product unevenly, causing texture inconsistency and increased tangling later.
Take 60 seconds to detangle and style properly.
Your hair will thank you.
Choosing The Wrong Formula Weight for Your Hair
Formula weight mismatches can silently flatten your results. Fine strands buckle under excessive polymer film or a heavy emollient load — think shea-rich creams meant for thick coils landing on delicate, low-density hair.
Watch for these strand diameter mismatch signs:
- Hair looks wet hours after drying — humectant overload
- Roots feel greasy despite avoiding the scalp — overly dense resins
- Fine hair loses bounce — heavy emollient load
- Curls clump instead of separating — excessive polymer film
Choosing lightweight sprays vs richer creams isn’t guesswork — it’s matching the formula to your strand diameter.
How to Prevent Product Buildup From Leave-in Conditioner

Even the best leave-in conditioner can work against you if buildup sneaks up unnoticed. A little awareness goes a long way toward keeping your hair feeling fresh and light.
what to watch for — and how to stay ahead of it.
Signs of Buildup on Hair and Scalp
Buildup doesn’t always announce itself loudly — sometimes it sneaks up through small clues. Watch for an itchy scalp that lingers after washing, flaky roots that look greasy rather than dry, or a waxy greasy hairline even on freshly washed hair. A musty odor or tender scalp bumps also signal product residue management is overdue.
These are your scalp health red flags.
How Often to Use a Clarifying Shampoo
Once you spot those buildup signs, a clarifying shampoo becomes your reset button.
For most hair types, every one to two weeks works well. Oily hair may need weekly clarifying, while dry or curly hair does better monthly.
Color-treated hair? Stick to once a month — too often speeds up fade.
Hard water or heavy product use? Clarify a little more frequently.
Adjusting Amount Based on Hair Thickness
Your thickness dosage matters more than you’d think. Fine strands saturate fast — a small amount goes a long way with proper damp ratio and sectioned saturation.
Thick or coily hair needs load scaling: work up to a quarter-sized amount, focusing on outer sections first. Reapply weight only where ends feel dry, not everywhere.
Lightweight Alternatives to Reduce Residue
Sometimes the fix is as simple as swapping your formula. Heavy creams linger on fine strands — lighter options do the same job without the weight.
- Ester Emollient Sprays and Volatile Silicone Mists spread easily and dry clean, leaving no gritty film
- Amino Acid Boosters and Protein Mists strengthen strands, reducing your need for heavier oils
- Light Polymer Filmers detangle effectively without the residue creams leave behind
Lightweight sprays vs richer creams aren’t about preference — it’s about what your hair actually needs.
Top 7 Leave-in Conditioners for Every Hair Concern
With so many leave-in conditioners on the market, picking the right one can feel overwhelming. The good news is that a handful of standout products consistently deliver real results across different hair types and concerns.
Here are seven worth knowing about.
1. K18 Molecular Repair Hair Mask
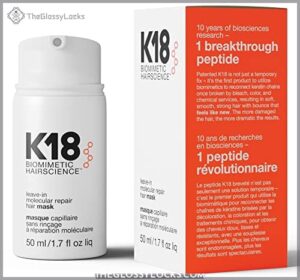
If your hair has been through bleach, heat, or chemical processing, the K18 Leave-In Molecular Repair Hair Mask was basically built for you.
At $75 for 50ml, it’s a splurge — but the patented K18Peptide technology actually works inside the hair shaft, reconnecting broken keratin chains rather than just coating the surface.
Apply a small amount to clean, damp hair and leave it for four minutes. No rinsing needed.
With consistent use, you’ll notice real improvements in softness, elasticity, and strength.
| Best For | Anyone with seriously damaged hair from bleach, color, chemicals, or heat styling who wants actual repair — not just a temporary fix. |
|---|---|
| Format | Leave-in cream |
| Heat Protection | Not specified |
| Frizz Control | Yes |
| Price | $75.00 |
| Volume | 50 mL |
| Hair Types | All types |
| Additional Features |
|
- Works at the molecular level to rebuild broken keratin chains, not just coat the surface
- Leave-in formula takes only 4 minutes — no rinsing, no fuss
- Works on all hair types, including color-treated and chemically processed
- $75 for 50ml is a real investment, especially since you’ll need consistent use to see full results
- You have to skip your regular conditioner when using it, which takes some getting used to
- Results build over time — don’t expect a one-and-done miracle
2. Kerastase Nectar Thermique Heat Protecting Cream
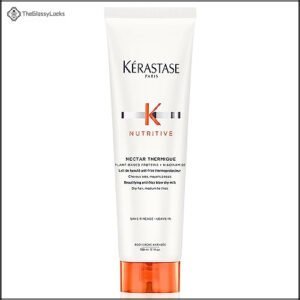
If your hair is dry, thick, or just plain unruly before heat styling, the Kérastase Nectar Thermique is worth keeping on your shelf.
At $50 for 5.1 fl oz, it protects strands up to 450°F while plant-based proteins and niacinamide work to strengthen and moisturize from within.
Apply a small amount to towel-dried mid-lengths and ends, comb through, then blow-dry or flat-iron as usual.
You’ll notice smoother, glossier results — with noticeably less frizz.
| Best For | Anyone with dry, thick, or heat-styled hair who wants serious frizz control and strand protection without skipping the hot tools. |
|---|---|
| Format | Leave-in cream |
| Heat Protection | Up to 450°F |
| Frizz Control | Yes |
| Price | $50.00 |
| Volume | 151 mL |
| Hair Types | Medium to thick |
| Additional Features |
|
- Shields hair up to 450°F — solid coverage whether you’re blow-drying or flat-ironing
- Plant-based proteins and niacinamide actually nourish while they protect, not just coat
- Works great on highlighted or damaged hair that needs extra conditioning love
- $50 for 5.1 oz is a steep ask, especially if you have thick hair and go through it fast
- Mostly online-only, so you can’t just grab it at a local store last minute
- The fragrance is a dealbreaker for anyone with scent sensitivities
3. Olaplex No 5 Leave In Conditioner
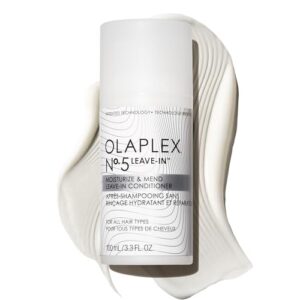
Olaplex No. 5 is the kind of product that quietly earns its place in your routine.
At $32, it delivers real bond-building repair — not just surface conditioning.
The gel-cream texture spreads evenly with one or two pumps, and it’s clinically proven to reduce breakage by 71%.
Apply it to damp mid-lengths and ends, comb through, then style as usual. It’s especially good for color-treated or chemically processed hair that needs steady, day-to-day strength.
| Best For | Anyone with color-treated, bleached, or chemically processed hair who wants daily frizz control and breakage protection without weighing their hair down. |
|---|---|
| Format | Leave-in cream |
| Heat Protection | Up to 450°F |
| Frizz Control | Yes, 72-hour |
| Price | $34.00 |
| Volume | 100 mL |
| Hair Types | All textures |
| Additional Features |
|
- Fights frizz for up to 72 hours and protects hair from heat up to 450°F — solid all-in-one coverage.
- Clinically proven to reduce breakage by 71% and make detangling 91% easier, so it actually delivers on its promises.
- Works on all hair textures, wet or dry, making it easy to fit into pretty much any routine.
- The 100 mL bottle goes fast, and at $34 it adds up quickly if you’re using it daily.
- Can feel greasy or too light depending on how wet your hair is when you apply it.
- Very dry hair types might find the watery texture a bit underwhelming on its own.
4. Briogeo Curl Charisma Leave In Cream
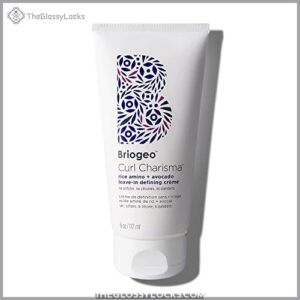
Curly hair needs a product that works with your pattern, not against it. Briogeo Curl Charisma Leave-In Cream does exactly that.
At $24, it blends rice amino acids, avocado oil, and shea butter to lock in moisture and define your curls without any crunch or stiffness. It’s 95% naturally derived and safe for color-treated hair.
Apply a dime to quarter-sized amount to damp strands, comb through, then diffuse or air-dry. Your curls come out bouncy, soft, and actually touchable.
| Best For | Anyone with wavy, curly, or coily hair — especially those with color-treated or chemically processed strands who want defined, frizz-free curls without harsh chemicals. |
|---|---|
| Format | Leave-in cream |
| Heat Protection | Not specified |
| Frizz Control | Yes |
| Price | $24.00 |
| Volume | 158 g |
| Hair Types | Wavy, curly, coily |
| Additional Features |
|
- Locks in moisture and defines curls with a clean, 95% naturally derived formula — no silicones, sulfates, or parabens
- Works with all curl types and drying methods, leaving hair soft, bouncy, and touchable
- Safe for color-treated hair, so you don’t have to choose between protection and style
- May not fully tame very high frizz levels, particularly when air-drying
- Thick or dense curls might need more product per use, which adds up cost-wise
- At $24, it’s pricier than drugstore options — frequent heavy users might feel the pinch
5. Ouidad Moisture Lock Leave In Conditioner
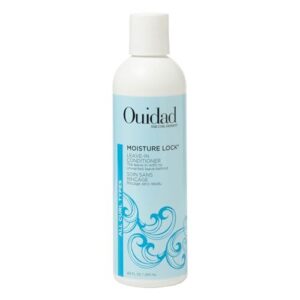
Low-porosity hair has one stubborn quirk — it resists moisture like a closed door. Ouidad Moisture Lock Leave-In Conditioner was built specifically to push past that barrier.
At $26, it uses glycerin, panthenol, and prickly-pear cactus extract to pull hydration into the hair shaft and keep it there. The formula is lightweight, non-greasy, and free from parabens, sulfates, and mineral oil.
Apply to damp curls from mid-lengths to ends. hair stays soft, frizz-free, and defined all day.
| Best For | People with curly hair of all types who want a lightweight leave-in that detangles, locks in moisture, and primes hair for styling without weighing curls down. |
|---|---|
| Format | Leave-in spray |
| Heat Protection | Not specified |
| Frizz Control | Yes |
| Price | $12.99 |
| Volume | 255 mL |
| Hair Types | All curl types |
| Additional Features |
|
- Adds slip and moisture to damp curls, making detangling way easier without leaving hair feeling heavy or greasy
- Clean formula — no silicones, parabens, sulfates, mineral oil, or phthalates, and it’s vegan and cruelty-free
- A little goes a long way, so the $12.99 bottle lasts longer than you’d expect
- Some fine or loosely curled hair types find it leaves a sticky feel with limited frizz control
- The fragrance is strong and lingers, which can be a dealbreaker if you’re scent-sensitive
- Results vary — a handful of users found it didn’t do much for their hair or left it feeling dry
6. OUAI Leave In Conditioner Spray
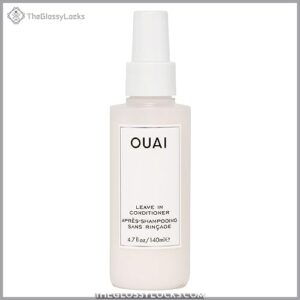
If your hair sits somewhere in the fine-to-medium range, the OUAI Leave-In Conditioner Spray earns its $32 price tag. It’s built around tamarind seed extract, panthenol, and vitamin E — a combo that hydrates without any of that heavy, weighed-down feeling.
The heat protection holds up to 450°F, so it doubles as a styling primer. A few spritzes on damp hair, comb through, and you’re ready to blow-dry.
Clean, practical, and genuinely lightweight.
| Best For | Fine-to-medium hair types that need daily detangling, heat protection, and frizz control without weighing strands down. |
|---|---|
| Format | Detangling spray |
| Heat Protection | Up to 450°F |
| Frizz Control | Yes |
| Price | $32.00 |
| Volume | 140 mL |
| Hair Types | Fine to medium |
| Additional Features |
|
- Pulls double duty as a leave-in conditioner and heat protectant up to 450°F — one less product in your routine
- Lightweight formula hydrates dry or damaged hair without any greasy residue
- Amino acids and tamarind seed extract actually strengthen strands and reduce breakage while brushing
- At $32, it’s pricier than most leave-in conditioners, which might make you think twice before stocking up
- Thicker or very dry hair may need extra water to get full coverage from the spray
- The scent is noticeably strong on wet hair, which can be a dealbreaker for anyone sensitive to fragrance
7. ACT ACRE Squalene Leave In Conditioner
For something even lighter, 2% Squalene Leave-In Conditioner is worth a look. At $48, it’s formulated around plant-derived squalane, snow mushroom extract, and glycerin — ingredients that work together to hydrate without any greasy residue.
It’s vegan, cruelty-free, and tames frizz well on fine, wavy, or color-treated hair.
Stick to 2–3 pumps on damp mid-lengths to ends. Too much, and you’ll notice puffiness. Get the amount right, though, and your hair feels soft all day.
| Best For | Anyone with fine, wavy, color-treated, or dry hair who wants frizz control and hydration without the greasy weight. |
|---|---|
| Format | Leave-in cream |
| Heat Protection | Yes, unspecified limit |
| Frizz Control | Yes |
| Price | $48.00 |
| Volume | 17 g |
| Hair Types | Dry or damaged |
| Additional Features |
|
- Lightweight 2% squalene formula hydrates and softens without buildup or residue
- Protects against heat and environmental damage — great for daily styling
- Vegan and cruelty-free, so it checks the box for conscious beauty shoppers
- At $48 for only 0.6 oz, you’re paying a premium for a bottle that won’t last long
- Too many pumps can leave hair feeling puffy — takes a little trial and error to dial in
- The scent is hit or miss; a few users found it off-putting
How to Build a Leave-in Conditioner Hair Routine

Knowing which products work for your hair is only half the battle — the other half is using them consistently and at the right time. Building a simple routine around your leave-in conditioner makes a real difference in how your hair looks and feels day to day.
Here’s how to structure it.
Morning Routine for Dry or Damaged Hair
If hair wakes up thirsty, a simple routine makes all the difference. On damp strands, work a cream leave-in from mid-lengths to ends — no scalp contact needed.
Use a wide-tooth comb for gentle detangling and moisture lock sealing throughout.
This daily hair routine delivers moisturizing benefits, adds a morning shine boost, and keeps dry, damaged hair feeling genuinely soft.
Incorporating Leave-in Before Heat Tools
Once your morning leave-in is locked in, the next move is heat tool sequencing — getting your products in the right order before any tool touches your strands.
- Apply leave-in first for pre-heat slip and moisture.
- Layer a heat protectant after for temperature compatibility.
- Let both settle briefly — product layering strategy matters.
- Manage residue by using only what your hair needs.
Refreshing Curls Mid-Week Without Washing
By midweek, your curls need a reset — not a full wash. Lightly mist with a water mist reactivation spray for hydration refresh, focusing the spritz application on mid-lengths and ends.
Scrunch gently to revive curl shape.
For targeted root lift, dust dry shampoo at the scalp for scalp oil absorption.
Finish with a small amount of leave-in conditioner for curly hair care to lock moisture back in.
Frequently Asked Questions (FAQs)
Is leave-in conditioner good for high porosity hair?
Yes — leave-in conditioner is excellent for high porosity hair.
It delivers humectant role benefits like glycerin to attract moisture, while coating layer benefits seal the cuticle, slowing moisture loss between washes.
Does leave-in conditioner expire or go bad over time?
Like food in your fridge, leave-in conditioner does expire. Most last 2–3 years unopened, and 12–18 months after opening. Check the expiration date labels on the bottle before each use.
Can you use leave-in conditioner on wet or dry extensions?
Both work — damp is usually better. On wet or dry hair extensions, damp gives a product absorption rate and reduces frizz.
Always keep leave-in away from attachment areas, regardless of extension fiber types.
Conclusion
Switching up your routine can feel like a risk, especially when your hair finally behaves. But learning to apply leave-in conditioner correctly isn’t about starting over—it’s about working smarter with what you already have.
Match the formula to your hair type, apply it to damp strands, and keep it away from your roots. Small adjustments, real results.
Your hair doesn’t need more products. It needs the right ones, used the right way.
- https://www.healthline.com/health/how-to-use-leave-in-conditioner
- https://amitys.co.uk/how-to-apply-leave-in-conditioners-correctly-a-guide/
- https://www.usatoday.com/story/life/health-wellness/2024/05/11/how-to-use-leave-in-conditioner/73384690007/
- https://www.hims.com/blog/how-to-use-leave-in-conditioner
- https://natureshair.com.au/how-to-use-leave-in-conditioner/