This site is supported by our readers. We may earn a commission, at no cost to you, if you purchase through links.

Skipping sections when you moisturize feels harmless—until you notice the same dry patch showing up on the left side every wash day, no matter how much product you use. That’s a distribution problem. Without a system, you’re basically hoping moisture finds its own way through your hair, and it won’t.
Sectioning hair for moisturizing gives you actual control—over coverage, product dosage, and those stubborn low-moisture zones that keep setting you back. Here’s exactly how to do it right.
Table Of Contents
- Key Takeaways
- Why Section Hair Before Moisturizing
- Choose The Right Section Count
- How to Section Hair for Moisturizing
- Start With Damp, Detangled Hair
- Divide Hair Into Front and Back Halves
- Split Each Half Into Manageable Sections
- Secure Each Section With Clips or Loose Twists
- Mist One Section Before Applying Moisturizer
- Apply Product From Ends to Roots
- Smooth Product Through Each Section Evenly
- Re-secure Moisturized Sections to Prevent Tangling
- Continue Until Every Section is Fully Moisturized
- Top 4 Sectioning Tools for Moisturizing
- Prevent Breakage While Sectioning
- Finger Detangle Before Using a Brush or Comb
- Start Detangling at The Ends
- Work Slowly Toward The Roots
- Keep Sections Damp for Better Slip
- Avoid Clipping Too Close to The Scalp
- Use Loose Twists for Tension-sensitive Areas
- Keep Moisturized Sections Separate From Dry Sections
- Adjust Section Size Based on Tangles and Density
- Frequently Asked Questions (FAQs)
- Conclusion
Key Takeaways
- Sectioning your hair before moisturizing isn’t optional—it’s the only way to guarantee every strand actually gets coated, not just the ones on top.
- Your section count should match your hair’s density: four sections for fine hair, six for medium, eight for thick or long, and even smaller for tight 4C coils.
- Always work product from ends to roots, misting each section first so moisture glides in instead of sitting on top.
- Breakage sneaks in during sectioning when you skip finger detangling, clip too close to the scalp, or let moisturized sections mix back into dry ones—so don’t rush the details.
Why Section Hair Before Moisturizing

Skipping sections might seem like a time-saver, but it’s actually where most moisture routines fall apart.
Getting the timing right makes all the difference—check out this guide on pre-shave prep for electric razors to nail that drying interval most guys overlook.
When you work through your hair in organized sections, every strand gets the attention it needs — no guessing, no dry patches. Here’s exactly why sectioning makes such a difference.
Ensures Even Moisture From Roots to Ends
Skipping sections is basically setting yourself up for patchy results. When hair sits in one big mass, outer strands hog all the product while inner ones stay thirsty.
Sectioning fixes that by giving you real control over even product flow — root saturation, mid-length hydration, all of it. That’s moisture lock working the way it should, from roots straight to ends.
Research shows that the hair lipid barrier function doesn’t provide humidity resistance, so proper sectioning helps compensate for this limitation.
Helps Deep Conditioner Reach Every Strand
Deep conditioner can’t do its job if it never actually touches the strand. Tight curl bundles hide dry pockets inside, and without smart section size optimization, product just sits on top.
Working one section at a time—with solid clip placement strategy—lets that thick formula coat every strand fully, root to tip, no strand left out.
Reduces Dryness-related Breakage
Once every strand is coated, friction reduction really kicks in. Dry hair snaps—it’s that simple. Sectioning locks in uniform hydration, ensuring no patch is missed, while gentle product application through each section builds real slip enhancement instead of surface gloss.
The benefits of hair sectioning for natural hair stack up fast: less strand-on-strand rubbing, reduced breakage, and more length retained.
Prevents Product Overload on The Scalp
Think of your scalp as real estate — you don’t want heavy product squatting up there rent-free. Sectioning gives controlled product dosage, ensuring lightweight formulas reach every strand without dumping excess near the roots. This optimizes distribution, preventing buildup and residue.
Treat your scalp like prime real estate — sectioning ensures product earns its place without overstaying its welcome
- Mist first for slip-enhanced application before any cream touches your hair
- Apply from ends upward for minimal root coating
- Controlled product dosage prevents scalp residue issues
- Sectioning facilitates scalp accessibility during hair care routines
- Moisturizing techniques for natural hair work best with the right amount of product per section
By strategically dividing hair into sections, you ensure even product distribution and maintain a healthy, residue-free scalp.
Makes Low-moisture Areas Easier to Target
Sectioning is basically dry zone mapping in action. You can feel exactly which spots are still rough and give them localized reapplication without disturbing already-saturated hair. Targeted misting, prepped section by section, combined with a quick sectional feel check, makes precision product placement straightforward.
That’s the real power of sectioning methods — you’re not guessing anymore.
Choose The Right Section Count

The number of sections you use makes a bigger difference than most people think. Too few & you’ll miss spots; too many & wash day turns into a whole production.
Your hair type & density are really the deciding factors — here’s how to figure out what works for you.
Use Four Sections for Fine or Low-density Hair
Fine or low-density hair? The four-section method is your best friend. Less hair means product moves fast — and without structure, moisture pools in some spots while others stay dry. Four sections give you the control to nail even distribution of products every time.
- Section size balance keeps coverage consistent across sparse areas.
- Product allocation efficiency prevents scalp overload.
- Moisture retention speed improves because each section gets full attention fast.
Clip placement strategy matters too — secure each section away from the roots for focused scalp comfort.
Use Six Sections for Medium-density Natural Hair
Medium-density natural hair hits that sweet spot where four sections feel too broad & eight feels like overkill. Six is your number. The six-section method uses horizontal partitioning — splitting the head into top, middle, and bottom zones — so balanced clip placement keeps scalp tension mapping even.
Each section receives section-specific moisture dosage, and the slip mist technique locks in moisture retention before product distribution begins.
| Section Zone | Hair Area Covered | Key Benefit |
|---|---|---|
| Top Left | Crown to nape, left | Even curl saturation |
| Top Right | Crown to nape, right | Prevents dry patches |
| Middle Left | Ear to ear, left side | Controls product buildup |
| Middle Right | Ear to ear, right side | Targets mid-shaft dryness |
| Bottom Left | Nape, left | Strengthens breakage-prone ends |
| Bottom Right | Nape, right | Seals moisture from ends up |
Use Eight Sections for Thick, Dense, or Long Hair
Thick, dense, or long hair doesn’t play by the same rules. The eight-section method is your answer here. Hair thickness and hair density both demand smaller section sizes so moisture saturation actually reaches inner strands — not just the surface.
Vertical layering helps with clip positioning and processing time per bundle. Think of it as optimizing product distribution through sectioning for real moisture retention results.
Create Smaller Sections for Tight Curls and 4C Hair
Tight coils & 4C hair need their own rules. Smaller section size ensures even curl definition, consistent tension, and targeted hydration — eliminating dry streaks and guesswork. This approach guarantees thorough product distribution and lasting moisture retention.
When working on sectioning techniques for short 4C hair, tiny sections allow product application to reach inner strands effectively, enhancing moisture retention. This method also improves slip, minimizes product buildup, and maximizes deep conditioning benefits that visibly enhance hair health.
Make Larger Sections Where Hair is Thinner
Thinner spots actually need less fuss, not more. Larger sections mean fewer clips disturbing those sparse areas and less tension pulling at sensitive zones—that’s real scalp comfort. Broad section coverage keeps your moisturizing strategy consistent, ensuring moisture uniformity without overworking the hair.
Managing hair thickness with sections this way also speeds up product application and moisture retention. Faster styling, better results.
How to Section Hair for Moisturizing
Once you’ve figured out how many sections you need, it’s time to actually do the work.
The process is pretty straightforward — just follow these steps in order and you won’t miss a spot. Here’s exactly how to get it done.
Start With Damp, Detangled Hair

Before you touch a single clip, get your hair damp — not soaking, just a light water spritz to wake up each strand. That damp hand-feel is your moisture lock primer. It creates slip-enhanced detangling conditions, so your wide-tooth comb glides instead of fights.
Always use a detangle-first approach; sectioning considerations for damp versus dry hair aren’t optional — damp wins every time.
Divide Hair Into Front and Back Halves

Now that your hair is damp and ready, grab your rat-tail comb. Draw a clean center part from forehead to nape — that’s your front and back half separation.
Do a quick symmetrical section check in the mirror. Re-adjust any strands crossing the line before securing each half with clips or loose twists.
Front half secured, back half accessible. Clean start, no guesswork.
Split Each Half Into Manageable Sections

With each half secured, it’s time to break things down further. Half-side symmetry matters here — balanced section volume on both sides keeps your four-section method consistent throughout.
Split each half using midline partitioning:
- Front left, front right
- Back left, back right
- Add vertical parts for density
- Keep even half distribution in mind
- Prioritize section size consistency in knot-prone spots
Sectioning saves time later.
Secure Each Section With Clips or Loose Twists

Once your sections are mapped out, lock them in — fast. Grab your hair clips and position them using the Clip Angle Technique: perpendicular to the hair’s pull, about 1–2 inches from the scalp. That’s your sweet spot for Clip Tooth Alignment — enough grip, no scalp pinching.
Prefer loose twists? Twist Tension Control is everything. Use moderate tightness, consistent twist direction, and knot end securing at the ends. Done.
| Method | Best For | Watch Out For |
|---|---|---|
| Hair clips | Thick, dense sections | Bunching at one edge |
| Loose twists | Tension-sensitive areas | Uneven twist thickness |
| Knot end securing | Long or slippery hair | Over-tightening the knot |
| Clip tooth alignment | Fine or layered hair | Placing too far from scalp |
| Consistent twist direction | All hair types | Mixing directions mid-routine |
Choosing Hair Clips vs. Loose Twists for Sections really comes down to your density and sensitivity. Either way, How to Section Natural Hair Effectively starts here — secured sections mean better product application and moisture retention later.
Mist One Section Before Applying Moisturizer

Before you reach for any product, grab your spray bottle and mist just the section you’re working on. That quick spritz is your secret weapon for Slip Optimization & Even Product Spread.
- Controlled Hydration keeps each of your hair sections at the same dampness level
- Precise Moisture Layering starts with a damp surface, not a dry one
- Reduced Tangling happens naturally when strands aren’t fighting friction
- Targeted misting enhances better product application and moisture retention section by section
Apply Product From Ends to Roots

Start at the ends — not the roots. The end-first technique gives you controlled product flow where your strands need it most, then gradually works moisture upward. This gradual moisture buildup keeps roots weightless and prevents scalp overload.
| Step | Action | Why It Works |
|---|---|---|
| 1 | Apply to ends first | Prevents root heaviness |
| 2 | Rake upward through mid-lengths | Boosts product absorption |
| 3 | Lightly layer toward roots | Maintains weightless roots |
| 4 | Press palms together first | Ensures smooth cuticle glide |
| 5 | Repeat if needed | Encourages gradual moisture buildup |
Smooth Product Through Each Section Evenly

Once product hits your strands, how you smooth it matters just as much as what you apply. The Palm Film Technique preps your hands for even coverage — rub product between both palms before touching hair.
- Rake through each section using the Raking Motion
- Follow with Praying Hands for Water Mist Slip
- Use Repeated Passes to catch dry spots
- Optimizing Product Distribution with Sectioning means no guessing
Re-secure Moisturized Sections to Prevent Tangling

Done moisturizing a section? Re-secure it immediately — this is where boundary clip reinforcement earns its keep. Loose strands drift and interlock quickly. Place your hair clips so they hold section edges without compressing the curl.
Slip maintenance is crucial here too: misted edge rehydration keeps boundaries pliable and tangle-free. Tension-free re-tightening means adjusting only the edges, never disturbing the full section.
Sectioning is an underrated hair care hack, and this step proves it.
Continue Until Every Section is Fully Moisturized

Keep the momentum going — section by section, no shortcuts. This is where uniform saturation actually happens.
- Run your fingers through each section: if it doesn’t feel evenly slick, it’s not done
- Coverage verification means checking for dry patches before moving on
- Mist anything drying mid-process to maintain moisture retention
Section progression keeps your deep conditioner working, not guessing.
Top 4 Sectioning Tools for Moisturizing
The right tools make sectioning so much easier — no slipping, no snagging, no frustration. Having the correct gear in your kit can mean the difference between a smooth wash day & a full-on battle with your hair.
Here are four tools worth keeping on hand.
1. Revlon Black Extra Long Hair Elastics
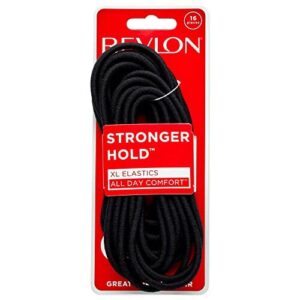
Thick hair needs a hold that actually holds — & Revlon’s Extra Long Hair Elastics deliver. Each elastic stretches far enough to wrap around dense, braided, or stretched hair without that dreaded slip halfway through your routine.
No crimped edges mean no dents or damage when you release each section. They’re firm enough to keep everything in place during a full wash day, yet gentle enough for daily use.
One pack gives you 16 elastics, so you’re covered for a while.
| Best For | Anyone with thick, curly, braided, or 4C hair who needs an elastic that can actually keep up with their hair — especially on wash days or active days. |
|---|---|
| Hair Type | Thick, curly, 4B-4C |
| Pack Size | 16 elastics |
| Daily Use | Yes, active wear |
| Damage Prevention | No crimper edge |
| Material Quality | Elastic, no metal |
| Durability Concern | Tension lessens over months |
| Additional Features |
|
- Long enough to wrap fully around dense or braided hair without slipping
- No crimped edge means no dents or breakage when you take them out
- 16 per pack, so you’re not constantly running out
- The hold weakens after a few months of daily use
- Thin construction can snap if your hair is especially thick or heavy
- Too firm for fine or delicate hair — might feel uncomfortable
2. Curl Keeper Tweek Curl Cream
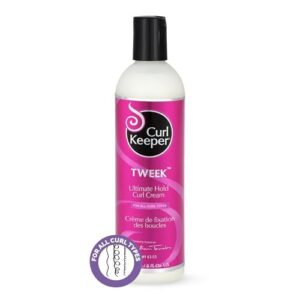
Once your sections are clipped and ready, Curl Keeper Tweek Curl Cream earns its spot by ensuring curls stay moisturized without crunch. This spray-in-cream hybrid delivers a flexible hold and zero stiffness, keeping curls defined without weighing them down.
Work a small amount through mid-lengths to ends in each section. The formula is silicone-free, water-based, and reactivatable with just a mist—ideal for second-day revitalizing.
At $25 for 8 oz, it’s a solid investment for maintaining a consistent curl routine.
| Best For | Curl enthusiasts with wavy to curly hair who want flexible, frizz-free hold that refreshes easily on day two or three. |
|---|---|
| Hair Type | All curl types |
| Pack Size | 8 fl oz bottle |
| Daily Use | Yes, day 2-4 hold |
| Damage Prevention | Silicone-free formula |
| Material Quality | Water-based, pH-balanced |
| Durability Concern | Perceived dilution over time |
| Additional Features |
|
- Reactivates with just water, so second-day curls are a quick spritz away
- Silicone-free and pH-balanced formula keeps curls soft and defined without stiffness
- Works on wet, damp, or dry hair—great for touch-ups and bedtime refreshing
- Hold can feel weak for coarser or tighter curl patterns
- Too much product leads to stickiness, so you have to dial in the right amount
- A small number of users pick up a chemical scent that might bother sensitive noses
3. Tangle Teezer Curly Hair Detangler Brush
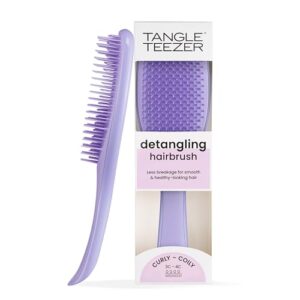
After moisturizing your curls section by section, use a brush that preserves their hydration. The Tangle Teezer Curly Hair Detangler is designed for this purpose. Its two-tiered teeth first tackle tough knots, while the shorter teeth smooth the cuticle in a single pass—reducing frizz and enhancing definition.
Priced at $13.59, this tool works seamlessly on wet or dry hair and evenly distributes conditioner during shower use. For 3C–4C hair types, it streamlines the routine significantly, saving time without compromising results.
| Best For | People with 3C–4C curly or coily hair who want to cut down detangling time and keep their curl definition intact. |
|---|---|
| Hair Type | 3C-4C curly, coily |
| Pack Size | Single brush |
| Daily Use | Yes, wet and dry |
| Damage Prevention | Breakage-minimizing teeth |
| Material Quality | Firm-flex plastic teeth |
| Durability Concern | Handle lacks grip |
| Additional Features |
|
- Two-tiered teeth tackle tangles and smooth the cuticle in one pass, saving serious time
- Works wet or dry, and spreads conditioner evenly in the shower
- Easy to clean—just a quick rinse and a comb-through
- The plastic handle gets slippery, which is rough if you have limited grip strength
- Can pull out more hair than expected on dry hair or mixed curl patterns
- Feels stiff compared to softer brushes, and some users notice brief scalp irritation
4. Goody Large Hair Claw Clips
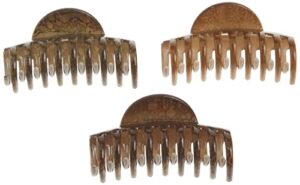
Your clips matter just as much as your technique. Goody Large Hair Claw Clips are a solid go-to for keeping sections neatly divided while you work through each part of your routine. They’re built with a wide jaw & strong hinge — so they actually hold thick hair without slipping mid-session.
At roughly 3 inches, they’re compact enough to grab multiple sections without crowding. Just don’t count on them for very dense updos — they work best when you’re sectioning, not styling.
| Best For | Anyone with long or thick hair who needs a reliable clip for sectioning during styling — especially if you’re always on the go and want something lightweight and easy to toss in a bag. |
|---|---|
| Hair Type | Thick, long hair |
| Pack Size | 3 clips |
| Daily Use | Yes, quick styling |
| Damage Prevention | Strong hinges, no slip |
| Material Quality | Plastic, tortoise-shell |
| Durability Concern | Paint wears off teeth |
| Additional Features |
|
- Strong hinges keep thick hair from slipping mid-style
- Comes in a pack of three, so you’ve always got a backup
- Compact and light enough for daily use or travel
- The paint on the teeth can wear off with regular use
- Plastic teeth may get brittle or break over time
- Might not cut it for very thick or dense hair — the 3-inch size has its limits
Prevent Breakage While Sectioning

Sectioning is gentle work — or at least it should be. The wrong moves here are exactly where breakage sneaks in, especially on wash day when your hair is at its most vulnerable.
Here’s what to do to keep every strand intact while you work through each section.
Finger Detangle Before Using a Brush or Comb
Before you reach for that wide tooth comb, finger detangle first — your hair will thank you. Working through each section by hand gives you real knot awareness, letting you feel resistance before a tool causes damage. It’s built-in tension control & slip enhancement in one step.
This simple detangling technique protects your scalp and seriously boosts breakage reduction during moisturizing.
Start Detangling at The Ends
Always start at the ends — never the root. This is the golden rule of knotted tip release. Work each tangle from the bottom up, using low tension pulling so you’re not forcing a comb through resistance.
Sequential section detangling means one clear zone before moving higher. This end-start flow keeps your moisturizing routine smooth and your strands intact.
Work Slowly Toward The Roots
Once you’ve cleared the ends, slow down — this is where root frizz & brittle spots live. Root First Layering means inching upward, letting each zone absorb before you move on. That Incremental Absorption & Controlled Product Flow prevents overloading the scalp while still delivering Targeted Scalp Hydration. Patience Driven Saturation isn’t overthinking — it’s just letting your sectioning & moisturizing routine actually work.
Keep Sections Damp for Better Slip
Misting each section before you work through its your best Friction Management move. Dry hair grabs & snags — damp hair glides. That Slip Boost makes a real difference for Tangle Minimization & Product Absorption, since conditioner spreads more evenly on damp strands.
Think of it as dry vs damp hair sectioning considerations made simple: a quick spritz keeps Moisture Retention steady & your fingers moving freely.
Avoid Clipping Too Close to The Scalp
Clips sitting right on your scalp are a sneaky source of tension. The Clip Gap Technique is simple — place each clip slightly above the scalp line, not flush against it. That small buffer delivers real Scalp Pressure Relief.
Use Gentle Grip Placement to confirm the clip holds without compressing skin.
A quick Visual Clip Check in the mirror keeps Tension-Free Sectioning consistent throughout your moisturizing routine.
Use Loose Twists for Tension-sensitive Areas
Some spots on your scalp—like the hairline, crown, and tender sides—just don’t tolerate clips. That’s where a loose twist beats a clip every time. Your Twist Placement Strategy is simple: wrap two strands around each other gently, letting the interlocking do the work.
This Gentle Tension Technique provides Scalp Pressure Relief with zero digging. It maintains Elasticity Balance, aids in hair moisture retention, and helps prevent breakage—all without sacrificing section control.
Keep Moisturized Sections Separate From Dry Sections
Once you moisturize a section, treat it like it’s done — don’t let it mix back into dry hair. That’s your dry‑wet separation benefits working in real time. Boundary friction control & product transfer prevention keep your work intact.
- Re‑secure each section immediately after moisturizing
- Use coverage verification technique before moving on
- Monitor moisture retention by feel & look
- Apply product layering within each section shape only
- Practice hair moisture retention through consistent moisturizing techniques
Adjust Section Size Based on Tangles and Density
Your section size shifts with your hair — it isn’t fixed. High knot density and curl tightness signal the need for smaller sections, while strand thickness tells you how deep moisture penetration needs to go.
If the inside feels dry after product application, that is your cue for section re-assessment. This ensures moisture reaches beyond the top layer.
Understanding hair texture and section size is key to eliminating guesswork and achieving consistent results.
Frequently Asked Questions (FAQs)
Can sectioning work on chemically treated hair?
Absolutely, chemically treated hair benefits the most. Sectioning promotes cuticle protection, moisture retention, reduced friction — all critical for fragile strands.
Adapted section size keeps scalp relief consistent while hair porosity stays balanced.
How often should you redo your sectioning routine?
Redo your full routine every wash day. Between washes, spot-mist dry areas only. Switch products? Re-section. Detangle? Re-section. For 4C coils, re-section whenever curl clumping drops off.
Does sectioning help with heat styling preparation?
Yes, sectioning absolutely helps with heat styling prep. You get even heat coverage, consistent tension, and uniform product application, including heat protectant.
Fewer repeated tool passes means a faster styling workflow and less damage overall.
Should you section differently for overnight moisture treatments?
Overnight treatments call for tighter section control. Keep clips loose near the scalp, seal each section with oil after your deep conditioner, then twist & cover — moisture retention depends on it.
Can sectioning techniques vary by season or climate?
Seasons change your hair — and your sectioning should too. High humidity softens strands, while dry winter air demands smaller sections & extra misting for real deep conditioner coverage.
Conclusion
Less guessing, less buildup, less of that one stubborn dry patch ruining your whole wash day. Sectioning hair for moisturizing isn’t extra work—it’s the difference between product sitting on top & actually getting in.
You know your hair now. You know where it drinks moisture fast & where it holds out. Work the system, trust the sections, and watch your hair respond the way it should.
- https://carolsdaughter.com/blogs/beauty-blog/how-to-moisturize-natural-hair-the-right-way?srsltid=AfmBOoo7X2XYNviMbBYYjCyAe2diLn3NcFnO5w_5Kqb1p4HPyM0EeDsf
- https://hairstory.com/blogs/news/how-to-moisturize-natural-hair-bring-curls-and-coils-back-to-life?srsltid=AfmBOopgkMbPl25QIaapFprvTE6RJvSb9WawX1EoQ8rsSt8AC-I9gLMM
- https://www.curlynikki.com/deep-conditioning-dos-and-donts.html
- https://holistichabits.com/2021/09/30/hair-tools-for-long-healthy-hair/
- https://finenaturalhairandfaith.com/how-to-section-natural-hair-guide/