This site is supported by our readers. We may earn a commission, at no cost to you, if you purchase through links. This content is for general informational and educational purposes only and is not a substitute for professional medical, dermatological, or nutritional advice.

Pumpkin’s not just a fall candle scent. Those natural enzymes break down keratin buildup clogging your pores, while the fruit’s mild acidity helps loosen dead skin without stripping your barrier. That combination makes a pumpkin enzyme mask for acne one of the few DIY treatments that’s actually backed by real chemistry.
But strength matters here. Too much acid, wrong pH, or a random kitchen recipe with lemon juice thrown in, and you’re trading breakouts for chemical burns.
Get the formula right, though, and you’re looking at clearer pores, calmer redness, and skin that tolerates exfoliation instead of fighting it. Here’s how to make and apply it the safe way.
Table Of Contents
Key Takeaways
- Pumpkin’s natural enzymes and mild acidity break down keratin buildup and loosen dead skin without stripping your barrier, making it a legit acne treatment when the formula’s right.
- Skip the DIY additions like lemon juice, honey, yogurt, or cinnamon since they throw off your skin’s pH and raise your risk of irritation or chemical burns.
- Always patch test on your forearm and wait 24 to 48 hours before applying to your face, since reactions to glycolic acid and enzymes often show up late.
- Start with once-weekly use for 5 to 10 minutes, moisturize right after rinsing, and wear SPF 30 daily to protect freshly exfoliated skin and lock in results.
How Pumpkin Enzyme Masks Help Acne

Pumpkin enzyme masks aren’t just a trend, they earn their spot in acne care through real, active ingredients. Each one plays a specific role, from clearing pores to calming redness. Here’s what’s actually working under the surface.
If your skin flares up at the mere mention of exfoliation, this gentle enzyme mask guide for sensitive skin breaks down why the Revision formula’s blend of gold clay and jojoba oil feels more soothing than stripping.
Pumpkin Enzymes and Pore Buildup
Under all that gunk sits keratin, the protein holding dead cells together. Natural pumpkin enzymes break it down, easing pore congestion relief and clogged pores.
Enzymatic action delivers:
- Dead skin removal
- Pore minimizing
- Oil control balance
- Gentle exfoliation method
- Smoother texture
The Pumpkin Enzyme Masque uses pumpkin fruit purée to dissolve buildup, not scrub it, clearing pores without stripping skin. This enzymatic process also helps with naturally occurring zinc that regulates oil production, preventing the rebound oiliness that harsher treatments can trigger.
Glycolic Acid for Congestion
Enzymes handle the surface. Glycolic acid goes deeper, working as the masque’s exfoliating resurfacing treatment for stubborn buildup. As an AHA, it dissolves dead cells and oils sitting in pores, easing congestion that scrubbing alone can’t touch.
Think of it as your clogged pores solution, smoothing texture and refining pore appearance while prepping skin for what pumpkin’s enzymes started.
Vitamin C for Dark Spots
Once pores are clear, the real work starts: fading what acne left behind. Ascorbic acid, the masque’s vitamin C source, works as an antioxidant that helps suppress excess melanin production, the root cause of dark spots.
Results build slowly, expect visible brightening over weeks, not days. Pair it with daily SPF for real, lasting skin tone improvement.
Neem and Ginger Benefits
Brightening only goes so far without calming the skin underneath, which is where neem seed oil and organic ginger root step in.
Neem seed oil brings antibacterial power straight to acne-prone areas. Ginger root works as an anti-inflammatory, easing redness while supporting collagen. Together, they round out this natural acne treatment with plant-based healing your skin actually feels.
- Neem fights bacteria
- Ginger calms inflammation
- Both support collagen
- Redness fades faster
- Skin feels balanced
Realistic Acne Scar Expectations
So what can this mask actually do for scars? Be honest with yourself: full erasure isn’t realistic. Expect postacne hyperpigmentation to fade faster than true texture. Scar type matters too, ice pick and boxcar scars respond slower.
Consistent use over weeks brings skin texture improvement, not overnight change. Manage irritation risk, and results stay steady.
Choose Acne-Safe Mask Ingredients

Not every pumpkin mask deserves a spot on your skin. Some formulas soothe acne-prone skin, while others push it into overdrive. Here’s what to check before you buy or brew one.
Check Acid Strength and PH
Not all acids treat skin the same. Glycolic acid works best at 5 to 10 percent, buffered to pH 3–4.5, gentle enough for acne-prone skin.
- Below pH 3: harsh, irritating
- 3–4.5: ideal chemical exfoliation range
- Above 6: mild, less effective
Check labels or test with a calibrated pH meter. Skin pH balance matters more than marketing claims.
Look for Barrier-supporting Humectants
A good exfoliating mask shouldn’t leave skin tight or stripped. Check labels for glycerin, hyaluronic acid, or panthenol, humectants that pull moisture into the skin without clogging pores.
Pair these with a noncomedogenic formula for real barrier repair. Ingredients like ginger and glycerin support hydration layering, keeping skin calm even after exfoliation.
Avoid Harsh Fragrance Blends
That sweet, spicy scent might be the real troublemaker. "Fragrance" hides up to 300 undisclosed compounds, common allergens that inflame acne-prone skin rather than clog it.
Skip blends with citral or synthetic musks. Choose a fragrance-free, noncomedogenic formula instead, sensitive skin friendly and less likely to trigger flare-ups. Always patch test new products first.
For an extra layer of gentle care, pairing your routine with a non-aerosol shaving cream for sensitive skin can help minimize irritation even further.
Compare DIY and Formulated Masks
DIY pumpkin blends sound appealing, but ingredient consistency varies with ripeness and mixing time.
Formulated options like the Pumpkin Enzyme Masque use standardized Glycolic Acid AHA levels, so you get repeatable enzyme mask benefits. They also include preservatives for contamination risk control and rinse predictably.
DIY skincare can work short-term, but matching acne actives to a real formula gives steadier results.
Match Your Skin Sensitivity
Not every acne fighter needs the same acid level. Identify skin sensitivity first: reactive, easily flushed skin needs gentler routines than resilient, oily skin.
- Check for stinging, burning, or redness after products
- Note if wind, heat, or stress trigger flare-ups
- Choose skin barrier promoting ingredients like glycerin
- Favor anti-inflammatory plant-based ingredients over strong acids
- Adjust the Pumpkin Enzyme Masque frequency accordingly
Make a Gentle Pumpkin Mask

Making your own pumpkin mask at home sounds simple, but a few missteps can turn a gentle treatment into an irritant. Not every kitchen ingredient belongs on your face, even if it’s natural. Here’s how to keep your DIY version safe and skin-friendly.
Use Plain Pumpkin Purée
Skip the fancy formulas. Plain pumpkin purée, canned or fresh-cooked, gives you real enzyme action without added sugars or acids.
| Type | Enzyme Activity | Best For |
|---|---|---|
| Plain purée | High | Acne-prone skin |
| Spiced mix | Lowered | Not recommended |
| Sweetened pie filling | None | Avoid entirely |
Check labels carefully. Pure pumpkin only, nothing else, keeps your homemade acne treatment gentle and effective.
Keep The Recipe Acid-free
Pure purée is only half the job. What you mix in matters just as much.
Your face already sits at a naturally acidic pH, around 4.7 to 5.75. Adding yogurt, honey, or milk tips that balance further, leaving skin irritated instead of glowing.
Keep it acid-free:
- Skip Greek yogurt (lactic acid)
- Skip milk, even small amounts
- Skip honey (pH 3.4–6.1)
- Use distilled water to thin texture
Mix a Single-use Portion
Portions matter here. Mix one heaping tablespoon of pumpkin purée with ½ tablespoon distilled water, no more.
Use a clean glass bowl and a silicone spatula, never metal, to keep proteolytic enzymes stable. Room temperature ingredients work best.
Apply within 5 minutes of mixing for peak enzyme potency, and toss any leftovers. Freshness fuels skin brightening results.
Avoid Lemon, Cinnamon, Essential Oils
Keep the recipe bland on purpose. Lemon juice and cinnamon feel like natural boosters, but both raise irritation risk, especially cinnamon’s burning potential and lemon’s phototoxic reaction with sun exposure.
Skip essential oils entirely. Even diluted, they’re concentrated compounds your acne-prone skin doesn’t need. This recipe stays sensitive skin friendly by relying on plain pumpkin’s proteolytic enzymes alone, no extras required.
Discard Leftovers Immediately
Once you’ve mixed your mask, the clock starts ticking. Bacterial load can spike 128-fold within a week, so don’t save leftovers for later.
Bacterial load can spike 128-fold within a week, so never save leftover pumpkin mask for later use
Enzyme activity fades fast without stabilizers, and oxidation dulls the puree’s brightening power too. Store extra puree separately for cooking, never for your face.
Fresh batches protect your skin texture improvement goals and keep acne-fighting benefits intact.
Patch Test Before Facial Application

Skip the patch test, and you’re gambling with your face. This mask packs active exfoliants, and your skin deserves a heads-up first. Here’s exactly how to test it right.
If you want a gentler at-home option, try this DIY apple cider vinegar toner recipe to balance your skin before layering on stronger treatments.
Test a Small Area
Never slather a new mask across your whole face first. Test a small area on your inner forearm, a quarter-sized patch, clean and dry. This patch test safety step protects acne-prone skin from surprise reactions before your next at-home facial. Sensitive skin friendly? Confirm it here, not on your cheeks.
- Choose inner forearm or elbow crease
- Use a quarter-sized patch, about 2×2 cm
- Skip broken or irritated skin
- Keep the area hair-free
- Apply your normal product amount
Wait 24 to 48 Hours
Patience pays off here. Wait 24 to 48 hours before judging your patch test a pass, since allergic reactions to proteolytic enzymes and glycolic acid often surface late, not instantly.
| Check Time | What to Watch For |
|---|---|
| 24 hours | Early redness, itching |
| 48 hours | Delayed swelling, bumps |
| Beyond 48h | Rare lingering sensitivity |
No reaction by 48 hours? Your acne-prone skin likely tolerates this Pumpkin Enzyme Mask.
Check Current Acne Treatments
Already on a retinoid or benzoyl peroxide? Your skin’s exfoliation threshold is lower than you think.
- Topical retinoids thin the skin barrier
- Benzoyl peroxide raises irritation risk
- Oral antibiotics don’t rule out masking, but check timing
- Combination therapy users should space actives out
Stacking chemical exfoliation with active treatments overloads acne-prone skin fast. When in doubt, skip masking that day.
Skip Broken or Inflamed Skin
Broken skin and glycolic acid don’t mix. Visible cracks, oozing, or crusting mean your skin barrier is compromised, not ready for exfoliation.
Active acne with pus or bleeding? Skip the mask entirely. Uniform redness signals inflammation already in progress.
Healing before exfoliation always wins. Try aloe or a niacinamide serum instead, both sensitive skin friendly and gentler on acne-prone skin.
Watch for Delayed Irritation
Your patch test isn’t done after ten minutes. Real trouble often shows up 24 to 48 hours later, not right away.
Watch for delayed dryness, roughness, or redness that lingers. This applies double for acne-prone or sensitive skin care routines.
If your Pumpkin Enzyme Mask patch stays calm past that window, chemical exfoliation is likely safe for your face.
Apply Your Mask Step by Step
Patch test done and skin looks clear? Good, you’re ready for the real thing. Application matters just as much as the formula itself, so let’s break it down step by step.
Cleanse and Dry Your Face

Wash first, mask second. If you’re wearing sunscreen or makeup, double cleanse: oil-based cleanser, then a water-based one, within two minutes.
- Use lukewarm water (98-102°F)
- Pat dry, never rub
- Use a clean, dedicated face towel
- Let skin air-dry 30 seconds
Clean, dry skin lets your Pumpkin Enzyme Mask work properly on acne-prone skin, no barriers in the way.
Apply a Thin, Even Layer
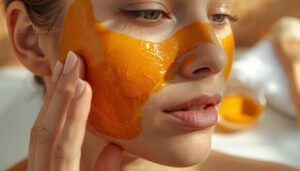
Now for the fun part. Scoop a dime-sized amount and spread it thin across cheeks, forehead, and chin, no gaps, no thick patches.
| Layer Type | What Happens | Result on Skin |
|---|---|---|
| Thin, even | Dries uniformly | Smooth exfoliation |
| Thick, uneven | Cracks, traps moisture | Irritation risk |
| Patchy | Dries unevenly | Tough removal |
Thin coats mean gentler contact for acne-prone skin, better texture, less residue.
Avoid Eyes and Lips
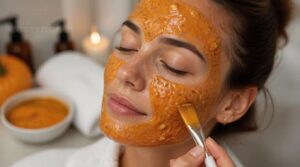
Even coats matter, but placement matters more. Keep the mask off your eyes and lips, both areas are thin-skinned and more reactive to acids.
If product touches your eyes, rinse with warm water right away. On lips, wipe with a damp cloth then rinse. This gentle application technique protects sensitive skin barriers while your Pumpkin Enzyme Mask targets clogged pores and uneven texture everywhere else.
Limit Wear Time Appropriately

Timing makes or breaks this mask. Wash off in 10 minutes, that’s the standard for acne-prone skin doing chemical exfoliation and skin brightening.
New users, start at 5 minutes. Watch for stinging reactions, tingling is normal, burning isn’t. Rinse immediately if it hurts.
Skin sensitivity limits vary, so gradual time increase matters more than rushing to full duration. Recovery after rinsing starts the moment you remove it.
Rinse and Moisturize Thoroughly

Grab lukewarm water, not hot, and use clean fingertips to lift the mask off in gentle circles. Keep rinsing until nothing clings to your nose or jawline. Pat dry, don’t rub.
- Apply moisturizer while skin’s still damp
- Choose noncomedogenic formulas for acne-prone skin
- Look for ceramides for barrier support
- Skip heavy oils that clog pores
Moisturize within minutes to lock in hydration and calm irritation.
Build a Weekly Exfoliation Routine

One good mask doesn’t build clear skin, consistency does. Your routine needs a rhythm that fits your skin’s actual tolerance, not just a calendar. Here’s how to pace it right.
Start With Once-weekly Use
Patience pays off with a Pumpkin Enzyme Mask. Start with once-weekly use, 5-10 minutes max, even if you’re battling acne-prone skin.
| Skin Type | Starting Frequency |
|---|---|
| Acne-Prone/Oily | Once weekly |
| Sensitive/Dry | Bi-weekly |
| Normal | Once weekly |
| Mature (55+) | Once weekly |
Chemical exfoliation speeds dead skin cell removal, but your barrier needs time to adjust first.
Increase Only When Tolerated
A few clean weeks earns you the next step, not the calendar.
Give your Pumpkin Enzyme Mask 48 hours minimum before judging tolerance. Watch for:
- Mild tingling that fades fast, not lingering burn
- Skin that’s calm, not red or flaking
- No new breakouts within 24 hours
Tolerated twice? Move to twice-weekly. Acne-prone skin can handle up to three times weekly, once proteolytic enzymes and glycolic acid stop causing irritation.
Avoid Same-day Exfoliating Actives
One active per day, that’s the rule. Your Pumpkin Enzyme Mask already brings proteolytic enzymes and glycolic acid, so skip retinoids, scrubs, or other acids that same day.
| Same-Day Combo | Result |
|---|---|
| Mask + retinoid | Barrier stress, redness |
| Mask + acid serum | Excess chemical exfoliation |
| Mask alone | Balanced, controlled results |
Space actives separately. Simple avoids setbacks.
Track Breakouts and Dark Spots
Progress hides in the mirror unless you measure it. Snap photos each morning after cleansing, same light, same angle.
- Severity score weekly, 1-10
- Log environmental triggers: diet, stress, sleep
- Track dark spots separately from active breakouts, since hyperpigmentation fades slower than inflammation
AI analysis can flag postinflammatory changes photos alone might miss.
Adjust for Sensitive Skin
Sensitive skin doesn’t mean skipping exfoliation, it means adjusting the approach. Choose a buffered pH formula, shorten contact time to 3-5 minutes, and rinse at the first sign of stinging.
Look for a milky, self-warming mask with kaolin clay or aloe to calm skin during exfoliation. Always follow with post-mask hydration to protect your barrier.
Prevent Irritation and Protect Results

Exfoliation works best when you know how to protect your skin around it. A few simple habits keep irritation in check and results on track. Here’s what to watch for, before and after every mask.
Recognize Normal Mild Tingling
When your pumpkin enzyme mask starts working, your skin talks back. Proteolytic enzymes and glycolic acid stimulate nerve endings, causing mild tingling on normal skin, a totally expected sensory response.
Signs you’re in safe territory:
- Light prickling, not sharp pain
- Sensation fades within a minute or two
- No redness spreading beyond application area
- Skin feels alert, not raw
For acne-prone skin, this signals active exfoliation, not damage.
Rinse Excessive Stinging Immediately
That prickle crossing into a burn? Don’t wait it out.
Stop use right away. Head to the sink for a cool water rinse, no rubbing, until stinging fades. Pause other actives like glycolic acid until skin normalizes. Avoid fragrance on the area, and if redness or burning persists, seek medical advice. Acne-prone skin doesn’t need a lesson in toughing it out.
Restore Moisture After Exfoliation
Once stinging settles, skin needs water back. Glycolic acid and pumpkin fruit purée exfoliate, but they also strip moisture, leaving rough skin texture behind.
Layer hydration thin to thick:
- A humectant serum with glycerin or hyaluronic acid
- A ceramide-rich cream for barrier lipid support
- Aloe or panthenol for soothing comfort
This locks in moisture and prevents post-exfoliation dryness before it starts.
Wear Broad-spectrum SPF 30 Daily
Freshly resurfaced skin sunburns fast. Glycolic acid and pumpkin enzymes leave new cells exposed, so daily sunscreen isn’t optional.
| Do This | Why |
|---|---|
| SPF 30+, broad spectrum | Blocks UVA and UVB |
| Apply each morning | Guards new skin |
| Reapply every two hours | Maintains coverage outdoors |
Skip a day, and hyperpigmentation risk climbs right back up.
Seek Help for Persistent Irritation
When should you stop troubleshooting and call a pro? If tingling turns into real pain, or redness lingers past 48 hours, that’s persistent irritation, not normal exfoliation. Left unchecked, that kind of irritation can feed the same cytokine-driven cycle behind inflammatory acne and its underlying triggers, making early professional input worth the visit.
Watch for:
- Swelling or hives (allergic reaction)
- Crusting or oozing (infection risk)
- Painful cystic breakouts
- Spreading dark spots
See a dermatologist promptly. Even acne-prone, non-comedogenic formulas can misfire on sensitive skin.
Frequently Asked Questions (FAQs)
How long before results are visible?
Don’t expect a miracle overnight, but your skin won’t keep you waiting long either. You’ll notice immediate glow post-rinse, calmer texture within a first week, and visible hyperpigmentation fading by week six to twelve.
Can pregnant or breastfeeding women use this mask?
Usually, yes, if the Pregnancy-safe formulation is confirmed and your doctor agrees. The Pumpkin Enzyme Mask appears in retailer safety listings, but breastfeeding ingredient concerns still matter, so patch test first and protect acneprone skin.
How long does the product last once opened?
Six months, per manufacturer specs, once opened. Store it cool and dry, away from light, to protect enzyme stability. Cooler storage can stretch that window, but stick to the printed expiration date for best results.
Where should the mask be stored?
Keep your jar in a cool, dry spot away from sunlight and humidity, lid tightly closed. This protects the pumpkin enzymes and small-batch formulation, backed by our 45-day guarantee if storage conditions aren’t ideal for you.
Is there a money-back guarantee if unsatisfied?
Most guarantees hinge on fine print, not just goodwill. This one holds up: a 45-day money-back guarantee applies if bought from the official store, product unused, refund issued to your original payment method after return.
Conclusion
Think of your skin like an orchard. Rush the harvest and you bruise the fruit. Wait too long and it rots on the branch.
A pumpkin enzyme mask for acne works the same way: patient, seasonal care that respects timing over urgency. Weekly use, gentle pH, and diligent SPF turn that patience into visible payoff.
Clear pores don’t happen overnight. They happen through consistency, restraint, and trusting the process one careful application at a time.