This site is supported by our readers. We may earn a commission, at no cost to you, if you purchase through links.

You opened the box, saw your reflection, and felt your stomach drop. That’s not the subtle brunette you asked for—it’s practically black. Dark hair dye mistakes happen more often than you’d think, whether from overprocessing, using the wrong developer, or simply misjudging how porous your hair is.
The good news? You don’t have to live with a color that makes you feel like you’re hiding instead of shining. Lightening overly dark dyed hair safely requires understanding what went wrong and choosing the right correction method for your hair’s condition.
With the right approach—whether natural remedies or professional-grade treatments—you can reclaim the shade you wanted without wrecking your hair in the process.
Table Of Contents
- Key Takeaways
- Why Hair Dye Turns Out Too Dark
- Assessing Hair Health Before Lightening
- Natural Ways to Lighten Dark Dyed Hair
- Chemical and At-Home Lightening Solutions
- Step-by-Step Guide to Lightening Dyed Hair
- Top Products for Lightening Dark Dyed Hair
- Protecting and Maintaining Lightened Hair
- Frequently Asked Questions (FAQs)
- Conclusion
Key Takeaways
- Your hair turned darker than expected because of dye overload, timing errors, or high porosity from previous damage—understanding what went wrong helps you choose the safest correction method.
- Natural remedies like lemon juice, vitamin C, and clarifying shampoos work gradually for semi-permanent dyes, while chemical solutions like color removers and bleach baths deliver faster results on stubborn permanent color.
- Wait at least four to six weeks between lightening treatments and prioritize deep conditioning before and after to prevent breakage, chemical burns, and permanent structural damage.
- Protect your lightened hair with sulfate-free shampoos, regular trims every 6-8 weeks, weekly hydrating masks, and heat protectants to maintain color vibrancy and prevent rapid fading.
Why Hair Dye Turns Out Too Dark
You follow the instructions perfectly, mix the color exactly right, and somehow your hair still turns out way darker than the box promised. It happens more often than you’d think, and it’s not always your fault.
Let’s break down why hair dye goes rogue and what’s really happening beneath the surface.
Common Causes of Overly Dark Results
Dye overload happens when you leave color on too long or pile new dye over old pigment—your hair can’t absorb it evenly, so it goes darker than you planned. Improper mixing or developer errors worsen the problem, especially if you used high-volume peroxide with ammonia-based formulas.
If your strands are brittle or damaged from previous treatments, consider how to style curls with moisture-focused techniques before attempting another color correction.
Porosity issues mean damaged strands soak up color fast, leading to patchy, overly dark results that demand color correction.
If you’re wondering whether you can dye hair right after bleaching, porosity damage is a major factor in timing your next color treatment safely.
How Hair Structure Affects Color Absorption
Your cortex structure and melanin density dictate how aggressively color penetration happens—thicker cuticles resist pigment, while high hair porosity (from damage or processing) lets colorants flood in unevenly. If your cuticle scales lift easily, you’ll see faster absorption and darker results.
Understanding hair structure gives you control: damaged strands absorb unpredictably, so proper hair care before dyed hair lightening becomes non-negotiable.
Knowing how long to leave bleach in hair with 30 volume developer helps you lift color safely without pushing damaged hair past its breaking point.
Differences Between Permanent and Semi-Permanent Dyes
Beyond cuticle behavior, the type of hair dye you used fundamentally changes what happens next. Permanent dye creates covalent bonds deep in your hair structure—that’s why color longevity extends through dozens of washes and why hair dye removal becomes a battle. Semi-permanent formulas coat the surface with minimal dye penetration, fading quickly:
Demi-permanent dyes fall between these two extremes, using low-volume peroxide to gently open the cuticle for longer-lasting color that fades gradually over weeks.
- Permanent dye bonds chemically inside the cortex
- Semi-permanent sits on the cuticle layer
- Covalent bonds resist standard lightening methods
- Surface coatings respond faster to color remover treatments
Assessing Hair Health Before Lightening

Before you jump into lightening that too-dark dye job, you need to take an honest look at your hair’s current condition. Skipping this step is like building a house on shaky ground—it won’t end well.
Let’s walk through how to tell if your hair is ready, how to prep it properly, and when you should hold off entirely.
Signs Your Hair Can Handle Lightening
Before you jump into any hair lightening techniques, you need to know if your strands can actually take it. Healthy hair bounces back when stretched—that’s solid hair elasticity telling you the breakage risk is low. Check for split ends, assess your scalp health for irritation, and consider porosity levels and hair diameter. If previous hair dye removal attempts didn’t wreck your hair, you’re likely good to go.
| Health Indicator | What to Check | Green Light Sign |
|---|---|---|
| Hair Elasticity | Stretch a strand gently | Returns to shape without snapping |
| Breakage & Splits | Inspect ends after detangling | Minimal visible damage |
| Scalp Condition | Look for redness or flaking | No irritation or dermatitis |
| Porosity & Texture | Water absorption test | Even product penetration across strands |
Your hair health matters more than the color you want—damage from lightening can set you back weeks or months.
Prioritize your hair’s health over your dream color—lightening damage can cost you weeks or months of recovery
Preparing Hair With Deep Conditioning
Strength comes from preparation—your hair needs moisture and resilience before you lighten. Deep conditioning builds up your strands so they won’t snap under chemical stress. Here’s how to prep your hair the right way:
A solid hair care routine for long hair keeps your strands hydrated and protected, which is especially crucial when you’re planning any lightening treatments.
- Use protein masks twice weekly for four to six weeks before lightening
- Apply silicone-rich deep conditioning treatments to seal cuticles and prevent lifting
- Focus on moisture-boosting formulas that restore elasticity and reduce breakage
- Let treatments sit for 30 to 45 minutes under a processing cap
- Track your hair’s bounce-back—healthy elasticity means you’re ready for the next step
When to Avoid Immediate Lightening
Sometimes pushing ahead with color correction techniques backfires spectacularly. If you’ve got high-porosity hair or a compromised scalp, immediate lightening can lead to chemical burns and serious hair damage. Wait two to four weeks after recent dye jobs, and steer clear if you’re dealing with visible scalp conditions or taking medications like isotretinoin—your hair health depends on patience.
| Warning Sign | Risk to Hair or Scalp | Recommended Wait Time |
|---|---|---|
| Skin sensitivity or dermatitis history | Burning, itching, allergic reactions | Clinician clearance required |
| Recent dye, perm, or keratin treatment | Uneven lightening, breakage, address | 2–4 weeks minimum |
| High hair porosity or severe damage | Chemical burns, rapid over-processing | Condition for 4–6 weeks first |
| Active scalp conditions (psoriasis, sores) | Infection, delayed healing, inflammation | Resolve condition fully before lightening |
| Medication interactions (isotretinoin, antibiotics) | Impaired healing, photosensitivity, burns | Discontinue or consult clinician |
Natural Ways to Lighten Dark Dyed Hair

You don’t have to rush straight to harsh chemicals when your hair color turns out darker than expected. Natural lightening methods work slowly but gently, giving you more control without wrecking your hair in the process.
Let’s look at some kitchen-cabinet solutions that can gradually lift that overly dark shade.
Lemon Juice and Sunlight Method
Lemon juice can lighten hair through citric acid effects and the photoactivation process when exposed to sunlight.
Dilute fresh lemon juice with equal parts water to reduce hair porosity changes and scalp irritation. Apply the mixture to dry hair, then spend 15–30 minutes outdoors during peak UV hours.
This natural hair lightening method works best on previously dyed hair with multiple sessions, though results vary widely.
Using Honey, Cinnamon, or Vinegar
Honey benefits your hair with enzymes that gently lighten over time. Mix four parts raw honey with one part water, apply to damp hair, and leave for 1–4 hours under a shower cap.
- Cinnamon masks blend 2 tablespoons honey with 1 tablespoon cinnamon for warm highlights
- Vinegar rinses use 1 part apple cider vinegar to 6 parts water as a clarifying treatment
- Apply these natural hair lightening methods to achieve natural highlights without harsh chemicals
- Leave cinnamon mixtures overnight for noticeable hair color correction techniques
- Repeat gentle lightening sessions weekly to lighten dyed hair gradually
For best results, consider using a honey hair mask to boost your natural hair lightening process.
Baking Soda and Vitamin C Treatments
Think of baking soda as your rebellious partner in DIY lightening—it lifts color fast, but carries real risks. Mix equal parts baking soda and water, apply for 15 minutes, then follow with vitamin C powder mixed into clarifying shampoo for natural fading.
This color remover combo works best on semi-permanent dyes, though you’ll need deep conditioning after to prevent damage and breakage. For effective hair lightening, consider using a hair dye remover technique.
Hot Oil and Deep Conditioning Approaches
Oil Treatment Benefits meet your color fading goals when you apply coconut or argan oil to freshly dyed hair—these penetrative formulas disrupt semi-permanent pigments and accelerate washout within 72 hours.
Deep Conditioning Methods boost Moisture Balance Tips while promoting Hair Cuticle Repair, though clarifying shampoos work faster for deliberate Color Fading Techniques.
Your hair care routine gains hair health and hair restoration through weekly deep conditioning treatments that support gradual, damage-free hair treatment results.
Chemical and At-Home Lightening Solutions

When natural methods don’t cut it, you’ll need stronger solutions to lift that stubborn dark dye. Chemical lightening products work faster and more effectively, but they require careful handling to protect your hair.
Let’s break down the most reliable at-home options and how to use them without wrecking your strands.
Clarifying and Lightening Shampoos
Clarifying shampoo strips away buildup that dulls your color, but it won’t deliver true color correction. These products rely on strong sulfate effects like sodium lauryl sulfate to cleanse deeply, which can temporarily lighten hair by removing surface pigment. However, they’re not designed as hair lightener or color remover tools.
If your hair porosity is high, clarifying formulas may cause uneven fading, so use them sparingly between more effective lightening agents.
Color Removers and Bleach Baths
For real color correction, reach for a commercial color remover. These formulas use reductive agents like sodium hydrosulfite to shrink oxidative dye molecules and flush them out, offering gentler hair dye removal than bleach.
A bleach bath blends powder bleach, low-volume developer, and shampoo to moderately lighten hair with improved bleach safety.
Both methods require strand tests and damage prevention strategies to protect your hair’s integrity.
Safe Use of Hydrogen Peroxide
Hydrogen peroxide gives you control, but it demands respect. Start with 20-volume developer—it lifts one to two levels without destroying your hair. Apply evenly to dry sections, watch processing closely for 20 to 30 minutes, and rinse immediately when you see lift.
Here’s your safety checklist:
- Patch test behind your ear 24 hours before application
- Wear gloves and avoid contact with inflamed scalp
- Never exceed 30 minutes of processing time
- Check strands every 5 minutes during lightening
- Deep condition immediately after rinsing to restore moisture
Frequency and Timing of Treatments
Timing separates smart hair lightening from disaster. Wait at least four to six weeks between bleach intervals—your hair needs that recovery window to rebuild strength. Damaged strands? Push your lightening phases to eight weeks minimum.
Clarifying shampoos work weekly for gradual fading, while color removers max out at two applications per day. Treatment schedules aren’t suggestions—they’re your insurance against breakage.
Step-by-Step Guide to Lightening Dyed Hair
Now that you understand your options, it’s time to put that knowledge into action. The right approach depends on your hair’s current condition, the darkness of your dye, and how much lightening you’re after.
Let’s break down exactly how to lighten your hair safely, from choosing your method to getting the results you want.
Choosing The Right Method for Your Hair

Not all hair lightening methods work the same way—what works on virgin hair might wreck already damaged strands. Before you dive into a bleach bath or reach for hydrogen peroxide, run through these five checks to choose the safest path forward:
- Damage assessment – If your hair snaps easily or feels like straw, skip harsh lightening and rebuild first with protein masks.
- Porosity test – Drop a strand in water; high-porosity hair absorbs fast and needs gentler formulas to avoid uneven fading.
- Hair texture – Fine hair lifts quickly but breaks easier, while coarse hair takes longer but tolerates stronger treatments.
- Dye type – Semi-permanent color fades with clarifying washes, but permanent hair dye requires color correction or oxidative methods to lighten hair effectively.
- Scalp sensitivity – Past itching or burning? Choose low-alkalinity options and always patch-test before full application.
Match your method to your hair’s current condition, not just the shade you want.
Application Techniques for Even Results

Precision separates patchy disaster from smooth, even lift. Use these steps to lighten hair without zebra stripes.
| Step | Action | Why It Matters |
|---|---|---|
| Sectioning Strategies | Divide into four quadrants, then 0.6–1.25 cm subsections | Uniform product saturation prevents banding |
| Product Saturation | Press lightener or clarifying shampoo into each strand with a tint brush | Thin layers miss pigment; thick coverage lifts evenly |
| Timing Management | Apply to darkest zones first, roots last | Scalp heat accelerates lift—stagger for balance |
| Tool Selection | Non-metallic bowl, fresh bleach bath mix, foil or cap | Dried product stops working; moisture holds consistency |
Start at the nape, work upward, and check several spots mid-process—hair lightening speeds vary across your head, especially after box dye.
Rinsing, Conditioning, and Aftercare

Every second counts once you’ve lightened—rinse until water runs clear. This gentle rinsing removes leftover chemicals, protects your cuticle care, and prevents reoxidation that drags you back to dark.
Here’s your post-treatment plan for hair moisture and hair health:
- Rinse cool for 3–5 minutes to seal the cuticle and stop color loss.
- Apply a rich conditioner immediately—clarifying shampoo strips; now restore.
- Skip heat styling for 48 hours and use color protection leave-ins for ongoing hair maintenance.
When Multiple Sessions Are Needed

Think you’ll nail ash blonde in one go? Not happening. Major shifts from dark to light demand multi-session hair dye correction—2 to 3 lightening intervals spaced 4 to 6 weeks apart for session planning that prioritizes damage prevention.
Your cortex needs hair recovery time between treatments. Rushing color correction techniques guarantees breakage, not freedom. Patience is how you actually lighten hair without losing it.
Top Products for Lightening Dark Dyed Hair
You don’t have to go it alone when lightening dark dyed hair—the right products can make all the difference between patchy results and an even, controlled lift.
The market offers several reliable options designed specifically to reverse overly dark color without wrecking your hair in the process.
Here are three tried-and-true products that consistently deliver results when you need to reclaim your lighter shade.
1. Pravana Hair Color Extractor Set
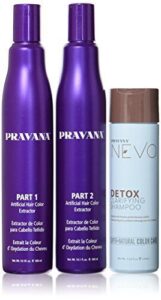
Ever felt trapped by a dye job that’s just too dark? The Pravana Hair Color Extractor Set is your ticket out. This sulfur-based color remover targets artificial oxidative color—think permanent or demi-permanent dyes—without bleach or ammonia, making color extraction gentler on your hair’s natural pigment.
The extraction process is heat-activated and requires a clarifying shampoo, but be warned: the smell’s strong and post-treatment care is non-negotiable. Deep conditioning is essential to combat hair damage and keep your dyed hair feeling healthy.
| Best For | Anyone stuck with artificial oxidative dye that’s too dark or needs a color reset without the harsh effects of bleach. |
|---|---|
| Primary Use | Anti-aging skincare |
| Form | Cream |
| Application Type | Topical moisturizer |
| Processing Required | No processing needed |
| Target Area | Face and neck |
| Strength Level | Standard formula |
| Additional Features |
|
- Removes permanent and demi-permanent color without damaging your natural hair pigment or lightening virgin hair
- No ammonia, bleach, or formaldehyde in the formula, making it gentler than traditional lighteners
- Leaves hair feeling conditioned and soft after use, unlike stripping bleach treatments
- Strong sulfur smell that can linger even after rinsing and shampooing
- Not suitable for all hair types—especially permanently straightened hair without a strand test first
- May require multiple applications to fully remove stubborn color, and deep conditioning is essential to prevent dryness
2. Colour B4 Hair Colour Remover Extra Strength
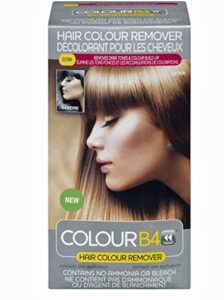
When you’re battling layers of stubborn, dark color, Colour B4 Extra Strength packs the punch you need. This ammonia-free color remover shrinks artificial dye molecules—perfect for heavy build-up or multiple applications—without touching your natural pigment.
You’ll need patience: apply the activator-remover mix to dry hair, let it process for 60 minutes, then rinse for at least 10 minutes to flush out those shrunken molecules.
Follow with the buffering shampoo twice to lock in your colour correction techniques and prevent re-darkening. Deep condition immediately after—this extra strength formula demands solid post-treatment care.
| Best For | Anyone dealing with multiple layers of dark permanent or semi-permanent dye who wants to lighten their hair without bleach—especially if you’ve got heavy color build-up from overlapping applications. |
|---|---|
| Primary Use | Color removal |
| Form | Liquid |
| Application Type | Chemical treatment |
| Processing Required | Heat processing required |
| Target Area | Previously colored hair |
| Strength Level | Standard strength |
| Additional Features |
|
- Shrinks artificial dye molecules without ammonia or bleach, so it’s gentler on your hair structure than traditional lightening methods
- Comes with a pH-balancing buffer system that prevents removed color from re-oxidizing and darkening again
- Strong enough to tackle stubborn dark shades and multiple color layers in one 60-minute treatment (though very dark hair might need up to three applications)
- Won’t reverse previous bleaching or restore your original natural color—it only removes artificial dye, not lost melanin
- Requires a serious time commitment (over 2 hours for the full process including rinsing and buffering) and can cause temporary dryness
- Has a notoriously strong, unpleasant smell and can stain skin or clothing if you’re not careful during application
3. Clairol Hair Lightener
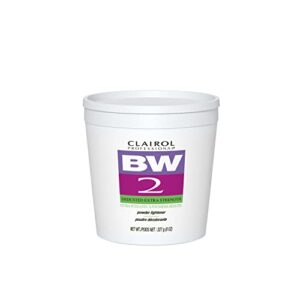
When color removers fall short, Clairol Professional Bw2 Lightener steps in with real lifting power. This dedusted powder formula gives you control over the lightening process—mix it with 20-volume developer for gradual results or 30-volume for stubborn darkness.
Apply to dry, sectioned hair, process 20–45 minutes depending on your base color, and watch for even color correction. The creamy consistency means less mess during application, and you’ll see predictable results without the guesswork.
Always follow with intense conditioning—chemical lightening methods demand serious damage control to keep your hair healthy.
| Best For | Anyone trying to lift stubborn artificial color or dark dye buildup when regular color removers aren’t cutting it—especially if you’re comfortable working with developer and timing the process carefully. |
|---|---|
| Primary Use | Color removal |
| Form | Liquid |
| Application Type | Chemical treatment |
| Processing Required | pH balancing required |
| Target Area | Normal hair |
| Strength Level | Extra strength |
| Additional Features |
|
- Extra-strength formula actually lightens resistant dye instead of just fading it
- Creamy, dedusted consistency makes application way less messy than typical powder lighteners
- Gives you control over lift intensity by adjusting developer strength and processing time
- Requires mixing with separate developer, so it’s not grab-and-go simple
- Chemical lightening is harsher than removers and demands serious conditioning afterward
- Results depend heavily on your hair’s condition and porosity—damaged hair may not handle it well
Protecting and Maintaining Lightened Hair

Once you’ve lightened your hair, the real work begins—keeping it healthy, vibrant, and damage-free. Lightening treatments strip moisture and weaken your hair’s structure, so you’ll need to rebuild what was lost.
Here’s how to protect your newly lightened hair and maintain that color you worked so hard to achieve.
Deep Conditioning and Protein Masks
Your lightened hair needs both moisture balance and hair strengthening to thrive. Deep conditioning treatments every 2 to 4 weeks restore internal hydration, while protein treatments rebuild weakened structures—but balance matters.
Too much protein without moisture creates brittleness. Alternate between moisturizing masks and protein-based hair repair products weekly.
This hair care and maintenance strategy prevents breakage, improves manageability, and aids hair damage prevention after your bold hair lightening move.
Avoiding Heat and Chemical Damage
After rebuilding your hair’s strength, protect your work by skipping heat tools and harsh chemicals for 1–2 weeks—this lowers fracture risk by 15–25%. Excess heat boosts hair porosity by up to 60%, making thermal damage a real threat.
When you do style, use protectants that cut heat transfer by 20–40%. Avoid stacking hydrogen peroxide, lemon juice, vitamin C powder, or baking soda treatments. A clarifying shampoo every 2–4 weeks keeps buildup from sabotaging your results.
Heat protection and damage prevention aren’t optional—they’re your insurance policy.
Regular Trims and Hydrating Masks
Your lightened strands need backup. Schedule trims every 6–8 weeks to cut breakage prevention losses by 50% and preserve length. Pair that with a hydrating mask once a week—it delivers cuticle repair, boosts moisture retention, and shields dyed hair from brittleness.
Here’s your maintenance blueprint:
- Remove 0.25 inches per trim to stop splits cold
- Use masks on towel-dried hair for better absorption
- Leave treatments on 5–20 minutes for cortex penetration
- Increase to twice weekly if hair feels straw-like
- Expect 1–2 inches of net growth yearly with consistent care
This duo keeps your color fierce and your fibers strong.
Tips for Color Longevity and Shine
Keep your newly lifted shade vibrant by switching to sulfate-free, color-safe shampoos—they preserve intensity for up to four weeks longer. Wash every 2–3 days with lukewarm water, skip the blow-dryer when possible, and layer on UV-filter sprays before sun exposure. These color preservation moves lock in hair gloss and prevent rapid fading.
Consistent care equals lasting color.
| Color Protection Strategy | Benefit |
|---|---|
| Sulfate-free shampoo | Extends vibrancy, reduces pigment leaching |
| Lukewarm water rinses | Keeps cuticles closed, boosts shine maintenance |
| Heat protectant before styling | Guards chromophores, maintains tone |
| Weekly deep conditioner | Restores hydration, enhances color correction techniques |
Frequently Asked Questions (FAQs)
Can I lighten black hair dye at home?
Yes, but expect limits—at-home lightening usually lifts only two to three levels on black hair dye.
Strong oxidizing agents like hydrogen peroxide work, though uneven results and breakage remain real risks.
How long does color remover take to work?
Most color removers work within 20 minutes, though you’ll see results start around the 5-minute mark.
Your hair’s porosity and the dye type you’re removing affect how quickly the chemical reaction happens.
Will lightening damage my hair permanently?
Bleaching breaks disulfide bonds and can strip the cuticle layer, causing permanent breakage and structural change to processed fibers.
Your follicle stays healthy, so new growth remains undamaged—but already-lightened lengths can’t fully recover.
Whats the difference between bleach bath and bleaching?
Understanding the split between these lightening methods could transform your color correction game.
A bleach bath dilutes bleach powder with developer and clarifying shampoo, offering a gentler lift—while traditional hair bleaching uses concentrated formulas for dramatic results.
Should I tone my hair after lightening it?
Toning after hair lightening isn’t mandatory, but it’s your best move for neutralizing brassy yellow or orange tones.
A demi-permanent toner refines your shade, boosts shine, and delivers that polished, salon-worthy finish.
Conclusion
Don’t let a dye disaster dim your confidence. You’ve learned exactly how to lighten dyed hair that’s too dark—from gentle natural methods to professional-grade solutions—without sacrificing your hair’s health.
The key is evaluating your hair’s condition, choosing the right approach, and moving forward with patience.
Your ideal shade isn’t out of reach; it’s just a few intentional steps away. Take control, follow the process, and watch your reflection transform into someone you recognize again.