
This site is supported by our readers. We may earn a commission, at no cost to you, if you purchase through links. This content is for general informational and educational purposes only and is not a substitute for professional medical, dermatological, or nutritional advice.
You rinse your shaver under the tap, shake it twice, and snap it back together. Two weeks later, it whines, drags, and pulls at your skin.
That small habit is how most motors die. Moisture trapped inside corrodes the internals, and packed hair forces the motor to work harder with every pass. Cleaning an electric shaver without damaging the motor takes less effort than you’d think, but the order and timing matter.
Start by checking what your model can actually handle. From there, you’ll learn a 30-second daily routine, deeper cleaning for foil and rotary heads, and the drying step most people rush.
Table Of Contents
Key Takeaways
- Check your shaver’s water rating before you rinse anything, since water can ruin the motor of a dry-only model, and even waterproof ones need to follow the manual.
- Tap out loose hair and brush the cutter area after every shave, keeping the brush and your taps away from the delicate foils so they don’t dent.
- Let every part air-dry completely, ideally overnight and never with a hair dryer, and charge only once it’s fully dry, because trapped moisture causes corrosion, odors, and motor damage.
- Add one drop of shaver oil to clean, dry blades weekly, and replace worn parts (as matched pairs for rotary heads) as soon as you feel pulling.
Check Your Electric Shaver’s Water Safety

Before you rinse anything, find out what your shaver can handle. Water can seep into the motor of a non-waterproof model and ruin it. Your shaver will fall into one of two groups below, and each one needs its own cleaning approach.
Once you know which group your shaver belongs to, this step-by-step electric razor cleaning routine walks you through the right daily rinse and deeper clean.
Washable Models and Manufacturer Cleaning Instructions
A waterproof shaver can handle a rinse, but your manual still has the final say. An IPX7 rating covers temporary immersion under test conditions only, and IPX6 covers jets, not soaking. Check the label first.
Use mild, unscented soap and warm running water. Skip alcohol, since it degrades rubber seals. Switch the shaver on for 2-3 seconds while rinsing if Braun recommends it. Once you finish rinsing, let every part air-dry completely for at least a few hours before reassembly, because trapped moisture can cause corrosion inside the motor.
Nonwashable Models and Dry Cleaning Only
If your shaver has no IPX rating or water droplet symbol, treat it as dry only. Water slips past the seals and reaches the motor, where it causes corrosion and short circuits.
If you’re unsure, check the manual for a wet-use note or IPX7 rating, then read up on how electric shavers work on skin.
Switch it off and unplug it. Tap the head over a bin, then brush the cutter block and housing with the supplied brush. Keep the brush off the foil, since it bends easily.
Remove Loose Hairs After Every Shave
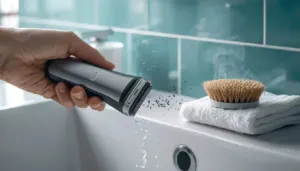
Whether your shaver is washable or dry-only, the first step after you shave is the same. Clear out the loose hairs before they settle in.
Switch the shaver off and unplug it. Then tap the plastic frame gently against your palm or the edge of the sink. Never strike the foils directly, because they dent easily.
Next, take your cleaning brush and sweep the cutter area, the underside of the head, and the frame. Keep the bristles away from the foil surfaces so you don’t scratch them.
If your model is waterproof, you can also rinse the head under warm running water before brushing. Skip this on a dry-only shaver.
Do this every day. It takes under 30 seconds, and it keeps hair from packing down overnight and straining your motor.
Follow it with a satin wave cap at night, since consistent routines are what let waves develop on almost any hair type.
Deep Clean Foil and Rotary Shaver Heads
A deep clean goes beyond the quick tap-out you do after each shave. It clears out the fine hair and skin oils that build up inside the head, and you’ll want to treat the two main shaver types a little differently.
Here’s how to handle foil shavers and rotary shavers so you get a thorough clean without risking the motor.
Foil Shavers: Protect Delicate Cutting Surfaces
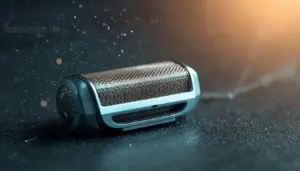
Picture a sheet of metal so thin it flexes under your fingertip. That’s your foil, and it’s what keeps the blades from your skin.
Detach the foil head and tap out the loose hair. Brush away from the screen, never across the inner surface. Bristles can snag in the perforations and dent the mesh. Check for dents often, and replace the foil if it looks thin.
Rotary Shavers: Keep Matched Cutters Together
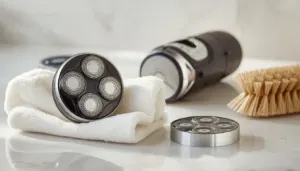
The cutters and combs in rotary shavers wear in together, so keep each pair matched. Mixing them hurts blade alignment and strains the motor.
Follow this cleaning routine:
- Open one head at a time.
- Rinse or brush that cutter and comb together.
- Reseat them before starting the next head.
Replace worn parts as matched pairs from the exact same model.
Air-Dry Completely Before Reassembly and Charging
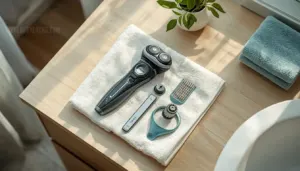
The motor is the one part you can’t afford to rush, so give every piece time to air dry before you put anything back together. Shake off excess water, then pat the head and body with a clean cloth. Detach the shaving head and set the parts on an absorbent surface in a well-ventilated spot, away from direct sunlight.
Leave everything overnight if you can. Some manufacturers call for at least 2-3 hours, but longer is safer. Trapped moisture causes rust on foils and blades, bad odors, and odd noises when you switch the shaver on.
Skip the hair dryer. Direct heat can warp delicate foils and plastics, and that’s a common drying mistake. Charge only when it’s completely dry.
Lubricate Clean Blades and Replace Worn Parts
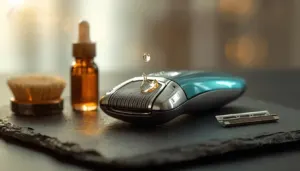
Dry blades are like a door hinge that hasn’t seen oil in years: they squeak, drag, and wear out fast. Once your clean blades are fully dry, give them a little attention. A bottle of light shaver blade oil is an easy way to keep foils gliding quietly, and a single drop goes a long way.
Neglected blades grind and groan like rusty hinges, so a little oil after cleaning keeps them cutting smoothly for years
Put one drop of light mineral oil or shaver oil on each foil or blade chamber. Skip cooking oil and WD-40, since they can harm seals and blade coatings. Run the shaver for 5 to 10 seconds to spread the oil, then wipe off the excess so it won’t trap hair and dirt.
Lubricate blades after every use, or at least weekly. Drive shafts need oil every 2 to 3 months, which is good motor protection because it cuts heat and strain.
Replace worn parts when pulling starts.
Frequently Asked Questions (FAQs)
Can I use isopropyl alcohol to clean my electric shaver?
Picture a cloth that smells sharply clean, and a foil that gleams after one gentle wipe. Yes, you can use 70% isopropyl alcohol, but only on removable blades and foils. Keep it away from the motor housing, then re-oil.
Can a cleaning station replace manual shaver cleaning?
Mostly, yes, but not completely. A cleaning station does the routine job well. It cleans, lubricates and dries in one go. Still, do a quick manual clean now and then to catch stubborn debris.
Why does my shaver smell musty after cleaning?
A musty smell after cleaning usually means moisture stayed trapped inside. Damp hair and skin oil feed bacteria and mold, which can start growing within 24 to 48 hours. Dry every part fully.
Is it safe to clean a shaver with vinegar?
Sometimes, but only on waterproof models, and only if it’s diluted. Mix one part vinegar to at least one part water, keep it cool, and rinse thoroughly. Skip it entirely if your manufacturer warns against it.
Conclusion
Think you don’t have time for all this? You do, because most of it takes under a minute.
Your routine for cleaning electric shaver without damaging motor comes down to three habits: tap out hair after every shave, deep clean weekly, and air-dry completely before you charge.
Do those, and your shaver stays quiet, smooth, and gentle on skin for years. Skip them, and the motor pays. Take two minutes today and set your routine.