This site is supported by our readers. We may earn a commission, at no cost to you, if you purchase through links. This content is for general informational and educational purposes only and is not a substitute for professional medical, dermatological, or nutritional advice.

My shaver started yanking hairs instead of cutting them, and I nearly bought a new one. Then I popped the head off and found a felt-like mat of stubble packed under the foil. Ten minutes of cleaning restored it completely.
That gunk isn’t gross for no reason. Trapped hair dulls cutters, breeds bacteria, and strains the motor, which is why knowing how to clean an electric razor saves you money and saves your face from irritation. Most shavers die early from neglect, not defect.
Here’s the full routine: safety checks, quick daily cleans, deep-cleaning foil and rotary heads, and the replacement signs most people miss.
Table Of Contents
- Key Takeaways
- What Should You Check Before Cleaning an Electric Razor?
- How Do You Clean an Electric Razor Step by Step?
- How Do You Deep-Clean Foil and Rotary Razor Heads?
- How Often Should You Clean and Lubricate an Electric Razor?
- What Cleaning Mistakes, Damage, and Replacement Signs Should You Watch For?
- Frequently Asked Questions (FAQs)
- What’s the best way to clean my electric razor?
- Can hydrogen peroxide clean an electric razor?
- How often should an electric razor be cleaned?
- Can you use isopropyl alcohol to clean an electric shaver?
- What are some common causes of electric razor problems?
- How can I avoid electric razor problems?
- What should I do if my electric razor is not working properly?
- How often should I clean my electric razor?
- Can I share my electric razor with others?
- How do I clean travel electric razors?
- Conclusion
Key Takeaways
- Packed hair under the foil dulls blades, strains the motor, and breeds bacteria — so regular cleaning extends your razor’s life and protects your skin.
- Always confirm your razor’s waterproof rating before cleaning: waterproof models (IPX7) can be rinsed under running water, while non-waterproof ones need dry brushing and compressed air only.
- Deep-cleaning foil and rotary heads requires disassembly and a brush — a simple rinse won’t reach the compacted debris hiding in blade gaps and carriage slots.
- Foil tears, persistent pulling, uneven cuts, or moisture inside the head are your cues to replace parts immediately, since most foils and cutters wear out within 12 to 18 months.
What Should You Check Before Cleaning an Electric Razor?

The first thing you should do is unplug your razor and power it off completely. Sounds obvious, but I’ve seen people skip this step, and electrical safety is no joke when water or alcohol enters the picture.
Pull up your user manual and confirm whether you have a waterproof or nonwaterproof model. Waterproof models usually carry an IPX7 rating, meaning they can handle submersion up to one meter for about 30 minutes. Nonwaterproof models need dry cleaning only, no rinsing.
For travel-ready options that balance durability with water resistance, our guide to the best beard trimmers for travel breaks down which models hold up on the road.
While you’re at it, inspect the housing and seals for cracks or damage. Broken seals let water reach the motor. Also quickly check your battery level; cleaning a razor with a low battery can cause short cycles or sudden overheating.
How Do You Clean an Electric Razor Step by Step?
The process breaks down into a handful of steps that depend on one key factor: whether your shaver is waterproof. Get that right, and the rest follows a clear, logical order. Here’s exactly what to do.
Remove Loose Hair
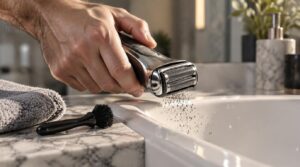
Tap the razor head firmly against your palm or sink edge within five minutes of shaving. Loose hairs pile up fast at blade gaps, and rotary or foil shavers both suffer when you skip this step.
Before brushing hair out of the motor, remember:
- Shake out loose hairs over a trash bin
- Use a soft-bristled brush only
- Never poke foil gaps with toothpicks
- Check the underside for hidden clumps
This quick sweep makes the rest of the cleaning process easier.
A full guide to cleaning and disinfecting razor blades with alcohol walks through each of these steps in detail.
Clean Waterproof Shavers
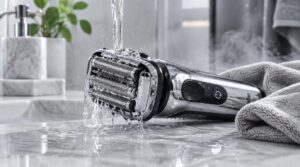
If your manual confirms waterproof models handle water, you’re in luck. Rinse the head under low-pressure running water for 30 seconds, letting it flow through the blade gaps. Don’t twist the cutter heads off; lift or rotate them only if your design allows it, then brush both foil and cutter surfaces.
Shake off excess water, pat dry with microfiber cloth, and air dry fully before you reassemble the shaver.
Dry-Clean Non-Waterproof Shavers
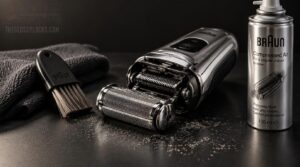
No waterproofing? You’re still in good shape. Dry-clean non-waterproof shavers with a small brush and short bursts of compressed air, holding the can a few inches away. Never use water, alcohol, or solvents on cleaning electric razor bodies like mine, which rusted once after a splash.
- Brush after every use
- 15–20 psi air max
- Don’t disassemble the shaver
- Skip lubricants unless specified
- Deep clean monthly
Air-Dry and Reassemble
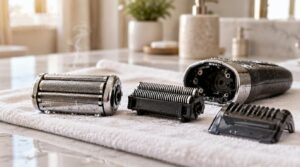
After cleaning, let your electric razor air out completely. Place every part on a clean towel in a dust-free spot and allow it all to air dry for at least 30 minutes. Moisture trapped inside can breed mold, so don’t rush it.
For a deeper dive into keeping every part of your razor hygienic, this guide to shaving tool cleaning tips covers sanitizing routines that prevent bacterial buildup. Pairing these habits with a simple routine of natural exfoliation tools at home keeps both your skin and razor in better shape over time.
Once dry, reverse the order of your disassembly. Never force misaligned fittings; if a part resists, realign and try again.
How Do You Deep-Clean Foil and Rotary Razor Heads?
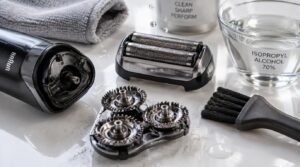
A quick rinse keeps your shaver running, but the heads need real attention eventually. I’ve pulled apart enough foil and rotary units to know that grime hides deep where a rinse can’t reach.
Below, I’ll walk you through foil heads, rotary cutters, and disinfecting, so your shaver stays sharp and safe.
Foil Head Cleaning
The underside of a foil head hides more gunk than the top ever shows. Disassemble the shaver, lift the frame, and brush trapped hair with your cleaning brush. Skip compressed air on hinges; it forces debris deeper. Then:
- Rinse foam residue under a light nozzle flow.
- Never blast water into hinges.
- Air-dry 1–2 hours.
Finish with a quick foil damage inspection for thinning lines.
Rotary Cutter Cleaning
I rinsed my rotary shaver for weeks before popping the heads off and finding packed hair that the water had never reached. Twist each head counterclockwise, then use your cleaning brush to clear the carriage slots.
Hit the blade pivots with compressed air in short bursts to dislodge debris. Skip metal tools during a deep clean, they’ll nick the edges.
Disinfecting Razor Parts
Skipping razor sanitization gave me a rash. Spray 70% isopropyl alcohol on your removable parts. Let it sit 30 seconds. Wipe dry. Alcohol helps clean and sanitize; it’s ideal for disinfecting shaving devices while preventing bacterial infection. Follow with blade oil; it disinfects and lubricates. Skip all this and risk:
- Ingrown hairs
- Raw, infected skin
- Persistent breakouts
- Razor rash flare-ups
How Often Should You Clean and Lubricate an Electric Razor?
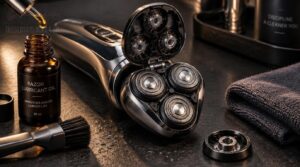
Here’s the honest answer: it depends on your shaver, your bathroom, and how lazy you are between shaves. I’ve killed a razor by ignoring all three.
Follow this baseline and you can’t go wrong:
- Daily users: clean after every shave, lubricate razor blades every 1–2 weeks.
- Waterproof models: rinse under warm water each use, then oil monthly or every 10–15 shaves.
- Non-waterproof models: dry-brush after use, oil every 4–8 shaves.
Rotary heads trap more hair inside, so clean them more often to protect the blade gap. Humid or dusty bathroom? Step it up: clean every other day, oil weekly.
Your ears and face will flag trouble first. Pulling, irritation, or louder motor noise means tighten your maintenance schedule immediately. Stick to it, and you’ll extend product longevity by years.
What Cleaning Mistakes, Damage, and Replacement Signs Should You Watch For?
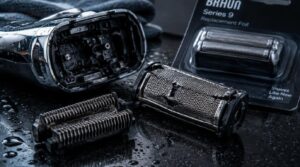
A dirty razor won’t just shave badly. It’ll bite you. I learned that after ignoring a tiny foil tear and paying for it with three nicks in the blades and one irritated neck.
A dirty razor doesn’t just shave poorly—it bites back, as I learned from one ignored foil tear
Avoid the classic cleaning mistakes first: no hot water, no stiff brushes, and never submerge a non-waterproof body. Hot water warps foils; abrasive tools dull cutters fast.
Then inspect. Here’s your quick reference:
| Warning Sign | What It Means | Your Move |
|---|---|---|
| Foil tears or pinholes | Compromised shielding | Replace head now |
| Pulling, irritation, uneven stubble | Worn cutters | Schedule blade replacement |
| Moisture inside head | Failed seals or gaskets | Replace head immediately |
Watch for cracks in the casing too. If seals or gaskets look degraded, don’t gamble with water ingress. Most foils and cutters need replacement every 12 to 18 months. Mark your calendar; your face will thank you.
Frequently Asked Questions (FAQs)
What’s the best way to clean my electric razor?
Tap out loose hairs, brush the head, then rinse under warm water if it’s waterproof. Dry-clean non-waterproof models. Air-dry everything fully, wipe with a microfiber cloth, and reassemble only when completely dry.
Can hydrogen peroxide clean an electric razor?
Picture bubbles fizzing over dull foil, loosening gunk. Yes, 3% hydrogen peroxide works for device sanitization. Soak parts 1–3 minutes, rinse well, air-dry. It won’t deep clean clogged heads, and prolonged contact can pit foils.
How often should an electric razor be cleaned?
How long has it been since your last clean?
Give your razor a daily quick clean after every shave. Schedule a deep clean weekly, or every two to three uses if you shave less often.
Can you use isopropyl alcohol to clean an electric shaver?
Yes, but keep it strictly on external surfaces only. Use 70% isopropyl alcohol with a cotton swab to wipe down electric razor heads and guards. Never soak internal parts; it damages the cutting mechanism fast.
What are some common causes of electric razor problems?
Most electric razor problems trace back to skipping routine cleaning. Hair debris clogs the head, bacteria buildup irritates your skin, and dirty contacts drain the battery. Neglect long enough, and you’re looking at motor burnout.
How can I avoid electric razor problems?
Lubricate blades after every clean, replace worn foils on schedule, and always let parts dry fully before reassembly. Skipping these steps invites bacteria buildup, motor burnout, and a razor that pulls instead of cuts cleanly.
What should I do if my electric razor is not working properly?
Studies show roughly 30% of electric razor issues come from battery degradation. Check your charge level first; if it runs plugged in but not on battery, the cells likely need replacing. Clean debris, then lubricate.
How often should I clean my electric razor?
Want consistently clean, close shaves every single morning? Do a daily quick clean right after each shave, then once a week, disassemble the head and wash each part thoroughly to stop clogging and residue buildup.
Can I share my electric razor with others?
Sharing your razor transfers skin cells, bacteria, and microbes even after a routine clean. Foil and rotary heads trap residue that rinsing alone can’t fully remove, raising your skin irritation risk substantially. Keep it yours.
How do I clean travel electric razors?
Travel razors deserve a quick post-trip check. Inspect the seals for nicks, rinse waterproof models under lukewarm water, and dry fully before packing. A compact cleaning kit keeps everything tidy and prevents lingering luggage odors.
Conclusion
This sounds like too much work" is the objection I hear most. But learning how to clean an electric razor takes maybe five minutes once you know the routine, and you’ll do it on autopilot after the second or third time.
A clean razor cuts faster, irritates less, and lasts years longer. That felt-like mat of stubble nearly cost me a new shaver. Don’t let yours cost you one.