This site is supported by our readers. We may earn a commission, at no cost to you, if you purchase through links.

Your ends snap off before you even finish detangling. Your curls drink up moisture like it was never there, and by midday, your hair feels like it forgot it was ever conditioned.
This happens because curl geometry forces moisture to travel farther down each strand, while natural oils barely make it past the first half of the curl before running out. The distal ends—the oldest, most exposed part of your hair—get almost nothing.
A DIY deep conditioning treatment built from natural ingredients changes that equation by working with your hair’s structure instead of against it.
Table Of Contents
- Key Takeaways
- Why Natural Hair Needs Deep Conditioning
- Best Natural Ingredients for Deep Conditioning
- Choose by Hair Type and Porosity
- DIY Deep Conditioner Recipes to Try
- Apply Deep Conditioner Step by Step
- Heat and Timing for Better Results
- Top 5 Oils for DIY Treatments
- Frequency, Storage, and Common Mistakes
- Weekly Deep Conditioning for Dry Natural Hair
- Biweekly Schedules for Fine or Oily Hair
- Twice-weekly Plans for Severely Damaged Hair
- Signs You Need More Conditioning
- Signs of Over-conditioning and Hygral Fatigue
- Avoiding Protein Overload With Monthly Protein Masks
- Safe Storage and Shelf Life by Recipe Type
- Can You Leave a DIY Treatment Overnight?
- Frequently Asked Questions (FAQs)
- Conclusion
Key Takeaways
- Curl geometry forces moisture to travel farther down each strand while natural oils quit halfway, leaving your ends perpetually dry no matter how much product you pile on.
- Matching your ingredients to your hair’s porosity is the real game-changer — low porosity needs lightweight oils like jojoba, while high porosity craves layered sealants like shea butter and honey to hold moisture in.
- Heat — whether from a plastic cap, warm towel, or steamer — nearly doubles absorption by lifting the cuticle open, making it one of the easiest upgrades to your deep conditioning routine.
- Protein and moisture need to stay balanced: too much protein makes strands stiff and snappy, too much moisture leaves them limp and gummy, so alternating treatments monthly keeps your curls strong and elastic.
Why Natural Hair Needs Deep Conditioning

Natural hair is beautiful, but it comes with a real challenge: moisture doesn’t travel down tight curl patterns the way it does on straight hair. That means your ends are often thirsty no matter how much product you use.
That’s why techniques like deep conditioning and moisture sealing matter so much—explore how curl and straight hair differ in oil distribution to better understand what your hair actually needs.
Here’s what’s actually happening inside your strands — and why deep conditioning changes everything.
Why Curls and Coils Lose Moisture Faster
Your curl pattern is working against you — and here’s why. The spiral geometry of coils forces moisture to travel farther, while sebum only reaches the first half of each strand. Think of it like a winding road versus a highway.
Coils are winding roads for moisture — sebum quits halfway, leaving your ends perpetually thirsty
- Curl Geometry creates longer moisture pathways
- Sebum Distribution stops halfway down coils
- Cuticle Porosity causes rapid moisture escape
- Surface Friction strips protective lipids daily
- Environmental Evaporation accelerates through high surface exposure
High porosity strands lose 30–40% of moisture within hours, triggering hygral fatigue. Recognizing that high porosity hair absorbs quickly helps you select lightweight, water-based products.
How Deep Conditioners Reach The Cuticle
So how does a deep conditioner actually get inside your hair? It comes down to four things: molecule size, pH adjustment, cuticle swelling, and cationic attraction.
| Factor | What Happens | Why It Matters |
|---|---|---|
| Cuticle Swelling | Damp hair lifts cuticle layers open | Allows conditioner absorption |
| Heat-Enhanced Penetration | 95°F nearly doubles ingredient uptake | Speeds up deep conditioning results |
| Molecule Size | Smaller molecules reach the cortex | Coconut oil penetrates; shea stays on surface |
| pH Adjustment | Alkaline pH above 7 opens cuticles wider | Maximizes ingredient entry |
| Cationic Attraction | Positively charged ingredients bond to hair | Delivers lasting softness after hair cuticle sealing |
Start with damp hair — that alone opens your cuticles slightly. Add gentle heat, and ingredient absorption nearly doubles.
Protein-moisture Balance for Elasticity
Getting ingredient absorption right is only half the story — your hair also needs the right balance of protein and moisture to stay strong. Think of it like a tightrope: lean too far either way and you get breakage. Do a simple Stretch Test on a clean, wet strand. Healthy hair stretches 30–50%, then springs back.
- Hair Elasticity depends on protein-moisture equilibrium — not just hydration alone.
- Ratio Tuning matters by porosity: low porosity needs 80% moisture, 20% protein; high porosity flips to 60% protein, 40% moisture.
- Moisture Retention drops when cuticles stay raised and can’t seal properly.
- Protein Overload Prevention means limiting protein-rich DIY Deep Conditioning Treatments to once monthly.
- Hygral Fatigue develops when moisture repeatedly swells strands without Protein Sources to rebuild structure, causing a gummy, limp feel and Moisture Lock failure.
Reducing Breakage, Frizz, and Split Ends
Balanced hair doesn’t just feel good—it holds up. When strands stay moisturized and cuticles sealed, friction reduction occurs naturally. Fewer snags mean fewer split ends from forming. Combined with Protective Night Care and Gentle Detangling, DIY deep conditioning treatments achieve real, lasting results.
| Problem | Solution |
|---|---|
| Hair Breakage | deep conditioner + Cuticle Sealing Rinse |
| Frizz & split ends | frizz control oils + Scalp Hydration |
Best Natural Ingredients for Deep Conditioning

The right ingredients make all the difference between a mask that actually works and one that just sits on top of your hair.
Nature has plenty of options, but some stand out for what they can genuinely do for your curls. Here are the ones worth keeping in your kitchen.
Shea Butter for Softness and Frizz Control
Shea butter is one of the hardest-working ingredients you can add to your DIY deep conditioning treatments. Its fatty acid profile — mostly stearic and oleic acids — delivers serious emollient softening without leaving your hair greasy. Here’s what makes it stand out:
- Moisture Lock – Seals the cuticle against humidity for up to 12 hours
- Frizz Control – Reduces frizz by 61% in humid conditions
- Vitamin E Boost – Protects strands with powerful antioxidant support
- Hair Softness – Improves elasticity and leaves coils supple and defined
Humidity resistance is the real difference-maker for natural hair.
Coconut Oil for Penetration and Protein Loss Prevention
Coconut oil doesn’t just sit on your hair — it actually travels inside the strand through a process called Cortical Oil Diffusion. Its secret weapon is lauric acid, which manages Lauric Acid Binding by locking onto keratin proteins deep in the cortex.
This Pre-Poo Protein Shield effect cuts protein loss by up to 39%. Unlike mineral oil (Oil-Mineral Contrast), coconut oil delivers a real Micron Thickness Boost, making strands noticeably fuller.
Coconut Milk for Lightweight Moisture
Think of coconut milk as your curls’ invigorating drink of water — lightweight hydration without the heaviness. Its natural fatty acids promote moisture retention and improve slip, making it a smart base for any DIY hair mask. Volume-friendly hydration is the real win here.
- Spreads easily through damp strands
- Rinses clean without buildup
- Supports deep conditioning without weight
- Offers emulsifier synergy with honey or aloe
- Safe for most hair types, though allergy awareness matters
Avocado for Fatty Acids and Slip
Avocado is one of the most nutrient-rich ingredients for DIY deep conditioning hair treatments. With roughly 70 percent monounsaturated fats, its fatty acids penetrate deeply into each strand, reinforcing the hair’s natural lipid barrier.
| What It Does | Why It Matters |
|---|---|
| Slip enhancement | Fingers and combs glide easily through coils |
| Monounsaturated benefits | Softens and strengthens without greasiness |
Its emulsion stability ensures seamless blending with shea or honey, while gentle heat fluidity allows the deep conditioner to spread evenly through every curl.
Aloe Vera for PH Balance and Scalp Comfort
Aloe vera is quietly one of the hardest-working ingredients in any DIY deep conditioning routine. Its natural scalp pH level sits right around 4.5 — almost identical to a healthy scalp — so it helps your cuticle lie flat after cleansing.
For scalp soothing and hydration, acemannan anti-inflammatory compounds go to work fast.
Always do a patch test protocol before applying widely.
This is especially true for sensitive skin—check out these gentle deep-cleansing techniques for sensitive skin before committing to daily use at any price point.
Honey for Humectant Support
Honey is a natural humectant that pulls moisture from the air and locks it into your strands—a process known as Moisture Lock. Its mild acidity also aids in pH balancing, keeping your cuticle smooth for a real Hair Shine Boost.
Incorporate honey into your DIY deep conditioning treatments, such as a nourishing honey and olive oil hair mask.
Why honey belongs in your routine:
- Attracts and holds moisture without heavy build-up
- Smooths the cuticle for more visible shine
- Reduces frizz by keeping strands flexible
- Blends easily into masks and stays stable — solid Shelf‑Life Stability
- Works gently for most hair types, though Allergy Considerations apply — patch test first
Jojoba Oil for Finer Hair
Fine hair needs a lighter touch—and that’s exactly where jojoba oil shines. Unlike heavier oils, its sebum mimicry ensures absorption without greasiness. It delivers cuticle smoothing, breakage prevention, and scalp balance in one gentle ingredient.
| Benefit | How to Use |
|---|---|
| Lightweight shine | 1–2 drops on damp ends |
| Moisture retention | Mix 3–5 drops into conditioner |
| Scalp balance | Massage sparingly, rinse after 20–30 min |
| Fine hair conditioning | Replace coconut oil in DIY deep conditioner |
Argan Oil for Extra Nourishment
Jojoba cares for fine hair beautifully — but if your coils are dry, frizzy, or damaged from color, argan oil brings serious backup. Its fatty acid profile (80% unsaturated acids, including oleic and linoleic) allows deep cuticle penetration that restores moisture where strands need it most. Add it to any homemade hair mask for argan-infused shine without heaviness.
Three ways to use it:
- Stir 1 teaspoon into your natural ingredients blend for heat-boosted absorption
- Apply a few drops to damp sections before your step-by-step deep conditioner preparation
- Use vitamin E antioxidant protection by mixing argan oil into a shea-based deep conditioning mask
Choose by Hair Type and Porosity

Not every hair thrives on the same formula — what works for your friend’s fine strands might weigh yours down completely. Your porosity, texture, and damage level all shape which ingredients your hair actually drinks up versus rejects.
Here’s how to match the right blend to what your hair is telling you.
Best Blends for Low-porosity Hair
Low-porosity hair keeps its cuticles tightly shut, so heavy oils just sit on top and go nowhere. That’s where ingredient synergy matters most.
Stick to lightweight sealants like jojoba and argan — mix equal parts for a non-greasy base that promotes heat-free penetration. pH-balanced mixes with aloe keep cuticles receptive.
Smart oil ratio optimization means your moisture actually gets in.
Best Blends for High-porosity Hair
High-porosity hair is basically a wide-open door — moisture gets in fast but escapes just as quickly.
Layered sealants like avocado, olive oil, and raw honey work well together; they deliver an antioxidant boost while slowing water loss.
Deep conditioning with heat-activated absorption helps these blends actually stick.
Seasonal formulation matters too — use richer mixes in dry months, lightweight emulsifiers when humidity climbs.
Fine Hair Vs Coarse Hair Needs
Your hair texture changes everything about how you deep condition. Fine strands have serious weight sensitivity — too rich a formula, and you lose volume retention fast while risk of residue creeps in. Coarse hair craves heavier moisture dosage and more ease of detangling.
- Fine hair: jojoba oil, mid-length focus, shorter timing
- Coarse hair: shea butter, root-to-end saturation, longer processing
- Both types: protein vs moisture balance shifts with damage level
Dry, Damaged, or Bleached Hair Adjustments
Bleached or heavily damaged strands are basically wide open — they absorb moisture quickly but lose it just as fast. That’s why moisture sealing matters so much here.
Focus on silicone-free care with rich oils like avocado and shea butter. Keep protein timing in check: use a protein mask every two to four weeks to prevent brittleness.
Reduce shampoo frequency to once or twice weekly for better moisture retention and scalp hydration.
Curly, Coily, and Kinky Texture Recommendations
Your curl pattern shapes everything — from which ingredients absorb best to how often you need to condition.
- Curly (type 3): Lightweight jojoba oil and aloe vera support hair porosity management without weighing curls down
- Coily (type 4): Coconut oil penetrates the hair shaft to provide moisture and protein balance in hair care
- Kinky (4C): Thick shea butter and honey masks deliver intense softness and DIY deep conditioning for natural hair
- Low porosity: Warm towel methods open cuticles, preventing product buildup
- High porosity: Layer shea butter over leave-ins to seal gaps fast
When to Use Moisture Vs Protein Treatments
Think of protein vs moisture treatments like a seesaw — lean too far either way and something breaks. Watch for protein deficiency cues like limp, stretchy strands or lost curl definition. Notice moisture overload signs if hair feels gummy or droopy.
Color-treated hair requires protein treatments every four to six weeks, while post-heat styling care calls for biweekly protein. Alternate both treatments to maintain moisture and protein balance.
DIY Deep Conditioner Recipes to Try

Now comes the fun part — actually mixing your own treatments at home. Each recipe below uses simple ingredients you can find at most grocery stores, with exact amounts so there’s no guesswork.
Pick one that matches what your hair needs most right now.
Coconut Oil, Jojoba Oil, and Essential Oil Blend
This blend is a classic for good reason. Coconut oil’s lauric acid benefits penetrate the hair shaft and reduce protein loss by up to 60% during washing — serious protection. Jojoba oil brings wax ester mimicry that mirrors your scalp’s natural sebum, making it lightweight and balanced. Together, they create oil viscosity balance without heaviness.
Add tea tree or peppermint essential oils for antibacterial scalp defense and aromatherapy scalp stimulation.
Mix 8 tablespoons coconut oil with 4 tablespoons jojoba, drop in 15–20 drops of your chosen essential oil, and leave this DIY deep conditioner on for 30 minutes.
Banana, Honey, and Coconut Oil Mask
Your kitchen might already have the perfect DIY deep conditioner waiting. Mash one ripe banana — that potassium boost strengthens strands against breakage — then mix in 2–3 tablespoons melted coconut oil and 2 tablespoons honey for serious humectant synergy.
Blend smooth, strain out fibers, and leave it on for 15–30 minutes.
Note allergy precautions with banana sensitivity, and choose sustainably sourced honey when possible.
Shea Butter, Avocado, Olive Oil, and Honey Mask
This one’s for your driest, thirstiest coils. Mash half a ripe avocado, then blend in 2 tablespoons melted shea butter, 1 tablespoon olive oil, and 1 tablespoon honey.
The emulsion technique — blending until completely smooth — keeps the oils from separating mid-application. No heat needed; heatless activation works beautifully here.
Leave it on for 45–60 minutes.
Yogurt, Egg, and Coconut Oil Protein Mask
Your hair craves protein? This mask delivers. Crack one egg—use just the yolk if your hair gets oily fast, as egg white lightening effects work better for finer strands. Mix in 2 tablespoons of plain Greek yogurt (a thicker yogurt consistency helps the mask stay put) and 1 teaspoon of melted coconut oil.
The lactic acid in yogurt benefits your scalp by loosening buildup, while coconut oil and the yogurt-egg conditioning treatment together achieve the perfect protein and moisture balance in hair.
Leave the mask on for 20–30 minutes, then rinse with cool water.
Apple Cider Vinegar Rinse for Cuticle Smoothing
After a protein mask, your strands need a reset. An apple cider vinegar rinse is that reset.
Mix 2 tablespoons of ACV with about 16 ounces of cool water — that acidic dilution is key to the hair cuticle’s pH balance without risking scalp irritation.
This method seals the hair cuticle, locking in your deep conditioning work for a real shine boost.
How to Customize Recipes With Lighter or Richer Oils
Not every recipe fits every head of hair — and that’s the point. Swap coconut oil for jojoba oil if your strands feel weighed down.
- Seasonal Oil Swaps — lighter argan oil in summer, richer avocado in winter
- Allergy-Free Alternatives — skip coconut oil; use grapeseed instead
- Travel-Friendly Packs — pre-portion your oil treatment for hair in small tins
- DIY Oil Emulsifiers — add aloe vera to help oils blend smoothly
Apply Deep Conditioner Step by Step
Getting the most out of your deep conditioner starts with how you apply it. A little structure goes a long way — and yes, there’s a right order to follow.
Here’s exactly how to do it, step by step.
Start With Freshly Shampooed, Damp Hair

Think of shampooing as unlocking the door before you knock. Clean, damp hair gives you real cuticle activation — buildup-free strands absorb up to 30% more treatment. This is dilution prevention in action: towel-blot until damp, never soaking.
Excess water cuts conditioner’s strength in half. Moisture retention starts right here, before the mask even touches your hair.
Section Hair Into 4 to 8 Parts

Four sections work for short hair, six for medium length, and eight if your hair is long or thick. Use the Quadrant Parting Method — divide from forehead to nape, then ear to ear — as your foundation.
Section size guidelines suggest keeping each part one to two inches wide. Secure everything with duckbill clips so your hands stay free for clean, even application.
Saturate Each Section From Roots to Ends

Work the conditioner into each section using one of three Application Techniques for Deep Conditioners — whichever suits your texture best:
- Raking Technique — Pull two or three fingers through wet strands from root to tip for defined, clumpy curls.
- Praying Hands — Press warmed product between palms and glide smoothly along each section, sealing the cuticle as you go.
- Finger Massage — Work conditioner in with circular motions, stimulating circulation while coating every hidden layer.
- Wide-Tooth Comb — Follow finger application by combing ends-upward for uniform coverage on thick or coarse sections.
- Wet Hair Saturation — Always apply on soaking-wet hair; damp strands absorb roughly 30% more moisture, boosting elasticity noticeably.
Focus Extra Product on Dry Ends

Your ends are basically the oldest, most worn-out part of your hair — and they need backup.
After coating each section, take a fresh walnut-sized scoop and "paint" it onto just the last 3–4 inches. This end lock-in technique and weighted product allocation seal the hair cuticle, improving moisture retention and reducing split ends.
Aim for heavy-satin, not dripping-wet.
Use a Plastic Cap for Better Absorption

Once your hair is saturated, grab a plastic shower cap and pull it on snugly — this is where the magic happens. The plastic cap traps your body heat, raising the temperature just enough to lift the cuticle and push conditioner deeper into each strand.
That sealed heat distribution doubles the moisture retention time and cuts your deep conditioning session nearly in half.
Rinse With Cool or Lukewarm Water

Cold water is your deep conditioning session’s closing act. Once you rinse, cool or lukewarm water triggers cuticle closure — those tiny scales snap flat, locking hydration inside the cortex. That’s hair cuticle sealing techniques working in real time.
Shine amplification kicks in as flat cuticles reflect light, while scalp soothing follows, and your curls retain moisture throughout the day.
Heat and Timing for Better Results

Getting the most out of your deep conditioner isn’t just about what you put in it — it’s also about how you apply heat and how long you leave it on.
A little warmth opens the cuticle, allowing ingredients to penetrate effectively. The right timing, meanwhile, determines whether you achieve decent results or a real transformation.
Here’s what you need to know before you start the clock.
When Gentle Heat Improves Penetration
Think of your cuticle like a closed door — low heat is the key. When you apply gentle warmth between 35 and 50 degrees Celsius during deep conditioning, heat-induced cuticle lift opens those layers up to 20 percent wider. This porosity heat interaction means moisture and oils absorb up to three times faster.
A simple heat cap keeps safe, steady heat duration consistent, maximizing every ingredient you applied.
Warm Towel Method at Home
No heat cap? No problem. A warm towel works just as well for heat activation on hair masks.
Dampen a 100% cotton towel—cotton choice matters because it holds moisture better than synthetics—wring it out, and warm it gently. Perform a quick wrist temperature test before wrapping to ensure safety.
A snug wrap ensures heat retention without pulling. If the towel cools mid-treatment, reheat a second towel and continue.
Low-setting Hooded Dryer Option
If a warm towel isn’t doing enough, a hooded dryer on the low setting is your next move. Low heat styling for low porosity hair works especially well here — gentle warmth opens the cuticle without overdrying.
Most portable setups offer cap comfort design that fits snugly while you relax. Keep noise level considerations in mind, check safety precautions on your model, and prioritize steady heat distribution for optimal results.
Steamer Method for Added Moisture
Steam takes deep conditioning up a notch. Vapor penetration works by gently lifting the cuticle, allowing moisture and oils to actually reach the cortex — not just coat the surface.
For safe heat activation with hair masks, follow these steps:
- Set temperature settings to warm, never hot — 15–30 minutes is enough for moisture retention without hygral fatigue.
- Keep steam safety in mind — hold the nozzle a few inches from your scalp to avoid burns.
- Use distilled water for device maintenance and cleaner vapor.
Timing for Light, Moderate, and Severe Dryness
How long you leave your deep conditioner in matters more than most people realize. For light dryness, 10–15 minutes does the job — cap absorption benefits kick in fast.
Moderate dryness needs 20–30 minutes under gentle heat.
Severe dryness? Go 45–60 minutes, or overnight for brittle strands.
These heat duration guidelines and moisture recovery indicators help you master optimizing deep conditioner timing every wash day.
Why Egg-based Masks Should Not Be Heated
Egg is the one ingredient where heat activation works against you. When egg proteins hit around 60–65°C, protein coagulation kicks in — and suddenly your protein mask for hair becomes scrambled eggs on your strands.
Here’s what happens when you apply heat to raw eggs:
- Hard residue clings to the shaft
- Sulfur odor gets trapped
- Scalp tightness increases
- Reduced slip makes detangling harder
- Multiple washes strip your natural oils
Keep egg cool. Always.
Top 5 Oils for DIY Treatments
Not all oils pull their weight the same way for deep conditioning. The ones you choose can make the difference between hair that drinks up moisture and hair that just sits there coated.
Here are five oils worth keeping in your rotation.
1. California Olive Ranch Extra Virgin Olive Oil
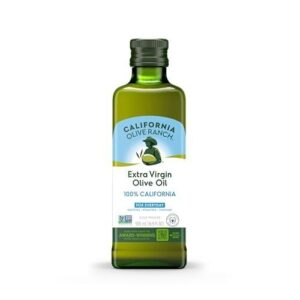
California Olive Ranch Extra Virgin Olive Oil is a standout choice for DIY hair treatments. It’s cold-pressed, 100% California-grown, and certified extra virgin through both chemical and sensory testing — so you know exactly what you’re putting on your strands.
The high monounsaturated fat content helps seal moisture into dry coils, while its smooth, lightweight texture won’t leave your hair feeling weighed down.
Use 1 tablespoon in the shea butter-avocado mask for deep hydration that actually lasts.
| Best For | Home cooks, health-conscious eaters, and anyone on a keto, paleo, or vegan diet who wants a high-quality, traceable olive oil they can actually trust. |
|---|---|
| Certification | Non-GMO, Kosher, Vegan |
| Extraction Method | Cold-pressed |
| Hair Use | Conditioning treatment |
| Skin Use | Moisturizing base |
| Price | $22.99 |
| Net Volume | 500 mL |
| Additional Features |
|
- Certified extra virgin through both chemical and sensory testing, so you’re getting the real deal — not a watered-down blend.
- The QR code on the bottle links to harvest and bottling dates, giving you full transparency on what you’re buying.
- Dark glass packaging keeps the oil fresh longer by blocking out light, and it works great for everything from sautéing to baking.
- At $22.99, it’s noticeably pricier than most grocery store options, which might be a tough sell if you’re watching your budget.
- Some product lines (like the Destination Series) aren’t California Olive Oil Council certified, which can make the origin a little murky.
- The 500 mL bottle is a solid size, but if you only cook with olive oil occasionally, it might go stale before you finish it.
2. Carrington Farms Organic Virgin Coconut Oil
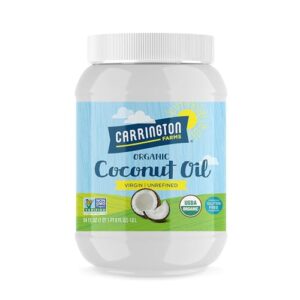
Carrington Farms Organic Virgin Coconut Oil is the workhorse of any natural hair toolkit. Cold-pressed from fresh young coconuts — never dried copra — it ensures the lauric acid structure remains fully intact.
Lauric acid’s small molecular size allows it to penetrate the hair shaft, not just coat it. This unique property prevents protein loss during washing, reducing breakage over time.
Use 1–2 tablespoons in hair masks. If solid, melt it first before application.
| Best For | Anyone on a natural hair care journey who wants a clean, multipurpose oil that also pulls double duty in the kitchen or medicine cabinet. |
|---|---|
| Certification | Non-GMO, Vegan, Gluten-Free |
| Extraction Method | Cold-pressed |
| Hair Use | Scalp and ends conditioning |
| Skin Use | Dry skin and eczema relief |
| Price | $19.99 |
| Net Volume | 54 fl oz (1.59 L) |
| Additional Features |
|
- Cold-pressed and unrefined, so you’re getting the real deal — nutrients, MCTs, and lauric acid fully intact
- Incredibly versatile: cook with it, slap it on dry skin, use it in a hair mask, or mix it into a DIY deodorant
- Certified organic, non-GMO, vegan, and gluten-free — plus a BPA-free container and four-stage filtration for peace of mind
- It solidifies below 76°F, so you’ll need to melt it before use in colder months — a minor but real inconvenience
- That coconut scent is noticeable, which can clash with savory dishes or feel too strong for some people’s taste
- 54 oz is a lot of oil — if you only use it occasionally, you might struggle to get through it before it loses freshness
3. Cliganic Pure Vitamin E Oil
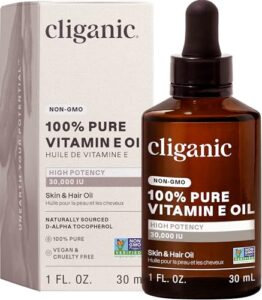
Vitamin E is the quiet powerhouse your DIY masks have been missing. Cliganic’s pure oil delivers 100% d-alpha tocopherol — sourced from non-GMO soybean oil — with zero fillers or synthetics. This ensures every drop works directly to reduce dryness, protect your cuticles from environmental damage, and strengthen brittle strands over time.
Add just 2–3 drops to your conditioner or blend it into your next mask. It also extends the shelf life of homemade treatments, which is a real bonus.
| Best For | Anyone looking to boost their DIY hair masks and skincare routines with a clean, natural antioxidant oil — especially those dealing with dryness, dull skin, or brittle hair. |
|---|---|
| Certification | Non-GMO, Vegan, Cruelty-Free |
| Extraction Method | Minimally processed |
| Hair Use | Reduces dryness and breakage |
| Skin Use | Deep moisturization |
| Price | $9.98 |
| Net Volume | 1.76 oz (52 mL) |
| Additional Features |
|
- 100% pure d-alpha tocopherol with no fillers, synthetics, or GMOs — what you see is what you get
- Pulls double duty for skin, hair, nails, and scalp, so one bottle goes a long way
- Third-party tested for purity, which is reassuring at this price point
- The smell is strong and can be off-putting — some describe it as fishy
- Thick and viscous, so it feels heavy and the dropper can get messy
- Not a great fit for oily or acne-prone skin types
4. Kate Blanc Organic Jojoba Oil
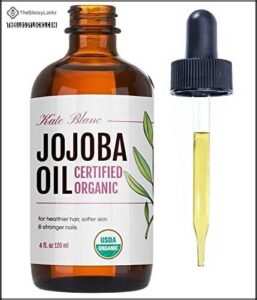
Fine hair doesn’t need a heavy oil weighing it down — it needs something smarter. Kate Blanc’s USDA Certified Organic Jojoba Oil is cold-pressed, unrefined, and hexane-free, making it one of the cleanest options you can add to a DIY mask.
Its wax-ester structure mimics your scalp’s natural sebum, so it seals moisture without buildup.
Use 1–2 tablespoons in your next banana or shea butter blend.
At $8.99 for 4 oz, it delivers serious results without breaking the bank.
| Best For | Anyone with fine or oily hair who wants a lightweight, natural oil for DIY masks, scalp care, or everyday moisture without the greasy feel. |
|---|---|
| Certification | USDA Organic, Vegan, Cruelty-Free |
| Extraction Method | Cold-pressed |
| Hair Use | Conditions, reduces frizz |
| Skin Use | Rapid hydration, soothing |
| Price | $8.99 |
| Net Volume | 4 oz (118 mL) |
| Additional Features |
|
- USDA Certified Organic and cold-pressed — about as clean as it gets, no sketchy additives.
- Incredibly versatile: hair, skin, nails, makeup removal, carrier oil — one bottle does a lot.
- At $8.99 for 4 oz, it’s genuinely affordable for a certified organic product.
- The glass bottle looks great but can crack or leak if it takes a tumble.
- The natural scent might be noticeable if you’re sensitive to it.
- Too light for seriously dry or damaged skin that needs something richer and more occlusive.
5. Kate Blanc Organic Argan Oil
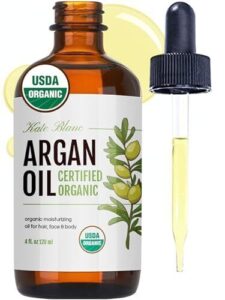
If jojoba is the lightweight option, argan oil is its richer cousin—and your dry ends will thank you for the upgrade. Kate Blanc’s USDA Certified Organic Argan Oil is cold-pressed, hexane-free, and packed with vitamin E and fatty acids that genuinely strengthen the hair cuticle.
Add 1–2 teaspoons to your shea butter or avocado mask for extra slip and frizz control. At $25.99 for 4 oz, a little goes a long way.
| Best For | Anyone with dry, frizz-prone hair or sensitive skin who wants a clean, multipurpose oil that plays well in DIY masks and everyday routines. |
|---|---|
| Certification | USDA Organic, Third-Party Tested |
| Extraction Method | Cold-pressed |
| Hair Use | Reduces frizz, adds shine |
| Skin Use | Deep hydration, sensitive skin |
| Price | $25.99 |
| Net Volume | 4 oz (118 mL) |
| Additional Features |
|
- USDA Certified Organic and cold-pressed, so you’re getting pure oil with no sketchy additives
- Works on hair, face, and body — one bottle does a lot
- Fast-absorbing and non-greasy, so it won’t leave you feeling like a slip-and-slide
- The scent is very subtle — if you love a fragrant oil, this one might feel a little flat
- Heavily damaged or color-treated hair may not see dramatic results without using a generous amount
- Like all natural oils, it can go rancid over time if you don’t store it properly
Frequency, Storage, and Common Mistakes

Getting your deep conditioning routine right isn’t just about the recipe — it’s also about knowing when to do it, how to store leftover products, and what mistakes can quietly set your progress back. A few small missteps, like conditioning too often or leaving a mask in the fridge too long, can undo a lot of good work.
Here’s what you need to know before your next wash day.
Weekly Deep Conditioning for Dry Natural Hair
If your ends feel like straw by midweek, your hair is signaling a need for care. Dryness and brittleness are common signs of moisture depletion, especially in natural textures.
A weekly deep conditioning routine provides essential nourishment, restoring strength and elasticity to parched strands. This consistent practice addresses follicle health, preventing damage and promoting resilience between washes.
| Weekly Routine Step | What It Does |
|---|---|
| Hair Porosity Testing | Matches treatment to your cuticle needs |
| DIY Mask Rotation | Prevents ingredient overload |
| Deep Conditioner Application | Rebuilds moisture retention |
| Nighttime Moisture Boost | Seals hydration between wash days |
| Post-Conditioning Styling | Locks in softness longer |
Biweekly Schedules for Fine or Oily Hair
Not every hair type needs weekly masks. If your strands are fine or your scalp runs oily, a biweekly timer tip works better — aim for every 10 to 14 days. Scalp oil control matters here, so keep the mask at mid-lengths and ends only.
Stick to light mask formulations, use minimal product, and finish with gentle post-wash styling to avoid limpness.
Twice-weekly Plans for Severely Damaged Hair
Severely damaged hair — bleached, heat-styled, or chemically treated — calls for a different recovery timeline.
Twice-weekly deep conditioning provides steady damage repair without overwhelming strands. Adopt a layered treatment approach: one moisture-focused session, followed later in the week by a balanced protein and moisture session.
Monitor adjustment cues like softness and elasticity. When hair stops feeling brittle, gradually reduce treatment frequency.
Signs You Need More Conditioning
Your hair talks — you just have to listen. Watch for these clear signals:
- Brittle Texture and Dry Ends that snap or fray into split ends during detangling.
- Persistent tangles that form quickly after wash day, signaling protein loss and rough cuticles.
- Lackluster shine and scalp flakiness, which points to moisture-starved strands and hair breakage waiting to happen.
Signs of Over-conditioning and Hygral Fatigue
Over-conditioning causes limp curls, gummy texture when wet, and heavy roots that feel soggy.
You might also notice flat shine, brittle breakage, and strands that snap instead of stretching — classic signs of hygral fatigue.
These are common mistakes in deep conditioning. Pull back your frequency guidelines for deep conditioning immediately.
Avoiding Protein Overload With Monthly Protein Masks
Protein overload sneaks up on you — one wash your curls feel defined, the next they’re stiff, rough, and snapping instead of stretching. Those are classic protein buildup signs.
Do a label ingredient audit on your shampoo, conditioner, and leave-in; if keratin or collagen appear in all three, you’re stacking without realizing it.
Spacing protein treatments to once monthly, with a moisture recovery strategy in between, keeps protein and moisture balance in hair right where it needs to be.
Safe Storage and Shelf Life by Recipe Type
Dairy recipes require immediate refrigeration — use yogurt or milk masks within one day. Raw eggs must be refrigerated and discarded if left out for more than four hours.
Fruit masks spoil quickly, so banana or avocado blends should be applied within 24 hours.
Oil-only mixtures last longer, remaining stable for one to two weeks. Vinegar rinses remain stable for up to two weeks when refrigerated.
Can You Leave a DIY Treatment Overnight?
Yes, you can sleep in a DIY deep conditioner — but only if the formula is right for it.
- Scalp irritation risk is real; keep heavy butters and essential oils off your scalp
- Fine hair caution applies — rich masks will flatten your strands by morning
- Ingredient suitability matters most: coconut oil or aloe-based blends work best overnight
- Morning rinse strategy counts — cool or lukewarm water removes residue cleanly
Frequently Asked Questions (FAQs)
What is a good homemade deep conditioner for natural hair?
A single bowl of avocado, honey, and coconut oil might be the most powerful deep conditioner your natural hair has ever met — and it’s already in your kitchen.
What can I use in place of a deep conditioner?
Pre-wash oils like coconut or olive oil, aloe vera gel, and scalp-soothing rinses make solid budget-friendly substitutes.
Even a simple honey-and-water mixture serves as a quick homemade deep conditioning hair treatment.
Should you deep condition before or after coloring?
Deep condition before coloring, not after. Pre-color prep on dry or porous hair improves moisture balance. Post-color care means waiting 48–72 hours before any deep mask to protect color-treated hair.
Can children use the same DIY recipes?
Some DIY recipes work for kids, so keep it simple. Stick to plain coconut oil or avocado and skip essential oils entirely.
Always do a skin patch test first and closely supervise application.
Do seasonal changes affect deep conditioning frequency?
Seasons act like a thermostat for your deep conditioning routine. Winter calls for a Winter Moisture Boost weekly, addressing the need for extra hydration during colder months.
Meanwhile, a Summer Light Mask every two weeks often works fine when humidity naturally keeps curls hydrated, reducing the frequency required for maintenance.
Is deep conditioning safe during pregnancy?
For most pregnancies, deep conditioning is considered low risk. Keep your ingredient watchlist handy, watch scalp absorption, avoid formaldehyde-based formulas, and seek clinical consultation if anything feels off.
Conclusion
Maya’s ends were snapping off every wash day—until she started using a weekly DIY deep conditioning treatment tailored to her hair’s needs: avocado, honey, and shea butter. Applied in sections with a plastic cap for 30 minutes, this routine restored her hair’s elasticity and reduced breakage within a month.
Your hair communicates its needs through dryness, frizz, and snap. Now equipped with the recipes, the method, and the knowledge, you can effectively respond to these signals and nurture your hair’s health.
- https://www.regirlworld.com/blogs/beauty/5-diy-deep-conditioner-recipes-for-natural-hair
- https://www.bing.com/ck/a?!&&p=e1f9963689e16b06d4e4ce6cf5e37328c14b3b39802638c566d29faa5b42fd2bJmltdHM9MTc3MDY4MTYwMA&ptn=3&ver=2&hsh=4&fclid=305c23ae-5db1-6019-007b-354d5cb0612e&u=a1aHR0cHM6Ly9zaW1wbHliZXlvbmRoZXJicy5jb20vZGl5LWRlZXAtY29uZGl0aW9uZXItZm9yLWhhaXIv
- http://e-jkc.org/journal/view.php?doi=10.52660/JKSC.2026.32.1.180
- https://www.earthtonesnaturals.com/blogs/all-about-your-hair/17522328-the-ultimate-guide-to-deep-conditioning-part-1
- https://science-yhairblog.blogspot.com/2011/08/deep-conditioning.html