This site is supported by our readers. We may earn a commission, at no cost to you, if you purchase through links. This content is for general informational and educational purposes only and is not a substitute for professional medical, dermatological, or nutritional advice.
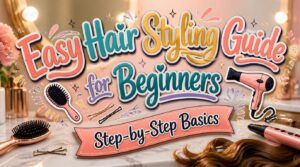
You’ve stood in front of the mirror, brush in hand, wondering why your hair never looks like it does after a salon visit. Here’s the truth: it’s not talent. It’s technique, and nobody handed you the manual.
Most beginners skip the groundwork entirely, they grab a flat iron before they even know their own hair type or porosity. That’s like driving somewhere new without checking the map first. No exaggeration, understanding your hair’s texture and density changes every step after it.
Good easy hair styling guides for beginners start small: identify what you’re working with, build a routine you’ll stick to, and pick tools that match your texture. Get those basics right, and the rest starts falling into place.
Table Of Contents
- Key Takeaways
- Hair Styling Basics for Beginners
- Essential Hair Styling Tools to Start
- Easy Everyday Hairstyles Step by Step
- Beginner Styling Techniques Without Damage
- Common Styling Mistakes and Fixes
- Frequently Asked Questions (FAQs)
- What hairstyle is good for alopecia?
- What is the easiest hairstyle for beginners?
- What are the best hair styling tools for beginners?
- How to learn hair styling for beginners?
- What are the 7 principles of hair design?
- What is the easiest hairstyle to learn?
- How to do simple hairstyle at home?
- How should I style my hair as a female?
- How do I prevent heat damage when styling hair?
- Can I style short hair with limited tools?
- Conclusion
Key Takeaways
- Before touching any tools, identify your hair type, texture, porosity, and density since these factors determine which products and techniques actually work for you.
- Build a simple, consistent routine (3-5 non-negotiable steps, 10-20 minutes) anchored to an existing habit rather than chasing complicated multi-step regimens.
- Protect your hair from heat damage by always applying heat protectant, matching tool temperature to your hair type (fine hair 250-350°F, coarse up to 400°F), and never straightening damp strands.
- Master a few easy, low-effort styles like the low ponytail, half-up twist, claw clip look, and three-strand braid, since these cover most everyday needs without requiring advanced skill or heavy tool investment.
Hair Styling Basics for Beginners
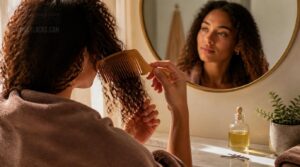
Great style starts before you touch a single tool. Your hair has its own personality, and working with it beats fighting it every time. Here’s where to start building that foundation, step by step.
Once you know your texture, picking the right products for your hair type becomes so much easier.
Identify Your Hair Type
Ever stared at your hair wondering why nothing seems to work? Start with the Andre Walker system: types 1 (straight) through 4 (coily), each split into A/B/C sub-types.
- Check your curl pattern (2A waves to 4C coils)
- Test porosity by dropping a strand in water
- Note moisture absorption needs
- Watch scalp visibility for density clues
- Observe natural drying shape
Understanding your hair strand texture helps choose suitable products.
Check Texture and Density
Curl pattern only tells half the story. Grab a strand and stretch it gently — good elasticity means it snaps back without breaking. That’s a texture check, not just a curl check.
For density, gather a ponytail and check its diameter around your wrist. Thin bundle, low density. Thick bundle, high density. Combine that with scalp visibility and porosity, and you’ve got real answers.
Build a Simple Routine
Now that you know your hair’s texture and density, build a routine anchor habit — brushing your teeth works great — and stack one hair step right after it.
Pick 3-5 non-negotiable actions, 10-20 minutes total. Style during peak energy hours, not midafternoon slumps.
Track weekly progress with a simple checklist. No exaggeration: consistency beats complexity every time for beginner styling tutorials.
Match Products to Hair
Grab a strand and drop it in water. Sinks fast? High porosity — your hair soaks up moisture but loses it just as quick, so seal with creams. Floats? Go lightweight with humectants.
Match cleansers to your scalp and color status: sulfate-free for dye, clarifying for buildup. Humid climate? Grab anti-frizz formulas. Your routine only works if the products actually fit your hair.
Prep Hair Before Styling
Before any hot tool touches your hair, start clean. Wash with sulfate free cleansing, blot with a microfiber towel, then detangle gently using wide tooth detangling from ends up.
Sectioning your hair into 4-6 parts ensures coverage. Apply heat protectant evenly, let products sit 1-2 minutes for activation, and make sure hair’s clean, dry hair before styling begins.
Essential Hair Styling Tools to Start
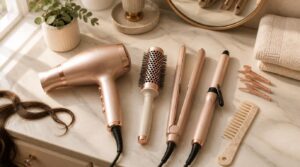
You don’t need a huge toolkit to start styling like a pro. A handful of the right pieces will cover almost everything you want to try. Here’s what actually belongs on your shelf.
A good claw clip is one of those pieces that earns its spot, and this quick hair styling guide for lazy days shows how far one can take you.
Best Brushes by Texture
Not all brushes are created equal — and using the wrong one is basically fighting your own hair.
Soft nylon bristles glide through fine hair with zero pull. Boar bristles shine on straight to wavy hair, spreading natural oils for shine and less static. Coarse or thick hair? Go mixed fiber — boar plus synthetic for real detangling power. Hard bristles smooth texture but snag fragile ends, so ease up.
Beginner Hot Tool Options
Before buying anything shiny, figure out what you actually need. Two tools cover most beginner routines:
- Flat iron — smooths or waves, 300°F for fine hair
- Curling wand — no clamp, easy bends
Look for ceramic or tourmaline plates, an ergonomic handle, and temperature control. Bonus points for dual voltage and interchangeable attachments — flexible, travel-ready, budget-smart.
Hair Dryer Attachments
That plastic nozzle sitting in your dryer’s box isn’t just packaging filler — it’s five different tools in one.
The concentrator nozzle directs airflow downward for sleek blowouts. A diffuser boosts curl definition on wavy or curly texture. Smoothing attachments seal cuticles and cut frizz. Detangling combs work oils through thick hair. Brush-head attachments add volume, mimicking a round brush mid-dry — genuinely handy for quick, step-by-step styling.
Budget-Friendly Styling Essentials
Good styling doesn’t need a fat budget. Multi-use products cut your total purchases nearly 40%, so skip single-purpose bottles.
Grab a microfiber towel — cheaper than salon brands, dries faster too. Add a $15 paddle brush, a scalp massager under $10, and an affordable styling mat to protect counters.
These basic tools cover every easy beginner hairstyle without draining your wallet.
Heat Protectant Basics
Skip a heat protectant spray, and you’re basically ironing hair with no ironing board underneath. It matters that much.
Skipping heat protectant is like ironing your hair with no ironing board underneath
Look for these on the label:
- Silicones (dimethicone) for even heat distribution
- Film-forming polymers for cuticle protection
- Humectants (glycerin) for moisture retention
Apply before every hot tool, roots to ends. This thin barrier slows heat conduction into the cortex, cutting real heat damage.
Easy Everyday Hairstyles Step by Step
Now that your tools are sorted, let’s put them to work. You don’t need an hour or a mirror trick to look pulled together, just a few go-to moves. Here are five styles you can master today, no experience required.
Two-Minute Low Ponytail

When you’re rushing out the door, this is your best friend. Gather hair at the nape, keeping tension moderate. Stretch the elastic while wrapping twice for hold. Smooth flyaways with a flat brush, front to back.
| Step | Action | Time |
|---|---|---|
| 1 | Gather & smooth | 30 sec |
| 2 | Secure elastic | 20 sec |
| 3 | Wrap strand | 40 sec |
Simple Half-Up Twist
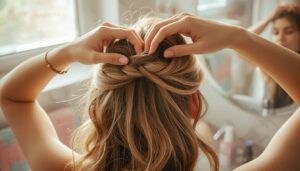
Want more polish without more effort? Grab two crown sections, cross them at the back, secure with an elastic. Pancake the twist gently for volume, mist texture spray on slippery hair for grip.
- Frames face beautifully
- Works on all textures
- Takes 5-8 minutes
- Hides elastic when pinned
- Loosen for romantic vibes
Resecure with bobby pins if it slips—easy confidence builder for beginners.
Beginner Three-Strand Braid
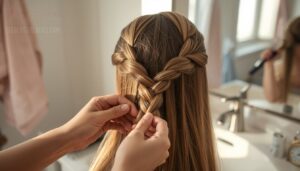
Once your twist skills feel solid, try the classic braid. Brush hair smooth, split into three even sections, then cross left-over-middle, right-over-middle, repeating down the length.
If your braid keeps coming out lopsided, this step-by-step guide to braiding hair shows how tension and sectioning keep each strand even.
Keep tension consistent, glance in a mirror to check alignment, and secure the end with an elastic. This step-by-step tutorial builds real braiding confidence, no fancy tools needed.
Quick Claw Clip Style
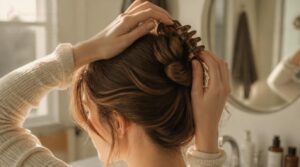
No braiding elastic on hand? Grab a claw clip instead. Gather hair, twist into a loose coil, and clip at the crown for an instant half-up look.
For messy buns, twist tighter and fold ends under before clipping. Mini clips handle face-framing pieces beautifully — this is genuinely one of the fastest beginner-friendly styling tricks you’ll learn for quick morning hairstyles.
Easy Scarf or Headband

For instant style without effort, tie a scarf around your hairline. Cotton blends grip best; silk needs a knot to stay put. Try:
- Classic single knot
- Twist-and-turn wrap
- Bow tie back
- Wrapped headband updo
DIY options from scrap fabric keep this budget-friendly — entry-level picks run under ten bucks, no exaggeration.
Beginner Styling Techniques Without Damage
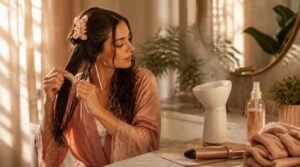
Great style shouldn’t cost you your hair’s health. The good news? A few smart habits protect your strands while still giving you the look you want. Here’s exactly how to section, dry, curl, and straighten without the damage.
Section Hair Correctly
Sectioning your hair isn’t busywork—it’s what separates a clean style from a frizzy mess.
Grab a rat tail comb and part hair into top, crown, and nape zones, clipping each with alligator clips. Work horizontal sections at the base, vertical panels up top, in roughly 1-2 inch pieces.
Preventing section overlap keeps heat even and your ponytail or curls looking sharp.
Blow-Dry for Volume
Once your sections are clipped, real volume starts at the roots. Angle the nozzle attachment upward, tilt your head down, and use round brush tension—pulling away from the scalp as you dry each crown section.
For curly or wavy texture, a diffuser adds lift without frizz. Either way, finish every section with the cool shot setting to lock the blowout before releasing your clip.
Curl and Wave Safely
Curls are a heat commitment, so treat your barrel like it deserves respect, not just speed.
Before wrapping any section, mist with heat protectant and check temperature: fine hair stays at 300-350°F, coarse strands can handle up to 400°F.
- Keep a small gap from your scalp
- Hold each section briefly
- Let curls cool untouched before brushing
Smooth and Straighten Hair
Glass-smooth hair starts with a ceramic plate flat iron—it distributes heat evenly and cuts down on hot spots that fry your ends.
Keep it between 350-365°F for fine to medium hair. Never straighten damp strands; steam damage is real and weakens hair fast.
Spray heat protectant first, work in 1-inch sections, then seal with a silicone serum for shine and humidity resistance.
Try Heat-Free Waves
Want waves without frying a single strand? Braid damp hair into three loose sections before bed, secure with clear elastics, and sleep on satin.
By morning you’ll have soft, beachy waves—no heat, no damage. Try two-strand twists for tighter curls, or finger coiling for defined pieces. Mist with water to refresh, skip heavy gels, and let moisture do the work.
Common Styling Mistakes and Fixes
Even with the right tools, small habits can quietly wreck your style. Most beginner mistakes come down to timing, product amount, or heat settings, not skill. Let’s fix the five that trip people up most.
Using Too Much Product
More product doesn’t mean more style. Your hair can only absorb so much before it just sits on top, blocking moisture and causing buildup, itchy scalp, and dull color. Excess product weighs down roots, killing volume and curl.
Signs? Greasy strands, flat texture, faster re-washing.
If buildup lingers, a clarifying treatment resets things—your foundation for real beginner hairstyling confidence starts with using less.
Styling Damp Hair
Less product is step one. Step two? Timing.
Damp hair (60–80% moisture) is your styling sweet spot — pliable, but not soaked. Detangle first with a wide-tooth comb, ends to roots. Squeeze water out with a microfiber towel, not rough rubbing.
If you wear extensions, use one of these gentle shampoos made for hair extensions so each wash keeps your wefts and bonds intact before you style.
- Section hair before diffusing
- Diffuse low heat, 8-12 min
- Skip heavy layering — go light
Wrong Heat Settings
Cranking the dial to max doesn’t mean better results — it just means more damage.
Fine hair styles best at 250–300°F; thick hair up to 350°F. Dial numbers lie, too, so test on a hidden strand first.
Slow passes reheat the same section repeatedly. Fast, confident passes at the right temperature beat slow ones every time, no exaggeration.
Skipping Moisture Needs
Heat gets all the blame, but skipped moisture does quiet damage too. Dry scalp turns tight and flaky; dry strands roughen, tangle, and lose elasticity. That’s when frizz creeps in and styles fall flat by noon.
Fix it with a real hair care routine: leave-in conditioner, weekly deep conditioning treatment, and lengths-focused moisture (not just roots) for lasting moisture retention and healthier hair overall.
Managing Frizz and Flatness
Frizz and flatness sit on opposite ends, yet both trace back to the same culprit: moisture mismanagement. Fight frizz with humidity control, sulfate-free cleansing, and a weekly protein mask. Beat flatness by lightening product layers.
Small swaps help too: a satin pillowcase or silk scrim cuts friction overnight, keeping strands smooth without sacrificing volume the next morning.
Frequently Asked Questions (FAQs)
What hairstyle is good for alopecia?
Fragile follicles need low-tension styles, not tight pulls.
Try loose braids, layered volume cuts, or a soft wig for coverage. Strategic parting and scalp-friendly clips help hide thinning without stressing already fragile hair areas.
What is the easiest hairstyle for beginners?
Your best bet? A low ponytail, half-up twist, or claw clip.
Each takes under two minutes, needs zero skill, and covers busy mornings, gym runs, or lazy Sundays without a single hot tool in sight.
What are the best hair styling tools for beginners?
You don’t need a whole cabinet full of gadgets to start. Five essential tools cover it: ceramic flat iron, ionic dryer, wide-tooth comb, heat-resistant brush, and adjustable curling wand — your complete beginner-friendly styling kit.
How to learn hair styling for beginners?
Learn by pairing your hair type with matching products, then practice ponytails, half-up twists, and braids through repetition.
Watch step-by-step tutorials, section hair before styling, and use heat protectant.
Consistency builds confidence—track progress, adjust technique, repeat weekly.
What are the 7 principles of hair design?
Seven key rules guide every cut: proportion balance, visual symmetry, rhythm through texture, focal emphasis, and design togetherness — plus contrast and repetition.
Master these, and hair styling practice becomes easy, turning easy hairstyles for beginners into confident, balanced looks every time.
What is the easiest hairstyle to learn?
Think of a ponytail as a security blanket for your hair: simple, familiar, endlessly reliable. It’s genuinely the easiest style to master—one elastic, one motion, done. From there, branch into claw clips or a three-strand braid.
How to do simple hairstyle at home?
Brush hair smooth, gather at the nape, secure with an elastic. Twist into a knotless bun, pin snug. No heat, no fuss—just a beginner-friendly, step-by-step tutorial giving you a polished DIY style in under two minutes.
How should I style my hair as a female?
The less you fuss, the better you’ll look. Start with your hair type, match products accordingly, then keep it simple: a low ponytail or half-up twist beats a ten-step routine every busy morning, no exaggeration.
How do I prevent heat damage when styling hair?
Coat hair evenly with heat protectant first, dry to about 90% with a microfiber towel, then keep tools moving with low passes at temperatures matched to your texture—fine hair stays cooler, thick hair takes more, always fewer than three sessions weekly.
Can I style short hair with limited tools?
[Less clutter, more freedom.
Short hair thrives on minimalist tool kits: a small curling iron, lightweight styling serum, and texture building product.
Skip the overwhelm — beginner-friendly styling for pixie cuts and bobs really just needs a steady hand and one good tool.]
Conclusion
One day soon, you’ll catch your reflection and barely recognize the ease in your own hands. That’s what practice does. It quietly turns fumbling into muscle memory until styling feels less like a chore and more like second nature.
These easy hair styling guides for beginners were never about being perfect; they were about giving you a starting point. Keep testing, keep adjusting. Your hair will teach you the rest, one good day at a time.