This site is supported by our readers. We may earn a commission, at no cost to you, if you purchase through links.

The difference between a clean fade and a botched haircut often comes down to a single guard size. Most barbers work with guards numbered 0 through 8, each representing a precise 1/8 inch increment in cutting length, but understanding which guards to use where separates amateur cuts from professional results.
A low fade might require guards 0 through 2 for that tight blend near the nape, while a high fade demands guards 0 or 0.5 at the base and careful progression upward. Half guards like 1.5 and 2.5 become essential tools for creating those smooth shifts that define a quality fade.
Matching the right guard sizes to your hair texture, face shape, and desired style requires knowing not just the numbers but how each increment affects the final gradient and where to position those critical shift points.
Table Of Contents
- Key Takeaways
- What Are Fade Clipper Guard Sizes?
- Fade Haircut Styles and Guard Size Chart
- Choosing The Right Guard Size for Fades
- Fading Techniques Using Clipper Guards
- What to Do if You Make a Fading Mistake
- Top Clipper Guard Products for Fades
- Clipper Guard Maintenance and Care Tips
- Frequently Asked Questions (FAQs)
- Conclusion
Key Takeaways
- Guard sizes progress in precise 1/8 inch increments from 0 (1/16 inch) to 8 (1 inch), with half guards like 1.5 and 2.5 creating the smooth transitions that separate professional fades from amateur cuts.
- Low fades typically use guards 0-2, mid fades work with guards 1-3, and high fades require guards 0 or 0.5 at the base progressing to 4-5 on top, with your hair texture and face shape determining the exact combination.
- Lever manipulation between guard sizes controls the final 20% of your blend quality, allowing you to open the lever for longer cuts that soften transitions or close it for tighter results that lock in your desired length.
- Regular maintenance including guard cleaning after each use, blade oiling every few haircuts, and professional sharpening every 3-6 months keeps your equipment cutting accurately and prevents the pulling, heat buildup, and uneven results that come from neglected tools.
What Are Fade Clipper Guard Sizes?
Fade clipper guard sizes are numbered attachments that control how much hair your clippers remove, with each number corresponding to a specific length in fractions of an inch or millimeters. Understanding this numbering system is essential because it determines the gradient and sharpness of your fade, from skin-tight at the bottom to longer hair on top.
For a detailed breakdown of how each guard number translates to precise cutting lengths, check out this complete guide to hair clipper guard sizes.
Here’s what you need to know about how these guards work and which sizes barbers rely on for clean, professional fades.
Clipper Guard Numbering System Explained
Clipper guard numbering follows a straightforward system where each number represents a specific hair length in fractions of an inch. Guard sizes start at zero for the shortest cut at 1/16 inch and increase in 1/8 inch increments, with guard 1 cutting 1/8 inch, guard 2 leaving 1/4 inch, and so on up to guard 8 at 1 inch, giving you precise control over fade techniques.
Understanding the basics of the haircut number system can help you communicate effectively with your barber and choose the ideal style.
How Guard Sizes Affect Hair Length
Guard size effects determine the exact hair length left after each pass, with shorter numbers producing tighter cuts and longer numbers preserving more length. The difference between adjacent guards typically ranges from 1/8 to 1/4 inch, which directly impacts fade blending techniques:
- Guard 1 leaves 1/8 inch for tight, close cuts
- Guard 2 doubles that at 1/4 inch
- Guard 3 jumps to 3/8 inch for noticeable length
- Higher guards preserve progressively more hair for blending
For a detailed understanding of, it’s helpful to know how these measurements affect cutting results.
Common Guard Sizes Used for Fades
Most fades rely on a progression from guard 0 or 1 at the baseline, stepping up through guard 2 or 3 at mid-height, and finishing with guard 4 to 6 on top. Half guards like 1.5 and 2.5 create smoother transitions between these steps.
| Fade Type | Bottom Guard | Top Guard |
|---|---|---|
| Low fade | 1 or 1.5 | 2 or 3 |
| Mid fade | 2 | 4 |
| High fade | 3 or 4 | 6 or 7 |
You’ll adjust these based on hair texture and desired contrast.
Fade Haircut Styles and Guard Size Chart
Different fade styles require different guard combinations to achieve the right look, and knowing which guards work for each style makes all the difference. A low fade sits close to the neckline, a mid fade transitions around the temple, and a high fade starts well above the ear.
The guard sizes you choose determine how gradual or dramatic your fade appears, so understanding the standard combinations keeps your cuts consistent and professional.
Popular Fade Styles (Low, Mid, High)
")
You control the fade gradient by choosing where the shift begins on your head. A low fade starts near the nape, keeping hair above the ears longer for a subtle, conservative look.
Mid fades begin around your temple, delivering balanced contrast that works with textured tops.
High fades rise near the upper ear, creating dramatic scalp exposure and bold style variations.
| Fade Type | Starting Point | Scalp Exposure |
|---|---|---|
| Low Fade | Nape area | Minimal |
| Mid Fade | Temple region | Moderate |
| High Fade | Upper ear/temple | Maximum |
Typical Guard Sizes for Each Fade

Starting at the bottom, your low fade demands a 0 guard for the skin-close line, stepping up to 1 and 2 guards through the blending zone. Mid fades commonly pair guards 1 through 3, delivering balanced contrast around your temple. High fades rely on 0 or 0.5 at the base, jumping to 2 or 3 in the upper mid section, then finishing with a 4 guard on top.
| Fade Type | Bottom Guard | Top Guard |
|---|---|---|
| Low Fade | 0 or 0.5 | 2 or 3 |
| Mid Fade | 1 or 1.5 | 3 or 4 |
| High Fade | 0 or 0.5 | 4 or 5 |
Guard Size Chart in Inches and Millimeters

Precision separates clean fades from uneven results, so you need exact measurements before you start cutting. Below, your guard size chart breaks down each number in both inches and millimeters, giving you the metric equivalents and blade calibration reference you need for consistent clipper guard basics across every hair length measurement.
Once you’ve locked in your guard size, applying the techniques from this uneven beard trimming guide helps you correct asymmetry and maintain balanced edges throughout the cut.
| Clipper Guard Number | Inches | Millimeters |
|---|---|---|
| 0 | 1/16″ | 1.5 mm |
| 1 | 1/8″ | 3.2 mm |
| 2 | 1/4″ | 6.4 mm |
| 3 | 3/8″ | 9.5 mm |
Choosing The Right Guard Size for Fades

Selecting the right guard size for your fade isn’t just about picking a random number and hoping for the best. You need to factor in the final look you’re after, your hair’s natural texture, your face shape, and how often you’re willing to maintain the cut.
These considerations work together to determine which guard sizes will give you the cleanest, most flattering fade possible.
Matching Guard Size to Desired Look
Your desired fade haircut dictates which guard sizes you’ll reach for first. A guard size chart helps you visualize the outcome before making your first pass, showing exactly how guard numbers 1 through 4 translate into length progression. To match clipper guard numbers to style goals:
- Tight skin fades demand guards 0 through 2 for dramatic blending needs near the baseline.
- Classic tapers rely on guards 3 through 5 for gradual transitions that honor personal preference.
- Textured fades need hair clipper guard sizes 4 and higher to preserve movement on top.
Considering Hair Type and Texture
Your hair texture determines which guard sizes deliver the cleanest fade. Fine hair accepts guards 0 through 2 for tight blends without bulk, while coarse hair maintenance requires guards 2 through 4 to avoid patchy transitions.
Curl pattern management also shifts your approach—tight coils need longer guards to prevent uneven fading, whereas straight strands tolerate aggressive clipper guard sizes for sharper haircut techniques.
Face Shape and Fade Guard Selection
Your face structure dictates which fade haircut and guard sizes deliver facial balance. Round faces need high fades starting with guard 5 near the crown, dropping to 1 at the temples, creating length through cutting techniques. Square jaws pair well with mid-level guard placement at 3, while oval faces accept adaptable hair fading techniques.
Face mapping your bone structure before selecting clipper guards prevents mismatched haircut styles for men.
Maintenance and Upkeep Preferences
Your commitment to clipper maintenance directly shapes guard size choices for fade haircuts. Frequent blade sharpening, guard cleaning after each cut, and maintenance scheduling reduce clipper guard wear, letting you use smaller sizes like 0.5 through 2 without hair pulling.
Proper tool storage and blade lubrication maintain blade sharpness, ensuring consistent fade transitions across all guard sizes during repeated haircut sessions.
Fading Techniques Using Clipper Guards

Fading with clipper guards requires a systematic approach that combines proper guard selection, consistent hand movements, and precise blending techniques.
The process involves starting with shorter guards at the baseline and gradually shifting to longer guards as you move upward, creating a smooth gradient.
Mastering lever manipulation, maintaining the correct clipper angle, and executing controlled strokes will determine whether your fade looks sharp or uneven.
Step-by-Step Guide to Fading With Guards
Start by establishing your fade’s top boundary with a longer guard, usually a 3 or 4, creating a clean guideline around the head.
Move down to the next guard size, like a 2, positioning your line roughly 1/8 to 1/4 inch above the first.
Continue this guard size progression downward, using vertical flicking motions to prevent gouging while forming smooth fade haircut transitions with proper clipper guard sizes.
Lever Manipulation for Blending
Once you’ve marked your fade haircut zones with the right clipper guard sizes, the taper lever becomes your tool for smooth blending between guard numbers. Opening the lever reduces blade tension, lifting your cut slightly longer to soften transitions, while closing it tightens for shorter results. Lever control adjusts to hair texture:
- Open lever blends longer guards into shorter ones, smoothing visible lines
- Half-open settings create mid-step gradients between guard numbers
- Closed lever locks final length after blending
- Coarse hair needs slower, deliberate lever adjustments
- Fine hair reacts to quick, incremental lever shifts
Adjust lever pressure consistently, pausing after each movement to check your work before continuing your fade techniques.
Tips for Smooth Gradients and Transitions
Beyond lever work, smooth cutting demands steady guard layering methods. Move your clippers upward with consistent pressure, flicking outward near each shift zone to blend guard sizes without harsh lines.
Hold your clippers at a slight angle, not flat against the scalp, allowing gradual fade gradient development.
Practice these fade blending techniques slowly, checking your work after each stroke to adjust your haircutting approach.
What to Do if You Make a Fading Mistake

Even experienced barbers hit a snag with fades from time to time, leaving behind uneven patches, harsh lines, or transitions that don’t blend smoothly. The good news is that most fading mistakes can be corrected with the right technique and a steady hand.
Below, you’ll find practical solutions for common fade errors, from fixing minor imperfections to knowing when it’s time to seek professional help.
Fixing Uneven Fades
Uneven fades happen when symmetry checks reveal one side higher than the other or when guard adjustments skip too fast between numbers. You can correct these mistakes by addressing hair texture differences, rechecking clipper angles, and fine-tuning fade correction with gradual blending.
Focus on:
- Comparing both sides in natural light frequently
- Using half-guard steps between clipper guard sizes
- Flicking motions at shift zones
- Maintaining flat, perpendicular blade contact
Blending Out Harsh Lines
Smooth fade transitions depend on feathered edges that eliminate visible boundaries between guard numbers. You’ll blend harsh lines by tilting your clipper slightly, working in small circular motions from the outside in.
Use a midtone guard between contrasting clipper guard sizes to create continuous fades that accommodate hair texture differences.
Finish with a higher guard pass to confirm your blending techniques produced even results.
When to Start Over or Seek Professional Help
Precision fading demands judgment about when to salvage a cut and when to reset. Knowing these fade restart tips saves time and prevents deeper mistakes during clipper troubleshooting.
- Restart the fade if uneven lines persist after multiple blending passes or if transitions show abrupt weight breaks between clipper guard sizes.
- Seek a barber when dealing with coiled hair textures that create persistent ridge lines or when skin fading requires specialized haircutting techniques.
- Apply error correction by stopping after five minutes of unsuccessful adjustments, reassessing your guard sequence, and rebuilding the gradient from the baseline upward.
These barbering tips help you maintain control and deliver consistent results.
Top Clipper Guard Products for Fades
Having the right clipper guards won’t mean much if your clippers themselves aren’t up to the task, which is why selecting quality tools matters as much as technique. Wahl products have earned their reputation in barbershops and home settings alike for delivering consistent cutting performance and durability.
Here are four Wahl products that can help you achieve professional-grade fades with precision and control.
1. Wahl Hair Clipper Guards Set
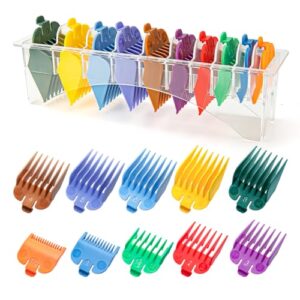
You need a guard set that holds up through client after client, and the Wahl Hair Clipper Guards Set delivers exactly that.
This 10-piece set includes lengths from 1/16″ to 1″, covering all the fading steps you’ll use daily. The guards snap onto most Wahl clippers with a secure click, and the color coding helps you grab the right size without squinting at tiny numbers.
Built from durable nylon, they’re designed to withstand the demands of professional use while maintaining consistent cutting accuracy.
| Best For | Barbers and stylists who need a reliable guard set that handles daily professional use with consistent performance across standard fade lengths. |
|---|---|
| Material | Nylon |
| Brand | LAVEST |
| Primary Use | Hair Cutting |
| Compatibility | Wahl & Select Models |
| Weight | 0.25 kg |
| Professional Grade | Yes |
| Additional Features |
|
- Color-coded guards make it easy to grab the right length quickly during busy sessions
- Covers all essential lengths from 1/16″ to 1″ for complete fading versatility
- Durable nylon construction stands up to repeated professional use
- Tighter fit means you’ll need to use a bit of force when putting them on
- Colors are randomly assigned, so you can’t predict which guard gets which color
- Limited to specific clipper models beyond Wahl, so check compatibility before buying
2. Wahl Hair Clipper Guard Attachments

You’re working with longer hair lengths and need guards that won’t slip mid-cut. The Wahl Hair Clipper Guard Attachments give you that stability with a 6-piece set ranging from 1.25″ to 2.5″, all crafted from reinforced ABS plastic.
The clip-on mechanism locks firmly to Wahl full-size clippers, and the rounded edges prevent snagging while you work through thick sections.
These guards maintain cutting precision without scissors, making them essential for longer styles and textured work that requires consistent length control.
| Best For | Barbers and home users cutting longer hair who need durable, slip-resistant guards that maintain consistent length without switching to scissors. |
|---|---|
| Material | ABS Plastic |
| Brand | Generic/Compatible |
| Primary Use | Hair Cutting |
| Compatibility | Wahl Full-Size Clippers |
| Weight | Not Specified |
| Professional Grade | Yes |
| Additional Features |
|
- Six guards cover 1.25″ to 2.5″ for versatile length options on longer cuts
- Reinforced clip-on mechanism keeps guards locked in place during use
- Rounded edges and precision teeth prevent snagging on thick or textured hair
- Only fits Wahl full-size clippers, not trimmers or mini models
- Requires checking compatibility images before purchase
- May be overkill if you primarily work with shorter hair lengths
3. Wahl Color Pro Cordless Hair Clipper
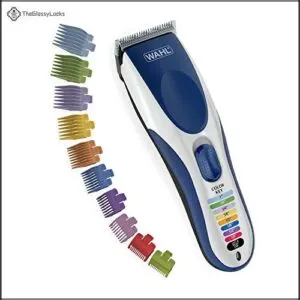
You’re cutting fades on the go without fighting cords that snag or limit your reach. The Wahl Color Pro Cordless delivers 60 minutes of consistent power from a rechargeable lithium-ion battery, letting you maneuver around the head without interruption.
Its color-coded guard system eliminates guesswork during transitions, with guards snapping securely from 1/16″ to 1″, and the removable blades rinse clean under water for fast maintenance between clients.
The worldwide voltage works anywhere you travel, and the complete kit includes scissors, a comb, and a storage case to keep everything organized.
| Best For | Barbers and home users who need cordless freedom for detailed cuts and fades, especially when traveling or working in spaces without easy outlet access. |
|---|---|
| Material | Plastic/Metal |
| Brand | Wahl |
| Primary Use | Hair Cutting |
| Compatibility | Universal |
| Weight | 1.4 lbs |
| Professional Grade | Yes |
| Additional Features |
|
- 60 minutes of runtime gives you plenty of power for multiple cuts without stopping to recharge
- Color-coded guards make it dead simple to grab the right length without second-guessing
- Removable blades rinse clean in seconds, so maintenance doesn’t eat into your day
- Battery needs a full charge every 6 months even when not in use to keep it healthy
- Dropping it can damage the cutting head, so you’ll need to be careful during fast-paced work
- May arrive with testing residue on the blades that needs cleaning before first use
4. Wahl Hair Clipper Lubricating Oil
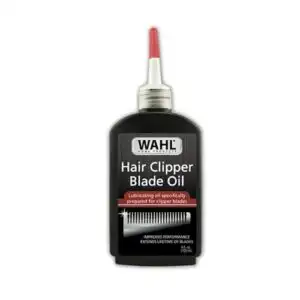
Sharp blades demand consistent care, and a few drops of Wahl Clipper Oil after every few haircuts keeps your tool cutting clean. Regular oiling extends blade life, maintains cutting speed, and eliminates the track marks that compromise fade precision.
This mineral-based lubricant reduces friction between blade teeth, preventing heat buildup and dulling while forming a protective film against rust. You’ll apply it straight to blade junctions, run the clipper briefly to distribute coverage, then store the 4 oz bottle upright.
| Best For | Barbers and home users who want to keep their clippers running smoothly and extend blade life without spending much time on maintenance. |
|---|---|
| Material | Synthetic Oil |
| Brand | Wahl |
| Primary Use | Blade Maintenance |
| Compatibility | Wahl & Other Brands |
| Weight | 0.1 lbs |
| Professional Grade | Yes |
| Additional Features |
|
- Prevents rust and reduces friction to keep blades sharp longer
- Works with Wahl and most other clipper brands
- Affordable at around $5 for a 4 oz bottle that lasts months
- Needs reapplication every few haircuts to stay effective
- No clear guidance on allergy concerns with the synthetic formula
- Small bottle size means frequent repurchasing for professional use
Clipper Guard Maintenance and Care Tips

Your clipper guards and blades need regular care to maintain cutting precision and prevent damage to hair. Neglecting maintenance leads to dull blades that pull hair, guards that cut inaccurately, and expensive replacements down the line.
The following practices will keep your equipment performing like new and extend its working life.
Cleaning and Storing Guards
Your clipper guards require consistent care to maintain precise guard sizes and cutting accuracy. Clean each guard attachment after every use with a soft nylon brush or microfiber cloth to remove hair buildup, then rinse with warm water and mild soap when needed. Guard sanitizing prevents contamination, while proper clipper storage in a labeled case protects against warping. Keep guards in a cool, dry environment with good air circulation to prevent material degradation and extend their functional lifespan.
| Cleaning Task | Recommended Tool | Frequency |
|---|---|---|
| Hair removal | Soft brush or cloth | After each use |
| Deep cleaning | Mild soap and water | Weekly |
| Guard sanitizing | Specialized plastic cleaner | As needed |
| Inspection | Visual check | During cleaning |
| Drying | Air circulation | Before storage |
Sharpening and Oiling Clippers
Beyond keeping your clipper guards clean, you’ll need to maintain blade sharpness and proper lubrication for consistent performance. Schedule professional blade sharpening every three to six months, using dedicated sharpening tools to restore the cutting edge without altering blade alignment.
Apply clipper blade oil after each session with these steps:
- Place 2 to 4 drops along the blade’s center and ends
- Run the clipper briefly to distribute oil evenly across the cutting surface
- Wipe away excess oil to prevent buildup on guard attachments
Proper oil application reduces friction, heat, and wear between sharpenings.
Replacing Worn or Damaged Guards
Even with careful oiling, clipper guards wear out and require replacement to preserve accurate guard sizes.
Inspect plastic guards for cracks or loose fits around the blade, and check metal guards for bending that affects alignment.
If guard pins fail to hold securely or edges appear chipped, swap them immediately—damaged guard signs like these compromise fade precision and can nick hair during cuts.
Frequently Asked Questions (FAQs)
What size guard to use for a fade?
Finding the right fit for your fade isn’t a one-size-fits-all scenario. You’ll usually start with guard 1, 2, or 3 at the bottom, progressing upward through at least three guard sizes to create smooth gradient transitions.
Is a 3 or 4 guard shorter?
A 3 guard is shorter, leaving roughly 3/8 inch of hair, while a 4 guard keeps about 1/2 inch—making the difference around 4-5 millimeters for tighter fade techniques and hair length control.
What is the 3 2 1 buzzcut rule?
You’ll love this: the 3 2 1 buzz cut uses three guard lengths—3mm on top, 2mm on sides, 1mm at the back—creating a stepped fade that delivers symmetrical balance and crisp transitions.
Can you fade without clipper guards?
Yes, you can fade without clipper guards using clipper-over-comb techniques and lever adjustments.
Guardless fading demands steady hand pressure, sharp blades, and careful angle control to create smooth fade transitions across different hair textures.
How do you fade curly or textured hair?
You fade curly or textured hair by starting with guards 0 or 1 at the base, blending upward through 2 to 4, then finishing with careful lever manipulation to soften transitions between curl patterns.
Whats the difference between taper and fade?
A taper gradually shortens hair from the neckline upward with a subtle shift, while a fade blends from very short hair at the bottom to longer hair toward the top with a noticeable gradient.
How long does a fade haircut last?
Like a vinyl record that spins perfectly until dust settles, your fade’s crisp lines soften within two to four weeks as hair regrowth blurs the contrast—faster for skin fades, longer for low tapers requiring less frequent touchups.
Should you fade wet or dry hair?
You should fade dry hair to avoid uneven transitions and breakage. Wet hair risks stretch and inconsistent cutting techniques, while dry fade benefits include predictable styling outcomes and clearer hair moisture levels during clipper guard application.
Conclusion
Most barbers learn fade clipper guard sizes through trial and error, which ironically costs more time than simply mastering the measurements upfront. Your fade’s success depends on understanding that each 1/8 inch increment creates distinct visual effects, not memorizing which number looks coolest.
Guards 0 through 8 provide the foundation, half guards polish the blend, and your clipper’s lever adds the final 20% of adjustment range. Execute the technique correctly once, and muscle memory takes care of the rest.
- https://www.londonschoolofbarbering.com/skin-fade/
- https://judicial.mc.edu/hair-clipper-guard-lengths
- https://silkysmoothbarbers.com/clipper-guard-sizes
- https://www.oreateai.com/blog/how-long-does-a-fade-haircut-last/6ca0d5485608fcc2730dfd359a392d0f
- https://www.tonysbarberbayview.ca/how-often-should-get-fade-haircut-to-maintain-the-style.php