This site is supported by our readers. We may earn a commission, at no cost to you, if you purchase through links. This content is for general informational and educational purposes only and is not a substitute for professional medical, dermatological, or nutritional advice.
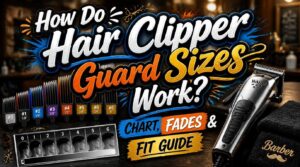
Two guys ask for a "number 2 fade" at the same shop. One walks out clean. The other walks out patchy, guard lines still showing. Same clipper, same setting — different hair, different result.
That’s the part most tutorials skip. Guard sizes aren’t fixed lengths — they’re starting points that shift with hair texture, density, and even how hard you press the clipper against the scalp. A 2 guard on coarse, curly hair cuts differently than on fine, straight hair.
Once you understand how guard numbers, millimeters, and lever position actually interact, you’ll stop guessing and start cutting with intent.
Table Of Contents
- Key Takeaways
- How Do Hair Clipper Guard Sizes Work?
- Hair Clipper Guard Size Chart: Numbers, Millimeters, and Inches
- How The Taper Lever Changes Guard Length
- Choosing The Right Guard Size for Your Haircut
- Clipper Guard Fit, Compatibility, and Cutting Accuracy
- Frequently Asked Questions (FAQs)
- What does 1, 2, 3, 4, 5 mean in haircuts?
- How long is a #4 clipper guard?
- Why don’t barbers like 16 guards?
- Does 5 guard cut more hair than 1 guard?
- How often should clipper blades be sharpened?
- Can you use clippers on wet hair?
- What causes clippers to pull or snag hair?
- Do all guards fit every clipper brand?
- How do you blend different guard lengths smoothly?
- Can you use guards from different clipper brands?
- Conclusion
Key Takeaways
- Guard numbers aren’t fixed lengths—hair texture, density, and clipper pressure all change how much a guard actually cuts, so the same setting can look different on different heads.
- Blade-to-scalp distance, not the number stamped on the guard, is what truly determines cutting length, and a loose or worn guard lets that distance shift mid-cut, causing patchy results.
- The taper lever fine-tunes length without swapping guards—closed tightens for sharp lines, open adds up to 1.5mm for softer blending, and half-open lets you feather edges precisely.
- Guard fit and maintenance matter as much as size: guards are brand-specific and not interchangeable, and dull or dry blades will snag and ruin a cut regardless of the guard you choose.
How Do Hair Clipper Guard Sizes Work?
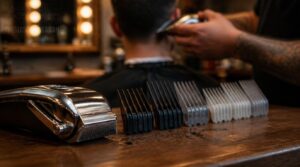
A clipper guard isn’t just a plastic cap — it’s a precision spacer between blade and scalp. Every number stamped on it translates to an exact cutting height, and that number changes everything about your final look. Here’s what’s actually happening each time you snap one on.
Picking the wrong guard length is the most common misstep beginners make, which is why this step-by-step men’s at-home haircut guide walks through matching numbers to your desired style before you make the first pass.
Guard Numbers Explained
Ever wonder why a "2" cuts more hair than a "1" but nobody agrees on exact millimeters? That’s the clipper guard numbering system — lower numbers mean closer cuts, higher numbers mean more length.
Standard increments run roughly:
- Guard 0 — near skin
- Guard 1 — 3mm
- Guard 2 — 6mm
- Guard 4 — 13mm
It’s a convention, not gospel — always test first. Understanding standard guard numbering helps you achieve the desired length for different styles.
Hair Length Control
Numbers don’t cut hair — clearance does. Each guard adds a fixed layer of plastic between blade and scalp, and that gap is what sets your final length.
Numbers don’t cut hair — clearance does, the fixed plastic gap between blade and scalp that sets your final length
Standardized sizing exists so a Guard 2 gets you close to 6mm regardless of who’s holding the clippers. Guard thickness scales up predictably, giving you clean, repeatable hair length increments from one cut to the next.
Blade-To-Scalp Distance
That gap between blade and scalp is the whole game. Blade-to-scalp distance stays constant across a guard’s length, which is why a Guard 2 clears 6mm evenly, edge to edge — no patchy spots.
Loose guards shift that distance mid-cut, causing uneven results. Check fit before every session, and mind contour angles on curves — that’s where distance drifts most.
Closed Vs Open Lever
That taper lever isn’t decoration. Closed tightens blade tension, shrinking the gap for a tighter cut — open loosens it, adding 0.5-1.5mm without swapping guards.
- Feel the confidence of dialing in a perfect fade
- Trust your control over every micro length adjustment
- Avoid the frustration of harsh, visible lines
Master this, and blending and fading becomes second nature.
Why Results Can Vary
Same guard, different results — that’s not a defective clipper, that’s hair texture at work. Coarse or curly hair traps volume under the guard; fine hair sits flatter, cutting shorter.
Manufacturing tolerances run ±0.5mm between guards, blade wear slows cutting speed, and scalp shape plus your own pressure and angle all shift the outcome.
Consistency comes from technique, not just the number stamped on the guard.
Hair Clipper Guard Size Chart: Numbers, Millimeters, and Inches
Numbers only tell half the story until you match them to real measurements. Every guard size converts to a specific millimeter and inch length, and knowing both keeps you from guessing at the chair. Here’s how each range breaks down, from skin-close to scissor-length.
0 to 0.5 Guards
Bald and buzzed live at this end of the chart. A 0 guard leaves 0mm — bare blade, chrome-scalp finish. Half-size steps in at 1.5-2mm, still near-bald but softer.
Since guard numbers shift between brands, it’s worth checking your trimmer’s actual mm output before you commit, especially if you’re chasing a crisp beard neckline shape alongside that close buzz.
| Guard | Length | Best For |
|---|---|---|
| 0 | 0mm | Skin fade baseline |
| 0.5 | 1.5-2mm | Softened near-bald look |
Dull blades cause nicks fast here — keep it sharp, keep skin taut.
1 to 1.5 Guards
One millimeter separates a clean fade from bare skin — that’s the whole story here. 1.0 guard hits 1.5mm, still used in the clipper guard numbering system for tight fade downsides. 1.5 guard adds barely a hair’s width for precision smoothing into longer top hair.
| Guard | Length | Best For |
|---|---|---|
| 1.0 | 1.5mm | Fade baseline |
| 1.5 | 2mm | Smooth connection |
2 to 4 Guards
Now we hit real length. A 2 guard leaves 1.5 to 2.0mm, still tight enough for scalp visibility on thinner heads. Jump to a 4 guard and you’re at 2.5 to 3.5mm — enough bulk reduction for side contrast against a longer top.
| Guard | Length |
|---|---|
| 2 | 1.5-2.0mm |
| 3 | ~2.2mm |
| 4 | 2.5-3.5mm |
Mix between them for smooth edge softening.
5 to 8 Guards
Length increases fast in this range. A 5 guard sits around 1.8mm, while an 8 guard pushes closer to 3.0mm — your go-to for mid-fade transitions and soft blending into longer top sections.
| Guard | Length |
|---|---|
| 5 | 1.8mm |
| 6 | 2.0mm |
| 7 | 2.5mm |
| 8 | 3.0mm |
Precision matters here — small millimeter shifts change the whole haircut length.
Quick Length Conversion Chart
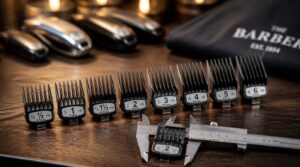
Metric and imperial rarely line up clean, so keep a quick reference tool handy instead of doing math mid-cut.
| Millimeters | Inches |
|---|---|
| 1mm | 0.039" |
| 3mm | 0.118" |
| 6mm | 0.236" |
| 13mm | 0.512" |
| 25mm | 0.984" |
The standard inch millimeter ratio is 25.4mm per inch — memorize that, and every guard size conversion gets easier.
How The Taper Lever Changes Guard Length
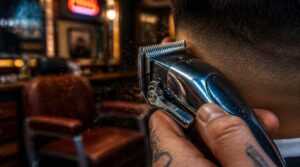
That guard number on the box isn’t the whole story. The taper lever fine-tunes it, adding or shaving off length without swapping attachments. Here’s what each position actually does to your cut.
Lever Closed Position
Push it down and the blade tightens — that’s your blade gap precision control for tight fades. Closed lever means max cutting depth reduction, roughly 1-1.5mm shorter than open.
Use it for:
- Crisp necklines
- Sharp lineups
- Zero-gap edge work technique
- Baseline fade starts
Watch skin sensitivity concerns — blade sits closer to skin, feels aggressive fast.
Lever Open Position
Flip it up and you add lever exposure — roughly 0.5mm to 1mm more blade gap, depending on your clipper model.
That’s your softer pass, used for smooth blending and light edge work without swapping guards. Open versus closed blade comes down to this: closed cuts tight, open eases the line.
Keep pressure light — precision tapering here means control, not speed.
Half-Open Blending
Half-open blending means splitting the difference — lever partway up, exposing roughly 0.5mm to 1.0mm of blade instead of the full open gap.
Use it for micro-blending, not major length change. Practitioners:
- Feather edges instead of jumping guards
- Manage the blending area with small movements
- Adjust based on texture — curly hair hides more
- Eliminate stair steps before they form
Slow lever adjustment, controlled hands.
Fading Between Guard Sizes
Micro-blending gets you feathered edges, but a full fade still runs through the guard sequence — 0.5, 1, 1.5, 2 — each step barely longer than the last. That’s guard sequence logic in action: skin to 0.5, then up, never skipping steps or you’ll cut a harsh line.
Coily hair hides transitions better; fine hair shows every one.
Symmetry check: mirror both sides before moving on.
Half Guards for Precision
Skip the guesswork with halfsize guards — 1.5, 2.5, 3.5 — built for incremental length adjustments between standard sizes on any clipper guard size chart.
Pair them with taper tension for fine blending and subtle fade transitions:
- Cleaner skin fades without harsh lines
- Sharper edge-up confidence
- Fewer callbacks for touch-ups
- Smoother client trust
- Pride in precision cutting
Guard alignment precision separates amateurs from pros.
Choosing The Right Guard Size for Your Haircut

Knowing the numbers is one thing — picking the right one for your head is another. Your hair type, your goals, and the style you’re chasing all change the math. Here’s how to match guard size to the cut you actually want.
Buzz Cut Lengths
A buzz cut isn’t one length — it’s a range, and your guard choice decides where you land.
| Guard | Length | Result |
|---|---|---|
| 0 | 1.5mm | Shortest, near-bald |
| 4 | 12-13mm | Mid-range, balanced |
| 8 | 25mm | Long, textured |
Shorter guards mean more scalp visibility and tighter maintenance schedules — plan trims every 2-4 weeks.
Fade Guard Progressions
Every fade lives or dies on skin zone definition — a clean zero-gap baseline that sets the stage for the gradient above it.
From there, guards climb in overlapping steps:
- Zero to 0.5 at the neckline
- 1 to 1.5 for mid-range blending
- 2 to 3 bridging upward
- Lever micro-adjustments smoothing each jump
- Final light pass tightening stray lines
That gradient overlap is what erases visible lines — sloppy jumps show, blended ones don’t.
Crew Cut Guard Sizes
A crew cut lives on contrast — short sides, longer top, with a clean shift between them. Classic crew proportions run a 4 guard up top against a 1 or 1.5 on the sides.
Check your hair clipper guard size chart before starting. Side-to-top blending at the crown separates a sharp cut from a shaggy one — haircut precision starts right there.
Curly and Coily Hair
Coily and curly hair lies to your clipper guard. What the chart promises isn’t what you’ll see once the hair dries and shrinkage kicks in.
- Coily: size up 1-2 guards
- Curly: expect moderate shrink
- Both: wet-cut for cutting consistency
Detangle gently first — density and fragility mean rough handling breaks strands. Moisturize before cutting; dry, brittle hair pulls instead of cutting clean.
Fine or Thinning Hair
Fine or thinning hair shows scalp fast — the clipper guard size chart doesn’t account for low hair density.
| Hair Type | Guard Risk | Fix |
|---|---|---|
| Fine | Scalp shows at 2 | Size up, soften edges |
| Thinning | Scalp visibility | Avoid tight guards |
| Both | Breakage | Gentle detangling, protein-rich diet |
Skip heavy oils. Volumizing products and careful tapering create fullness without exposing scalp.
Clipper Guard Fit, Compatibility, and Cutting Accuracy
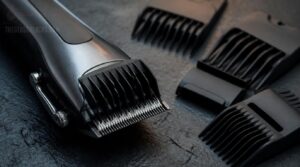
Picking the right guard number only gets you halfway there. Fit matters just as much as size — a loose or mismatched guard ruins a cut faster than the wrong length ever will. Here’s what actually keeps your clippers working the way they’re supposed to.
Brand-Specific Guard Fits
Brand-specific guards aren’t interchangeable — Wahl, Andis, Oster, and Remington each use proprietary attachment geometry, from tab engagement to bottom-notch alignment. Mix brands and you’ll get a wobbly fit, uneven cutting length.
Color-coding adds another wrinkle: one brand’s "2 guard" color won’t match another’s on any hair clipper guard size chart. Always check clipper compatibility before buying — guard material and fit precision depend on matching your specific clipper brand.
Snap-on Vs Magnetic Guards
Once brand match is confirmed, you’ll choose between two attachment styles. A snap-fit mechanism uses tabs and notches — firm click, tactile confirmation, rigid plastic that resists wear. A magnetic guard set attaches faster, single motion, no alignment tabs to check.
Trade-off: magnets drift under heavy hands or near strong magnetic fields. Snap-ons stay locked through side-to-side pressure. Speed versus stability — pick your priority.
Loose Guard Problems
Whichever style you pick, a loose guard ruins the cut. Worn latch notches or damaged locking tabs let the guard shift mid-pass, throwing off your guard number and leaving uneven tracks. Guard slippage risks run higher near ears and necklines — that’s your sign to stop and check the fit.
Cleaning guard sockets removes hair buildup that causes play, but proper attachment force matters too.
Blade Oil and Cleaning
A loose guard isn’t the only thing wrecking your line — a dry blade will too. Use light, low-viscosity clipper oil only, never cooking oils. Brush debris after every cut, then oil before storage.
- One drop per blade, centered
- Run clippers 3 seconds to spread it
- Wipe excess before cutting hair
Sharpen every three to six months.
Beginner Mistakes to Avoid
Most bad haircuts trace back to five habits, not bad tools.
Planning errors — no goal, no timeline — waste sessions before you even pick up clippers. Poor grip technique and uneven pressure control cause gouges. Skipping the hair clipper guard size chart means guessing at guard size conversion. Hygiene lapses and maintenance neglect finish the job — dirty, dry blades ruin blending and fading every time.
Frequently Asked Questions (FAQs)
What does 1, 2, 3, 4, 5 mean in haircuts?
Simple, standard guard numbering system — each digit is a fixed length step, not a guess. A 1 leaves 3 mm, a 5 leaves roughly 16 mm, and that guard size conversion holds true across most standard buzz cut variations.
How long is a #4 clipper guard?
A #4 guard cuts hair to 12–13mm (1/2 inch) — the go-to standard guard number for classic buzz cuts and medium length styles with real texture on top, blending smoothly into shorter guards for a clean fade.
Why don’t barbers like 16 guards?
Truth is, that number’s a social media myth — no clipper company makes one. Real guard sizes cap around Barbers stick to proven fade blending technique and honest client expectation management instead of chasing gimmick lengths.
Does 5 guard cut more hair than 1 guard?
Yes — a 5 guard cuts closer, leaving 5mm versus 3mm from a 1 guard. That’s more scalp visibility, sharper contrast, and faster-showing regrowth. On the clipper guard size chart, that half-step makes a real difference.
How often should clipper blades be sharpened?
Sharpen every three to six months with regular use — heavy daily pros need it every six to eight weeks. Blades tugging instead of slicing cleanly? That’s your sign they’re dull, regardless of hair density or clipper adjustment routine.
Can you use clippers on wet hair?
Skip it — clippers and trimmers aren’t built for soaked hair. Moisture drag strains the motor, throws off your hair clipper guard size chart accuracy, and raises electric shock risks. Cut dry, or towel-dry damp hair first, then oil blades after to prevent rust.
What causes clippers to pull or snag hair?
Blades don’t "snag" for no reason — they’re cutting corners, literally. A dull blade drags instead of slicing, poor lubrication builds friction, misaligned guards trap hair, and coarse or overheated setups make every pull worse.
Do all guards fit every clipper brand?
No — brand-specific attachment is the rule, not the exception. Wahl guards click onto Wahl clippers, not Andis or BaByliss. Snap-on vs magnetic mounts differ by design, and forcing a mismatch causes guard wobble, uneven cuts, or blade damage.
How do you blend different guard lengths smoothly?
Work down in sequential guard steps—4 to 3 to 2—using overlapping passes at each junction. Micro-adjust the lever, follow head contours, and check symmetry from both sides. Half-guards smooth harsh lines during any taper fade.
Can you use guards from different clipper brands?
Rarely — treat guard attachment compatibility like phone chargers.
Cross-brand safety matters: mismatched fits risk blade wear, wobble, and jamming.
Universal guard myths aside, cross-brand use often voids warranties, so stick with brand-specific guards for reliable clipper guard sizes.
Conclusion
Numbers guide you. Millimeters confirm you. Lever position refines you. That’s how hair clipper guard sizes work — three variables working together, not one number doing the job alone.
Master the relationship between guard, blade distance, and hair texture, and you’ll cut with precision instead of guesswork. A guard is a starting point, not a guarantee. Know your hair, adjust your lever, trust your hands — that’s the real skill behind every clean fade.