This site is supported by our readers. We may earn a commission, at no cost to you, if you purchase through links. This content is for general informational and educational purposes only and is not a substitute for professional medical, dermatological, or nutritional advice.
Foil highlights have one major flaw: that telltale line of demarcation that announces your last salon visit to the world. Hair painting highlighting techniques fix that by working with your hair’s natural growth pattern instead of against it, layering lightener freehand so the root zone melts seamlessly into lifted ends.
The result isn’t just subtler, it’s smarter. A well-executed balayage or foilyage can hold strong for 8 to 12 weeks before regrowth becomes noticeable, and the right technique for your specific hair type makes all the difference between a lived-in masterpiece and a muddy blur.
Here’s everything you need to get it right.
Table Of Contents
- Key Takeaways
- What is Hair Painting Highlighting, and How Does It Differ From Foil Highlights?
- Hair Painting Techniques Explained: Balayage, Foilyage, Ombré, and More
- Step-by-Step Hair Painting Highlighting Tutorial
- How to Choose The Right Hair Painting Technique for Your Hair Type, Color, and Goals
- Hair Painting Cost, Longevity, Touch-Up Schedule, and Color-Safe Aftercare
- Frequently Asked Questions (FAQs)
- What are the different techniques for highlighting hair?
- What are common highlighting mistakes to avoid?
- What is a peekaboo highlight?
- What are some tips for highlighting effectively?
- What maintenance products work best for painted highlights?
- Can hair painting damage chemically treated hair?
- How much does professional hair painting typically cost?
- Which hair painting works best for gray coverage?
- Can you do hair painting on previously colored hair?
- Can hair painting techniques be safely reversed or removed?
- Conclusion
Key Takeaways
- Hair painting techniques like balayage and foilyage work freehand with your hair’s natural growth pattern, eliminating the harsh root lines that foil highlights leave behind.
- Choosing the right technique depends on your specific hair type, porosity, base color, and maintenance goals — there’s no one-size-fits-all approach.
- Painted color typically lasts 8–12 weeks before regrowth becomes noticeable, making it significantly lower-maintenance than traditional foil methods.
- Aftercare is what protects your investment: cold rinses, sulfate-free shampoo, UV protection, and toner refreshes every 2–4 weeks are what keep painted color looking fresh.
What is Hair Painting Highlighting, and How Does It Differ From Foil Highlights?
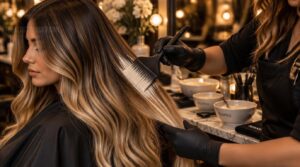
Set aside everything you think you know about highlights. Hair painting highlighting techniques work differently from the start, using a brush to sweep lightener directly onto the hair, no foil, no barriers, just pure instinct and control. You’re not working in sections; you’re reading the hair and responding to it.
This hands-on artistry is at the heart of balayage hair coloring techniques, where the goal is always a seamless, natural-looking result that mimics how sunlight naturally falls on hair.
Freehand brushwork lets you decide exactly where light lands. That’s the whole point: color placement that looks like the sun did it, not a stylist working from a grid.
Freehand brushwork places light exactly where the sun would—never where a grid demands
Traditional foil methods trap heat to push lift harder and faster, giving you predictable, consistent results, but also those telltale lines at the roots. Soft regrowth is hair painting’s signature, blending out so gradually you barely notice when it’s growing in.
For a closer look at how these two approaches compare side by side, balayage vs. foil highlights: key differences breaks down exactly why that lived-in regrowth feels so effortless compared to the sharper demarcation foils leave behind.
Hair Painting Techniques Explained: Balayage, Foilyage, Ombré, and More
Hair painting isn’t one technique—it’s an entire world of methods, and knowing your toolkit is what separates average results from the kind clients can’t stop talking about. Every technique you’re about to see has its own purpose, its own personality, and its own sweet spot. Let’s break them all down.
Balayage and Foilyage
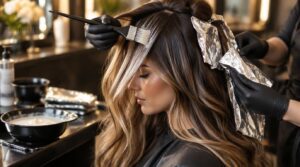
While balayage sweeps color freehand for a seamlessly blended glow, foilyage seals those painted sections in foil for faster, brighter lift. Both are handpainted hair color techniques, but they hit differently:
- Balayage: softer regrowth, multidimensional depth, low-maintenance magic
- Foilyage: higher-contrast, cleaner lift, punchier highlights
- Both rely on the freehand color painting technique at heart
Know your base. Choose your drama.
Teasylights and AirTouch
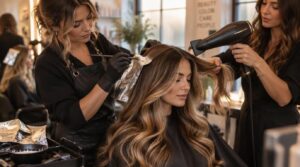
Want softer still? Teasylights use freehand brushwork on fine, diagonal crown slices, creating dispersed, natural highlights with no perimeter density. It’s one of the hair painting highlighting techniques built for subtle precision.
AirTouch goes further: air sweeps hair aside during color placement, concentrating lightener into larger blended panels. It grows out seamlessly, making it perfect for medium or long hair.
Babylights and Strandlights
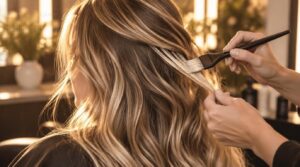
Babylights are basically the ultrafine strands revolution for anyone chasing a genuine sunkissed look. You’re weaving 6 to 12 foil-free highlights per section, all sitting between root and mid-shaft, giving hair that luminous overall glow.
Pricing varies widely based on hair length and salon, so checking a babylights cost breakdown and highlight pricing guide helps you budget realistically before booking.
Strandlights isolate individual strands for sharper sparkle points. Freehand brushwork powers both of these hair painting highlighting techniques, mimicking natural sun exposure with pinpoint control.
Ombré, Sombré, Shadow Roots
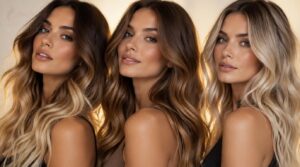
Although they share DNA, ombré, sombré, and shadow roots each hit very differently.
Ombré’s gradual color mix starts 2–4 inches from the root, punching contrast hard at mid-lengths. Sombré keeps things whisper-soft, lifting only 2–3 levels for a barely-there gradient.
Shadow root color placement deepens the scalp zone so your grow-out looks completely intentional every time.
Pick your drama level.
Face-Framing and Creative Placement
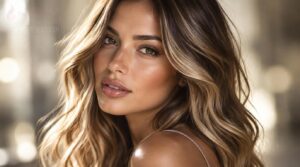
Sculpting light directly onto the strands framing your face is what faceframing highlights do best. This faceframing coloring technique uses freehand painting hair near temples and jawline for targeted brightness.
- Diagonal lighter sweeps near temples for a sunkissed hair look
- Varied color placement at mid-lengths adds real depth
- Soft transitions along cheekbone contours
- Micro-stripes and painterly framing around the jawline
Step-by-Step Hair Painting Highlighting Tutorial
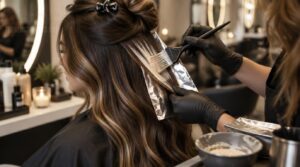
Ready to make the magic happen? This tutorial walks you through every critical step—from prepping your tools to that final toning rinse—so you’re not guessing when it matters most. Here’s exactly what you need to do.
Tools, Testing, and Preparation
Your tools set the tone for everything. Oil-based applicators and curling color brushes deliver the most controlled strokes, while clean mixing bowls keep your formula uncontaminated.
Before you touch a single strand, do a patch test 24 to 48 hours out and record the reaction. A quick strand test then calibrates saturation time and flags porosity issues before full application.
Sectioning for Even Placement
Imagine you’re mid-balayage and you notice your sections have drifted wider toward the nape. That’s the nightmare sectioning precision prevents.
Map 1–2 cm panels from temple to crown, then take parallel sections toward the nape. Diagonal or zigzag parting hides density lines. A consistent horizontal baseline keeps your color mapping tight so every strand catches light exactly where you planned.
Freehand Painting and Saturation
This is where your artistry really takes over. Using a brush, comb, or gloved fingers, you’re placing color with intentional pressure mapping, sweeping lighter near the root and building saturation toward the ends.
No foil barriers means natural diffusion, so your freehand highlighting reads sun-kissed, not salon-obvious. Multiple light passes keep your color placement controlled and the result genuinely dimensional.
Rinsing, Toning, and Finishing
This is where everything lands. Toner application neutralizes unwanted warmth, so don’t rush it. Process fully 10 to 20 minutes, then rinse with cool water only.
- Cool water rinse seals the cuticle and locks tone
- Toner corrects brassiness and refines your final color result
- Sulfate-free shampoo maintains color retention wash after wash
- Leave-in conditioner keeps hair moisture retention and shine
How to Choose The Right Hair Painting Technique for Your Hair Type, Color, and Goals
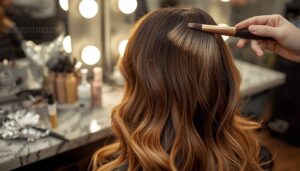
Choosing the right technique isn’t guesswork — it’s a suited decision that starts with knowing exactly what you’re working with. Your hair type, base color, and lifestyle all shape which method will give you the most jaw-dropping results. Walk through these six factors before you book that appointment.
Assess Hair Type
Knowledge of your hair texture and color is the real key here. Hair porosity analysis shows how fast your pigment absorbs, and your sectioning strategy follows your curl pattern.
| Hair Type | Hair Porosity | Sectioning Strategy |
|---|---|---|
| Type 1 Straight | Low | Long panels |
| Type 2 Wavy | Medium | Diagonal bricks |
| Type 3 Curly | High | Zigzag sections |
| Type 4 Coily | Very High | Micro layers |
Consider Base Color
Your base is your blueprint. Cooler bases pull ash naturally; warmer ones always favor gold. Your custom color story depends entirely on this:
- Deep bases, levels 1-4: Hair lightening techniques need serious lift; consider traditional foil methods.
- Mid bases, levels 5-7: Prime for color blending and natural hair dimension.
- Light bases, levels 8-10: Toning honestly does the heavy lifting here.
Define Color Goals
Once you know your base, your color goals get specific fast. During your hair color consultation, lock in two things: how many levels lighter you want, and whether you’re going warm or cool.
Your custom color story lives here. Want dimensional hair color across the full head, or targeted brightness? Your hair texture and color longevity both shape the direction.
Compare Technique Options
With your goals locked in, you can match them to a technique. Want soft, gradual dimension? Freehand application methods like balayage deliver that effortlessly. Chasing serious lift with defined contrast? The foil and balayage combo of foilyage gets you there faster. Either way, having the right hair foiling and balayage tools on hand makes all the difference between a clean result and a messy one.
Fine hair responds beautifully to babylights, while handpaint highlights like AirTouch keep root lines nearly invisible and transitions smooth.
Plan Maintenance Needs
Maintenance is where low maintenance hair color earns its legendary reputation, but hair color maintenance still needs a solid plan working in your favor.
Regrowth management is practically a breeze with painted techniques since there’s no harsh root line to hide. Rebook every 6 to 12 weeks to keep your sunkissed effect fresh, and use color-safe products to extend color longevity.
Set Your Budget
Most colorists blow their margins before they ever mix a bowl, so let’s fix that. Budget like a boss:
- Cap hair painting at 20% of the total bill
- Reserve 15–25% for premium lightener and foils
- Build a 10–15% contingency buffer for corrective work
During your hair color consultation, target 2–4 sessions yearly. Track everything, protect your 40–55% net margin, and watch your salon hair color trends pay off.
Hair Painting Cost, Longevity, Touch-Up Schedule, and Color-Safe Aftercare
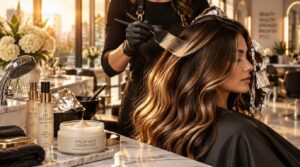
Roughly 60% of clients underestimate what hair color maintenance actually costs long-term, and that surprise is completely avoidable. A full hair painting session generally runs $150 to $350, depending on your hair length and your stylist’s experience level.
The good news? Lowmaintenance balayage genuinely earns that label. Painted color holds strong for 8 to 12 weeks before noticeable regrowth kicks in, so you’re not chasing touchups every single month.
Toning is the wildcard here. Your toner shifts in 2 to 4 weeks, so schedule a gloss refresh around that window to keep undertones clean. Colorsafe hair care absolutely matters: daily washing accelerates color fading by up to 40%. Rinse cold, skip the sulfates, and shield your hair from UV exposure.
Frequently Asked Questions (FAQs)
What are the different techniques for highlighting hair?
You’ve got balayage, foilyage, babylights, teasylights, AirTouch, ombré, sombré, and face-framing highlights. Each of these hair painting techniques uses a distinct freehand application method to control exactly where light, dimension, and depth hit your hair.
What are common highlighting mistakes to avoid?
Uneven saturation near the ends creates ugly banding. Stack foils at the roots and you’re begging for harsh lines. Under-processing kills color vibrancy; over-processing damages hair fast and lands you in professional color correction territory.
What is a peekaboo highlight?
Think of Peekaboo Highlights as your hair’s best-kept secret: a color placement strategy that tucks vivid, contrasting tones beneath your top layer, so you get a flash of hidden dimension every time your hair moves.
If you’re weighing a salon visit against a box dye, browsing these vibrant hair color styles first can help you pick a shade worth the investment.
What are some tips for highlighting effectively?
The idea that more lightener always equals better results? Not quite. Control your saturation with a tail comb, carefully test a strand every ten minutes, and let your application brush feather each section out cleanly.
What maintenance products work best for painted highlights?
Surprise: your highlights don’t maintain themselves. Sulfate-free shampoos preserve tone without stripping pigment, while deep conditioning masks weekly rebuild bonds. Add UV protection as a leave-in to stop color fading and prevent serious hair damage.
Can hair painting damage chemically treated hair?
Picture bleach rushing into already-porous strands like water into a dry sponge. On chemically processed hair, bleach application hits harder and faster, multiplying breakage risk. Always strand-test first, then tone carefully to lock in results.
How much does professional hair painting typically cost?
Hate to break it to you, but professional hair painting isn’t one flat rate. Expect between $150 and $550 for salon hair treatments, with hair length, technique complexity, and your colorist’s experience shifting that cost.
Which hair painting works best for gray coverage?
For gray blending techniques, balayage is your strongest pick. Its freehand application methods create softer regrowth lines, letting silver melt naturally. Denser gray? Teasylights target fine sections right around existing strands without any harsh contrast.
Can you do hair painting on previously colored hair?
Yes, you can absolutely hair paint over previously colored hair. Strand testing first keeps the hair lightening process safe, and bond-building additives protect against damage while helping you hit beautiful natural-looking highlights every single time.
Can hair painting techniques be safely reversed or removed?
Want to walk back your highlights? Once the hair lightening process lifts your pigment, true reversal isn’t possible. Chemical hair processing permanently alters your cuticle, so toning and color correction are your only realistic options.
Conclusion
Picture your hair catching golden afternoon light, color melting seamlessly from root to tip without a single telltale line. You’ve got hair painting highlighting techniques explained from every angle right here. Now put it to work.
Choose the approach that genuinely fits your hair type, commit to your aftercare routine, and trust the process every single time. Beautiful, lived-in color isn’t a lucky accident. It’s precision, patience, and a solid plan you actually stick to.