This site is supported by our readers. We may earn a commission, at no cost to you, if you purchase through links.

You just spent hours bleaching your hair to flawlessness, only to see brassy orange tones staring back at you from the mirror. That’s where toner swoops in to save the day—but leave it on too long, and you’ll swap brassiness for an ashy disaster.
The difference between salon-worthy color and a toning catastrophe often comes down to just a few minutes. Hair porosity, your starting shade, and the type of toner you’re using all play key roles in determining your ideal processing time.
Most toners need anywhere from 5 to 45 minutes to work their magic, but knowing exactly when to rinse requires understanding your unique hair situation. Getting the timing right means you’ll neutralize unwanted warm tones without overshooting into muddy, dull territory.
Table Of Contents
- Key Takeaways
- What is Hair Toner and Its Purpose
- When Should You Use Hair Toner
- Choosing The Right Toner for Your Hair
- Factors Affecting Toner Processing Time
- How Long to Leave Toner in Hair
- Step-by-Step Toner Application Guide
- What Happens if Toner is Left Too Long
- Aftercare for Toned Hair
- Maintaining Toned Hair Color
- Top 7 Products for Post-Toning Care
- Frequently Asked Questions (FAQs)
- Can I leave toner in my hair overnight for better results?
- Is it necessary to use a developer with toner?
- Can I tone hair without bleaching first?
- Does toner work on naturally dark hair?
- Can I sleep with toner in overnight?
- Will toner cover my gray roots completely?
- Can I mix different toner shades together?
- Conclusion
Key Takeaways
- Most toners need 5 to 45 minutes to neutralize brassy tones, but your exact timing depends on hair porosity, starting lightness level, and the specific toner formula you’re using—highly porous bleached hair grabs color faster than low-porosity strands.
- Leaving toner in too long causes serious damage like dryness, breakage, unwanted ashy overtones, and uneven color results, so set a timer and check your hair every 5 to 10 minutes instead of guessing when it’s ready.
- The right toner shade depends on your current color—purple or silver toners neutralize yellow in blonde hair, blue toners kick out orange in warm brunettes, and violet-based formulas cool down copper undertones in darker hair.
- After toning, rinse with lukewarm water followed by a cool final rinse to seal the cuticle, then immediately apply a color-safe conditioner and deep condition weekly to lock in your fresh color and prevent rapid fading.
What is Hair Toner and Its Purpose
Hair toner is a color-correcting product that adjusts and refines your hair’s tone after bleaching or dyeing. It works by neutralizing unwanted warm tones—think brassy yellows or oranges—to give you that fresh, salon-perfect finish.
Let’s break down exactly how toner works, what types are available, and why it’s become a must-have in your hair color toolkit.
How Toner Works in Hair
Hair toner works by depositing pigmented molecules onto your hair cortex, where they interact with underlying tones to neutralize unwanted hues. Think of it as color correction chemistry in action! Violet or blue toner formulations counteract brassy yellow shades through strategic pigment diffusion.
Your hair porosity—how open those cuticles are—determines how quickly toning hair absorbs these corrective pigments, especially on bleached hair.
Types of Hair Toners
You’ll encounter several toner formulas when color-correcting: demi-permanent options progressively fade with washing, while semi-permanent versions coat your cortex temporarily. Direct-dye toners deposit color without developer ratios, perfect for quick fixes. Pigment-based choices—violet, blue, or silver—target specific brassiness levels.
Professional salon toners allow custom blending, whereas at-home hair toner application offers pre-mixed convenience. Each toner strength affects how long you’ll leave it processing during hair toner application.
Benefits of Using Hair Toner
Once you’ve chosen your toner formulations, you’ll access serious color-correcting benefits. Here’s what toning delivers:
- Neutralizes unwanted warmth – Say goodbye to orange or yellow brassiness after bleaching
- Boosts hair shine – Sealed cuticles reflect light evenly, creating that glossy finish
- Maintains hair color – Extends time between salon visits by reviving faded tones
- Maintains moisture balance – Conditioning agents in hair toner application help prevent dryness
- Minimizes damage repair needs – Fewer full-color sessions mean less chemical exposure overall
When Should You Use Hair Toner

Timing matters regarding toner, but knowing when to use it in the first place makes all the difference. You don’t need toner every time you wash your hair—it’s a strategic step for specific situations.
Let’s look at the three key moments when toner becomes your hair’s best friend.
After Bleaching or Dyeing
Right after you bleach or dye, your hair’s practically begging for toner. That’s when color correction works best. You’ll want to apply toner within 24-48 hours of bleaching for ideal bleach recovery.
Your hair porosity is at its peak after lightening, so toner application grabs onto those strands faster. Just remember: bleached hair processes quicker than virgin hair, so watch your toner timing closely to nail those toning techniques.
Neutralizing Brassiness
Notice those unwanted yellow or orange tones creeping in? That’s brassiness, and toner is your weapon for color neutralization. Violet toning targets yellow undertones, while blue-based toner formulas tackle orange hues in bleached hair.
Your hair’s porosity effects how fast pigment grabs—higher porosity means faster color correction. Apply your color-correcting hair toner when you spot warmth sneaking back, usually every 6-8 weeks for brassiness correction that actually sticks.
Enhancing Natural Hair Color
Your natural color gets a major upgrade with the right toner application. Demi-permanent formulas deposit subtle pigments that amplify hair shine and improve hair reflectivity without drastically changing your base.
These color-correcting toners neutralize unwanted warmth, creating better color balance that lasts 2-6 weeks. Think of toner effects as a filter for your hair—boosting dimension and vibrancy through strategic hair color maintenance without harsh lightening.
Choosing The Right Toner for Your Hair

Picking the right toner isn’t about guessing—it’s about knowing what your hair actually needs. The shade you choose depends on your current color, your hair’s lightness level, and whether you’re going pro or DIY.
Let’s break down how to match the perfect toner to your unique hair situation.
Selecting Toner by Hair Color
Your hair color determines which toner shade you need for perfect color correction.
If you’re rocking bleached hair or blonde, reach for purple or silver toner to kick yellow tones to the curb.
Got warm brunette vibes? Blue toner’s your best friend for neutralizing orange brassiness.
Dark hair? Violet-based formulas cool down copper undertones beautifully.
Always match your toner to your current base—that’s the secret to gorgeous, salon-worthy results!
Matching Toner to Hair Level
Think of hair level charts as your roadmap—they guide you from brassy to beautiful using the right toner formulas for your base lightness. Here’s how color correction works:
- Level 9-10 (ultra-light): Use violet or ash toners with shorter processing times (5-15 minutes) to neutralize yellow without over-depositing on bleached hair.
- Level 7-8 (medium-light): Apply violet-based formulas for 15-25 minutes to combat yellowing while preventing gray overtones.
- Porosity testing matters: High-porosity strands grab toner faster, so adjust your toner ratio and timing accordingly!
Professional Vs. At-Home Toners
Salon toners and at-home toner formulas aren’t created equal—and that’s vital for color accuracy! Professional colorists use higher-strength developers and customize ratios for precise color-correcting, while DIY risks include uneven toner application and unpredictable results. Here’s what separates them:
| Feature | Salon Toner | At-Home Toner |
|---|---|---|
| Customization | Custom formulas | Pre-mixed options |
| Strength | Higher purity | Gentler formulas |
| Salon Experience | Expert application | Self-guided process |
Choose based on your hair’s condition and toner safety needs!
Factors Affecting Toner Processing Time

Toner doesn’t work the same way on everyone’s hair—what takes 10 minutes on your friend might need 30 on yours. The timing depends on several factors that affect how quickly the toner deposits color and neutralizes those unwanted tones.
Let’s break down the three main things that’ll determine how long you should leave toner in your hair.
Hair Porosity and Texture
Your hair’s porosity and texture are like fingerprints—totally unique and game-changing for toner timing! Understanding these factors protects you from hair damage and keeps your hair health on point.
Here’s what affects how toner penetrates your cortex:
- Hair cuticle condition determines moisture balance and how quickly your strands absorb product
- Porosity tests reveal if you have low, medium, or high porosity hair
- Texture analysis shows whether your fine, medium, or coarse fibers need adjusted processing times
- Cortex penetration varies based on cuticle structure, affecting hair toner distribution
Hair Color and Lightness Level
Your starting lightness level—measured on a 1 to 10 scale—is everything regarding toner timing. Melanin distribution and hair pigmentation determine how much brass you’re battling, so level 7 brunettes need more processing time than level 10 blondes.
Color theory proves that tonal balance depends on achieving the right lightness scale before you even think about color-correcting those unwanted tones!
Type of Toner Used
Once you’ve nailed your lightness level, the toner formula itself dictates timing—and not all toners play by the same rules!
Here’s how different toner ingredients affect your processing clock:
- Violet toner for blonde shades counters warmth in 10–20 minutes
- Ash toner deposits cool tones, usually needing 15–30 minutes
- Demi toner formulas penetrate deeper, requiring 20–45 minutes
- Semi toner sits on the cuticle, often processing in 5–20 minutes
- Purple-based color-correcting formulas work fastest on porous hair
Your toner application timing depends entirely on these hair toning techniques—so check that bottle!
How Long to Leave Toner in Hair
Timing is everything for toner—leave it on too short and you won’t see results, leave it on too long and you risk damaging your hair. The sweet spot usually falls somewhere between 5 and 45 minutes, depending on what you’re working with.
Let’s break down exactly how long you should leave toner in your hair based on the type you’re using and what signs tell you it’s time to rinse.
Average Processing Times (5-45 Minutes)
Most toner applications work their magic in 10 to 20 minutes, though the full processing time window spans 5 to 45 minutes depending on your hair’s starting level and the specific product you’re using.
Hair porosity plays a huge role here—highly porous hair grabs color faster, while low-porosity strands need extra time.
During the hair toning process, always check your progress every 5 to 10 minutes for perfect color correction without over-processing.
Guidelines for Different Toner Types
Different toner formulations need different timing strategies. Deposit toners work faster—think 5 to 15 minutes—since they’re just adding pigment without lifting.
On-scalp toners that interact with developer usually need 20 to 30 minutes for proper color correction.
Your hair toner application guide should specify whether you’re working with demi-permanent formulas (which fade over 4 to 12 washes) or permanent options requiring careful toning time management.
Signs Toner is Ready to Rinse
Saturation tells you everything—when your hair shifts from brassy to that cool, even tone you’re after, it’s rinse-ready. Check every 5 to 10 minutes during processing time to catch the sweet spot. High hair porosity means faster color shift, while denser strands need patience.
Your hair toner application should show a uniform tone without patchiness. Trust your eyes: if the color-correcting looks complete and toning time feels right, go rinse.
Step-by-Step Toner Application Guide
Applying toner isn’t rocket science, but getting it right takes a little know-how and preparation. You’ll want to follow a clear process to avoid uneven color or damage to your hair.
Let’s walk through each step so you can tone with confidence and get the results you’re after.
Preparing Hair for Toner

Before you even crack open that toner bottle, let’s talk hair priming—it’s your secret weapon for color correction success. Start with a thorough shampoo to strip away oils and buildup that block toner absorption.
Dry your hair completely, then assess your hair porosity with a quick strand test. This tells you how fast your strands will grab pigment, helping you nail damage prevention and timing!
Mixing Toner and Developer

With your non-metallic bowl ready, it’s time to master those color formulas! Most toner systems need a 1:2 toner ratio—one part toner to two parts developer.
Here’s your mixing roadmap:
- Choose 10 or 20 volume developer types based on your oxidation levels
- Blend thoroughly with a brush to avoid contamination
- Apply immediately after mixing for predictable hair color results
- Run a strand test first to verify your color-correcting timing!
Even Application Techniques

Applying toner like a pro means working smarter, not harder! Sectioning hair into four to eight segments guarantees smooth toner distribution from root to ends. Here’s your technique breakdown:
| Step | Technique | Why It Works |
|---|---|---|
| Section | Divide into 4-8 parts | Controls toner application flow |
| Tools | Use gloves + tint brush | Prevents uneven color correcting |
| Method | Start roots to mid-lengths | Minimizes hot spots |
| Secure | Clip each section | Maintains consistent contact |
| Sync | Apply within the same timeframe | Ensures uniform hair toning |
This systematic approach to hair care delivers salon-quality results every time!
Monitoring Development Time

Tracking your toner’s development phases is like watching magic unfold—but timing is everything! Color shift happens fast on lightened hair, so stay alert during those critical processing intervals.
- Set a timer and check your toner application every 5 minutes for perfect tonal balance
- Strand test small sections to catch the exact moment your color-correcting developer hits your target shade
- Watch for uniform coolness across all hair—that’s when your hair toner’s done its job
- Never exceed 45 minutes to avoid over-toning disasters during hair dyeing sessions
What Happens if Toner is Left Too Long

Leaving toner in your hair too long can turn a quick fix into a real problem. Your hair might end up over-processed, damaged, or even the wrong color—nobody wants that.
Let’s break down what can go wrong, how to spot it, and what you can do to fix it.
Risks of Over-Toning
Leave toner on too long, and you’re asking for trouble. Over-toning can strip moisture from your strands, leading to dryness and breakage—especially if your hair’s already high in porosity.
Over-toning strips moisture and causes breakage, especially in porous hair already vulnerable to dryness
You might also see unwanted purple or blue overtones with ash formulas, plus uneven color results due to porosity issues.
Repeated toner overuse weakens cuticles, causing frizz and split ends that no amount of color-correcting can fix.
Identifying Over-Processed Hair
So how do you know if your hair’s suffered from toner overload? Watch for excessive hair breakage and split ends—your hair literally snaps when you comb through it. You’ll notice dryness, a straw-like texture, and tangling that wasn’t there before.
Color damage shows up as uneven tones or unexpected shade changes, while scalp irritation signals chemicals penetrated too deep. These warning signs mean it’s time for serious hair restoration.
How to Fix Over-Toned Hair
Don’t panic—over-toned hair can be fixed! Start with a clarifying shampoo to strip excess pigment, or try a color-correcting toner in a warmer shade (think peach or gold) to neutralize those unwanted cool tones. Always do a strand test first to avoid making things worse.
For serious damage control, book a professional color correction appointment—they’ll rebalance your hair color safely without further toner removal disasters.
Aftercare for Toned Hair

You’ve just finished toning your hair, and now the real work begins. What you do in the next 48 hours can make or break your results, so don’t skip these essential steps.
Let’s walk through exactly how to rinse out toner and restore moisture to keep your color looking fresh and your hair feeling healthy.
Washing Out Toner Properly
After toner application finishes, you’re ready to rinse—but how you do it matters for color preservation. Start with lukewarm water for two to five minutes, letting the toner release gently without shocking your hair. A cool final rinse seals the cuticle and locks in those precious pigments.
Skip the clarifying shampoo right now—it’ll strip your fresh toner faster than you can say “brassy.” If you must cleanse, use a sulfate-free, color-safe option with minimal scrubbing.
Hair porosity plays a role here too: higher porosity means gentler handling during rinse techniques to prevent rapid pigment loss.
Using Conditioner and Deep Treatments
Once your toner’s rinsed clean, conditioner becomes your color preservation best friend. Toning strips moisture—so you’ll want to apply a color-safe conditioner immediately after that final rinse to restore hair hydration and smooth down the cuticle. This isn’t optional; it’s hair maintenance 101 for toner longevity.
Deep conditioning once a week keeps your tone vibrant and bolsters overall hair health. Look for protein-rich formulas or ceramide-infused masks that rebuild structure without weighing down fine strands. Proper hair treatment now means your fresh color sticks around longer, and your hair care routine stays simpler between salon visits.
Maintaining Toned Hair Color

Your toner looks perfect right now, but keeping it that way takes a bit of strategy. The color won’t last forever on its own—it fades gradually and needs some help from you.
Let’s talk about how often you’ll need touch-ups, which products actually protect your investment, and the simple habits that keep brassiness from creeping back in.
How Often to Re-Tone
Your re-tone schedules depend on how fast your color shifts. Most dyed or bleached hair needs toning every 4 to 6 weeks to keep brassiness in check, but porous hair? You might be back in that chair every 2 to 4 weeks.
Watch for faded toner after washing and heat styling—that’s your cue. Consistency in your toning intervals and hair regimen prevents over-toning and keeps your color maintenance game strong.
Color-Safe Shampoos and Conditioners
Your toner investment deserves the right backup. Sulfate-free formulas protect that freshly toned color by gentle cleansing without stripping pigment, while pH-balanced conditioners lock in moisture retention and maintain cuticle integrity.
Here’s your color protection arsenal:
- UV defense conditioners shield against sun-induced fading
- Protein-enriched shampoos reinforce damaged strands post-color treatment
- Silicone-free options prevent buildup that dulls your tone
- Bonding technologies safeguard melanin-bound hair proteins during every wash
Smart hair care means longevity.
Protecting Hair From Fading
Vigilance is your color’s best friend. UV exposure accelerates pigment breakdown by 30-40%, so apply UV protection sprays before heading outdoors.
Heat styling oxidizes color molecules—always use thermal protectant. Skip daily washing with harsh sulfates that roughen cuticles and leach toner.
Instead, choose color-safe formulas and seal with leave-in oils to lock pigment inside. Smart hair shielding means your toner lasts weeks longer.
Top 7 Products for Post-Toning Care
Your toner’s done its job, but now your hair needs some serious TLC to lock in that color and keep it looking fresh. The right products make all the difference between toner that fades in a week and color that sticks around for months.
Here are seven post-toning must-haves that’ll help you maintain your newly perfected shade.
1. Davines Replumping Hair Conditioner
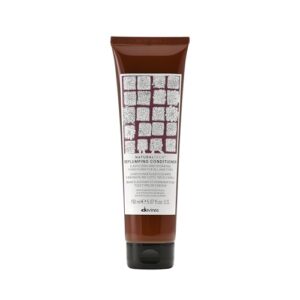
After you’ve toned your hair, restoring moisture balance becomes your top priority. Davines Replumping Hair Conditioner works like a dream for post-hair toning care, focusing on hair replumping and improving hair elasticity in fragile strands. This conditioner handles hair detangling while protecting against breakage—exactly what toned hair needs!
The product ingredients include their signature Replumping Complex, which helps restore fullness without weighing your hair down. Yes, it’s pricey at $40 for 5.07 ounces, but salon-quality hair care tips often start with investing in quality aftercare products that truly deliver results.
| Best For | People with fine, thinning, or brittle hair who want to restore elasticity and moisture after treatments like toning, especially if they’re willing to invest in salon-quality care. |
|---|---|
| Brand | Davines |
| Form | Cream |
| Size | 5.07 fl oz |
| Hair Type | All hair types |
| Price Range | $40.00 |
| Special Formula | Gluten Free |
| Additional Features |
|
- Improves hair elasticity and helps detangle while preventing breakage—perfect for fragile, color-treated hair
- Lightweight formula adds body and shine without weighing hair down or leaving it greasy
- Works well for all hair types and leaves a pleasant scent that lasts
- Expensive at $40 for just over 5 ounces, which adds up quickly for regular use
- Small bottle size means it won’t last long, especially for people with longer or thicker hair
- Some users find it doesn’t provide enough slip for easy detangling compared to other conditioners
2. Jerome Russell Silver Toner Cream
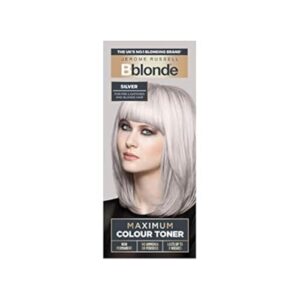
Ever wished your blonde could skip the brass and go straight to cool? Jerome Russell Silver Toner Cream is your secret weapon for Silver Toning and Hair Correction.
This creamy color-correcting tube neutralizes stubborn yellow or orange streaks, giving your hair that fresh, salon-finish Color Enhancement.
For Toner Application, mix as directed, apply evenly, and watch those brassy tones fade. Toner Maintenance is a breeze—just follow up with a color-safe conditioner to keep your hair toner results vibrant and your strands feeling silky.
| Best For | Anyone with blonde, silver, or lightened hair who wants to neutralize yellow or orange brassy tones and maintain a cool, salon-fresh color. |
|---|---|
| Brand | Jerome Russell |
| Form | Cream |
| Size | 75ml |
| Hair Type | Blonde hair |
| Price Range | Budget-friendly |
| Special Formula | Tone correction |
| Additional Features |
|
- Effectively neutralizes brassy tones for a cooler, more polished blonde or silver shade
- Cream formula makes application easy and even from roots to ends
- Works as part of an ongoing maintenance routine to keep color looking fresh between salon visits
- Results can vary depending on hair type, porosity, and starting color
- Requires mixing with developer and careful timing to avoid over-toning
- Some users report minimal color change, especially on certain hair conditions or if expectations don’t match the product’s toning capabilities
3. Grow Gorgeous Hair Density Serum
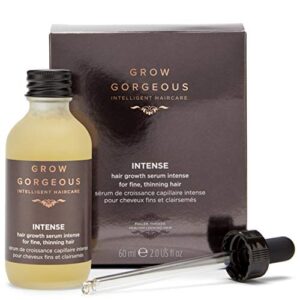
Your strands survived the toner—now let’s make them thrive! Grow Gorgeous Hair Density Serum pairs perfectly with hair toning techniques, delivering Hair Thickening power through caffeine, peptides, and hyaluronic acid.
This lightweight Density Treatment targets thinning areas while supporting hair health management after color correction. Massage a few drops into your scalp post-toning to boost circulation and follicle strength—Serum Benefits include improved fullness and reduced breakage.
It’s paraben-free, non-greasy, and a smart addition to your hair care tips arsenal for long-term Hair Density goals and hair damage prevention.
| Best For | Anyone dealing with thinning hair or noticeable scalp areas who wants a lightweight, daily serum to support hair density and thickness over time. |
|---|---|
| Brand | Grow Gorgeous |
| Form | Drop |
| Size | 2 oz |
| Hair Type | Fine, thinning hair |
| Price Range | Premium |
| Special Formula | 7 technologies complex |
| Additional Features |
|
- Combines 3% caffeine with peptides and hyaluronic acid to stimulate follicles and hydrate the scalp without feeling greasy.
- Paraben-free formula works well with color-treated hair and can target specific thinning zones like the crown.
- Lightweight drop format makes it easy to massage into the scalp and layer with other hair products.
- Results take patience—most users need 4 months of consistent use to see noticeable changes in density.
- Daily application can leave some hair types feeling oily, especially if you’re prone to greasy roots.
- Higher price point compared to drugstore alternatives, and it won’t work for everyone despite regular use.
4. Tigi Control Freak Hair Serum
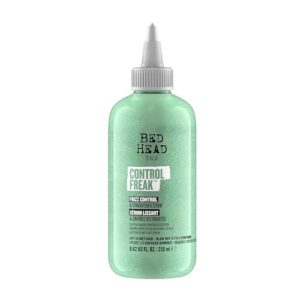
Frizz can sabotage your fresh toner job faster than you can say “brassiness”—that’s where Tigi Control Freak Hair Serum steps in! This silicone-based formula delivers serious Frizz Control and Hair Manageability without the grease, making it a smart pick among Tigi Products for post-color care.
Apply a pea-sized amount to damp ends after toning to seal the cuticle and lock in your new shade. The Serum Ingredients work overtime to tame flyaways and add shine, supporting hair damage prevention while you master hair toning techniques. Your hair care and maintenance routine just got smoother!
| Best For | Anyone with naturally curly or frizzy hair who wants to control flyaways and add shine after toning without weighing down their style. |
|---|---|
| Brand | TIGI |
| Form | Serum |
| Size | 8.62 fl oz |
| Hair Type | Curly, frizzy hair |
| Price Range | Mid-range |
| Special Formula | Talcum free |
| Additional Features |
|
- Light, non-greasy formula with glycerin and kiwi juice keeps hair hydrated while sealing the cuticle for long-lasting smoothness
- Works great in humid weather to tame frizz and manage curls without that heavy, product-loaded feel
- A little goes a long way—pea-sized amount delivers shine and slip from mid-lengths to ends
- Jelly-like texture feels sticky to some users, especially if you overdo the amount
- Can weigh down curls or fine hair if applied too heavily or near the roots
- Results depend a lot on your hair type and porosity, so it may not work for everyone
5. Olaplex Bonding Hair Oil Treatment
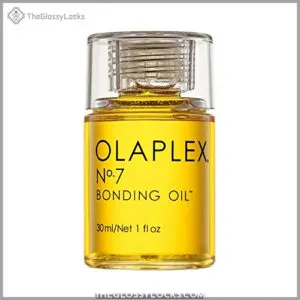
After you’ve tamed frizz, it’s time to rebuild what bleaching broke. Olaplex Bonding Hair Oil Treatment delivers serious Hair Bond Repair through its Bond Building Process—those disulfide bonds get re-linked, boosting Hair Strengthening Tips you actually feel.
This Silicone Free Products formula works wonders for post-toner care, reducing breakage while enhancing your fresh hair color. Apply a few drops to damp ends after your color-correcting session, and let the Oil Treatment Benefits sink in.
Your hair treatment routine just leveled up—no rinsing required, just healthier, shinier strands that hold tone longer!
| Best For | Anyone dealing with damaged, bleached, or color-treated hair who wants to strengthen bonds, reduce breakage, and keep their color looking fresh without weighing hair down. |
|---|---|
| Brand | Olaplex |
| Form | Oil |
| Size | 1 fl oz |
| Hair Type | All hair types |
| Price Range | Premium |
| Special Formula | Paraben-free |
| Additional Features |
|
- Actually repairs broken hair bonds from bleaching and chemical treatments, making hair noticeably stronger and more elastic over time
- Lightweight and silicone-free so it won’t leave buildup or make fine hair greasy when you use the right amount
- Works on damp or dry hair and doesn’t need rinsing, so you can layer it into your routine without extra steps
- Pretty pricey for a 1 oz bottle, and some people don’t think the results justify the cost
- Can cause slight yellowing on very light blonde hair if you use it repeatedly
- The small bottle size feels a bit misleading given the price point
6. The Body Shop Grapeseed Hair Serum
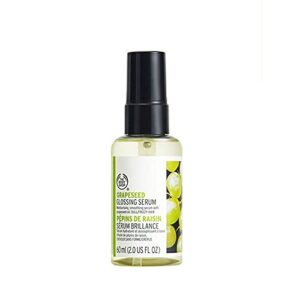
Looking for something lighter? The Body Shop Grapeseed Hair Serum brings Grapeseed Oil Benefits without weighing down your freshly toned locks. This Lightweight Formulas pick earns rave Hair Serum Reviews for its Non Greasy Products feel—just what color-treated hair craves.
For Serum Application Tips, warm 1-2 drops between your palms and smooth through damp mid-lengths to ends, skipping roots. It locks in moisture post-toning while adding natural shine. Your hair toner results stay vibrant longer, and you won’t battle that heavy, slick aftermath other hair products leave behind!
| Best For | Anyone with dull, frizz-prone, or color-treated hair who wants a lightweight serum that adds shine and smooths without the greasy feel. |
|---|---|
| Brand | The Body Shop |
| Form | Serum |
| Size | 2.5 fl oz |
| Hair Type | Dull, frizz-prone hair |
| Price Range | Value |
| Special Formula | Paraben-free |
| Additional Features |
|
- Lightweight, non-greasy formula that works well on fine hair and won’t weigh down your strands
- A little goes a long way, making it great value for money and perfect for everyday use
- Easily washes out and is paraben-free, plus it’s gentle enough for color-treated hair and even some wigs
- Can look greasy if you use too much product, so you need to be careful with the amount
- May not work for all hair types—some users find it too light or ineffective for their specific needs
- Product availability can be hit or miss depending on your location, and it may be discontinued in some areas
7. Kerastase Magic Night Hair Serum
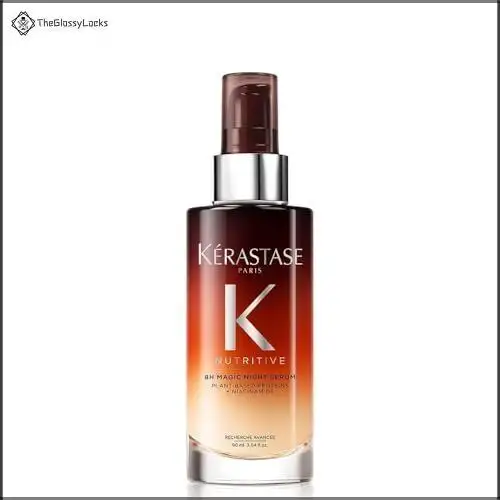
Want to wake up to softer, shinier strands? Kerastase Magic Night Hair Serum delivers Overnight Nourishment while you sleep—no rinsing required! This $62 leave-in treatment works its magic through Night Serum Benefits like reducing frizz and boosting Hair Vitality, perfect after toning sessions when your hair craves extra TLC.
Apply a small amount to mid-lengths and ends before bed, letting the Serum Ingredients support Hair Renewal overnight. Your hair treatment routine just got easier, and your toned color stays protected while you catch those Z’s!
| Best For | Anyone with dry, frizz-prone hair who wants to wake up with softer, more manageable strands without adding extra steps to their morning routine. |
|---|---|
| Brand | Kérastase |
| Form | Serum |
| Size | 10.62 oz |
| Hair Type | Dry hair |
| Price Range | $62.00 |
| Special Formula | Paraben-free |
| Additional Features |
|
- Works overnight while you sleep—just apply before bed and wake up to noticeably smoother, shinier hair with no rinsing needed
- Helps reduce frizz and protects hair from pillow friction, making it especially great after color treatments when your hair needs extra care
- Contains nourishing plant-based proteins and Niacinamide that support long-term hair health and vitality
- Pricey at $62, and the smaller bottle size means you might run through it faster than expected
- May feel too heavy for fine or oily hair types—some people find they need to use less product to avoid weighing hair down
- A few customers have reported receiving bottles with damaged packaging during shipping
Frequently Asked Questions (FAQs)
Can I leave toner in my hair overnight for better results?
Absolutely not—overnight toner application is a recipe for disaster! Most toners are formulated for 5 to 45 minutes max, and leaving them longer risks scalp irritation, chemical burns, and wildly uneven color results.
Is it necessary to use a developer with toner?
Most toners need developer for proper pigment deposit and color enhancement. Mix at a 1:2 toner-to-developer ratio for best toner activation, though some color-correcting formulations work solo—always check your product’s instructions first!
Can I tone hair without bleaching first?
You can tone hair without bleaching if it’s already light enough to show color correction.
Natural hair tones or previously lightened strands respond better to non-bleach methods than darker, virgin hair.
Does toner work on naturally dark hair?
Think of your dark hair as a deep canvas—toner can adjust those underlying warm tones, but won’t deliver dramatic shifts.
You’ll see subtle color-correcting and natural color enhancement rather than full transformation on naturally dark bases.
Can I sleep with toner in overnight?
No, don’t sleep with toner in overnight. Hair toner application requires 5–45 minutes max—leaving it longer risks serious scalp irritation, uneven color fade, and hair damage from over-processing during the toning time.
Will toner cover my gray roots completely?
Gray coverage with toner is limited—it neutralizes brassiness, not roots. For full color blending, you’ll need root concealers or a dedicated colorcorrecting service. Toning alone won’t hide regrowth completely.
Can I mix different toner shades together?
Want more control over your color-correcting results? Blend toner shades for shade customization, but always test a strand first.
Mix conservatively, maintain proper developer ratios, and document your tonal balance formula.
Conclusion
Here’s a stat that might surprise you: over 60% of at-home toning mishaps happen because people rinse too early, not too late. Patience pays off when you’re learning how long to leave toner in hair—those extra minutes can mean the difference between brassy regret and vibrant color.
Now that you’ve got the timing down, along with proper application and aftercare essentials, you’re equipped to tone with confidence and keep your color looking salon-fresh for weeks.