This site is supported by our readers. We may earn a commission, at no cost to you, if you purchase through links.

Blow drying curly hair gets a bad reputation—and honestly, most of it is earned. One wrong move with the heat and you’re left with a frizzy mess that looks nothing like the defined curls you started with.
But the dryer isn’t the enemy. The technique is. Curly hair needs a specific sequence of steps, the right tools, and a little patience to come out looking polished instead of fried. Get those pieces in place, and blow drying becomes one of the best ways to add volume and definition without sacrificing your curl pattern.
Table Of Contents
- Key Takeaways
- Essential Prep Steps for Blow Drying Curly Hair
- Choosing The Best Tools and Techniques
- Top 5 Products for Blow Drying Curly Hair
- Tips to Prevent Frizz and Maintain Curls
- Frequently Asked Questions (FAQs)
- How to blowout curly hair straight without frizz?
- What should you put in curly hair before blow drying?
- How to dry curly hair without making it frizzy?
- Is it better to blowdry curly hair wet or dry?
- How do you blow dry curls?
- How to air dry or blow dry curly hair?
- Is blow drying your hair difficult?
- How do you blow-dry curly hair?
- How to correctly blow dry curly hair?
- Is it better to blow out curly hair wet or dry?
- Conclusion
Key Takeaways
- Prep is everything — microfiber towel, wide-tooth comb, leave-in conditioner, and heat protectant before the dryer even turns on.
- A diffuser on low to medium heat is non-negotiable; high heat cracks the cuticle and kills your curl pattern fast.
- Direction and hands matter — aim airflow downward and keep your fingers out of your curls until they’re completely dry.
- Lock in your style with a cool shot at the end, then scrunch out the cast gently once hair is fully dry.
Essential Prep Steps for Blow Drying Curly Hair
Before your blow dryer even turns on, what you do to your hair matters just as much as the drying itself. Rushing past prep is how you end up with frizz you didn’t ask for.
A swipe of anti-frizz mousse or gel before blow-drying helps seal in moisture so the heat doesn’t strip your hair dry.
Here’s what to do first.
Gently Towel Dry Using Microfiber or Cotton

The right towel is your first act of curl preservation. Skip the terry cloth — those looped fibers rough up the cuticle and invite frizz before you even reach for the diffuser.
Instead, grab a microfiber towel or a soft cotton T-shirt. Both reduce friction dramatically. Just scrunch and blot gently upward — no rubbing, no wringing.
Your curls will hold their shape and dry faster on a low heat setting later. For more insight into the benefits of microfiber towels for hair health, see how they also help reduce breakage and improve shine.
Detangle Hair With Wide-Tooth Comb

Once your curls are blotted dry, it’s time to detangle — and this step sets the tone for your entire blow dry.
Reach for a wide-tooth comb while hair is still damp. Start at the ends, work upward, and divide into four to six sections for real curl preservation. Short strokes, no yanking. That’s your frizz reduction strategy right there.
Using a comb with wide tooth detangling benefits can also minimize breakage and preserve curl definition.
Apply Leave-in Conditioner and Curl Cream

Now that your hair is detangled, lock in moisture before heat touches it. Start with your leave-in conditioner — smooth it through using the praying hands motion from mid-lengths to ends.
Follow with curl cream, scrunching upward to boost curl definition. This product layering combo gives you real frizz control and curl enhancement without weighing your hair down.
Always Use a Heat Protectant

Skip the heat protectant and you’re setting your curls up for heat damage — rough cuticles, lost moisture, and breakage that won’t bounce back.
A good heat protectant product forms a protective barrier, cuts breakage by up to 45%, and helps with frizz control and curl definition. Spritz it on damp sections from roots to ends before you turn on the dryer.
Choosing The Best Tools and Techniques

The right tools can make or break your blow dry — and curly hair is especially unforgiving when you get it wrong.
Knowing what to use and how to use it puts you in full control of your results. Here’s what you need to get it right every time.
Select a Blow Dryer With Diffuser Attachment
Your blow dryer is either your best tool or your worst enemy — it all depends on which one you pick. For curly hair, you need a dryer with a diffuser attachment, ionic technology, and adjustable heat settings.
Here’s what to look for:
- Diffuser Bowl Shape — A deep bowl cups your curls and controls airflow, reducing frizz during blow drying.
- Prong Design — Short, closely spaced prongs support curls without disrupting their pattern.
- Motor Type — An AC motor copes with frequent heat styling sessions better and lasts longer.
- Cool Shot Button — Seals your cuticle and locks in curl definition at the end.
Section Hair for Even Drying
Sectioning is the move most people skip — and it’s exactly why their curls end up uneven. To blow dry curly hair right, divide it into four sections using quadrant sectioning: split from forehead to nape, then ear to ear.
Once your sections are clipped and ready, work a blend of frizz-fighting oils like argan, jojoba, and shea butter through each quadrant before you even pick up the dryer.
Use clip management to secure each piece. Work from the nape up, keeping section size around 1 to 1.5 inches for your curl patterns.
Use Low to Medium Heat Settings
Most people crank heat to max and wonder why their curls look wrecked. Don’t. When you blow dry curly hair, low to medium heat is your power move — it’s the difference between curl preservation and permanent damage. The cuticle starts cracking around 80°C, so thermal control isn’t optional.
Cranking heat to max wrecks curls — low to medium heat is the only move that preserves them
- Start on low heat setting to ease moisture out gradually
- Add medium heat only if hair isn’t drying fast enough
- Pair every session with a heat protectant product — no exceptions
- Use your diffuser to distribute heat without targeting one spot
- Finish on cool air for frizz reduction and definition lock-in
Blow Dry Hair Downward to Reduce Frizz
Direction matters more than you think. When you blow dry curly hair downward, you’re working with the cuticle layer — not against it.
Upward airflow lifts the cuticle and invites frizz in. Airflow control is your edge here: point your diffuser down the strand, root to tip, for real cuticle smoothing and curl definition. It’s one of the simplest blow drying techniques that actually delivers frizz reduction.
Finish With a Cool Shot for Curl Definition
That burst of cool air at the end isn’t just a nice finish — it’s what actually locks your curls in place. Switching to the cool shot while your curls sit in the diffuser seals the cuticle, boosts shine, and gives you real curl definition that holds.
- Cool shot benefits include frizz control by closing the cuticle and reducing humidity creep
- Smooth cuticle care means your curls reflect more light — instant hair smoothing, zero extra product
- Finishing each section with a few seconds of cool air cements your blow drying techniques without adding heat damage
Top 5 Products for Blow Drying Curly Hair
The right products can make or break your blow dry results. Not everything on the shelf is built for curls, so it helps to know what actually works.
Here are five products worth keeping in your routine.
1. Pattern Blow Dryer For Curly Hair
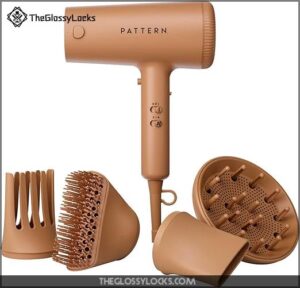
The PATTERN Blow Dryer was built with your curls in mind — not as an afterthought. It comes with four attachments, including a diffuser with long vented prongs that spread air in a vortex pattern, keeping curls defined instead of frizzy.
Three heat settings and two speed options give you real control over how much heat your hair takes. The ion switch lets you smooth the cuticle or boost volume at the roots. At $199, it’s an investment — but your curls will feel the difference.
| Best For | Anyone with curly, coily, or tight-textured hair (types 2B to 4A) who wants faster drying times without sacrificing hair health. |
|---|---|
| Hair Type | Curly, coily, tight-textured |
| Key Ingredient | Ceramic coating |
| Frizz Control | Ion-controlled switch |
| Formula Type | Electric appliance |
| Heat Protection | 3 heat settings, cold shot |
| Free From | N/A |
| Additional Features |
|
- Comes with four attachments — diffuser, wide tooth comb, brush, and concentrator — so you can dry and style without switching tools
- The ion switch gives you real control, whether you want a smooth finish or more volume at the roots
- Ceramic-coated grill distributes heat evenly, which means less damage over time
- At $199, it’s a big spend compared to most drugstore dryers
- The controls can feel awkward if you’re left-handed
- No indicator light on the cold shot button, so it’s easy to lose track of whether it’s on
2. SheaMoisture Bond Repair Masque Amla Oil
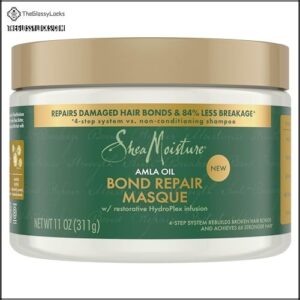
While the PATTERN dryer manages the heat, your curls still need strong, hydrated strands underneath — and that’s where SheaMoisture’s Bond Repair Masque earns its spot.
Packed with amla oil, fair trade shea butter, and an amino acid blend, it targets weakened, brittle curls at the source. Use it weekly before wash day. Apply generously root to tip, leave five minutes, then rinse.
The result? Up to 84% less breakage and curls that actually hold up under the diffuser.
| Best For | Anyone with damaged, breakage-prone curls who wants to strengthen and hydrate their hair with a weekly deep treatment. |
|---|---|
| Hair Type | Damaged hair |
| Key Ingredient | Shea Butter, Amla Oil |
| Frizz Control | Smooths and softens hair |
| Formula Type | Cream |
| Heat Protection | Not applicable |
| Free From | Parabens, phthalates, petrolatum |
| Additional Features |
|
- Repairs damaged bonds with a solid mix of amla oil, amino acids, and shea butter
- Reduces breakage and shedding, so your curls stay fuller and healthier over time
- Free from parabens, petrolatum, and mineral oils — clean ingredients you can feel good about
- Can be too heavy for the scalp, so it’s best kept on the lengths and ends
- Results vary depending on your hair type — it may not be enough for extremely dry hair
- Not a one-size-fits-all fix, especially if your hair is sensitive to richer formulas
3. Aunt Jackie’s Leave In Hair Conditioner
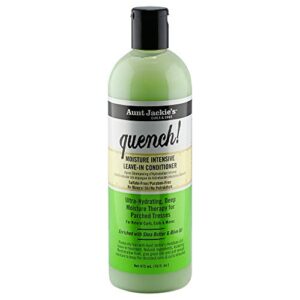
Once your strands are strengthened, they need moisture before heat — and Aunt Jackie’s Quench Leave-In Conditioner delivers exactly that. Loaded with shea butter, extra virgin olive oil, and marshmallow root, it softens even the thirstiest coils without weighing them down.
Work a dime-size amount through damp, towel-dried hair from ends to roots. It detangles, reduces frizz, and layers cleanly under curl cream or gel — giving your curls a hydrated foundation, ready to diffuse.
| Best For | Anyone with natural coils, curls, or waves that need a lightweight daily moisture boost before heat styling. |
|---|---|
| Hair Type | Coily, curly, wavy |
| Key Ingredient | Shea Butter, Olive Oil |
| Frizz Control | Reduces frizz and flyaways |
| Formula Type | Liquid |
| Heat Protection | Not applicable |
| Free From | N/A |
| Additional Features |
|
- Shea butter, olive oil, and marshmallow root give dry hair real, lasting hydration without feeling heavy
- Detangles and cuts down frizz, making it easy to layer under curl cream or gel
- Great for daily use and plays well with most other styling products
- May leave a light residue on your palms after applying
- Doesn’t mix well with certain hair sprays
- Some bottles have arrived unsealed or previously opened, which can affect quality
4. Mizani Heat Protecting Hair Serum
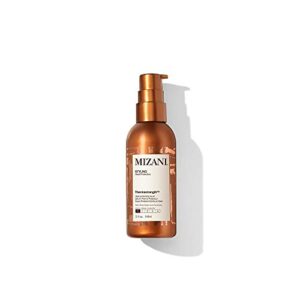
Now that your curls are moisturized and ready, they need a heat shield before heat touches them. That’s where Mizani Thermastrength Heat Protecting Serum earns its place.
Its shea butter and ceramide formula coats each strand, locking in moisture so heat doesn’t strip your curls dry. Apply a dime-size amount through damp hair before diffusing — ends first, then roots. It smooths frizz, reduces breakage, and leaves curls shiny without heaviness. One small step that makes a real difference.
| Best For | Anyone with curly to tightly coiled hair who regularly uses heat tools and wants to protect their curls without weighing them down. |
|---|---|
| Hair Type | Curly to tightly coiled |
| Key Ingredient | Shea Butter, Ceramide |
| Frizz Control | Controls frizz, smooths strands |
| Formula Type | Serum |
| Heat Protection | Anti-breakage heat protectant |
| Free From | N/A |
| Additional Features |
|
- Shea butter and ceramide formula keeps moisture locked in while shielding strands from heat damage
- Controls frizz and adds a healthy shine without leaving hair feeling heavy or greasy
- Works great for silk pressing and everyday heat styling on tight curl patterns
- Only works on wet hair, so you can’t use it as a touch-up on dry strands
- The creamy consistency might be too much for fine or short hair
- It’s been discontinued, so finding it may get harder over time
5. Chi Keratin Hair Smoothing Serum
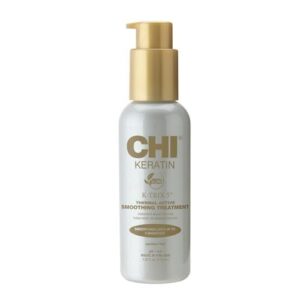
If you want to take smoothing one step further, Chi Keratin Hair Smoothing Serum is worth adding to your lineup. Its keratin amino acids fill in weak spots along each strand, while argan and jojoba oils add shine and flexibility — so your curls bend instead of break.
Apply a pea-sized amount to damp mid-lengths and ends before diffusing. It seals out humidity and cuts frizz for up to five days. Just don’t overdo it — a little goes a long way.
| Best For | Anyone with frizz-prone or curly hair who wants smooth, humidity-resistant styles that last a few days without a lot of effort. |
|---|---|
| Hair Type | All hair types |
| Key Ingredient | Tea tree |
| Frizz Control | Locks out humidity |
| Formula Type | Paraben-free treatment |
| Heat Protection | Thermally activated, not a protectant |
| Free From | Sulfates, parabens |
| Additional Features |
|
- Keeps frizz and flyaways in check for up to five days — solid staying power for a serum
- Smells great (tea tree) and works with your blow-dry routine to cut drying time
- Clean formula with no sulfates or parabens, fine for daily use
- Not a heat protectant, so you’ll need a separate product if you’re using hot tools
- Can weigh fine hair down fast if you use too much
- Won’t do much for seriously damaged hair — it’s more of a finisher than a treatment
Tips to Prevent Frizz and Maintain Curls

Getting a great blow-dry is only half the battle — keeping it that way is where most people slip up.
A few small habits can make a big difference between frizzy hair by noon and defined curls that last. Here’s what actually works.
Avoid Over-Drying and Excessive Heat
Too much heat is the fastest way to wreck your curl pattern. Blow drying curly hair above 356°F breaks down keratin proteins and strips moisture — leaving you with frizz instead of definition.
Nail your Blow Drying Techniques with this quick guide to Thermal Protection and Moisture Balance:
| Heat Damage Prevention | Curl Preservation Tips |
|---|---|
| Stay below 356°F | Air dry 60–80% first |
| Use a Thermal Heat Protectant | Diffuser on low airflow |
| Move dryer constantly | Avoid re-drying dry sections |
| Alternate warm and cool bursts | Stop at 80–90% dry |
Your heat protectant product shields strands from rapid moisture loss — but lower heat and a diffuser do the real heavy lifting for Frizz Control and Preventing Hair Damage.
Hands Off While Curls Dry
The hardest part? Keeping your hands away. Every time you touch damp curls, you break the curl pattern forming around each strand — and frizz sneaks right in. Let your diffuser and leave-in conditioner do the work while Dry Time runs its course.
- Keep hands off until hair is 100% dry
- Hover diffuser 4–6 inches for frizz control
- Let curl definition set naturally without touching lengths
- Hair porosity affects how long drying takes — be patient
Scrunch Out Product Cast Gently
That crunchy cast your styling products left behind? That’s actually a good sign — it means they worked.
Wait until your curls are completely dry, then cup small sections in your open palm and squeeze upward. Gentle scrunching breaks the cast without wrecking curl clumping or inviting frizz. A microfiber towel works even better than bare hands for smooth, controlled product removal.
Use Oils or Serums After Blow Drying
Once your curls are fully dry, a few drops of argan oil or jojoba oil can completely transform your finish. Work it between your palms, then scrunch lightly into mid-lengths and ends — this seals in your leave-in conditioner’s moisture and smooths the cuticle for real frizz control.
Lightweight serums boost curl enhancement and shine without weighing curls down or triggering buildup.
Sleep on a Silk Pillowcase to Reduce Frizz
Your hair care routine doesn’t stop when you go to bed. A silk pillowcase cuts friction by roughly 34 percent compared to cotton — meaning less frizz, better curl preservation, and real moisture retention overnight.
Silk won’t strip your styling products the way cotton does. Pair it with a loose pineapple bun, and your blowout can actually last multiple days.
Frequently Asked Questions (FAQs)
How to blowout curly hair straight without frizz?
Want a smooth blowout without the frizz takeover? Start with heat protection, blow dry downward using a concentrator nozzle, and keep tension steady with a round brush for silky results.
Keep in mind that to achieve frizz-free results, it is essential to follow these steps carefully.
What should you put in curly hair before blow drying?
Before blow drying, layer a leave-in conditioner, curl creams, and a heat protectant. Add detanglers if needed. These styling products lock in moisture and shield curls from damage.
How to dry curly hair without making it frizzy?
Frizz-free curly hair starts with low heat, a diffuser, and keeping your hands out of it while it dries.
Lock in moisture with a leave-in conditioner and heat protectant — that’s your defense.
Is it better to blowdry curly hair wet or dry?
Neither soaking wet nor bone dry — damp is your sweet spot. Blow drying curly hair at about 60–70% dry cuts heat damage, controls frizz, and locks in curl definition beautifully.
How do you blow dry curls?
Use a diffuser on low heat, working in small sections. Apply a leave-in conditioner and heat protectant product first.
Lift curls into the diffuser bowl, keep airflow gentle, and finish with a cool shot.
How to air dry or blow dry curly hair?
Picture soft, bouncy curly hair that hold their shape all day.
Whether you air dry or diffuse, curly hair thrives with gentle handling, a leave-in conditioner, and smart frizz prevention from start to finish.
Is blow drying your hair difficult?
Blow drying curly hair does have a learning curve, but it’s manageable.
With the right diffuser, a solid heat protectant product, and some practice, frizz control and minimizing hair breakage become second nature.
How do you blow-dry curly hair?
Mastering frizz-free curls starts with prep—gently towel-dry, apply a leave-in conditioner and heat protectant, then diffuse on low heat.
Work in sections, keep hands off, and finish with a cool shot.
How to correctly blow dry curly hair?
Getting it right comes down to prep, protection, and patience. Apply a leave-in conditioner, heat protectant product, and diffuse on low heat — those three steps alone handle most of your frizz control.
Is it better to blow out curly hair wet or dry?
Damp hair is your sweet spot — not soaking wet, not bone dry.
Wet hair risks frizz and damage, while damp hair benefits curl shape, cuts blow dry time, and keeps your diffuser working smarter.
Conclusion
They say a bad workman blames his tools—but with curly hair, it’s never about the dryer. Now that you know how to blow dry curly hair the right way, you’re working with the right prep, the right heat, and the right products.
That changes everything. Your curls don’t need to survive the process—they should thrive through it. Lock in your routine, stay consistent, and frizz stops being a problem you manage and starts being one you’ve solved.
- https://yuaiahaircare.com/blogs/knowledge-base/how-to-blow-dry-curly-hair-without-frizz
- https://www.cloudninehair.com/blogs/hair/how-to-use-a-hair-diffuser
- https://www.livingproof.com/blogs/hair-101/how-to-diffuse-curly-hair
- https://www.kiehls.com/skincare-advice/how-to-diffuse-hair-with-dryer.html
- https://www.growgorgeous.co.uk/blog/tips-tutorials/10-tips-for-diffusing-curly-hair-curly-hair-routine/